Last week, Rob asked for your thoughts about workbenches. Here’s what several of you have to say about it. – Editor< "I wish I had the room for a full-size traditional bench, but I work outside and must put my small Harbor Freight bench up in the shed every day when I finish working. One day though, my friend." – Wayne Miller
“I have an old workbench (60+ years) that I pulled from a neighbor’s garbage back when I was a pre-teen. Mostly just a bunch of 2x material cobbled together to which I’ve added some drawers and a particleboard top. This is generally cluttered with ‘stuff’ and not really usable as a working bench. Thus, my primary working bench is a heavy melamine-topped desktop from Grainger that sits on an adjustable-height base I built. It functions as my primary assembly table and table saw outfeed table and sits in the middle of my narrow shop space. I would love a ‘true’ woodworkers bench but have given up on the idea because I couldn’t come to grips with getting rid of something else to make room for it. So, I built a beech benchtop for my son instead.” – Rick Bird

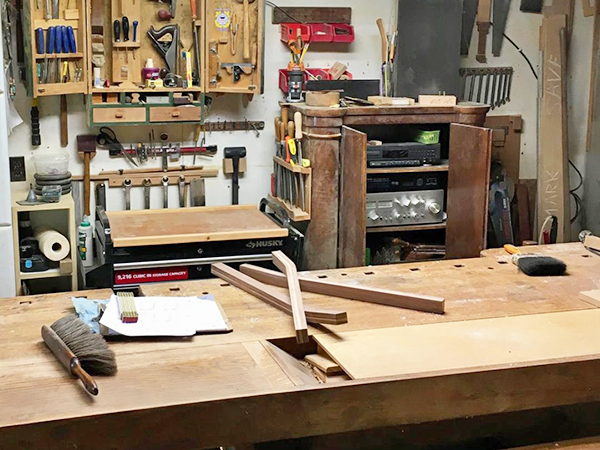
“The year was 1980, and I had just graduated from the Worcester Craft Center in Worcester, Massachusetts. The school had traditional workbenches. I had moved to Utica, Illinois, to start a cabinet shop in my grandfather’s old post-and-beam barn. I landed a stair job using red oak, so I ordered double the amount needed (I should have bought a couple semi truck loads in hindsight). As I worked on the stairs, I built myself an 8-ft.-long by 30-in.-wide (bench). It has served me well for the past 43 years. I had a tool tray which, after a couple years, I filled in since it only filled with wood chips and would lose small parts. Added casters so I could move the bench last year when I moved into a new 24 x 32 ft. metal post shop. A good bench makes cabinetmaking an enjoyable endeavor.” – Mark Edgcomb
“Workbenches need to be sturdy. That means a heavy top and heavy, beefy legs with strong joints. The top should be flat and level. The sturdiness comes into play when planing or sawing. You don’t want the bench moving with you on each stroke. The skimpy ones sold at the big box stores (think 2 x 2s and 3/8″ plywood tops) are flimsy and only good for painting and very light work. The old ‘door makes a good workbench’ plan is OK for starting out or in a pinch, but these won’t last very long for a continuing hobby or business. The workbench needs to be well-lit from above, too. You need to see clearly what you are working on, at any age. Don’t be afraid to USE your workbench. If you need to clamp the work down for a special cut, drill those holes or nail the work down to advance your project. Holes can be filled, spilled glue and paint overspray can be sanded back down, or leave the color for a bit of character. It took me several years to realize how long it would take me to really beat up my workbench, which is also several years, and by then making a new one would be a welcome project. My first workbench’s sacrificial top is still there, 38 years later. My workbenches tend to get filled up. I have three now, and they all started with 80 percent or more open table area. Now they all have about 30 percent free space to work on. Two are sturdy tables and the third is a ‘temporary’ sawhorse and plywood top that has been there for 10 years now. Its free space is also being encroached upon.” – Tom Triola
“After moving to a new house, my garage seemed to be the ideal space for a workshop. I soon realized a workbench would be necessary, so after going over several plans and photos, I decided to build my own version. My go-to lumberyard advised pine for the top, and I used 4x4s for the legs. It has worked out for the most part, but I still yearn for a proper Roubo. I think I’ll never get around to it. I’ve even considered putting out a chunk of money for a Sjoberg bench! At this point, my 15-year-old bench is showing its age but still works for my purposes (and honestly I would hate to lose it!).” – Jeff Hansen
“For about 28 years, most of which I was on active duty in the Air Force, my bench was pretty simple: 3′ x 5′, and the top was 5/8″ plywood supported by a lattice made of 1×6 pine boards. A sort of a torsion box with no bottom. The legs were 4x4s with a shelf about 6″ from the floor. The legs were attached to the lattice beneath the top and to the lower shelf using lag bolts, to make for easy disassembly. The moving companies have nice big trucks, so disassembly was not done very often. Most of the projects were small, making shelves or other items for the various houses we lived in on Air Force bases or rentals. I finished some unfinished furniture for the kids as they grew up. After I retired and stopped moving around, I started making bigger projects, and I became more interested in using hand tools. I still worked on an Air Force base, and so in 2013, when one of the guys was getting transferred, he had a bunch of Douglas fir and other stuff to get rid of. So I had the makings of a Roubo-style workbench. I got a copy of Christopher Schwartz’s workbench book and built the Roubo. My top is 3-9/16″ thick, 7′ long and 26″ wide. Legs are 5″ x 5″. Sliding deadman, leg vise and planing stop. I’m left handed, so I built my bench the proper way, with the leg vise to the right. It’s the best bench I can imagine. I have a few holes in the top for bench dogs and bench hooks. Solid as granite. Not as hard as granite, but that’s not been a problem. I wanted 8′ long by 30″ wide, but that would have taken up too much acreage in my shop, so I made it a little narrower and shorter. As I was gluing up the laminations for the top, I drilled some holes and included two T-nuts for 5/16-18 threaded rod to anchor a shoulder vise at the end opposite the leg vise, on the same side as the leg vise. I like cutting dovetails and thought the shoulder vise would be great for that, and could secure the far end of long boards clamped in the leg vise. I’ve not yet built the shoulder vise, partly because it would get in the way in the shop (remember, I went for a narrower workbench to better fit in available space). I bought a 36″ squeeze clamp so I can secure boards in the leg vise — I mean really secure the one end of a board in the leg vise — then secure the far end of the board clamping it to the front of the benchtop using the 36″ squeeze clamp. No tail vise or wagon vise. As I said, I can’t imagine a better bench. I know of different styles that may be just as good, but I can’t imagine anything working better.” – Andy Ziny
“I used sawhorses until I was inspired to build a split-top Roubo with the Benchcrafted hardware. I got the project plans and videos from Marc Spagnuolo. I made it from soft maple and walnut. The project was WAY out of my league, but I got it done in about 10 months. I LOVE it. It takes my breath away when I walk into my shop, and I’m always finding new ‘features’ as I approach my projects. It has also made my hand tool expansion process much easier. Thanks for asking. I’m looking forward to other responses.” – Paul Engel


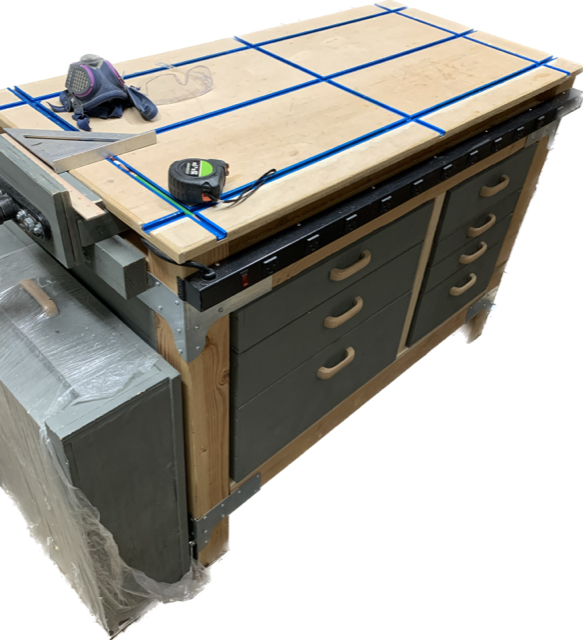
“I use mine almost daily. I have two that I made several years ago, and they are awesome for what I do. One has several rows of crossing T-track on top, and other is primarily used as additional space. One bench is 2′ x 4′ and the other 3′ x 5′. Construction is basically the same — 4×4 legs with a 3/4″ plywood top. The primary bench has drawers on the one side. I personally would be at a loss without my benches.” – John Randall
“My bench came from a GM patternmaker shop. It came complete with an Emmert vice. I can’t imagine working without it. The steel undercarriage is a little light for my mostly hand tool work, but now that I’ve retired, it may be time for new legs.” – Daniel Hulbert
“I was fortunate to work at a plant that threw away lots of oak 3×3 skid lumber that was used to haul in sheets of steel. About 20 years ago, I made a traditional bench with a really nice Sears wood vise on the end that opens 10”. No vise on the left side, just a drawer for miscellaneous junk. Size is 26″ x 84″ with a tray. Today, those vises are in the $100+ range. At that time, I didn’t have a joiner or a planer. Now have a 6″ jointer and a 15″ planer and could do a much better fit on the top. Also purchased a Scandinavian bench kit some time ago but haven’t used it yet. Good wood (beach) is just too expensive, and I’ve been wondering if I should use the oak for a more conventional bench. Making the end vise is a trade school test of sorts from what I’ve read. Still have lots of red oak, but it’s pretty grainy. Bench stops are much easier to make with a mortising bit and stepped plugs to stop falling through the hole; it’s free and works well. By the way, I also have an assembly bench made from a heavy outside door. It’s real handy.” – Mike Souhrada
“Many years ago, I decided woodworking would be a fun hobby. So I decided to build a workbench. I knew absolutely nothing, but I had seen my friend’s home-built woodworking bench years before that, so I plunged ahead. I still work at that bench, although it has seen many changes over the last 20 years as I have gained experience and learned lessons, some of them painful… I would love to build a new one, given that I know a little more about woodworking these days, but I suspect I will just keep plugging along with the one in my shop.” – Bill Killian
“I’ve been retired from my job in IT for 15 years, and the first thing I did was to build a traditional workbench with side vise, end vise, dog holes and a tool tray. I can’t live without it, to say the least! I only spent about $200 to build it. Just bought the end vise and 8/4 maple for the end vise, $2 for the side vise at an auction and $10 for a solid-core door from a school. The top and sides are heart pine from an old railroad shed in Nashville. The legs are 4/4 cherry (from a friend) along with hard maple from an old piano. Stretchers are also from the piano. The design was taken and modified from a bench built by Garrett Hack. His article claimed it would take as much time to build the end vise as the rest of the bench. He was right, but it was so worth it!” – Dave Smith< "Rob, like you, I cut my teeth in a production shop — Sensenich Propeller — in Lititz, Pennsylvania. I worked there during my summer breaks from college in their butcher block table shop. I obtained a seconds top and have been using for over 40 years as a workbench. You could park a car on this maple top!" – Mike Beam

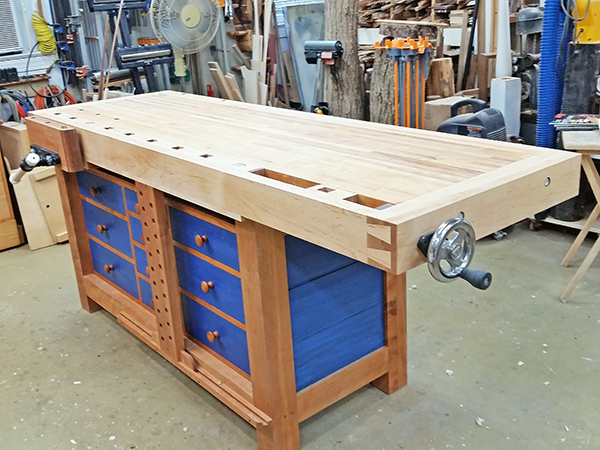
“I am 84 years old and have been a woodworker for over 70 years. I have always ‘made do’ with makeshift workbenches made of nailed-together 2×4 lumber. In 2020, I decided it was time to have a proper workbench and built the one pictured here. It is a modified version of one I saw in another woodworking magazine. I cannot believe the difference it has made in the ease and quality of my work! I would highly recommend to younger woodworkers to build or buy the best bench they can afford as soon as possible. I believe I am doing the best work of my life with this bench.” – John B. Anders


