A wooden mallet is an essential tool around a woodworking shop, especially when cutting mortises and dovetails by hand. I use the type with a rectangular head and flat surfaces because it is best for assembling (and disassembling) furniture without marring the wood. Round-headed mallets are principally a carver’s tool so you may need to have both in the workshop.
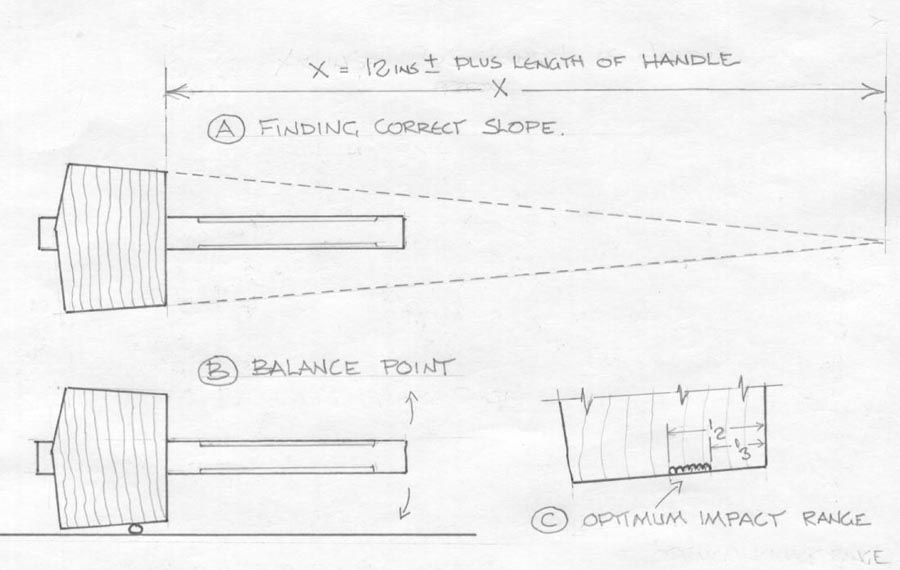
When marking a new mallet, angle the flat sides according to the diagram (A). The distance (X) is the length of your arm from wrist to elbow (about a foot) plus the length of the mallet handle. The slope of the other two faces, the narrower profile, is derived in exactly the same way. It is these faces that are used when working in a confined space with limited room to swing.
Not everyone realizes that it’s not only the weight but the balance of a wooden mallet that are so critical. To find the balance point, put the mallet on a flat surface, with a pencil under the head, as shown in diagram (B). The balance point should be somewhere between the half point and the third point as shown in (C). This is the optimum impact point, and if the mallet is not balanced about that point, the handle will tend to fly up (or down) each time you hit a hard surface. This weakens the blow and also jars the hand and arm each time you strike the tool – chisel, gouge or whatever.


