This article, “Turning Captured Rings,” is from the pages of American Woodturner and is brought to you by the America Association of Woodturners (AAW) in partnership with Woodworker’s Journal.
Soon after I started turning, I came across a photo in an old textbook of a captured, or captive, ring on a spindle. The ring was unattached to the spindle and could be slid up and down its length but not removed, as it was “captured” by the larger diameters at each end. I couldn’t wait to try it, though I had no idea what tools to use.

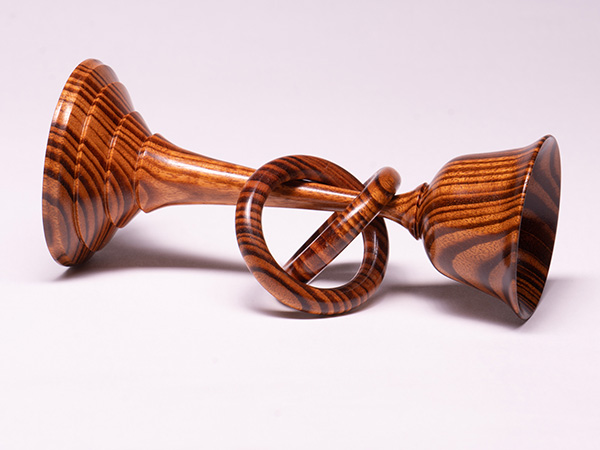
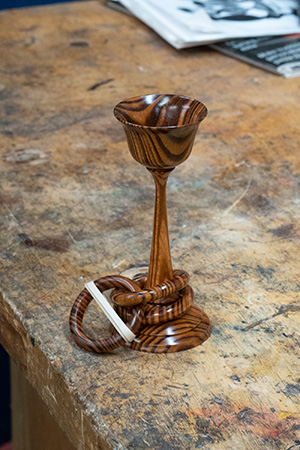
Goncalo alves, tagua nut,
6-1/2″ (17cm) tall
I scraped the bead with a skew and, believe it or not, used an old butcher knife to release the ring. (Don’t try that at home!) It was not pretty; the inside of the ring was awkwardly shaped, but it was complete and captured.
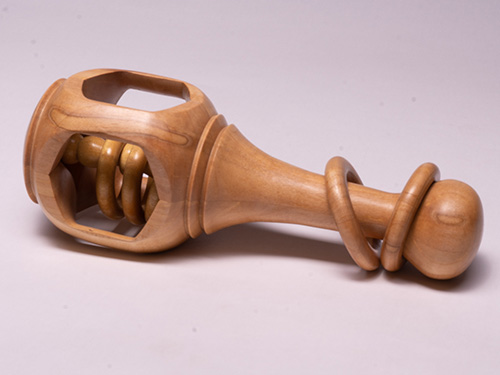
Maple, Osage orange,
3″ × 81/2″ × 3″
(8cm × 22cm × 8cm)
Since then, I have turned a lot of captured rings. They are fun, not too difficult to make, and can be used creatively on spindle projects.
Shopmade Beading and Captured-Ring Tools
Early on, I found it a challenge to cut the left and right sides of a ring to the same depth, which resulted in rings that weren’t quite round. I had made several tools that “did the job” but required extra sanding.
Eventually, I decided to make tools based on the commercially available versions, and they work much better. Here is how you can make your own beading and captured-ring tools.
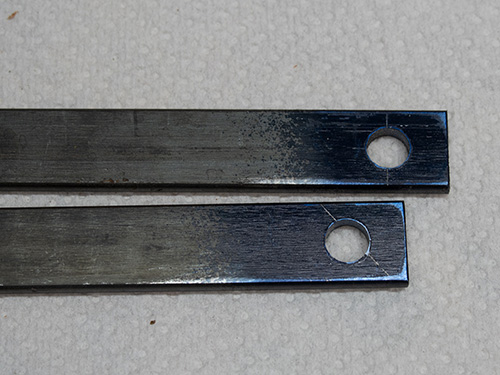
Step 1 – Drill: Drill a hole the size of the bead/ring you want near the end of a length of flat tool-metal stock. I used high-carbon steel I had purchased from a metal warehouse. Make two of them, one for the beading tool and one for the captured-ring tool.
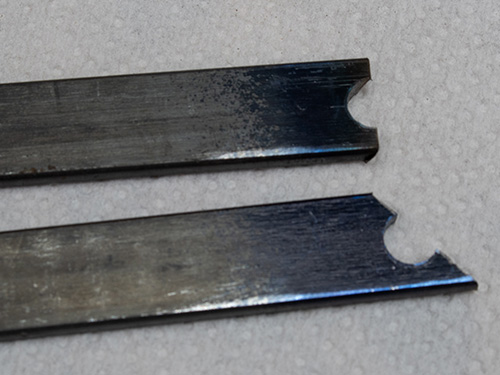
Step 2 – Cut: Cut the ends of the stock across the holes. Cut one at 90 degrees for the beading tool and one at 50 degrees for the captured-ring tool.
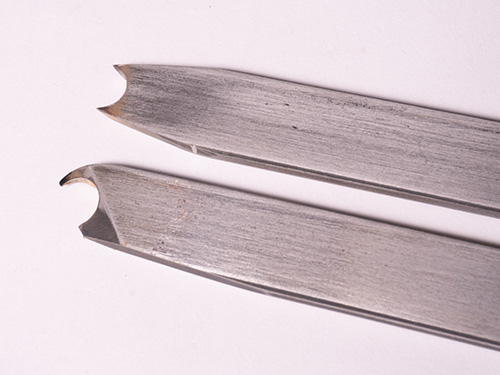
Step 3 – Refine: Grind a bevel on both the top and bottom surfaces, creating a negative-rake scraper effect. I honed the top surface of both tools. For the beading tool, angle the sides inward until you have two sharp points. For the captured-ring tool, refine the “hook” to a point. I enlarged the captured-ring tool hole just a hair so it would fit around the bead without rubbing. I also polished the inside of the hole with various stones.
Interlocking Rings

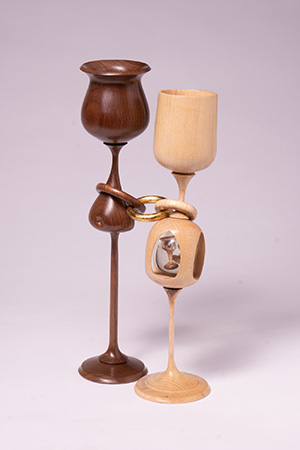
The piece shown in the opening image of this article is a wedding goblet, signifying the joining of two people. You may have noticed that the two captive rings are interlocked. How did I do this? The process involves breaking one ring apart and gluing it back together captured on the stem and another ring. With careful breakage and realignment, the glue joint will be nearly invisible. Note: The article photos show three captured rings, as I turned an extra as a spare, in case my first attempt at interlocking went awry.
Put one ring in a small vice and break it along the long grain, which should leave a clean break line.
To glue the ring together again, I used yellow woodworking glue. Don’t use CA glue, as it won’t allow working time for fine adjustments. With yellow glue, you can push the parts together, wipe off excess glue, then squeeze the sides of the joint to get them to align perfectly. Hold them in place for a minute or so, then clamp with rubber bands until the glue dries. After the glue dries, hand-sand the joint lightly and apply more finish.
Practice on Scrap
Although turning captured rings is a pretty straightforward process, I recommend practicing on scrap wood before you attempt it on a project you hope to keep. Your first rings might be misshapen and require a lot of sanding.
To practice, mount a length of scrap between centers, turn it round, and form a bead on one end. Then undercut the bead from both sides until it is released from the spindle.
Several tools could be used for these processes, such as a skew, spindle gouge, beading tool, and/or a specialized captured-ring tool. The latter two make it easier to get good results. Once the ring is cut free, pull it off the spindle to examine it. Keep practicing until you are satisfied with the shape of your rings.
Begin with Beads
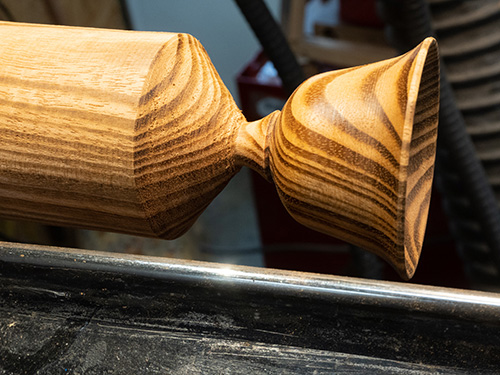
To illustrate this article, I turned a Celtic wedding goblet with two captured rings. To hollow the goblet, you’ll have to mount a spindle in a chuck, so you’ll have full access to one end. Turn the cup of the goblet first, leaving the stem thick to reduce vibration while hollowing.
Now it’s time to turn the captured rings. The first step is to determine their size relative to the goblet cup and foot. The inside diameter of the rings should be smaller than the diameter of those elements, so the rings will remain captured on the stem.
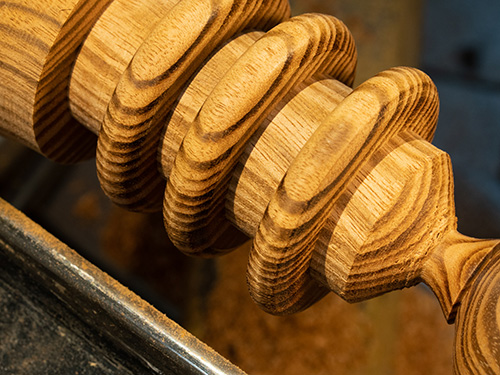
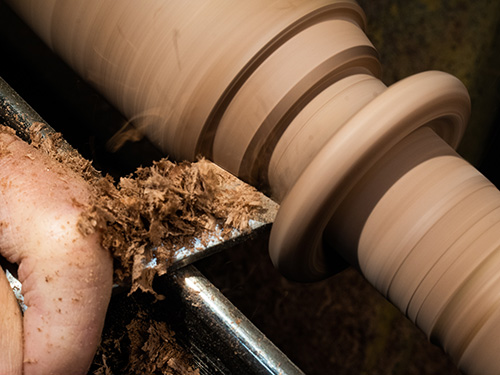
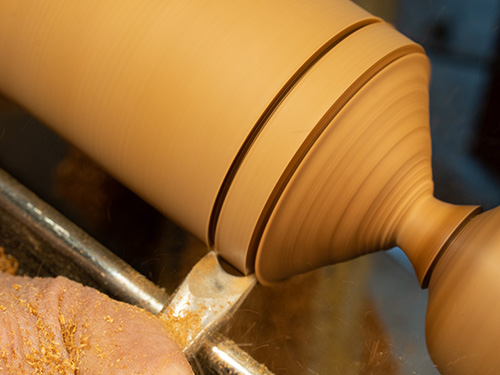
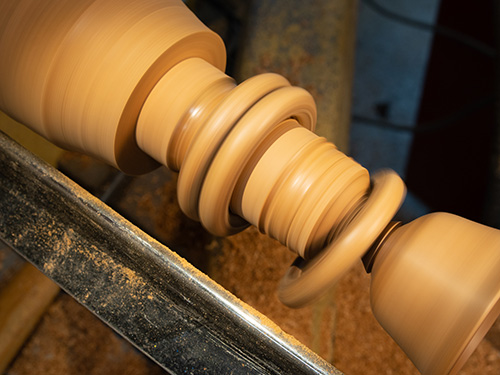
After determining what the size of the rings will be, I reduced the goblet stem to a diameter equal to the rings’ outside diameter. Then I used a beading tool to shape the outside of the ring. This tool makes it easy to form a truly round bead. If you want more than one ring, leave ample space between the beads, as this will provide clearance for the captured-ring tool, which I use in the next step to release the rings. After you have turned the outside of the rings (beads), use a parting tool to reduce the diameter of the stem between them.
Release the Rings

A captive-ring tool — either commercially available or shopmade — is useful for releasing the rings from the stem. First, push the tool in so the gullet, or curve, surrounds the bead. The curve on the captivering tool should have the same radius as the curve on the beading tool. See Shopmade Beading and Captured-Ring Tools sidebar at the end of this article.
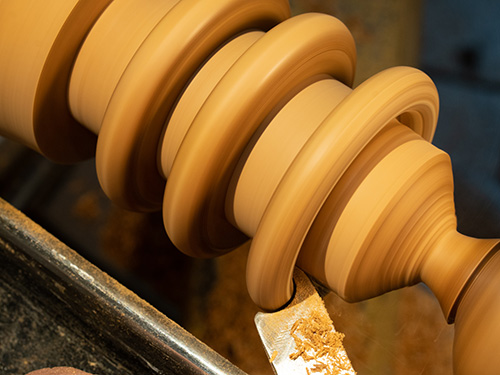
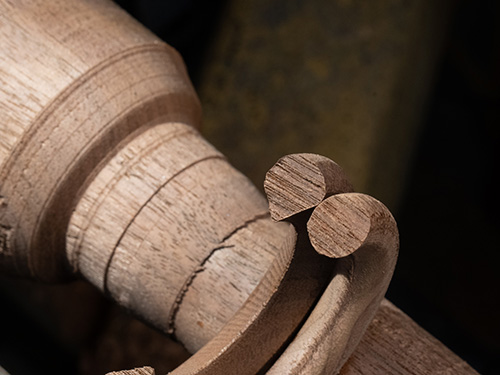
Next, move the tool handle in an arc from left to right to undercut the right side of the ring. As you proceed with the cut, keep the curve of the gullet against the bead, so it will act as a depth gauge. Then flip the captive-ring tool over and undercut the left side of the bead, but don’t cut all the way through just yet. To determine how close I am to releasing the rings, I put a bright light on the opposite side of the cut and check it frequently. The light acts as a useful gauge that indicates how much wood is left, as it appears brighter as the wood becomes thinner (more translucent).
Sometimes at this stage, if you didn’t quite follow the shape of the bead, the ring’s sides may be parallel and flat, rather than curved. There are two tricks I use to improve the shape of the ring. The first is to use the inside corner of the cutting portion of the captive-ring tool to remove small amounts of wood and further shape the sides of the bead. This can be tricky, so take gentle, light passes. The second trick works well only if your tool has sharp, clean edges on the inside curve. Tilt the outside of the tool up and make light shear-scraping cuts with the inside of the curved portion of the tool.
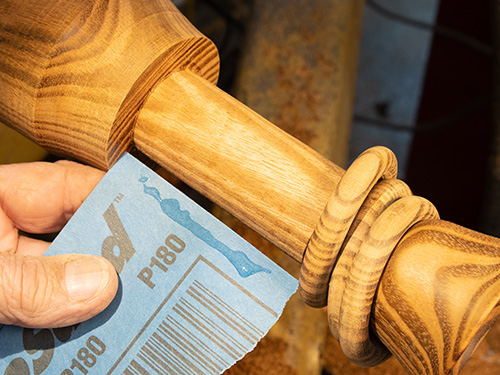
When you are satisfied with the shape of the rings, you are ready for the important part — sanding. Sand as much of the rings as you can before releasing them. If you were not able to round the beads over sufficiently with the tool, use coarse sandpaper to continue the shaping and to clean up the outside of the rings. Proceed with sanding through the grits.
After sanding the rings, use a captured- ring tool to finish releasing the rings.
Sand the Rings
With the rings released from the stem, you can sand the inside of the rings. This is done by affixing sandpaper to the spindle and rubbing the rings on the spinning abrasive.
First, turn the stem down to a cylinder a little wider in diameter than its final width. I use medium cyanoacrylate (CA) glue to fasten the sandpaper to the stem, making a sort of flap sander. Apply a strip of glue to the back of the sandpaper. Then spray the stem with accelerator and stick the paper down.
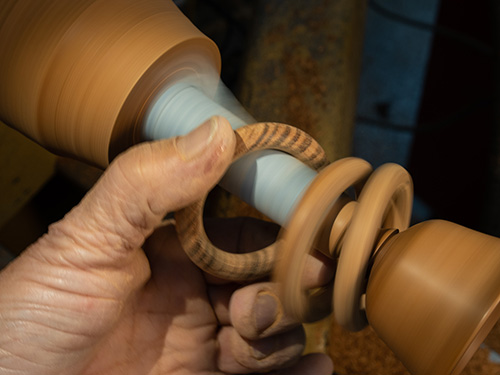
With the lathe running slowly, sand the inside of a ring by rotating it around the sandpaper, twisting it as needed to refine its shape and to clean up the area last cut. Sand each ring, then pull the sandpaper off and attach the next grit. Sand through the grits before turning the stem to its final shape.
Final Steps

Sometimes as you turn the stem, the loose rings will naturally go to one end or the other and stay out of your way. Sometimes they won’t. If the rings bother you, use masking tape to temporarily hold them out of the way. Finish turning the stem and base, sand them, apply a finish, and part the goblet from the lathe. I prefer to use a wipe on polyurethane, as the rings won’t stick to the stem as the finish dries. Then I buff the finish to a high sheen. Note that you might have to run the buffs at a slower speed so the wheel can reach the inside of the rings.
2004, Maple, walnut, 11″ × 5″ × 2″
(28cm × 13cm × 5cm)
John Lucas, a retired photographer, has been working in wood for more than thirty-five years and also dabbles in metalworking. He enjoys modifying machines, making tools, and sharing his knowledge through written articles and videos. He has taught classes at John C. Campbell Folk School, Arrowmont, and The Appalachian Center for Crafts.


