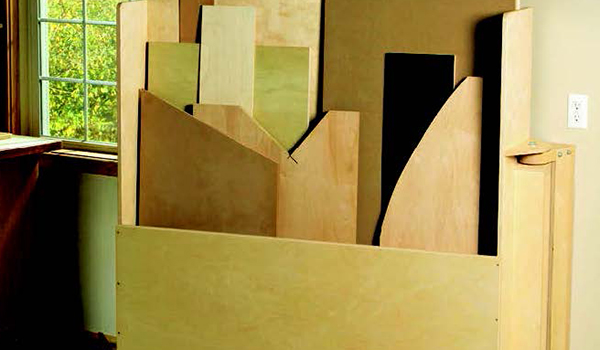
Sheet goods can be hard to manage, especially in a small-shop setting. They’re cumbersome, space-hogging and usually end up stacked in a ragtag pile against a wall. Most home shops don’t have room to store 4×8 panels horizontally like a lumberyard or home center can, so we resort to the only other option: standing them on end or edge. Still, that doesn’t solve the problem of how to pick from the back of the pile for the piece you need without unstacking everything. And there’s always the danger of a heavy stack of sheets toppling over. What to do?
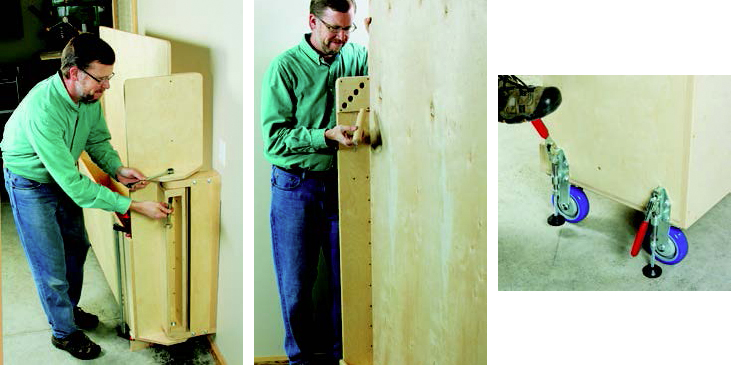
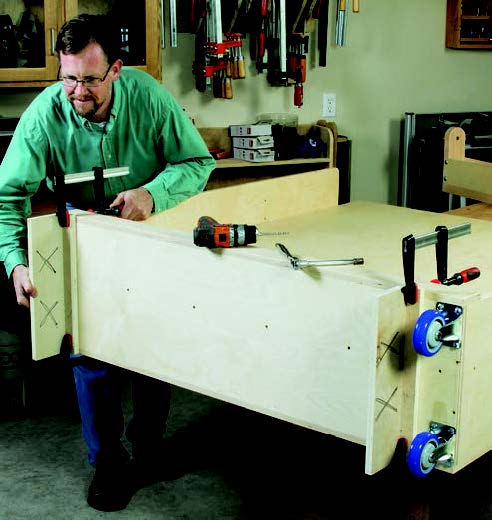
Well, we think this roll-out organizer takes a few big steps in the right direction. Made from 5 x 5-ft. sheets of Baltic birch plywood, it’s just big enough to fit 48″-wide material. The cart’s back side holds full sheets, and two pegs fit into a series of holes in the cart walls to keep them safely upright. The front bin stores loose cutoffs. When it comes time to load or unload the big stuff, just roll the cart out on its pivot and two casters and flip down a couple of toggle clamp “brakes” to park it. But take note: your shop ceiling should be at least nine feet high to stand full sheets upright on this cart.
Preparing the Cart Parts
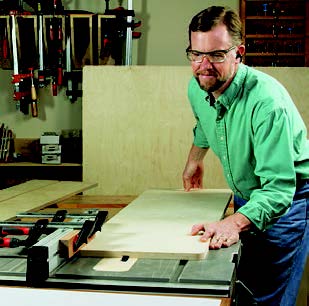
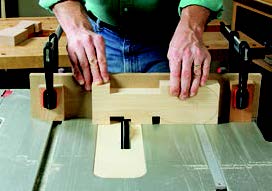
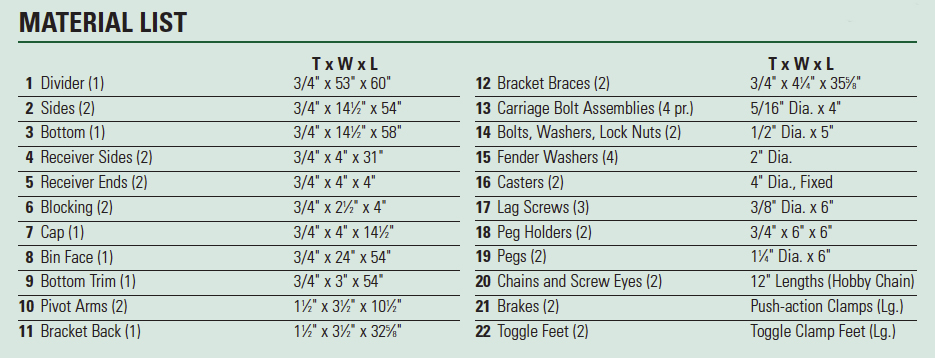
Get this project underway by cutting panels for the divider and two sides (pieces 1 and 2) to size and rounding over their top corners with 1″ radii. Then head to your table saw to plow 1/4″-deep dadoes down the length of the sides, 6″ from one edge (the pieces must mirror each other). Set the dado width to match the thickness of your plywood stock for a snug fit. Next, cut a bottom panel (piece 3), and lay out and cut the angles on one end as shown in the Drawings. Set these parts aside for now.
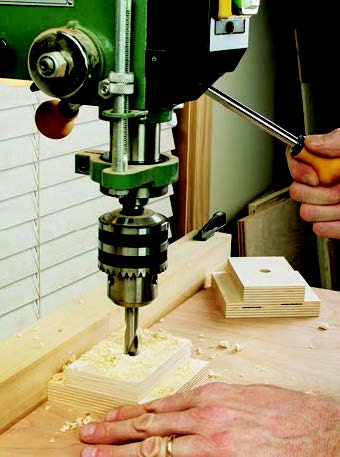
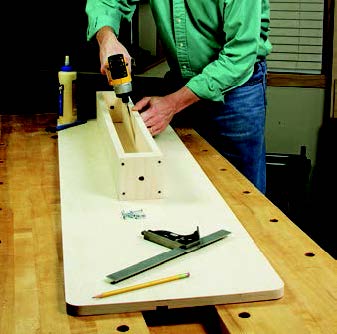
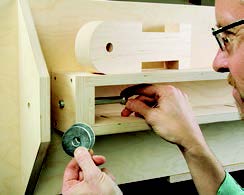
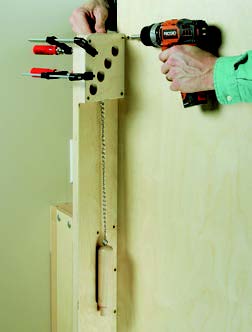
The “receiver” portion of the pivot mechanism consists of two sides, two ends and blocking pieces (pieces 4 through 6). Follow the Material List to cut them to size, and glue and clamp a piece of blocking to each receiver end, centering the blocking on the faces of the ends. While the glue dries, drill several pocket screw bores into one face of each receiver side; pocket screws will hold the completed receiver in place as it is attached to the side panel. Before assembling the receiver parts with glue and screws, step to your drill press and drill 1/2″-diameter centered holes through the ends/blocking for pivot bolts.
Now check the Drawings for locating the receiver on the “undadoed” face of one of the cart’s side panels. The side panel you choose determines which storage bin of the unit will be against the wall, so plan carefully. Center the receiver on the panel’s width, and drive the pocket screws home to “tack” the receiver in place. Reinforce this joint with 2″ countersunk wood screws. Be liberal with the screws: they’ll help the receiver support the bulk of the cart’s weight and storage load. Wrap up work on the receiver by cutting the cap (piece 7) to shape, marking and boring a 1/2″ hole through its center and fastening it to the side panel 1-3/4″ above the receiver to accommodate a pivot arm.
Assembling the Cart
You’re nearly ready for some big-component assembly, but first cut the bin face and bottom trim piece (pieces 8 and 9) to size, and give all the parts you’ve made up to this point a final sanding. Now glue and screw the divider into the side panel dadoes.
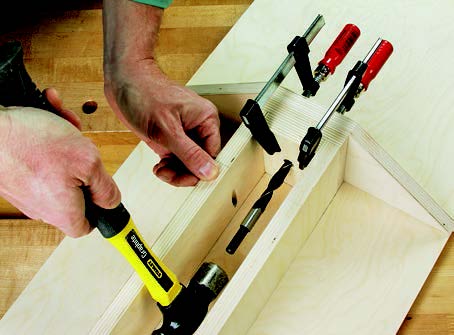
Set this big assembly onto the bottom panel in order to mark the receiver’s pivot bolt hole position. Extend a long bradpoint bit through the receiver hole to prick a centerpoint, then drill the bottom panel’s hole. With that done, install the cart bottom on the sides and divider with countersunk flathead wood screws.
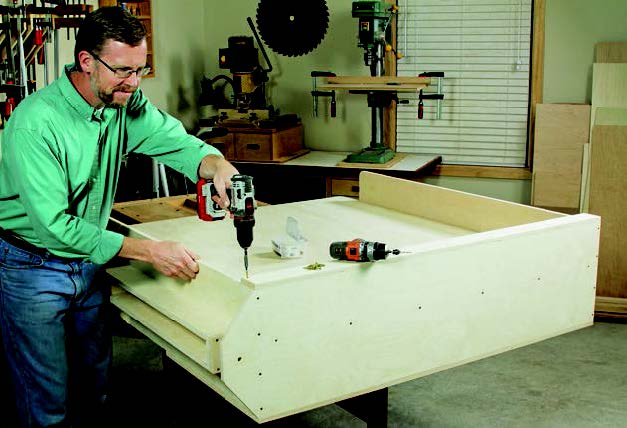
Chuck a chamfering bit in your handheld router to ease the top outside edge of the bin face and trim piece. It’ll help prevent these edges of the cart from splintering during use. Install them with screws so they overlap the cart bottom and sides.
Making the Pivoting Bracket

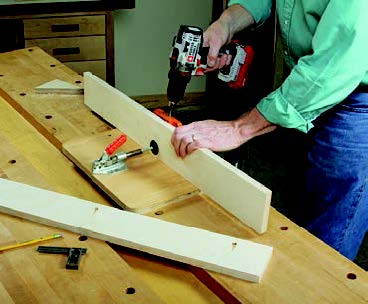
Find some 1-1/2″-thick, sturdy stock for making the pivot arms and bracket back (pieces 10 and 11). There’s no special trick to forming the pivot arms: cut one end to a 1-3/4″ radius with a jigsaw or bandsaw, and mill a pair of 3/4″-deep, 4-1/4″-long notches into both edges of each arm to house a pair of plywood braces (pieces 12).
You also need to drill 5/8″ holes for the pivot bolts; note that they are 1/16″ larger than the rest of the pivot holes to allow some “play” in the mechanism. It’ll help the cart shift up or down slightly at the pivot connection to roll over an uneven shop floor.
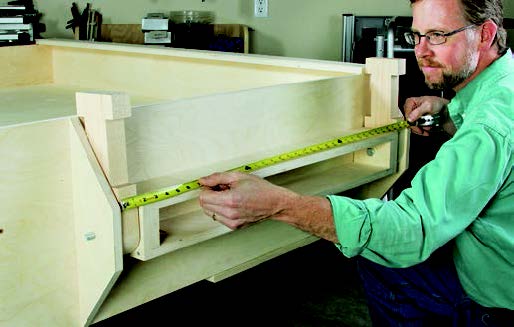
Before you cut the bracket back and braces to length, temporarily install the arms on the cart with bolts and two pairs of thin fender washers (pieces 14) situated against each end of the receiver.
Measure the pivot arm span carefully for the back and brace length. Take the time now to drill three counterbored mounting holes in the bracket back for lag screws, later.
With this work done, put the bracket together: glue and screw the arms to the ends of the bracket back, then glue and clamp the braces in their notches.
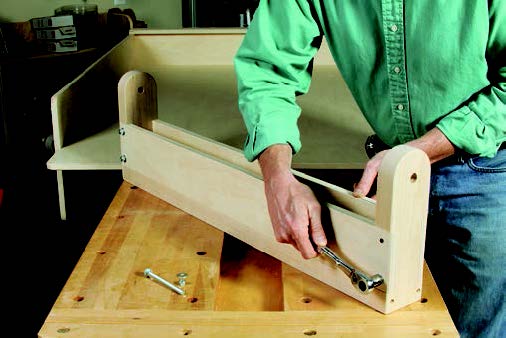
When the joints dry, drill all the way through the braces and bracket arms for pairs of 5/16″ carriage bolts. Install them with washers and nuts (pieces 13).
Mounting the Cart on the Wall
There’s not much work left to do before you can hang this project on the wall. Now’s the time to fasten a pair of non-swiveling casters (pieces 16) to the cart bottom on the end opposite the receiver. And, since the project is probably lying flat on your bench or sawhorses, do yourself a favor: clamp an “L”-shaped spacer to each end of the cart bottom. Make them about 1/16″ wider than the casters are tall; this will allow you to stand the project up level and without the casters rolling. Then bolt the pivot arm temporarily to the receiver, and stand the project up. Move it into position on its installation wall, and locate the wall stud for attaching the pivot bracket.
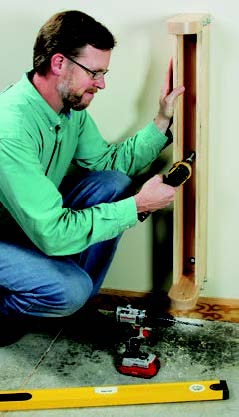
Mark the bracket height on the wall, and free the bracket from the receiver again. Drill pilot holes into the stud for the three 3/8″ lag screws (pieces 17), and drive them home to mount the bracket.
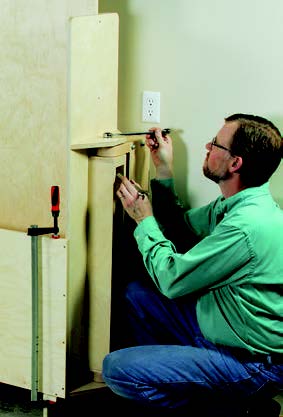
Next, hang the cart on it permanently with the pivot bolts, washers and lock nuts. You only need to tighten the hardware enough to take up the extra bolt length; in reality, the pivot bolts just act as hinge pins.
Wrapping Up with Pegs and Brakes
The full-sheet side of the cart will need two peg holders (pieces 18) mounted at the top corners of the sides for a pair of pegs (pieces 19) that will keep sheets upright and secure. The holders are 6″ x 6″ plywood squares with one rounded corner to match the cart sides. Bore four 1″-diameter holes through each one with a Forstner bit at the locations shown in the Drawings.
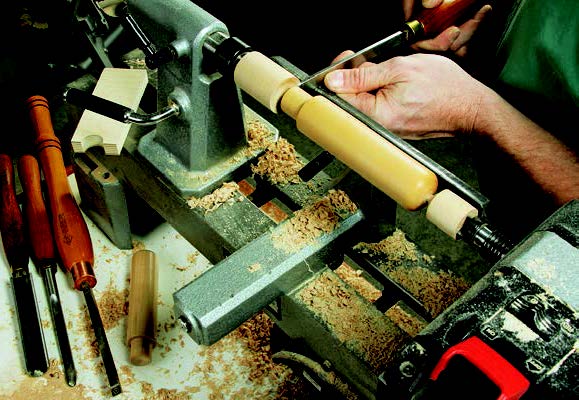
We turned the pegs to shape and created their 3/4″-long, 1″- diameter tenons on a lathe, starting from scrap stock. (You could make them from 1″ dowels if you don’t have a lathe.) Attach each peg to a 12″ length of hobby chain with a screw eye (pieces 20), and hang these chains from the two holders with a second pair of screw eyes. Fasten the holders to the cart with short screws. The chains will keep the pegs within easy reach when you’re loading or unloading sheets.
A pair of large, push-action clamps (pieces 21), mounted over the casters and pointing down, serve as “brakes” for this project. You can flip them up or down with your foot without bending over. However, their standard threaded versions won’t be long enough to reach the floor. Fortunately, Rockler offers 6″ versions (pieces 22) with oversized heads that make a perfect retrofit here. Hacksaw the posts down to 3-3/4″ long for an easy reach to the floor. Extend the clamp feet so the “brakes” just barely raise the wheels off the floor when engaged; that’s all the stopping power you’ll need.
Click Here to download a PDF of the related drawings.


