Today Gustav is the best-remembered of the Stickley brothers, but the other four — Albert, Charles, Leopold and John George — were active in the furniture business as well, with all of the brothers working for and against each other in a staggering number of combinations. Leopold and John George incorporated L & J. G. Stickley in 1904, originally manufacturing Arts & Crafts furniture before adapting to changing tastes. The company survives to this day, the only of the brothers’ ventures to do so.
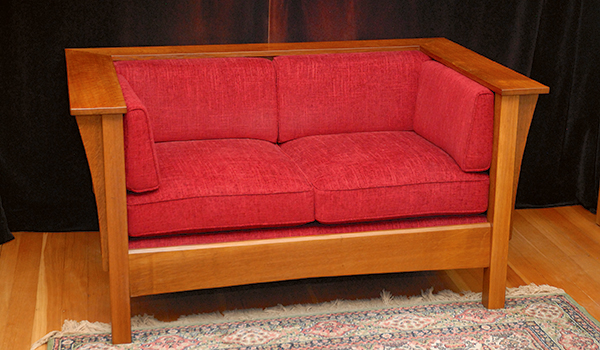
While much of L & J. G. Stickley’s Arts & Crafts output follows the style pioneered by Gustav’s Craftsman Workshops, the broad, continuous arm and frame-and-panel sides of these Peter Hansen designs distinguish the “Prairie” settle (No. 220) and chair (No. 416). Released in 1912, these pieces call to mind ,the early work of Frank Lloyd Wright. They also provide an attractive alternative to variations on common Mission designs. Simple construction techniques underlie the minimalist design: mortise-and-tenons join the rails to the legs, and grooves capture the stiles and panels. Corbels support the top while providing a little visual relief. I’ve long admired the settle, so when the time came to replace our loveseat, I jumped at the chance to build an interpretation of it. I began by scaling it down to fit its intended space, then added shallow arches to the long bottom rails to soften those strong horizontal lines. You can use my construction techniques to reproduce this version exactly, or to adapt the design to your own space. Following the original, I built my version in quartersawn white oak but substituted 1/4″ plywood for the panels.
While it’s not the most challenging work to upholster the piece, it was still beyond my skills, so I hired an upholsterer. Although leather is a popular choice for Arts & Crafts seating, we chose fabric. It’s historically accurate and less expensive than leather. My upholsterer used high-density polyurethane foam for the cushions and covered the seat frame with webbing, padding and a cloth cover. If you use an upholsterer, consider having a conversation before construction begins: my upholster had helpful input on the seat frame and its brackets.
The Quadrilinear Leg
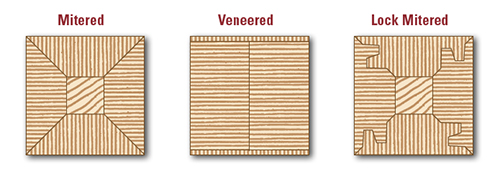
Quartersawing white oak produces strikingly figured grain, but it only shows on the faces of boards. So even if you have easy access to thick leg stock, you’re better off gluing up leg blanks. There are a couple of approaches you can take to make legs with four figured sides.
Gustav Stickley’s Craftsman Workshops veneered the non-quartersawn faces of legs so that figure would show on all sides. To produce these legs, laminate stock to final thickness and rip it 1/4” below final width. Saw 1/8” veneer stock and apply to the blanks, then dimension to final size. A light chamfer helps blend where veneer and solid wood meet. His brothers L & J. G. Stickley took a slightly different approach, shaping four sides to form a box leg. They called this the quadrilinear leg, and it’s functional as well as decorative since it allows you to use thinner stock to build the leg.
A similar effect can be achieved by mitering stock at the table saw or router table, then gluing up the miters, but a locking miter bit provides a mechanical interlock and avoids the slipping and sliding that can occur when joining simple miters. Since even small errors in setup will telegraph in the finished joint, it pays to take care setting bit depth and fence position. After reading good reviews of Inifinity Tools’ Lock Miter Master Jig, I decided to give it a try. I had my depth and fence zeroed in on my second attempt. If you don’t want to purchase the jig, be prepared with some scrap stock to test your cuts as you refine your setup. Once your setup is complete, mill the joints. Each cut needs to be made in a single pass, so take care to not bog down your router. And each joint has complementary faces, so you’ll be cutting one half of each joint with the edge of the board to the fence and the other with the face of the board to the fence.
Legs Form the Foundation
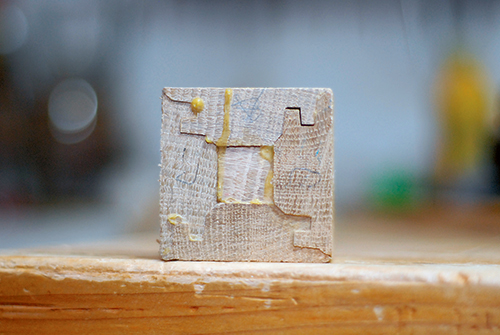
Whatever size you’re building, begin by milling stock to final thickness and gluing up panel blanks if you opted for solid wood instead of veneered panels. Since the legs form the foundation for the settle, it makes sense to begin construction with them. I ripped the faces of each leg to width and crosscut them a little long, then cut the locking miters at the router table, making sure to produce enough stock for an extra leg. The last step in cutting stock for the legs is to cut the central core of each leg. With the leg faces dry fit, measure the width and length of the hollow at the center of the legs, then rip your cores to fit.
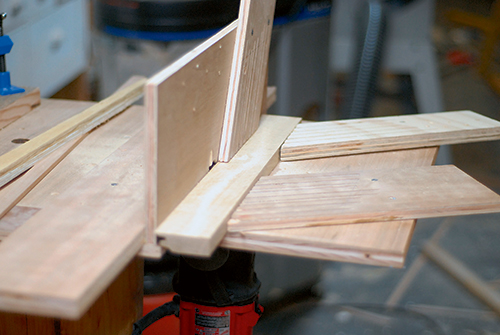
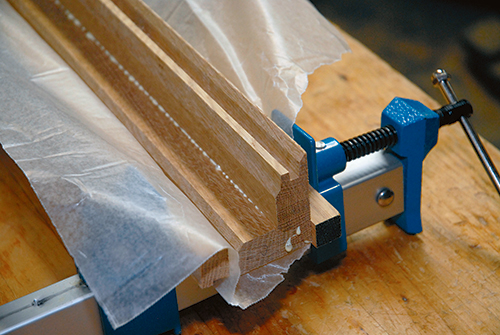
Leg assembly is best handled in stages. Begin by creating leg halves. Glue two complementary sides together to form an L-shape, taking care to control glue squeeze-out, then glue those halves together around the central core. After the glue has dried, trim the legs to final size (a stop block on a miter saw or crosscut sled helps ensure all four legs are the same length).
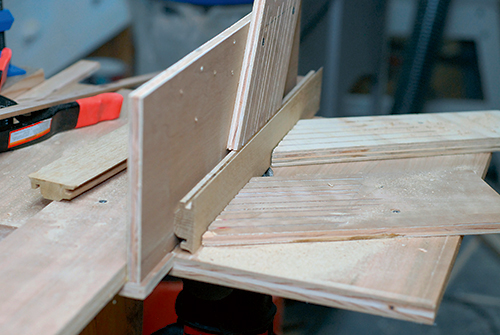
Take some time arranging the order of the legs until you’re satisfied with their appearance. The front faces of the front legs will be most visible, while the back legs will hardly be seen. A cabinetmaker’s triangle at the top of the legs will help you maintain that arrangement as construction continues.
Once you’ve selected your front and back legs, you can cut the mortises for the rails. With the construction Drawings as a guide, lay out the mortises and cut them using your preferred technique. The grooves for the corbels can wait until you’ve actually cut the corbels, so set the legs aside for now and turn your attention to the rails.
Rails Tie Everything Together
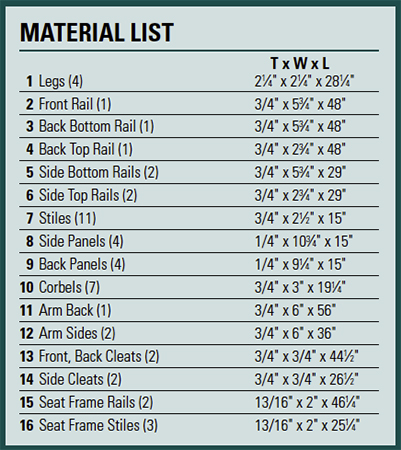
Rip and crosscut your rails to length, using wood with the most attractive grain for the front rail since it will be most visible in the completed project. Then cut your tenons and tune them to fit their mortises. If you want to follow the original design closely, omit the arch in long rails. Otherwise, lay out the arch, cut close to the mark with a jigsaw or band saw and fair the curves with a spokeshave or sandpaper. Because I put arches on the front and back rails, I first created a pattern for the arch. Using a pattern means I only have to do the work of fine-tuning the arch once. Satisfied with the shape of my pattern, I attached it to the back face of the rail with a couple of screws and routed it to shape. To avoid tearout, I made the cut from both ends, working towards the center.
The deep chamfer on the top of the front rail increases the settle’s comfort by softening an edge that would otherwise dig into the back of your legs. It’s an easy detail to reproduce using a large chamfering bit. To avoid taxing the router, ease into final depth with a couple of passes. You can also rip the chamfer on the table saw with the blade set for an angled cut, then clean it up with a plane or sandpaper.
To minimize tool setup and save time, wait to cut the grooves in the rails until you’re ready to groove the stiles as well. Begin by ripping and crosscutting the rails to size, then set up your machinery for the grooves. I use a 1/4″ x 1/2″ slot cutter in my router to make the cut, but a dado stack would work, too. Whatever your approach, you want to end up with a 1/4″-wide and 1/2″-deep groove centered on the rails and stiles. Then tenon the ends of the stiles. I used a 1/2″ rabbeting bit set for a 1/4″-deep cut. Fine-tune the fit of the stub tenons in the grooves, then cut the panels to size. If you’re using solid wood, you’ll want to cut them 1/4″ narrower than indicated in the cut list to allow for seasonal wood movement. Since I was using veneered panels, I cut them slightly undersized (about 1/16″) in both dimensions, then test fit everything.
Corbels Aren’t Just for Show
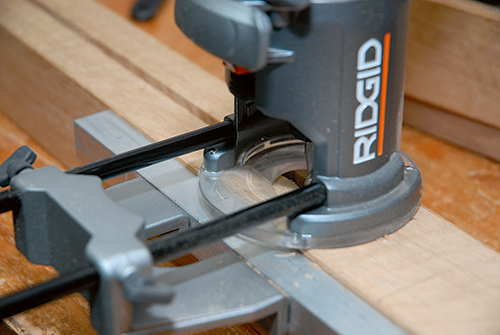
Functional as well as decorative, the corbels support the wide cap arm. You have a number of options for attaching them to the legs, including a simple butt joint or biscuits. I chose to cut a stub tenon on each corbel and grooves to match on the legs. This method registers the location of the corbel relative to the leg and provides for a solid connection. With a number of identical corbels to cut, a router template was a logical choice.
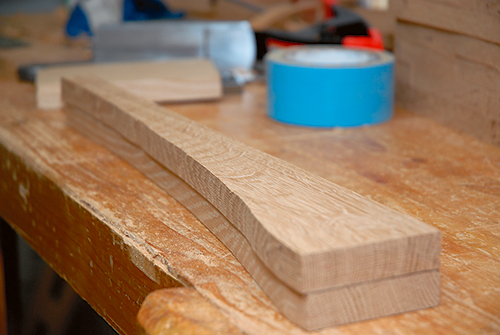
I laid out the shape on some scrap, cut it close on the band saw, then faired the curve with a spokeshave and sandpaper. Once I was satisfied with the pattern, I traced it out on my stock, then cut close to my layout lines before routing each corbel to size using a pattern bit in the router. You need seven corbels if you’re building the settle in a loveseat size, but it’s a good idea to cut a couple extra in case something goes wrong during pattern routing. And be sure to save a couple of your offcuts; you’ll use them as clamping blocks when it comes time to install the corbels.
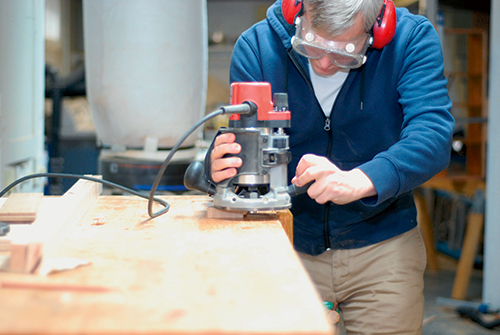
After routing the corbels, I used a 1/4″ rabbeting bit to cut the stub tenons. A 1/4″ straight bit made quick work of the corresponding grooves in the legs and center stile of the back.
Continuous Arm Caps Things Off
Perhaps the most distinctive feature of the settle is the continuous arm running along the top. Although there’s no complicated joinery involved in its construction, its prominence calls for careful execution. Ideally, you can cut the three pieces from a single board; if that’s not possible, find boards with similar figure and grain. Rip your stock to width, then cut the miters on the back piece to bring it to final size. Leave the sides long until you cut your miters, then trim to final length. I clamped both sides together and crosscut them on the miter saw to ensure they were the same length.
Because you want a smooth joint where the arm parts come together, you’ll want to assemble the arm, then sand or plane the top flush. I used loose tenons to reinforce the joint, but splines or biscuits would serve as well. After dry fitting, I sized the miters by applying a thin layer of glue and let it sit for a minute. This gives a chance for the end grain exposed in the joint to absorb glue and helps with adhesion. After a minute, I applied another thin layer of glue and clamped things together. When the squeeze-out had begun to gel, I scraped it away and let the assembly sit overnight.
With the arm assembled, I was ready to sand. I worked through 220-grit on all my parts, taking special care to make sure the miters of the arm were flush. I then routed a light chamfer (about 1/8″) on the edges of the arms and long edges of the legs to soften them. You could also ease the edges with sandpaper, but the chamfers’ crisp edges complement the design. To minimize the risk of splintering, the bottom edges of the legs get a slightly deeper chamfer.
Historically Accurate Finish
At this point, you have all of your parts cut and sanded and have a couple of options for completing assembly and finishing. When a design permits it, I like to pre-finish the parts and then assemble. Doing so makes removing glue squeeze-out an easy task — it tends to pop off the finish with minimal effort, and there’s no risk of glue interfering with the finish.
A fumed finish (so called because the oak is exposed to ammonia fumes, which reacts with tannins in the wood to darken it) was a popular finish for Arts & Crafts pieces in white oak. Many finishing schedules have been developed to replicate the look of a fumed finish while avoiding ammonia, but the traditional finish isn’t difficult to apply so long as you take some basic precautions. You’ll need aqueous ammonia (available by mail or from blueprint supply stores), containers to let it evaporate easily (glass pie pans work well), safety goggles and a respirator with appropriate cartridges. For ammonia fuming to be effective, you need to seal the piece. Furniture maker and author Kevin Rodel has described renting a moving truck and fuming a batch of furniture in the cargo bay, but the more common approach is to tent the piece in plastic sheeting. You can build a wood frame and staple the plastic to the frame, or build a more temporary structure by stringing line between posts.
Whatever your approach to tenting, you need a good seal at the base of the tent and air circulation all around the piece. Dry fit the entire assembly, and tent it along with some offcuts from your project. After putting on your safety equipment, pour ammonia into the pie pans, then position them under the piece, allowing the evaporating ammonia to circulate.
Longer exposure times lead to a darker final color, but exactly how long to fume your piece will vary with temperature since ammonia evaporates more quickly in warmer air. After four hours, remove an offcut from the tent and wipe it with a quick coat of boiled linseed oil. When the oak is fresh from the tent, it will have a greenish cast to it, but this is temporary. The boiled linseed oil reveals the wood’s true fumed color. If you’re satisfied with the color, dispose of the ammonia and let the piece air out. Otherwise, continue to check back.
While the piece is dry assembled, it’s a good time to install the cleats that support the seat frame. The long cleats run parallel to the rails, but the short ones slope downward from front to back to create a more comfortable seating angle. I glued and screwed the long cleats in place, then marked the slope of the side cleats and installed the cleats.
Before continuing with my finishing schedule, I masked any areas that were to be glued, then applied two coats of boiled linseed oil, sanding the last coat with 320-grit wet/dry paper while it was still wet. Once the oil was dry, I wiped on a few thin coats of garnet shellac. To even the shellac, I wet sanded the last coat with 400-grit paper.
Simplify with Subassemblies
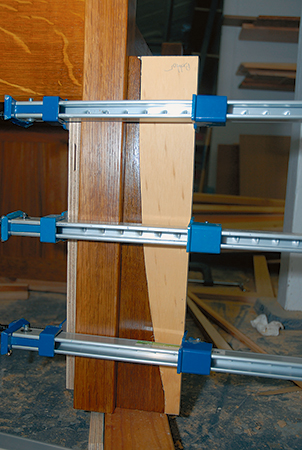
Breaking assembly into stages keeps it manageable and prevents the panic that can sometimes accompany large glue-ups. At each stage, dry fit your parts one last time to verify final fit and that you have all the clamps and cauls you’ll need. Begin with the sides. If you’ve used veneer panels, you can glue the panels to the frames for additional stability, but you’ll need to leave solid panels loose in their grooves to expand and contract with changes in humidity. Once the glue has dried, you can glue the legs to the ends of the sides and put the back together. When assembling the back, be sure that the grooves you cut in the rails and stile for the central corbel line up.
After the back has dried, you can glue it and the front rail to the side assemblies, checking for square. With the main body of the settle assembled, it’s time to glue on the corbels. Apply glue sparingly to the tongues and clamp in place, using offcuts from cutting the corbels as clamping blocks. Be sure the tops of the corbels are flush with the settle. Once the base is out of clamps, level the top to make an even surface for joining the arm to the base. A plane works well here.
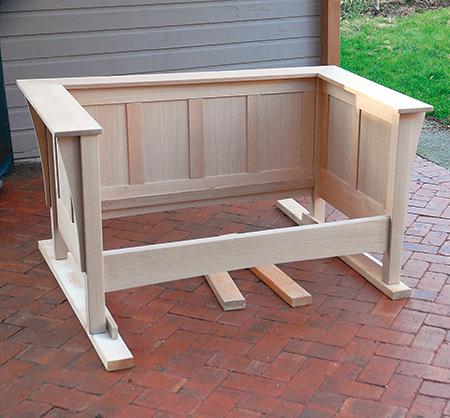
The last step in assembly is joining the arm to the base. There are a number of ways to attach it — screwing through the top of the arm and plugging the holes; using biscuits to align the piece; or pocket holes through the back faces of the corbel into the arm — but the joint provides ample long-grain to long-grain contact, so simply gluing the arm to the base is more than adequate. Apply glue and position the arm, checking to make sure it stays in place as you tighten your clamps.
If you’ve pre-finished your parts, you’re almost done. The seat cushions rest on a frame that sits on cleats attached to the inner rails. To determine the size of the frame, measure the opening of the base and subtract 1/4″ from both dimensions. Mortise-and-tenons join the frame, and the corners are notched to clear the legs. A center rail provides additional support; if you are building a sofa-length version of the settle, use two center rails. Once you have the cushions installed, sit back, relax, and think about your next project.
Click Here to download a PDF of the related drawings.


