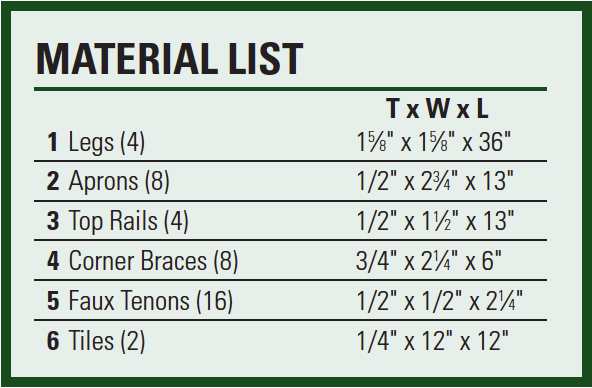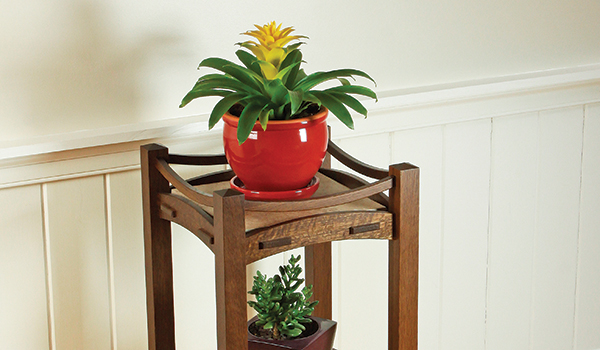
The Stickleys strived for function over flair in their designs, but that early 20th century sensibility makes some of their furniture seem imposing and “heavy” by today’s standards, particularly with a dark finish. So, we’re giving the conventional Arts & Crafts plant stand a bit of a facelift here. Instead of straight, wide and thicker crosspieces, gentle curves and a taller stance make our updated version appear lighter on its feet. And to me, those delicate top rails look like velvet cordons showcasing a favorite plant.
While you can certainly stain this project any “Mission brown” color you like, its compact size makes this project a manageable candidate for traditional ammonia fuming. If you’ve never tried it, there’s no better way to finally know what a fumed finish looks like than to give it a go and see for yourself.
So, now that I’ve planted that seed, let it germinate while I show you how to build this plant stand for your home.
Making the Legs
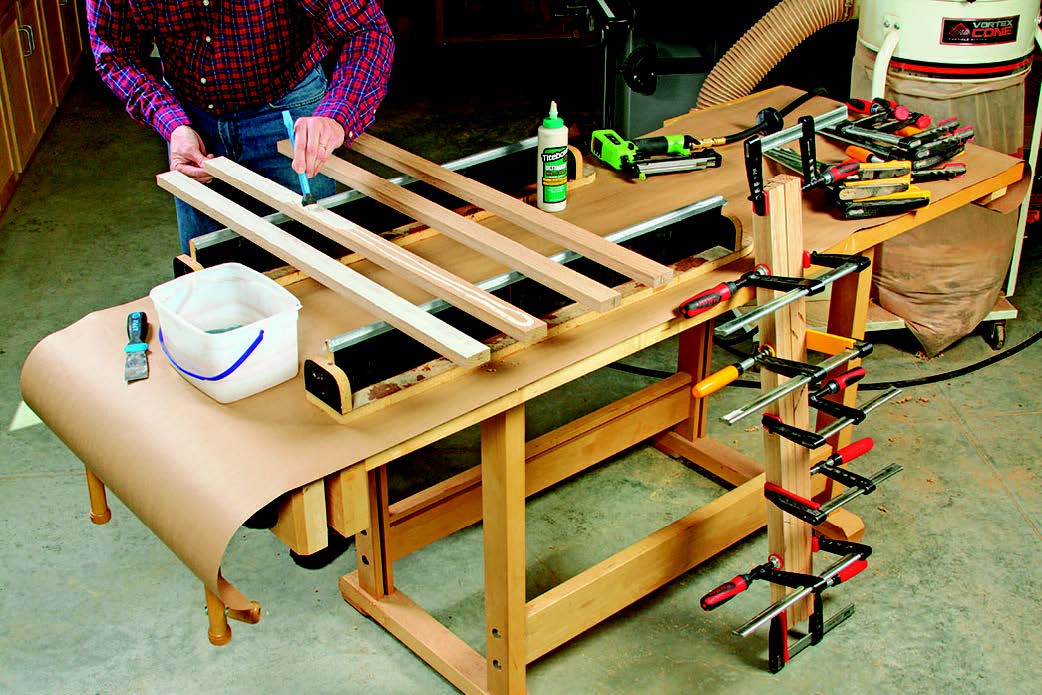
If you have access to 8/4 quartersawn white oak, you could make these 1-5/8″-square legs from solid blanks. But that will only provide quartersawn grain on two faces, with flat sawn grain on the other two. I think the difference in grain pattern is distracting. Here’s an alternative: save that showy flaked quartersawn grain pattern for the aprons and rails, and downplay the grain on the legs. To do that, I glued my leg blanks up from two laminations of 13/16″-thick riftsawn stock (look for end grain that runs about 45° to the board faces). Riftsawn grain has a linear and similar pattern on both its faces and edges. If you make them carefully from the same board, only a woodworker will notice that these laminated legs aren’t actually single pieces of wood. It’s a really good compromise here.
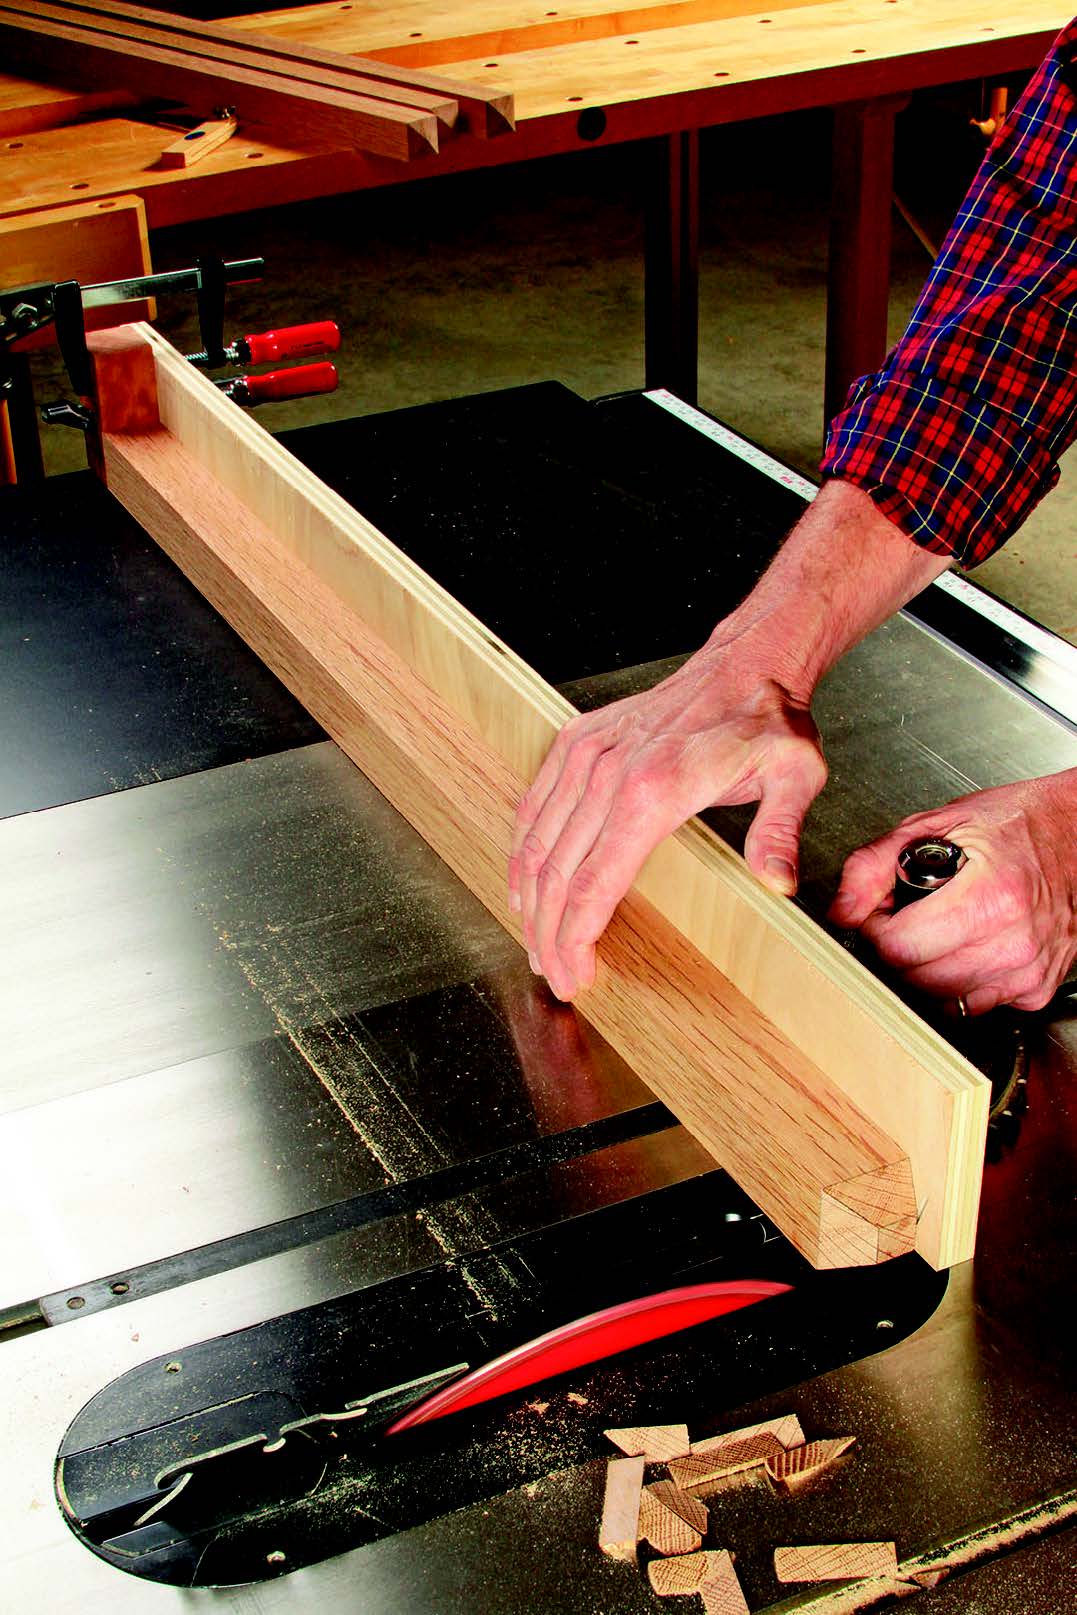
Once you’ve ripped and surfaced the legs to final proportions, cut them an inch or so longer than necessary and all to the same length. The tops of the legs will receive pyramids next. In case the pyramid-cutting process produces any tearout, the extra leg length gives you the chance for a “do over” or two, if needed. To set up for cutting the four beveled faces of each pyramid, I screwed a 40″-long fence to my miter gauge and tilted my table saw blade to 19.5°. Draw base lines all around each leg for the pyramids, 5/16″ from one end. Now, lightly score along these lines with a sharp utility or marking knife — it helps safeguard against splintering. Clamp a stop block to the miter gauge fence against the flat “foot” end of each leg so the blade lines up exactly with your score lines. Make four cuts to trim the pyramids to shape. If they’re crisp and meet your approval, crosscut the legs to final length.
Each leg requires two pairs of 1-3/4″-long mortises on its inside faces for the aprons and one pair of 1/2″-long mortises for the top rails. Choose the “show” faces of the legs first (arrange the laminated edges of the legs to the sides of the project), and mark the legs to keep their orientation clear. Then lay out these 1/4″-wide mortises, according to the Drawings. Chop all the mortises about 9/16″ deep.
I like to chamfer the bottoms of legs like these. It’s easy to do with a block plane or a chamfering bit in a trim router, and removing the edges and corners will ensure that the legs won’t chip if the plant stand gets dragged across a floor. Chamfering also adds a nice shadow line detail. About a 1/8″ chamfer is all you need. Once the chamfers are cut, sand the legs smooth, then up to 180-grit, and set them aside.
Machining the Apron and Rail Tenons
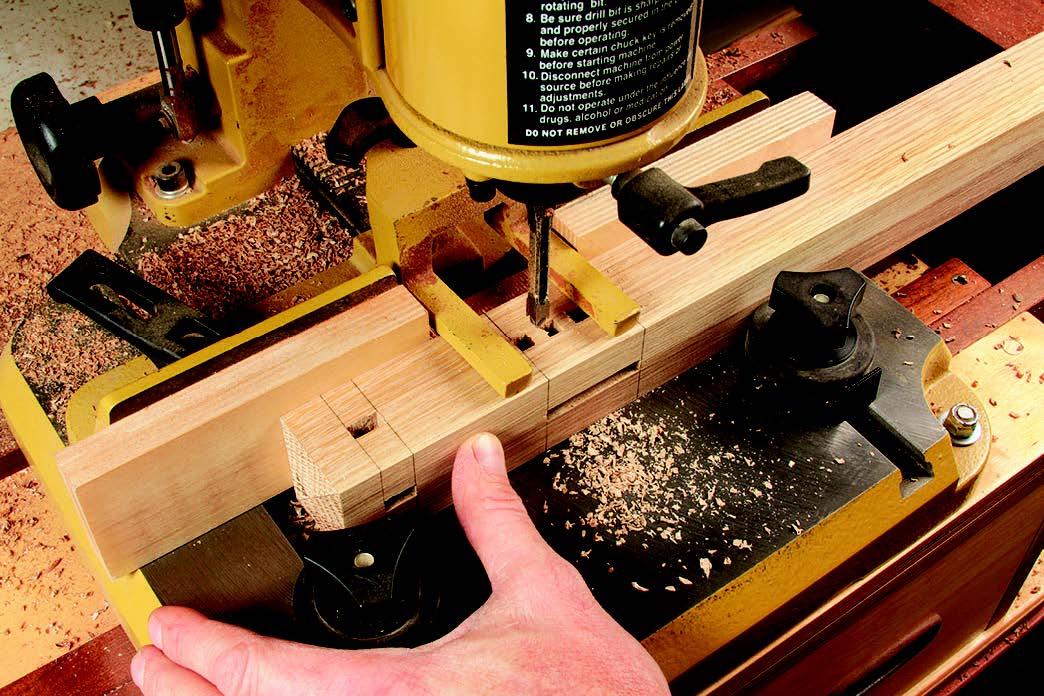
Mill nine, 3″-wide blanks for the aprons from 1/2″ stock, and prepare five, 1-3/4″-wide blanks for the top rails (one of each size is a test piece). Crosscut them all to 13″ long. While your first inclination might be to start cutting curves into these parts now, save that for last. The right place to begin is by raising tenons on their ends while you still have flat reference edges to bear against. Stack a wide dado blade in your table saw, and bury it in a sacrificial fence so only 1/2″ of the blade projects out from the fence.
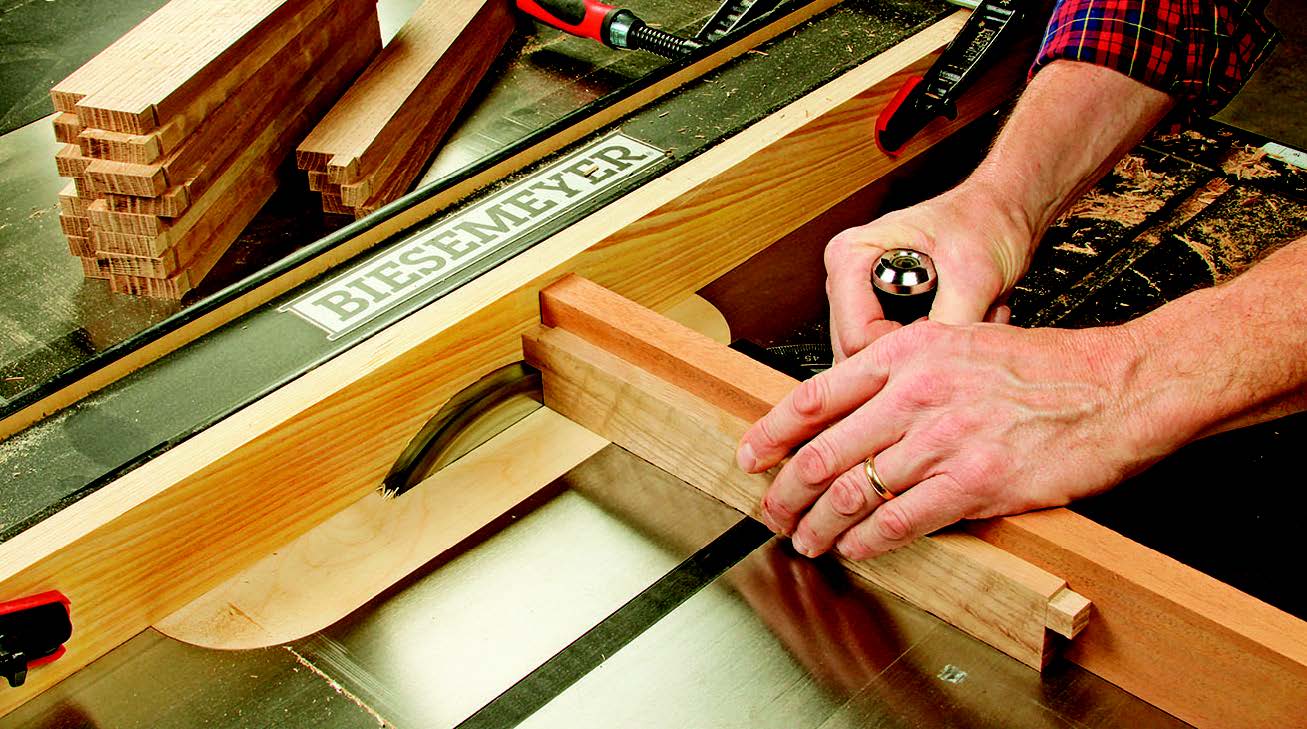
Start by cutting the “end” shoulders of the tenons, using the test pieces to set up these cuts. Raise the blade to 1/8″, install a scrap fence on your miter gauge to back up the cuts, and cut one shoulder on all the parts, with the workpieces standing on-edge. Next, crank up the blade to 1-1/8″, flip the workpieces to their opposite long edges, and cut the other end shoulders into all of them. This should produce a 1-3/4″-long tenon on the aprons and 1/2″ tenons on the top rails.
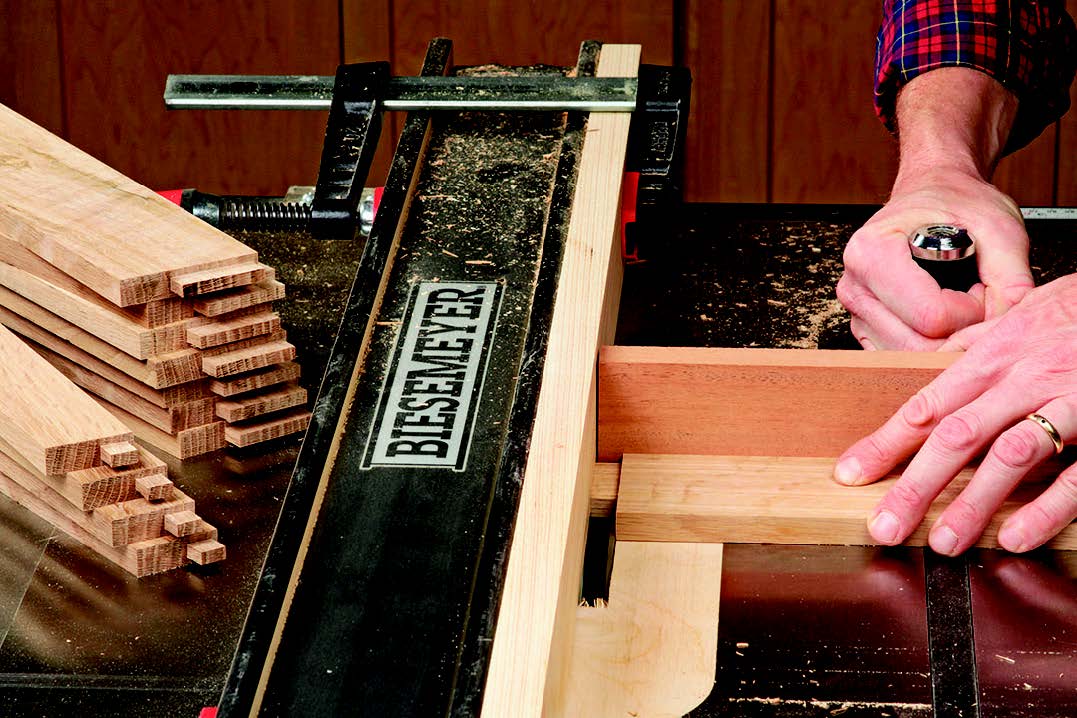
Complete the tenons by lowering the dado blade to 1/8″ again and cutting the final two broad shoulders of each one, starting with the test pieces. Aim for a good friction fit of the test tenons in their leg mortises. Slightly tight is always better than too loose: you can refine the fit of a snug tenon easily with a shoulder plane or a file.
Shaping and Mortising with Templates
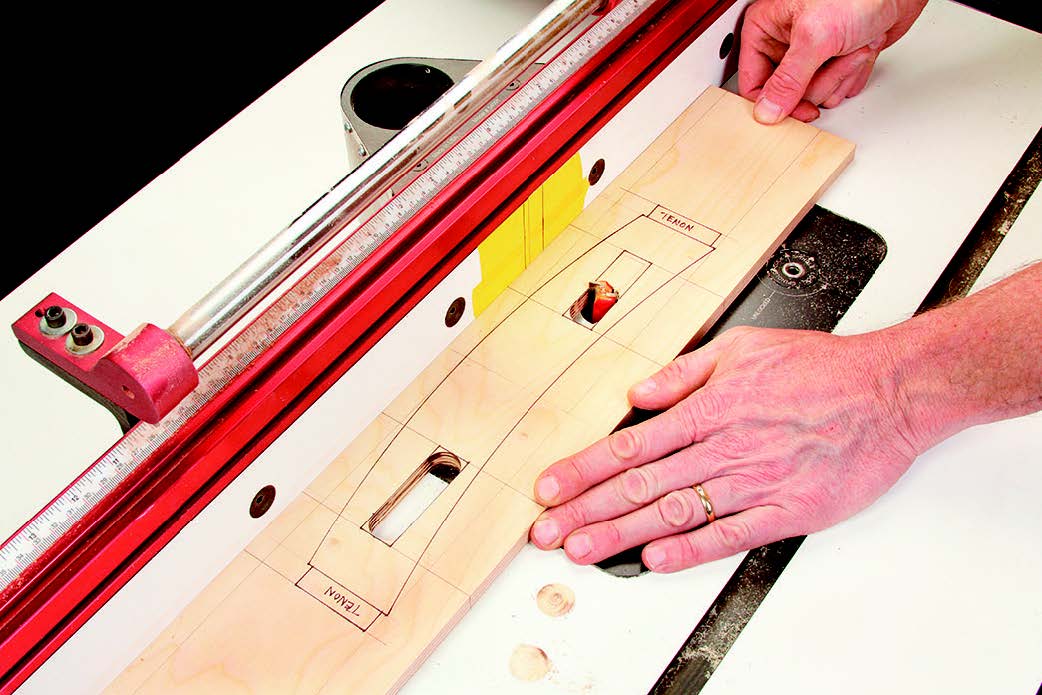
Our eyes can distinguish even subtle differences between two curves, especially when they’re parallel and close together — as they will be on these aprons and rails. So, uniformity is reason enough to make templates for shaping both the aprons and rails. You’ll also appreciate having stopped slots on the apron template for locating the mortises that house pairs of faux tenons. That way, you can rout these mortises to exact size easily and quickly with a guide collar and a straight bit.
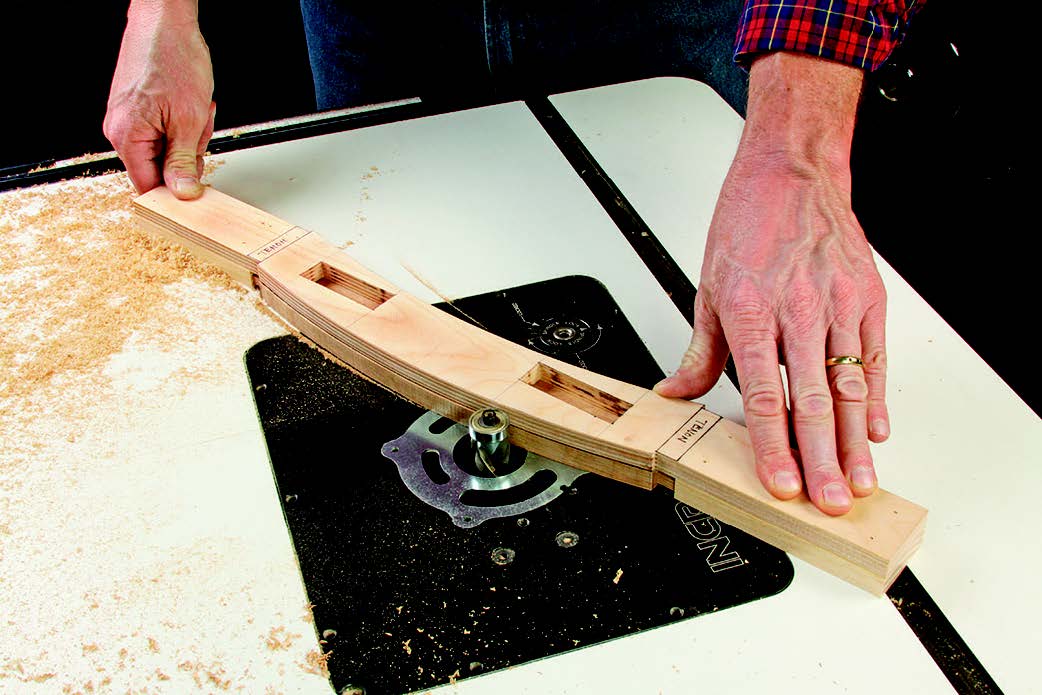
I laid out my apron and rail templates on long strips of 1/2″ plywood so I could leave some extra material at the ends for use as handholds. Bend a flexible batten to draw all the curves, and mark the tenons on the ends of the templates, too. Next, lay out the positions of the mortises on the apron template, then enlarge these two outlines to 3/4″ wide and 2-1⁄2″ long. Rout slots through the template to hit your outlines with a 3/4″ straight bit in your router table, starting and stopping these cuts carefully. Chisel the mortise cutouts square.
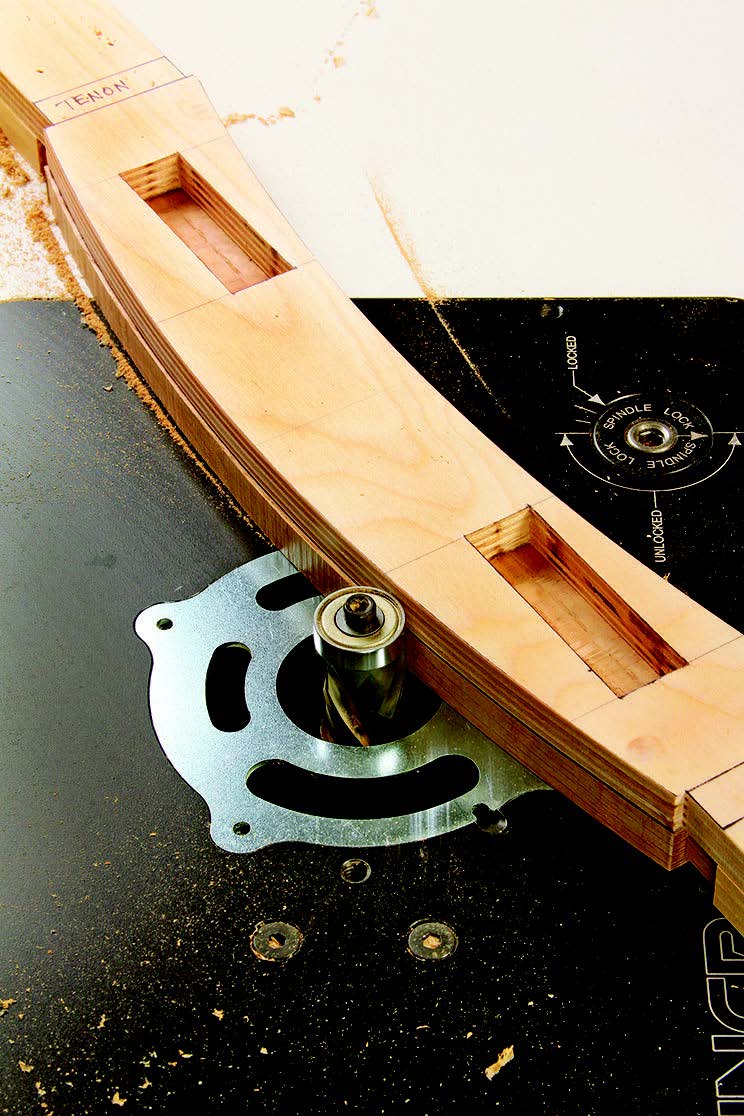
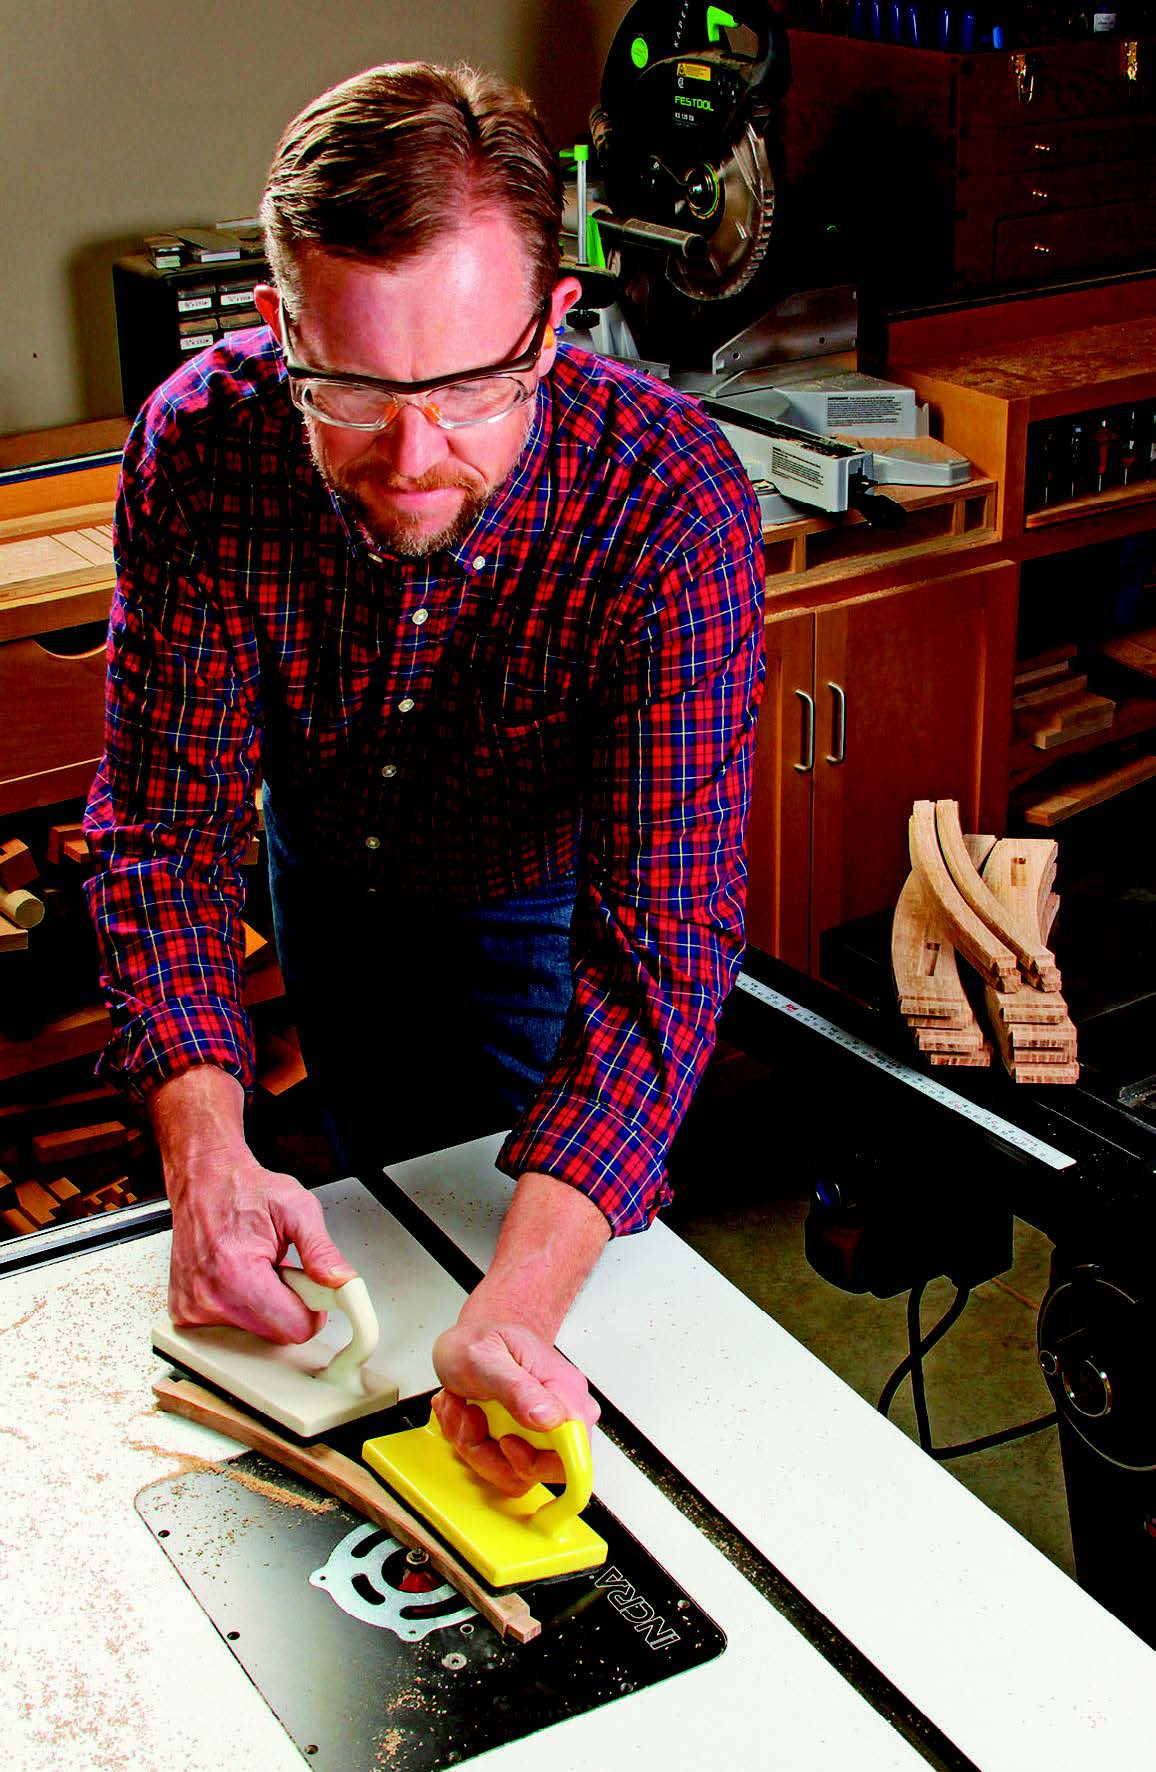
Now, grab your jigsaw or head to the band saw to cut the templates to rough shape, and smooth their curves with sanding drums or on a spindle sander. I tacked a pair of 1/2″ thick spacers underneath the handholds of each template to register the aprons and rails automatically, and to add some stability during use. Once the templates are ready, use them to draw curves on all the apron and rail workpieces. Cut these parts just outside of those layout lines. Then stick an apron or rail to its template with carpet tape, and shave the curves to match the templates with a piloted flush-trim bit in your router table.
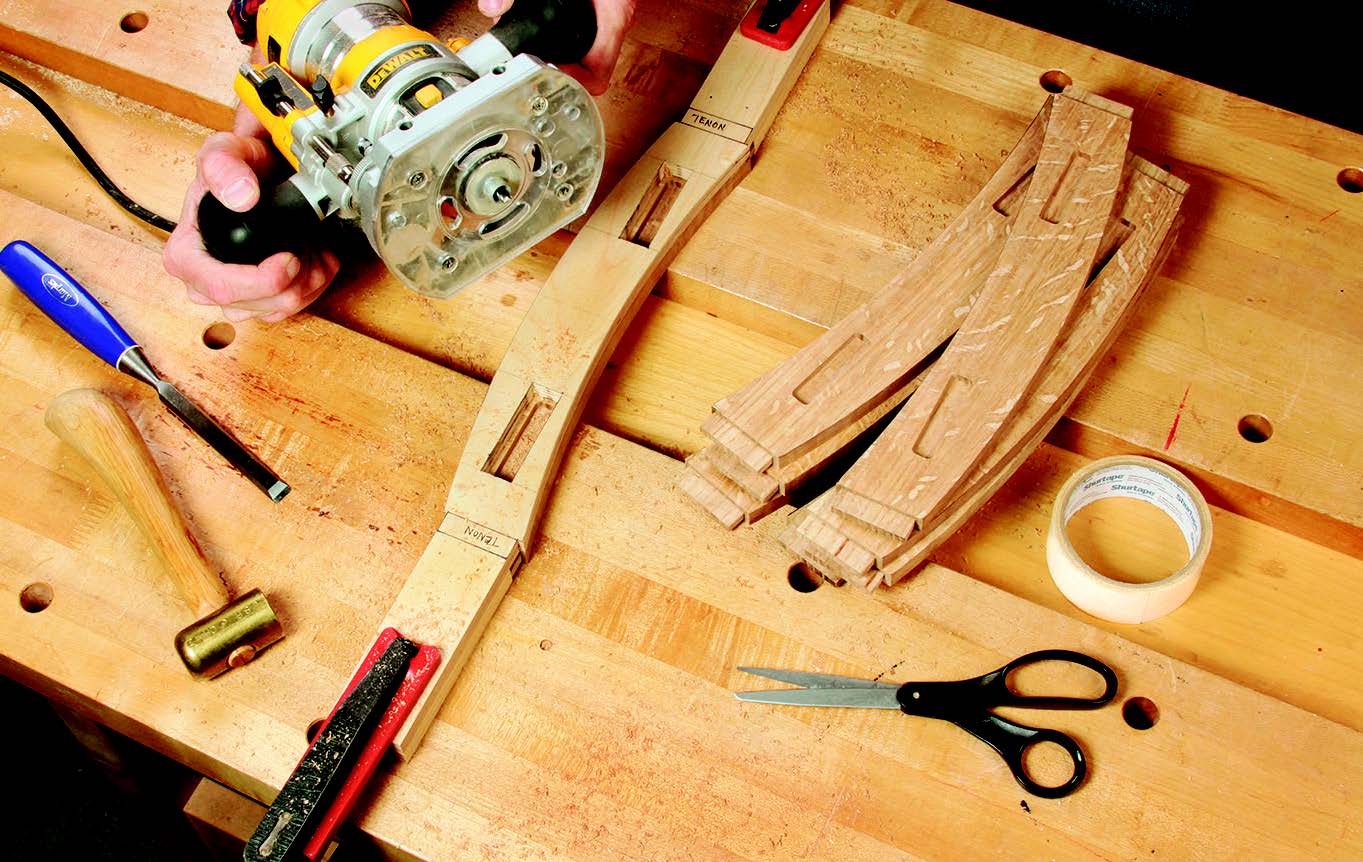
After forming the two curves on each apron, I routed its mortises before separating the apron from the template and moving onto the next one. Use a 1/2″ O.D. guide collar and a 1/4″ straight or spiral bit in a plunge router for this task. Your mortises will end up being 1/2″ wide and 2-1/4″ long. Rout them 1/4″ deep. Chisel the mortise ends square. Add some tiny chamfers to the long edges of the rails and aprons, then finish-sand them all to 180-grit.
Assembling the Framework
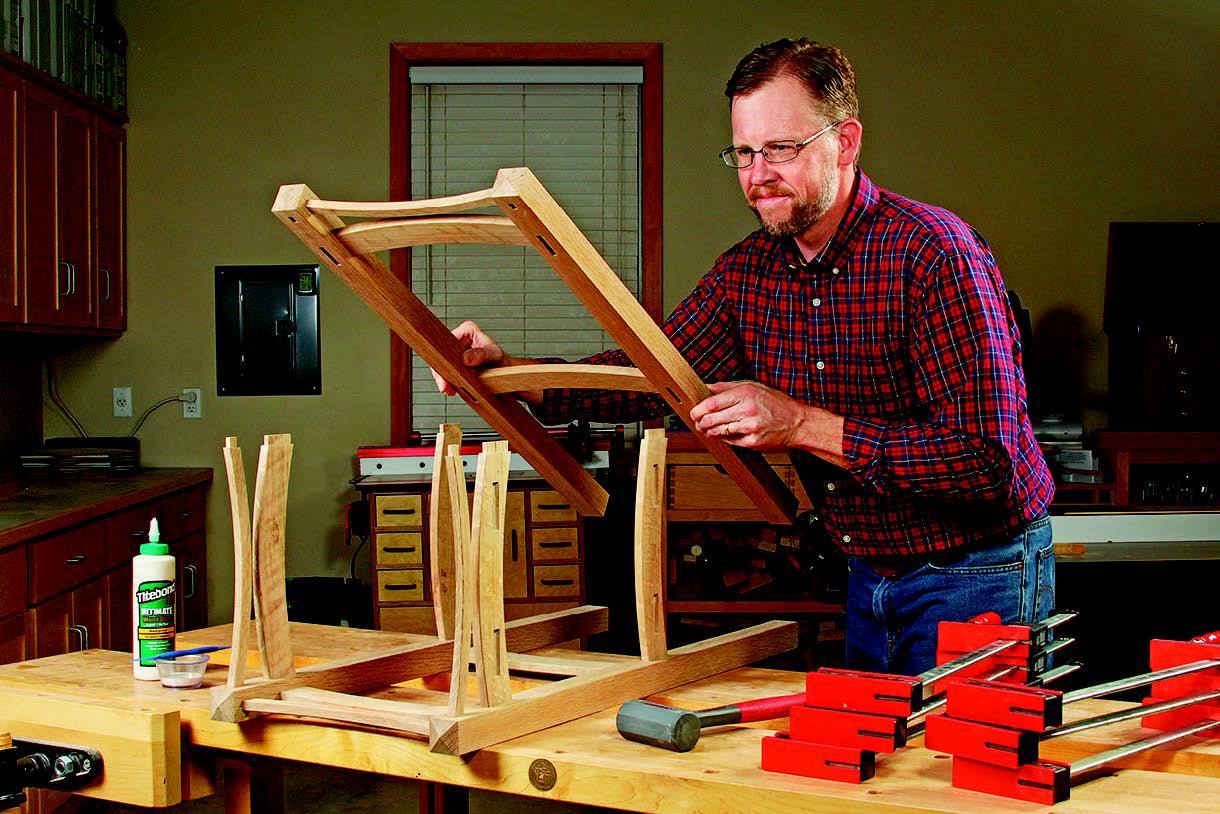
You’re now ready to bring your big stack of parts together into a framework. First, test the fit of all the pieces, then glue and clamp up two side assemblies consisting of two legs, two aprons and a top rail. When those dry, erect the frame with the last four aprons and two rails. Clamp carefully during glue-up so that all four legs stand flat and the frame is square.
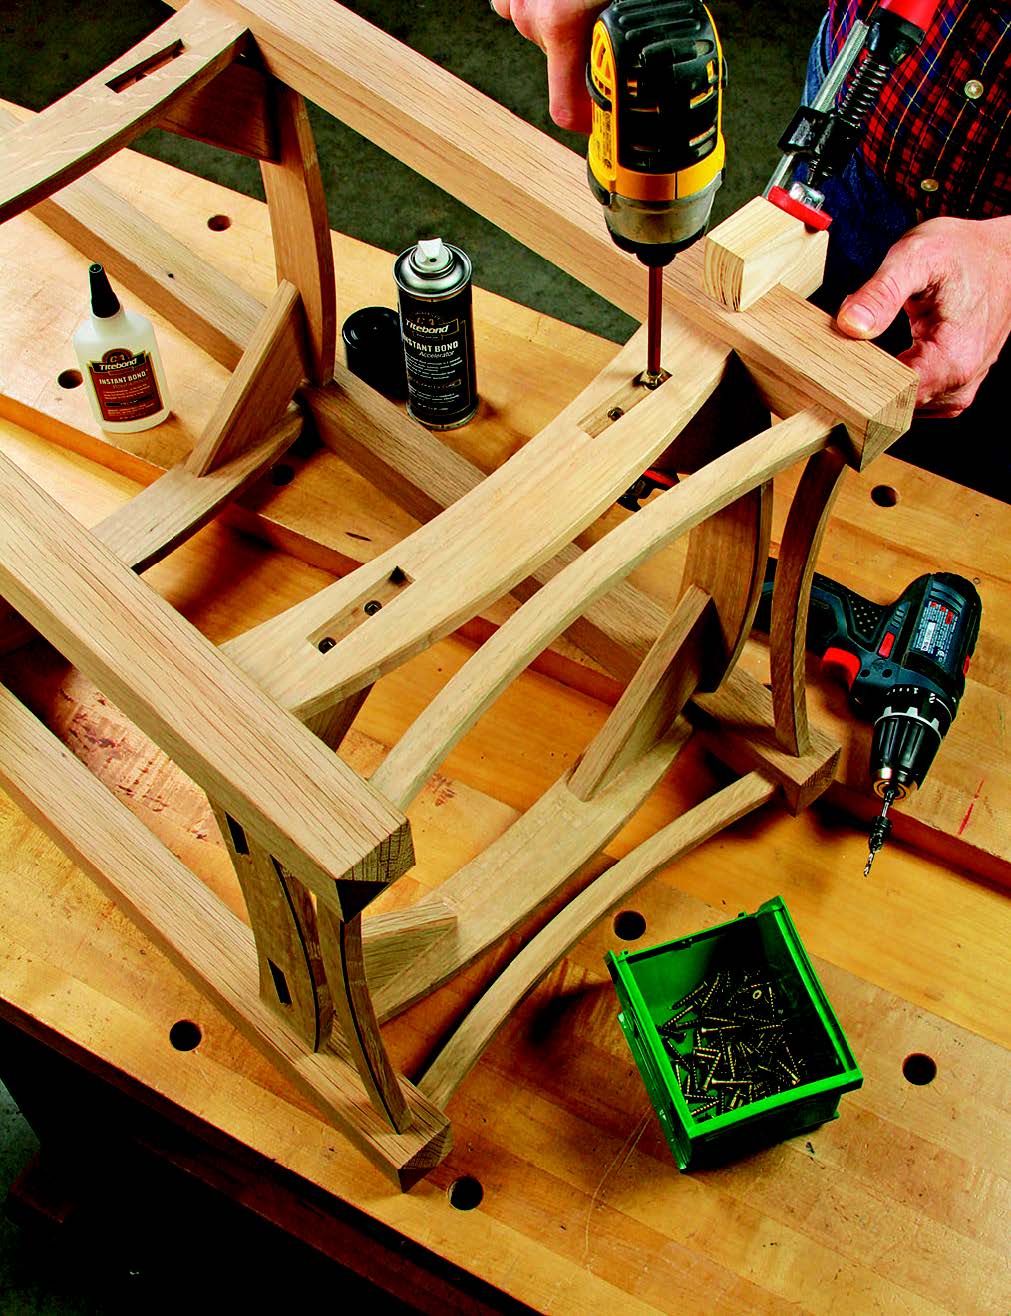
Mitered corner braces will support a pair of 12″ x 12″ floor tiles for the plant shelves. Make the braces by crosscutting eight blanks to 6″ long, then miter-cutting their ends to 45°. Measure up from the leg bottoms to set the brace heights from the floor at 17″ and 32″ (measured to their top faces).
Once I had these positions marked, I glued the braces to the aprons with cyanoacrylate for a quick bond. Then I drove pairs of #8 x 1″ screws through countersunk holes inside the mortise areas to secure the corner braces permanently.
The last building step is to cover those “secret” screwheads with faux tenons. These tenons look best if you rout or plane tiny chamfers around their ends. Just make up a long blank of 1/2″-thick, 2-1⁄4″-wide tenon stock.
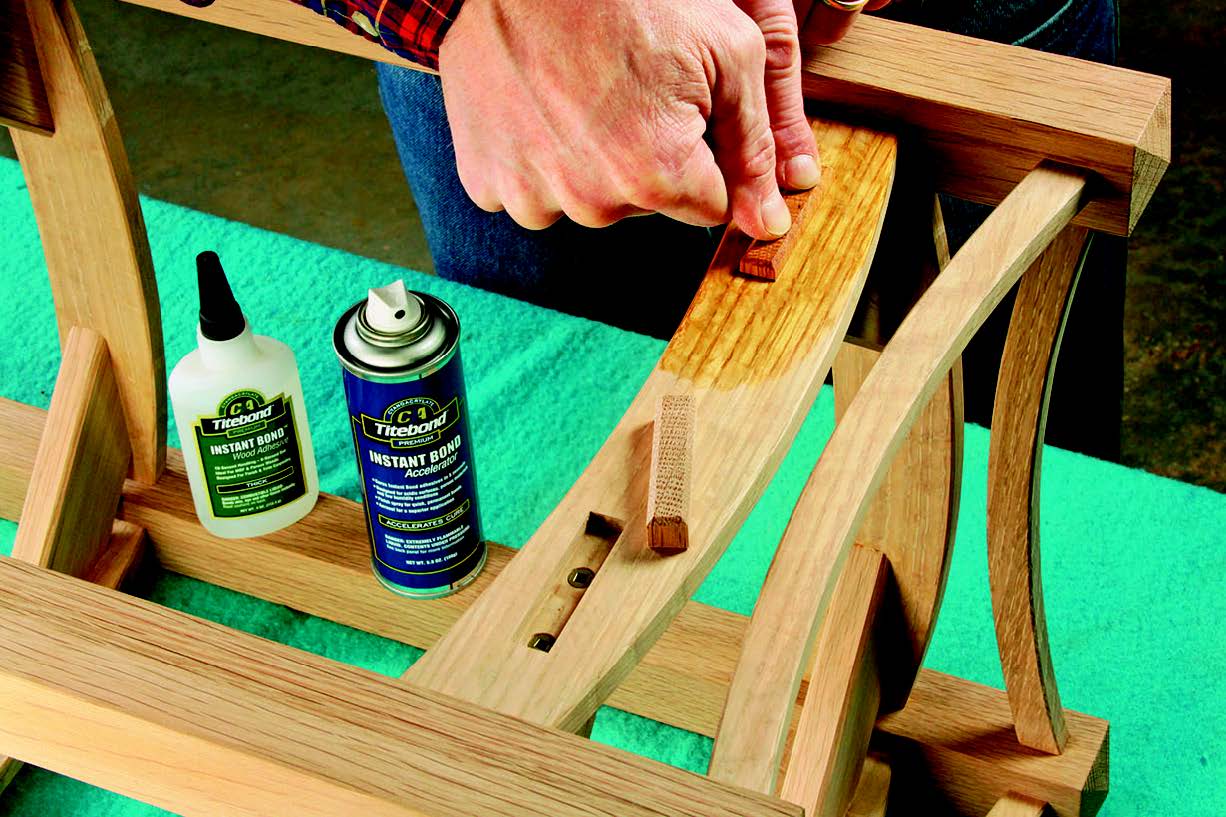
Chamfer both ends however you prefer (I used a chamfering bit in the router table), then chop the ends off in 1/2″ lengths. Repeat this process seven more times. Glue the 16 tenons into their mortises.
Fuming and Finishing
My “More on the Web” video for this article will provide the details of ammonia fuming, but here’s the short story: You’ll need a plastic “tent” to cover the plant stand, for trapping the fumes that turn this project from a raw tan color to a grayish or greenish brown. And, it’ll take potent, lab-grade ammonia with a 28% concentration to do that job; household ammonia is only about 5% and too weak to fume oak adequately. You can buy a gallon jug of 28% aqueous ammonia from Hi-Valley Chemical (hvchemical.com) for about $17.
Fuming is a simple process: ammonia reacts with the tannins in the oak to permanently darken it. The longer you leave your project in the tent, the darker it becomes, up to a point. I learned, through a timed test on scraps from the project, that after about 24 hours, darkening slows to a barely noticeable degree. So, after building my tent from furring strips and 4mil sheet plastic, I filled a glass pie plate with 12 ounces of ammonia, dropped the tent in place, and let the fun begin. I changed it at eight-hour intervals and stopped the reaction 24 hours later.
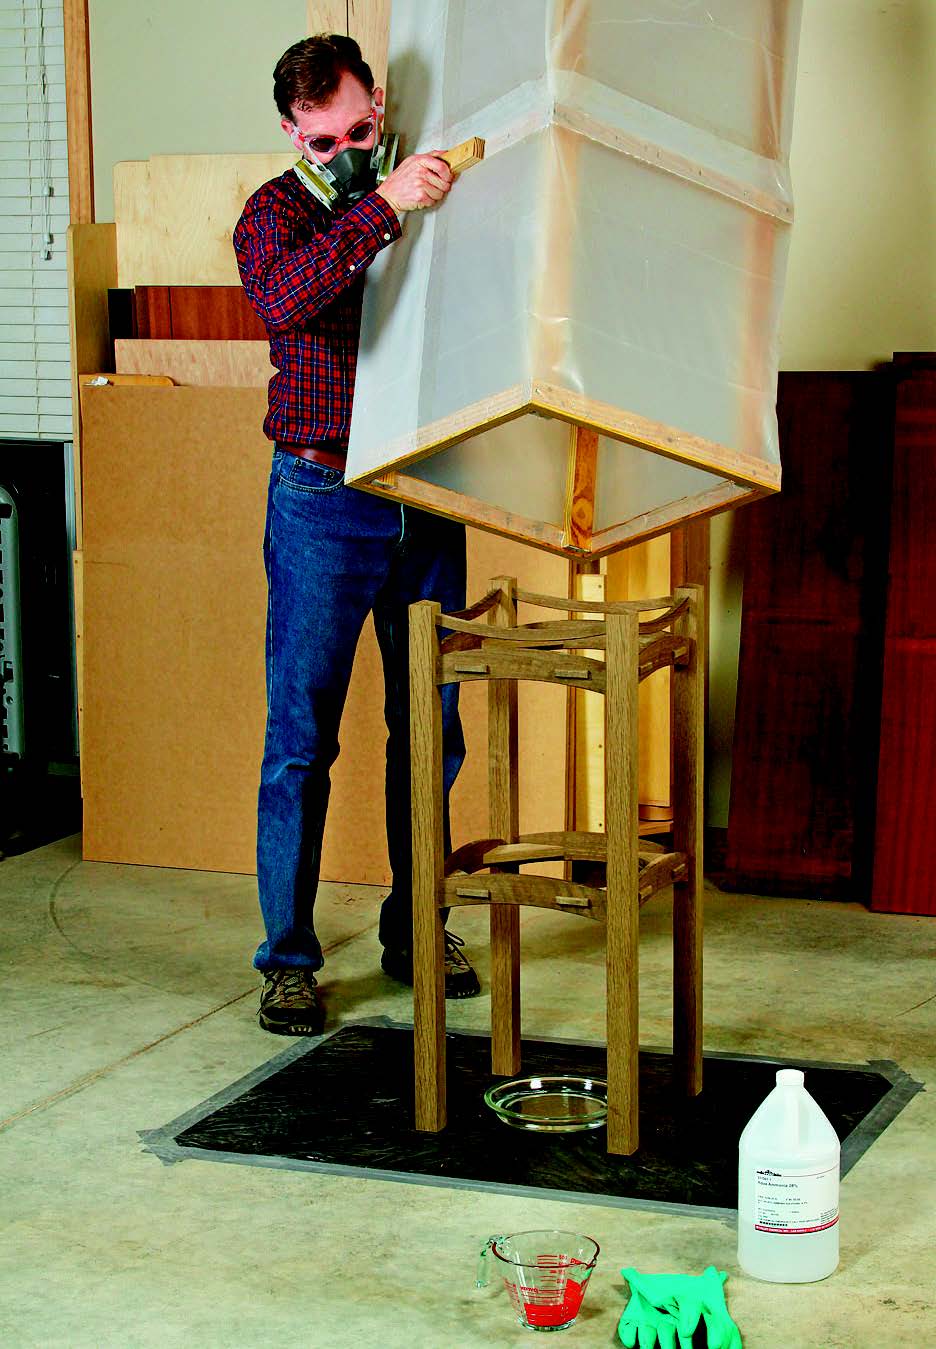
It is ABSOLUTELY essential to wear a respirator with cartridges approved for ammonia gas, goggles for your eyes, and long sleeves and chemical-safe gloves whenever you handle the liquid. Concentrated ammonia is extremely caustic. But, with proper precautions and good ventilation, I didn’t find it problematic to work with.
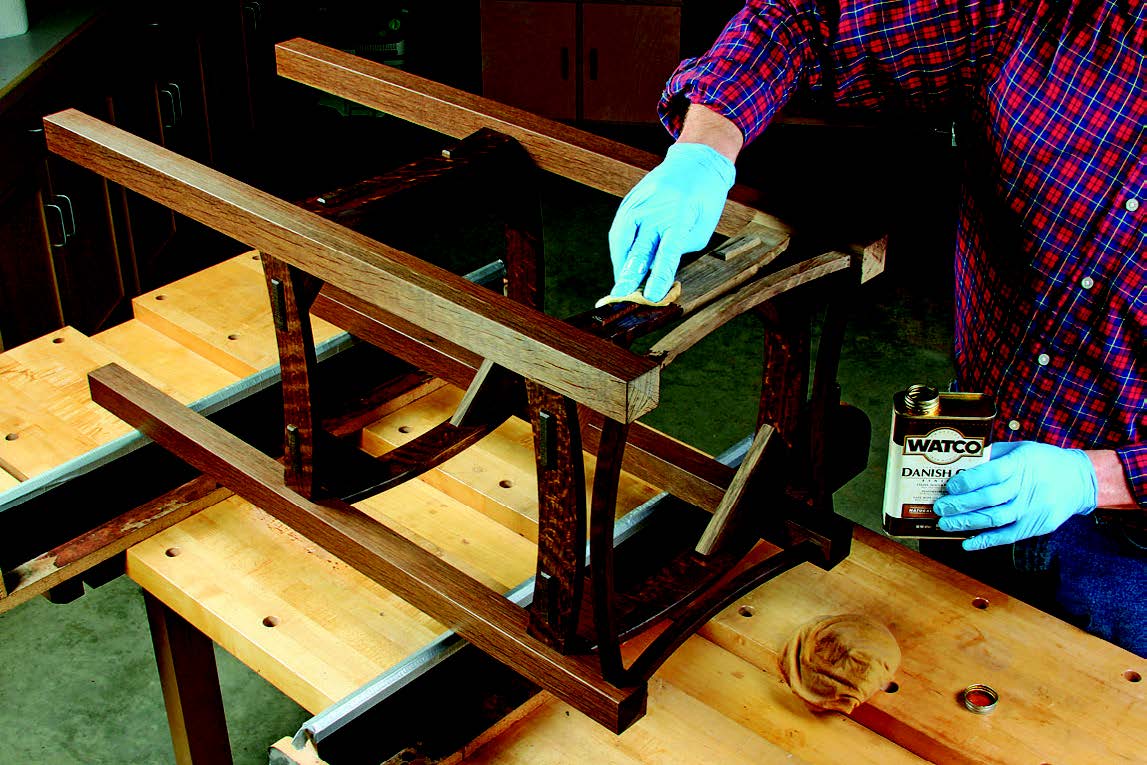
Once my plant stand came out of the tent, I let it off-gas for two days and then gave it a light final sanding. (Fuming actually penetrates the wood much more deeply than pigment or dye stains will, so touchup sanding won’t remove the color.) I wiped the wood down with Watco® Danish Oil Natural, which turned it immediately to a deep chocolate brown. When that dried, several coats of satin lacquer added a pleasant sheen.
After the finish cured, a trip to the home center for some porcelain floor tiles brought this handsome project to a close.
Click Here to download a PDF of the related drawings.
