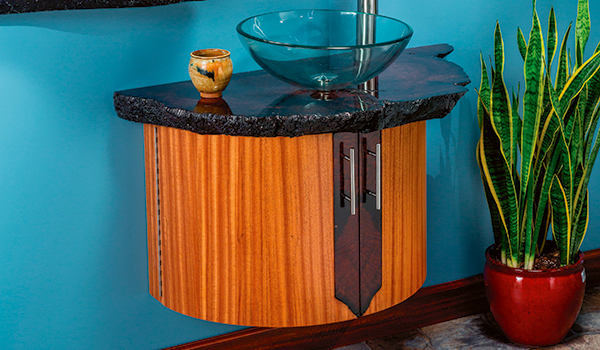
At first glance, this elegantly curved bathroom vanity with its chunky live-edge countertop looks like quite a challenging piece, but it’s really not all that difficult. That exquisite slab of redwood didn’t need much help to make it beautiful; it just needed protection. The high-gloss finish is a self-leveling epoxy that gives the counter a hard, durable surface. I made the curved cabinet and doors using bendable plywood and a simple bending form. Every slab of wood is a little different in size and shape, so this article is meant to guide you through the process.
Start with the Slab
Since the slab determines the size and shape of the cabinet that goes under it, that’s the place to start. First, decide which side of the slab will be the top. This one was obvious, as it had a huge crater on one side. As the slab will go against a wall, obviously it needs to be cut to make a straight edge. After considering that cut, a semicircular cabinet seemed like a natural choice, as it would roughly mimic the shape of the finished countertop.
Before making any cuts, make the slab as flat as possible. A drum sander — like the SuperMax 19-38 — makes easy work of the task, as its open end allows for sanding pieces up to 38″ wide. Alternatively, you could use a belt sander or a hand plane. I was very happy to have the use of a drum sander, as the belt sander and I have never been very good friends, and a hand plane would have meant hours of labor.
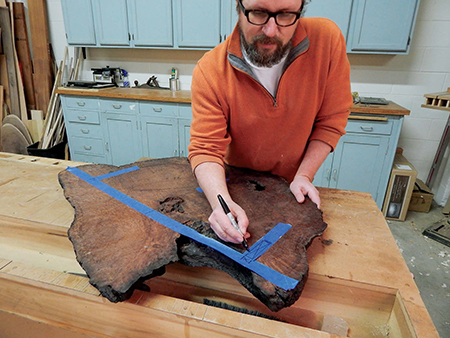
After flattening the slab, make a rough layout of the cabinet using tape to determine where to make the cut.
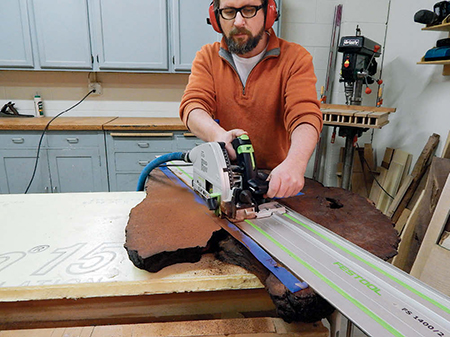
Use a track saw or a shop-made saw guide for your circular saw to make the long cut. This slab was close to 3″ thick, so I finished the cut with a hand saw and then smoothed the cut edges with a hand plane. You could make the cut on a band saw if you have a helper to catch it as it comes out.
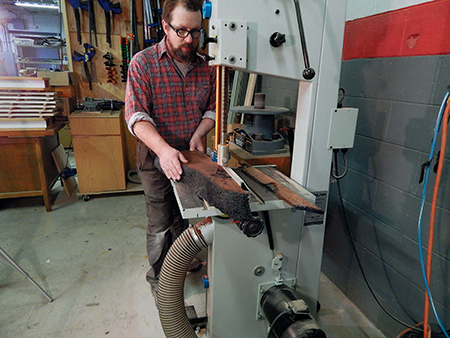
In this case, the off-cut is just as lovely as the main countertop, so I decided it would make a great shelf to complement the countertop. Also, to bring an element of the slab to the cabinet, I cut two strips from the offcut’s edge to make book-matched trim for the doors.
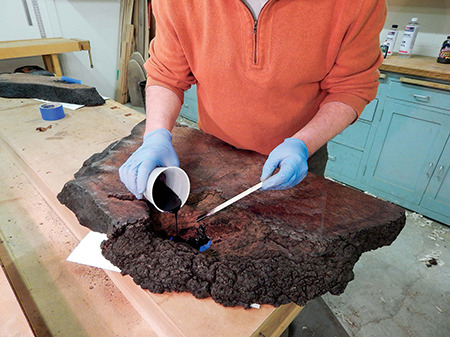
Slabs like this one are a challenge, as there are often voids of all shapes and sizes. Use epoxy to fill the voids before proceeding. This slab had one large hole all the way through. To fill the hole, I applied tape to the top surface, covering the hole. Then, I flipped the slab over and filled the hole from the bottom. I used black TransTint® from Rockler (a tint created with aniline dye) mixed into the epoxy, so that the hole wouldn’t be transparent.
After the epoxy cured, I flipped the piece over to determine what areas of the top needed pre-filling. Most large voids will take several applications to fill them, as the epoxy will continue to flow until it finds the end of the hole, or a way out. When you’re doing this, put plastic or cardboard on the floor and use wax paper under the slab. It’s going to be messy.
This can take multiple pours, so be patient. Sometimes, what appears to be a small surface crack can actually be a hidden cavern that seemingly has no end. Or, as was the case for my slab, there were a couple of cracks that presented no easy way to block the exit. In the end, I decided to move on and let them be cracks in the finished piece.
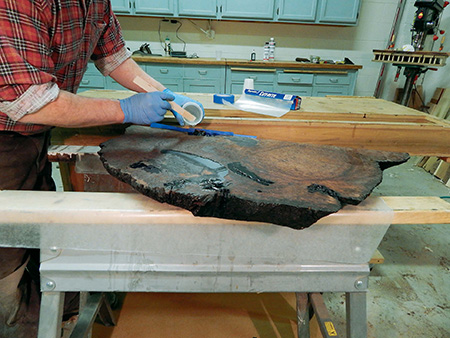
For voids at the edge of the slab, dam them up with tape before pouring. Depending on your preference, you can use clear or tinted epoxy for these voids.
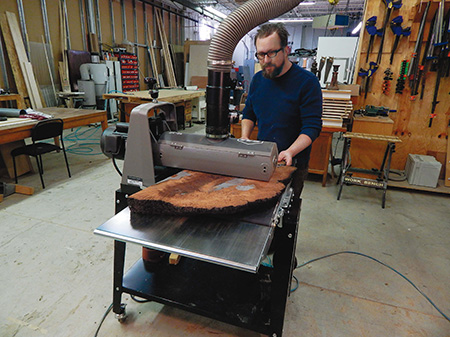
After filling the voids to my satisfaction, I let the epoxy cure for a couple of days before taking it back to the drum sander. If you try sanding it too early, it’ll just gum up the sandpaper and make a mess. To see if it’s ready to sand, try sanding it with a sanding block. If it feels even a bit sticky or the epoxy balls up, wait longer. When the epoxy is cured, sand both sides of the slab flat and then finish with a random orbit sander up to 220-grit.
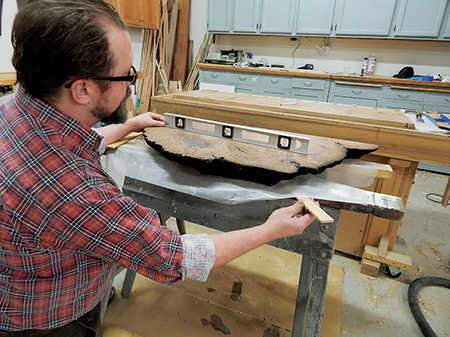
When the slab and shelf are sanded, it’s time to start applying finish. To apply MirrorCoat® epoxy, set the workpiece on sawhorses and then shim and level it. Leveling the workpiece is essential, as MirrorCoat is thin and will continue to flow as it cures, and you want it to flow evenly over the whole surface.
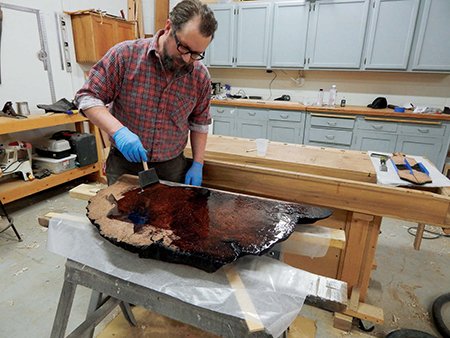
Mix up a half-cup or so of epoxy and pour some on. You can always mix more if you run short, but if you mix too much it’s a waste. Use a foam brush to spread the epoxy over the entire surface. Here again, cover the floor with plastic and place wax paper between the slab and the sawhorses.
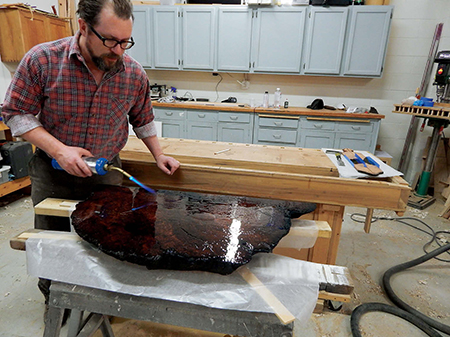
After you’ve spread the epoxy over the entire surface, you’ll notice air bubbles starting to appear; that’s when it’s time to apply some heat. Using a propane torch, just wave the flame over the finish and watch the bubbles disappear. Keep the flame moving so you don’t burn the epoxy. Let the finish rest for 15 minutes or so, and then revisit it with the torch.
This finish will likely take three or four applications. You don’t have to sand between coats as long as the next coat is applied within 72 hours of the last one. That said, I sanded anyway to make sure the surface was nice and flat. Between applying coats of epoxy, you can start building the cabinet.
Making a Bending Form
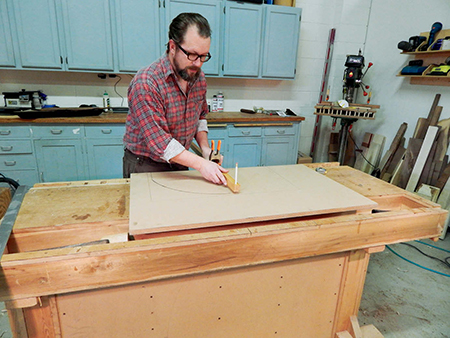
To make this curved cabinet, I laid up three layers of 1/4″ bendable plywood on a bending form. The outer plywood layer is veneered with ribbon stripe mahogany. My bending form consists of a base, four ribs and one layer of 1/4″ bendable plywood.
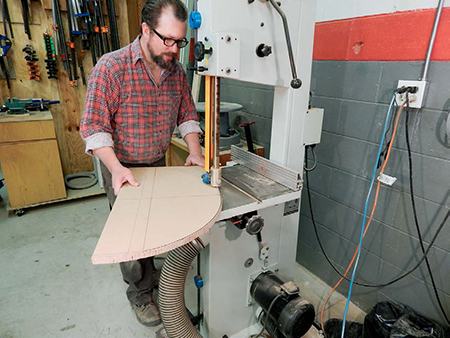
Lay out the arc with a large compass. Since this arc is the inside radius of the doors, it should be about 1″ smaller than the doors’ exterior radius.
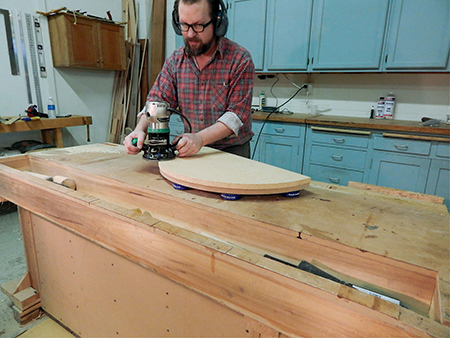
Band-saw this first piece close to the line, then sand the rest of the way. Use this first rib as a pattern to rout the rest of the ribs. Screw the ribs to the base.
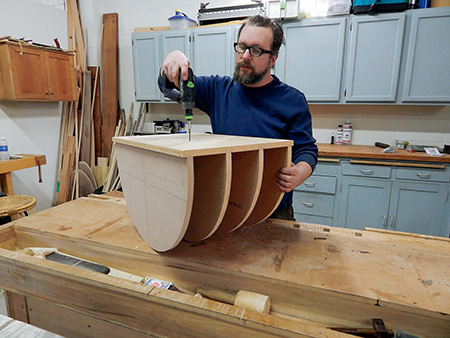
I didn’t glue the ribs to the base because I don’t have room to store the form, and I wanted to be able to disassemble it and reuse the parts.
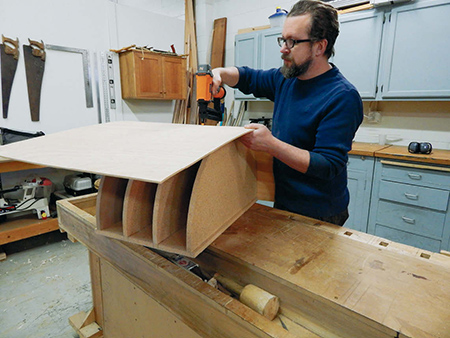
Staple one layer of bendable plywood to the ribs. This layer of bendable plywood helps to prevent flat spots in the finished lamination.
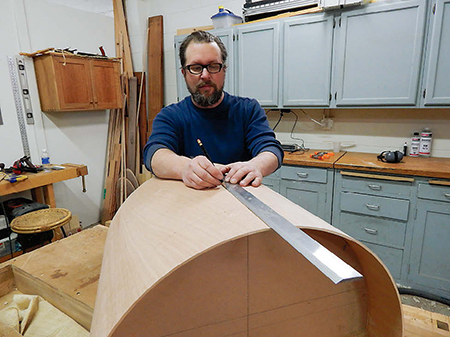
Mark a centerline across the form to help line up the laminations when you’re gluing them. This helps keep everything straight and square.
Building the Arc
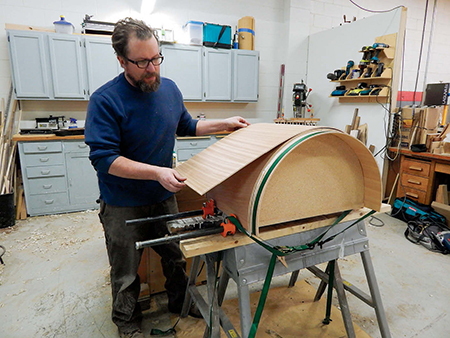
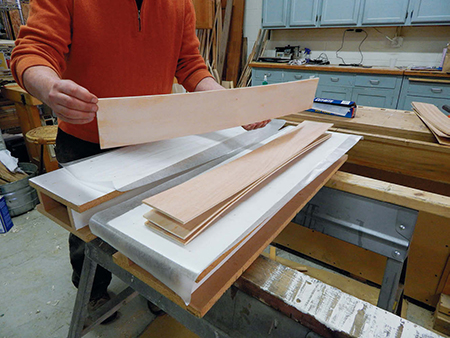
Cut three pieces of bendable plywood slightly larger than you’ve determined you’ll need for the finished arc. Make sure they don’t extend beyond the bottom edges of the form, however. Mark centerlines on the edges of all three pieces so you can line them up with the centerline on the form. Cover the form with wax paper so that you don’t glue the laminations to the form.
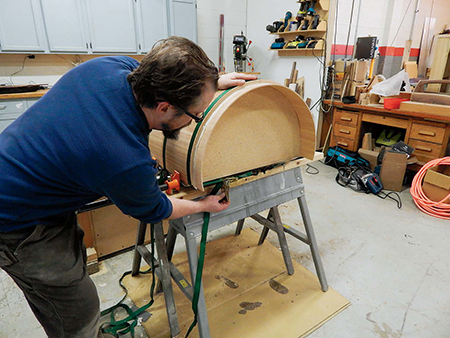
To make sure the glue-up goes smoothly, do it in stages, letting the first two layers cure before applying the third. Apply glue to the bottom lamination using a foam paint roller. These rollers work great for spreading glue, and you can wash them out with water and reuse them. Bend the first layer around the form and then apply the second lamination. Use ratchet straps to clamp the laminations. Let them cure overnight and then glue and clamp the outer layer.
Sizing Up the Curve
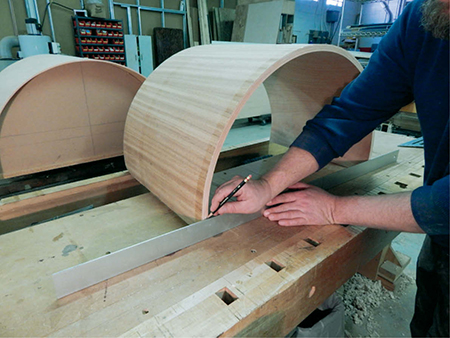
After removing the finished arc from the form, you’ll need to make two straight edges and two square ends. The edges are pretty straightforward: just run it through the table saw with the convex side down, rolling it as you go. The ends are a different matter.
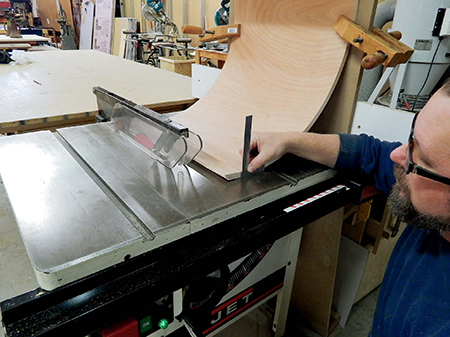
As a starting point, set the curve on a flat surface such as your bench. Lay a straightedge on the bench against one of the curve’s edges. Make a mark along the top of the straightedge where it meets the curve, on both ends. Repeat this step on the other edge.
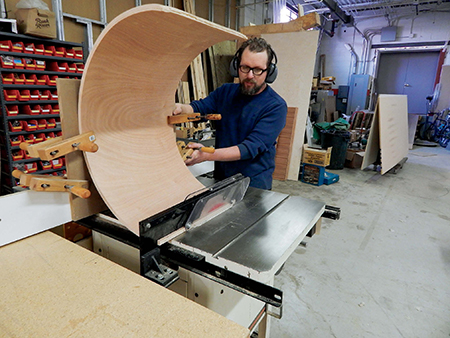
If you don’t have a sliding fence for your table saw, this is a good time to build one. It’s simply a fence that fits over your saw’s fence; just snug enough so that there’s no play but it’ll still slide. Fasten a tall board to the sliding fence using either screws or clamps. Clamp the arc to the board so that the marks you made on the edges are perpendicular to your saw’s table. Check the marks with a square and adjust if necessary. Slide the whole assembly through the saw, and then repeat the process on the other end of the arc.
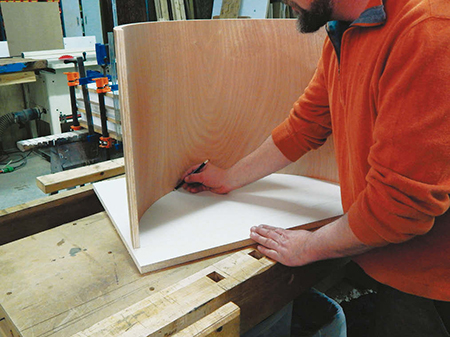
Once the arc is square, lay out the rest of the cabinet parts. Start by tracing the arc onto a piece of stock that will become the cabinet’s top or bottom, allowing room for the cabinet’s narrow sides. After laying out the cabinet, use hot-melt glue to temporarily stick the top and bottom together. Band-saw close to the line and then sand the rest of the way. Check the curve against the top and bottom to see if you need to trim any more from the ends of the arc. If so, trim them like you did before.
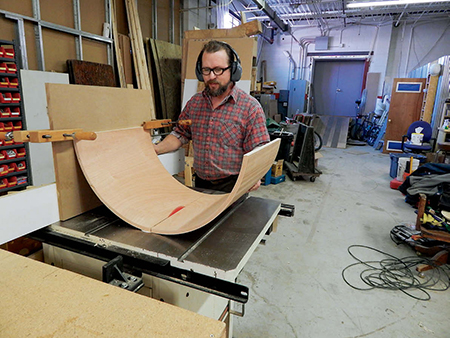
Split the arc into two equal size doors using the same table saw and fence jig setup used to trim the ends of the arc.
Building the Cabinet
Make the narrow cabinet sides by laminating more bendable plywood. I used four layers here so I could make more substantial rabbets for fastening the sides to the cabinet. The thicker sides also give a little more “meat” for the hinge screws. Make the pieces oversize, so you can square up the edges later.
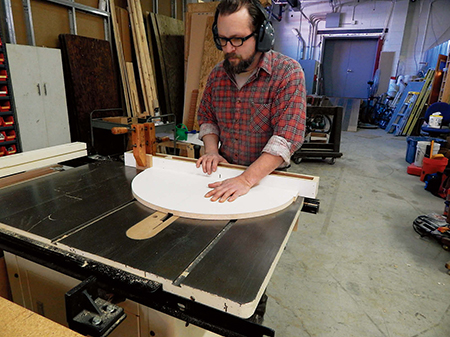
To laminate the pieces, I used I-beam style clamping platforms to ensure that they’d come out flat. Be careful when applying clamping pressure, as the glue can cause the pieces to slide. While the side laminations are drying, cut the remaining cabinet parts, making any necessary rabbets and dadoes.
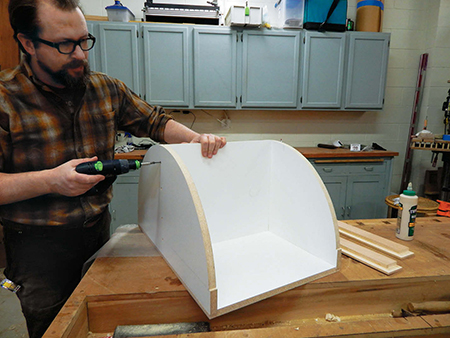
When the sides are dry, trim them to final dimension and then rabbet them for the top, bottom and back. Assemble the cabinet. Because this cabinet hangs on the wall and holds a lot of weight, use plenty of screws and glue. I added “L”-brackets to further secure the back to the sides.
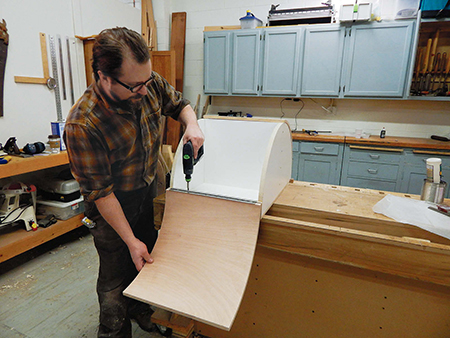
Attach the hinges to the doors using just a couple of screws. Pre-hang both doors to check their fit. I used piano hinges because they offer lots of support. Unfortunately, they don’t offer much adjustability, so you may have to do some trimming to get the doors to fit just right. When you’re satisfied, remove the doors and apply iron-on edge-banding to the cabinet’s raw edges if you wish. I chose not to veneer the doors’ edges. They don’t show until you open the doors, and I think the plywood edge adds to the modern flair of the piece.
Offcut Shelf Accent
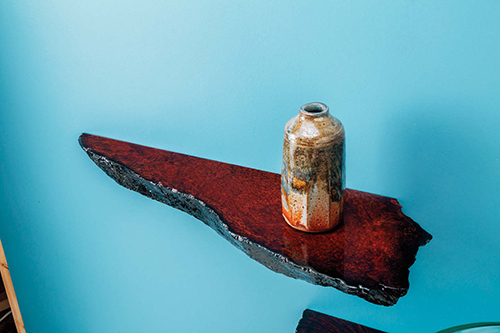
After I cut the shape for the vanity top, I had a piece remaining that made a nice shelf — and I sure didn’t want a sliver of this wood to go to waste! Thinking it through, I didn’t want to see any hardware on this shelf, so I used an invisible mounting system available from Rockler to mount it to the wall. The mounting system consists of small steel plates that mount to the wall, set screws and 5″-long hexagonal rods that thread onto the set screws. Use as many support rods as necessary. For this shelf, two would have probably been enough, but I used four because I like things a little “overbuilt.”
You’ll drill 7/16″-dia. holes that the wall-mounted rods will slide into to support the shelf. Because my shelf is wide at one end and narrow at the other, I had to cut two of the rods short.
Cut mortises in the back edge of the shelf to house the mounting plates, allowing the shelf to slide all the way against the wall.
Applying the Door Trim
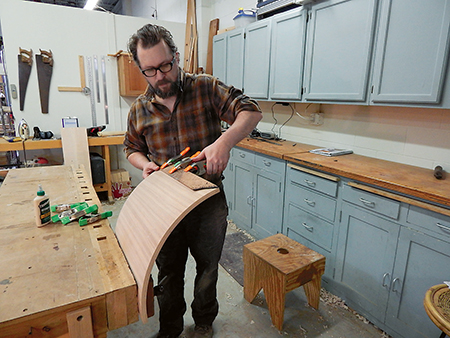
Cut the doors’ trim pieces to length and sand or plane them to final thickness. These pieces were cut off of the edge of the piece of redwood that I made into the accent shelf. They should be no more than 1/8″ thick so they’ll bend around the doors’ curves. Use glue and lots of clamps to attach them to the doors. Because of the bend I was putting in these pieces, I left the clamps on overnight to make sure the glue was well cured.
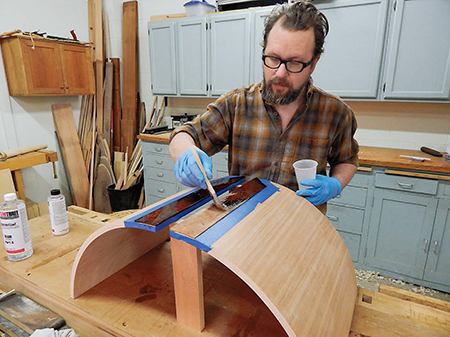
If you want the finish on the doors’ trim pieces to match the counter, mask closely around them and then apply epoxy. For this application, use a brushing technique instead of pouring it on and spreading like you did with the counter. You don’t want the epoxy to flow over the edges and pool up on the tape, because it takes forever to remove the tape cleanly. Ask me how I know! You’ll have to apply two or three coats.
Finishing Up
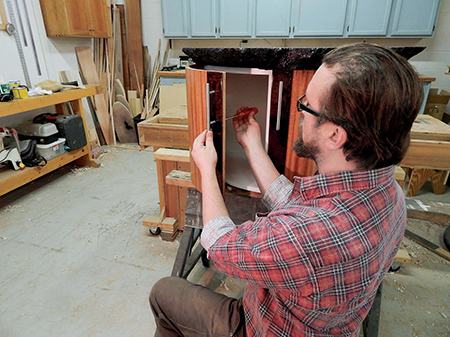
Apply the finish of your choice to the cabinet sides and doors. Attach the countertop to the cabinet using countersunk screws driven from inside the cabinet. When the finish is dry, rehang the doors and install handles and catches.
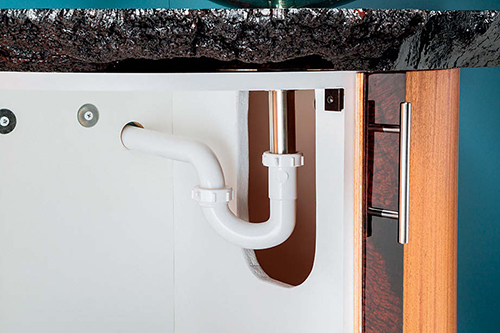
I found it best to wait to remove any material from the internal divider until I was ready to mount the sink and plumbing. Those details can vary. All in all, I found this to be a very satisfying project, and I think it looks just great in our bathroom.
Click Here to download a PDF of the related drawings.
Hard to Find Hardware
3″ Non-Mortise Butt Hinges (1) #33958
Low Profile Magnetic Catches (4) #26534
MirrorCoat Bar/Tabletop Finish (1 pk.) #29138
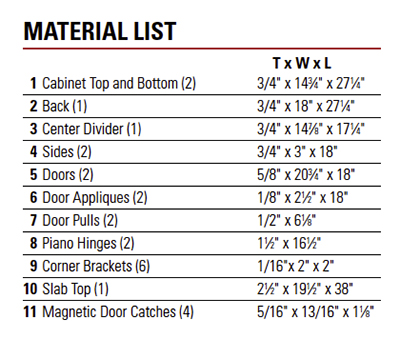
Blind Shelf Supports (2 pr.) #69053


