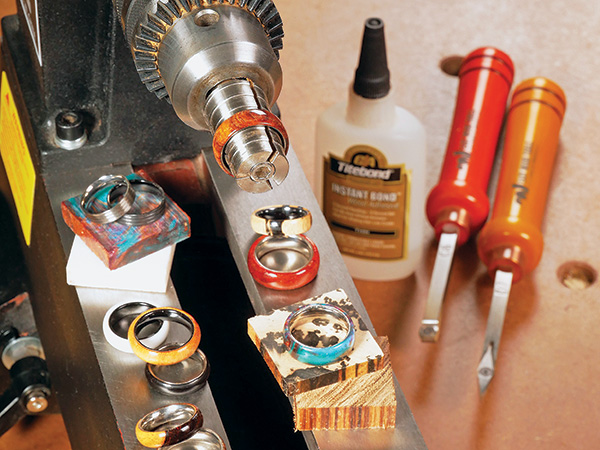
Of all the gift novelties you can turn on a lathe, a wearable, beautiful ring might seem the least plausible option. But with Rockler’s economical stainless, titanium or black ceramic ring cores and just a tiny bit of attractive wood, acrylic or epoxy, you can do just that! The process involves fitting the inner core to a thin turning blank, then remounting the core to a specialized ring mandrel, or to a pen-turning mandrel outfitted with ring bushings, and turning the ring’s exterior to shape. I used titanium and black ceramic cores for the rings you see here.
wooden ring blanks at rockler.com. If you pick ring blanks from your scrap bin instead, the denser, harder and more close-grained the wood, the better for this application. You want to use species that resist abrasion, take a high polish and call attention to themselves visually, even in the tiniest of displays.
I’ll also note — and you can see a couple of examples here — that these rings can be fashioned from Rockler’s multi-colored Acrylester handle blanks for a flashier, “synthetic” approach, too. Rockler also sells several variations of colored epoxy ring blanks. Or consider mixing epoxy and the colorant of your choice to create your own custom ring-turning blanks. Rockler offers silicone ring blank molds for pouring your own special creations.
Preparing the Ring Blank
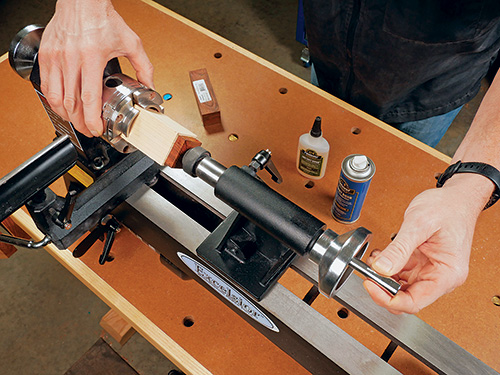
Mount a 1-1⁄2″ x 1-1⁄2″ blank for the ring to the end of a longer scrap of wood of the same or larger dimensions that will serve as a sacrificial waste block for turning. The ring blank should be thicker than the width of the metal or ceramic ring core you’ve chosen by about 1/8″ or so to give you sufficient waste material to turn away. You can attach the ring blank to the waste block with strips of Double Sided Turner’s Tape or a layer of thick or “gel” type cyanoacrylate (CA) glue. Center the ring blank on the end of the waste block. One way to ensure a secure bond is to grip the waste block in a scroll chuck and press a live center, mounted in the tailstock, against the ring blank while the glue cures. If you use double-sided tape, this will also help set the tape’s adhesive.
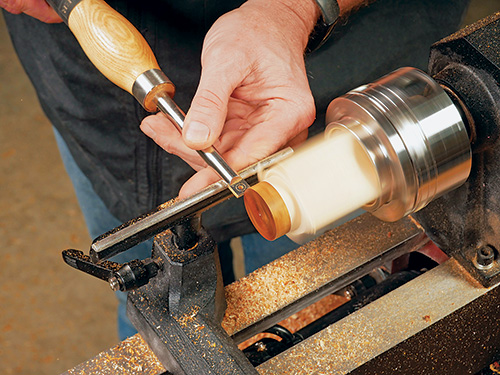
With the lathe dialed up to medium/high speed, true up the face of the blank with a flat-ended scraper or a square carbide-insert turning tool. Then rough-turn the ring blank round, as well as a portion of the waste block beside it.
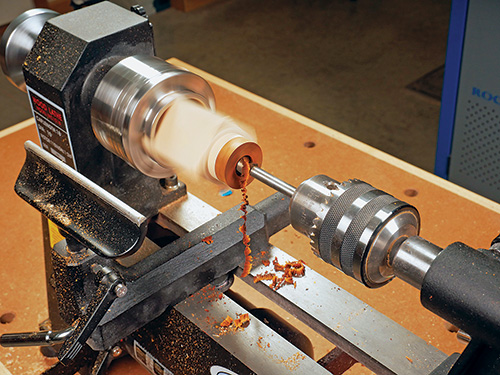
Now replace the live center in the tailstock with a drill chuck, and install a Forstner bit into it that’s about half the inside diameter of the metal/ceramic ring core. Bring the tailstock up to the ring blank, and bore a hole all the way through it and slightly into the waste block to serve as a starter hole for the ring core.
Simple Scraper Reaming Jig
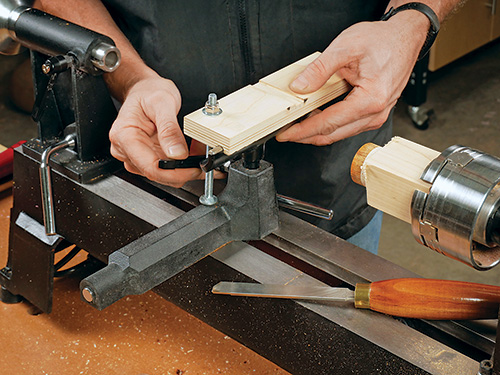
Widening the inner hole of the ring blank in order to fit the metal or ceramic ring core is the most challenging step of this entire ring-turning process, because the tolerance between a satisfactory fit of the parts and a poor one is a very narrow margin. The reaming process must produce a hole with a consistent diameter from front to back, and you need to be able to widen the hole in tiny increments. I suggest that you build a jig similar to mine to make this process easier. It’s just a piece of 3/4″ scrap plywood for a platform, measuring 2″ x 8″, with a shallow dado routed or cut across its top face to guide whatever scraper you’ll be using for widening the hole. A groove underneath the platform fits over the top edge of my lathe’s tool rest, enabling the jig to slide left or right along the rest during use. A carriage bolt, outfitted with nuts and washers both on top of the jig’s platform and beneath it, stabilizes the jig on the tool rest and tips it downward toward the hole so the scraper can cut with its top front and left edge burrs.
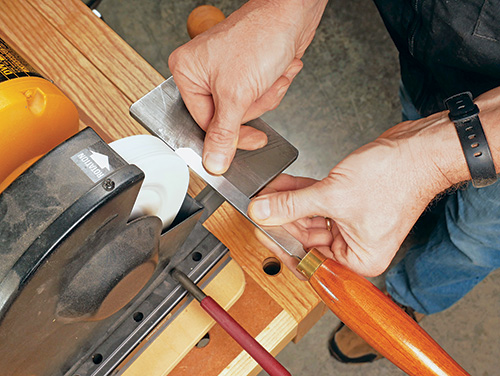
I used a 4″ carriage bolt. It’s long enough to reach from the jig’s plywood platform to the top face of the banjo on my Rockler Excelsior mini lathe, plus some room to fit the top nut and adjust the platform downward. I reground a 5/8-wide, flat-ended scraper to use as a reamer. I reduced the width of its front cutting edge to 1/4″ long. I also ground both the front and left edges of the tool to about a 15-degree bevel, permitting the scraper to cut both forward and along the ring blank’s left inside wall.
Widening the Starter Hole Carefully
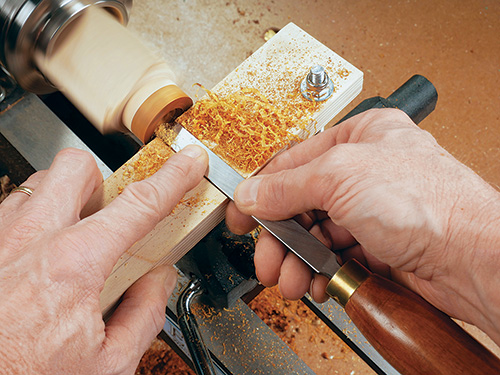
The next step is to widen this drilled hole until the ring core slips into it without force but also not loosely. While it’s possible to accomplish this freehandedly with a diamond-shaped carbide-insert tool or a narrow steel scraper, using only your sense of feel, a steady hand and experience in turning, it’s still not easy to do. Accidentally shifting your cutting tool slightly left or right, instead of feeding the cutter straight into the hole, can be hard to detect in such a small hole. And doing so can quickly create a conical opening that won’t fit the ring core snugly. This not only will produce a weak glue bond but also will leave an unsightly gap on a piece of jewelry this tiny. That’s why I built the simple plywood reaming jig to guide a narrow, square-ended scraper I modified and used for this task. If you do the same, adjust the carriage bolt to tip the jig’s plywood holder downward slightly toward the ring blank; that way, the scraper can cut on its top, burred edges, as they normally are used. The top of the jig’s platform also should be set so the scraper will cut slightly below the lathe’s axis of rotation. Adjust the lathe’s tool rest, bringing the jig’s front edge parallel to the face of the ring blank but spaced a small distance from it. (A thin piece of scrap or a steel rule can serve as a helpful spacer for this task.) Lock the tool rest and jig into position.
Now, set the scraper into its slot on the jig, and then slide the jig along the tool rest so the left edge of the scraper slightly overlaps the rim of the drilled hole in the ring blank. An overlap of 1/32″ or so is sufficient. Turn on the lathe, then slowly push the scraper forward into the ring blank to turn away the overlap and widen the hole. Stop feeding the scraper when it reaches the back of the ring blank and begins to cut into the waste block. Pushing too far can cause the scraper to overfeed and chatter against the back wall of the hole, so feed gently and carefully.
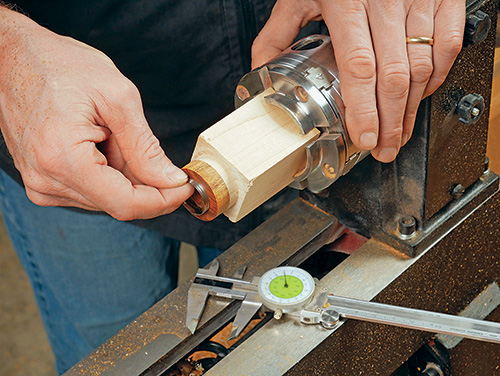
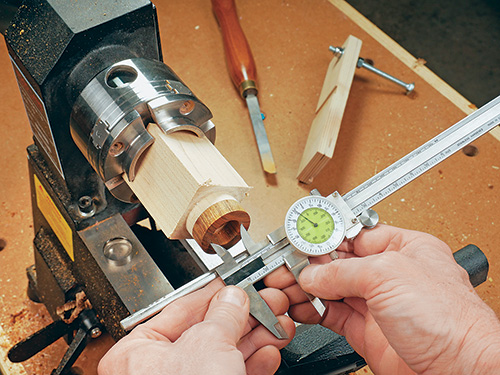
Stop the lathe and check your progress, using the ring core or a dial caliper as a gauge to determine how much more stock you still need to remove. Repeat the “reaming” process, overlapping the scraper’s left edge on the ring blank and widening the hole some more. Continue shifting the jig ever so slightly and widening the hole in repeated passes until the ring core slips into the ring blank hole without force. Stop reaming as soon as you achieve this fit.
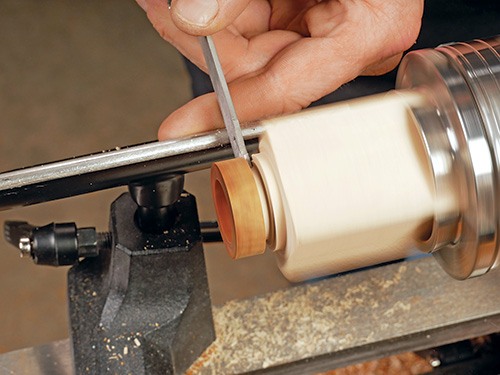
The tricky step of this project is now behind you! Part off the ring blank at the glue or tape joint to free it from the waste block. Be sure to catch it as it releases so it doesn’t fly off and get damaged or broken in the process.
Turning the Ring’s Outer Profile
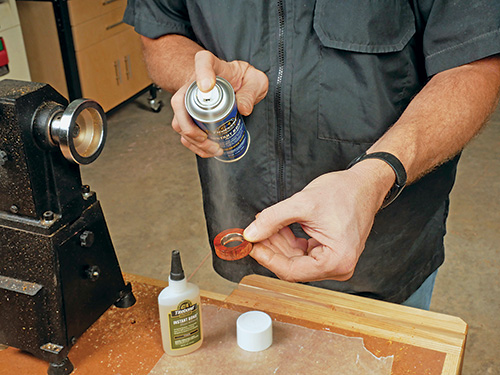
Now it’s time to glue the ring core and outer shell together. You could mix up a small amount of two-part epoxy for the job, but I had good luck using gel-type CA glue instead. Clean off the outer face of the ring core first with denatured alcohol or lacquer thinner to remove any residual oils and turning dust. Spread a liberal coat of glue or epoxy around the inner hole of the ring blank, and slide the core into place. Adjust it so the ring blank overhangs the edges of the core evenly, and wipe away any excess glue. If you use CA glue and have accelerator, spritz it around the glue seam to cure it instantly. Otherwise, wait for the epoxy or glue to harden on its own before proceeding.
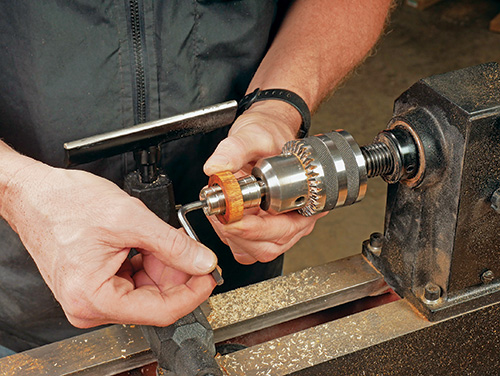
You could use an accessory ring bushing mounted on a pen mandrel, if you already own that mandrel, for the final turning and finishing stages of your ring. I opted to use one of Rockler’s specialized ring mandrels instead, which have a series of concentric sleeves to capture and hold rings in a range of sizes. Tightening a center Allen bolt in the mandrel expands the sleeves to create a snug, friction fit against the ring core. If you use one of these mandrels as well, slip your ring core into place on it, pressing the ring firmly against the appropriate sleeve and tightening the Allen bolt. Don’t overdo the tension; just snug the bolt up enough to hold the ring core in place. Turn on the lathe to make sure the ring spins in a flat orbit. If it wobbles, loosen the mandrel, adjust the ring’s position on it, and retighten.
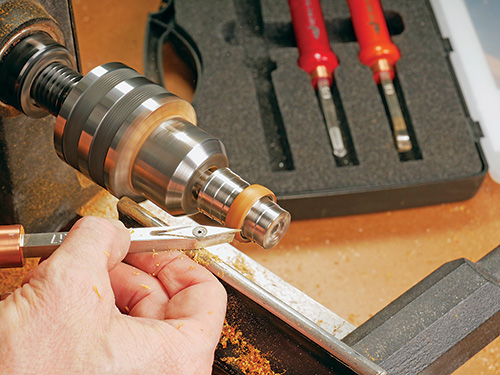
Small steel scrapers are one option for turning the exterior of your ring, but I found square- and diamond-shaped carbide-insert tools to be particularly handy for this tiny, delicate turning task. In fact, if you have access to negative-rake cutters for those tools, they work best of all to minimize splintering and produce easy-to-control, clean cuts. The goal here is to shape the ring’s outer core thin enough and close enough to the sides of the core so that it will be comfortable to wear. If you leave the shell too thick, the ring will look like a donut and spread the wearer’s fingers too far apart, making it uncomfortable. Conversely, if you turn too much of the shell away, you could cause it to become too fragile and even split, or risk turning too much and right through to the core. So take your time, and aim for a flatter outer curve with not more than about 1/16″ of outer shell left.
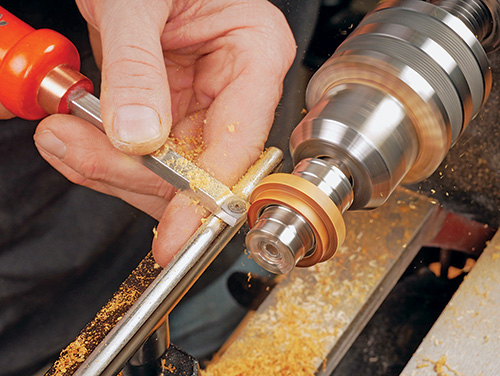
I started the turning process by chamfering the wood of my ring closest to the core so it would flare out slightly. Then I turned away the bulk of the waste until the thickness was around 1/8″. At that point, I worked on the final curvature, removing the excess wood slowly and carefully. I shaped the outer ends of the profile to leave just a tiny bit of the original chamfer cuts in place. I think it gives the ring’s edges a more refined look.
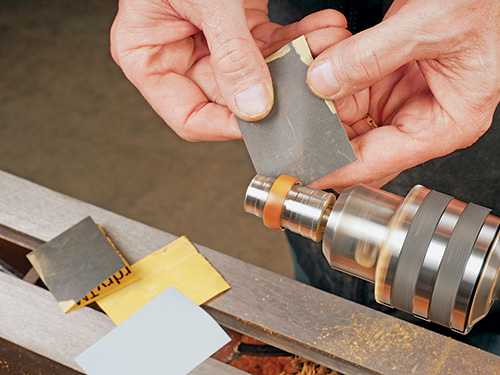
When you’re nearly finished shaping the ring’s exterior, switch to small pieces of sandpaper to smooth it and finalize the shape. I started with 220- then 320-grit. I switched to 600- and 800-grit black wet/dry abrasives after that. Sand the ring’s outer surface as smooth as possible, to the point of almost burnishing it. If you turn a wooden shell, the final protective finish will be microscopically thin and unable to hide any but the tiniest scratches and flaws. So sand almost as though there will be no finish applied at all.
Wrapping Up with a Pen Turner’s Finish
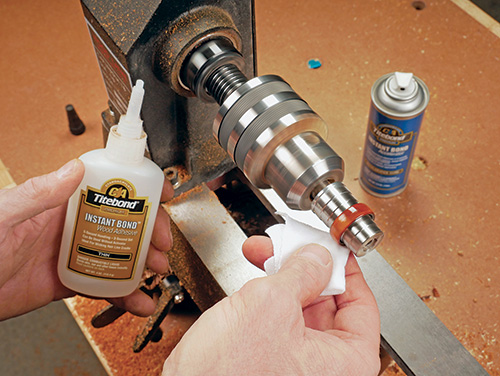
Acrylic or epoxy rings won’t require a separate finish coat for durability or to add sheen, but wooden rings do. It will seal the wood and offer moderate moisture protection. It then should be polished to a bright, shiny luster. You want that little gem to really catch attention! For my finish, I again turned to CA glue, this time in a thin viscosity. It’s a favorite choice of pen turners for its ease of application and instant drying time. I applied the glue to the ring with a soft, lint-free rag while the lathe spun, followed by a spritz of accelerator after each application, to cure the finish immediately. I applied six coats of glue, one after the next.
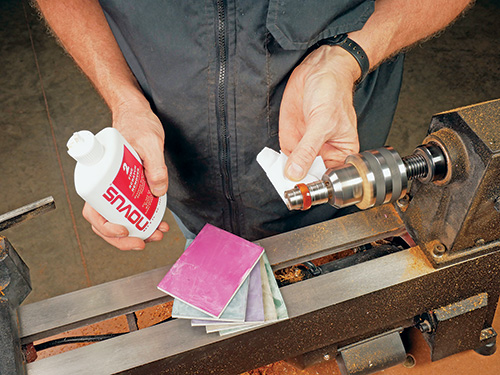
When you’ve built up enough layers of finish to be satisfied, sand away any imperfections with 800-grit wet/dry paper. I then switched to Micro-Mesh cushioned abrasive pads and continued sanding the surface with 1,800-, 3,200-, 6,000-, 8,000- and 12,000-grit pads. Each grit took just seconds of work with the lathe spinning, and it brought the finish to a medium luster. As a final step, I polished the ring on the lathe with Novus 2 liquid scratch remover for plastics and a soft rag, buffing to a glossy shine.

Carefully loosen the mandrel and remove your completed ring. Wipe the inside surface of the core clean. Then present it to a special someone who’s probably very eager to try it on for size!


