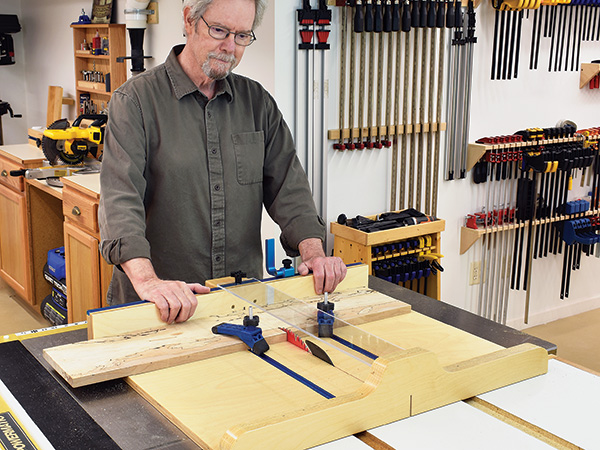
For perfect crosscuts, it’s hard to beat a miter saw. But when workpieces are too wide for a miter saw — or worse, you don’t have the funds or room for one — a table saw and miter gauge are your best friends. But you can do even better with a dedicated crosscut sled. It’s constructed from the start with a dead-on right angle, so you’ll never adjust a finicky miter gauge again. Plus, stock is supported on both the bottom and rear edge, meaning no table friction on the workpiece for easier control and splinter-free cuts.
Because of this support, augmented with adjustable hold-downs, crosscutting is safer, especially for workpieces too small for a miter gauge. If you add a T-track flip stop on the rear fence, effortless repeatability will be built in.
Material and Sizing
You can use any engineered sheet material — solid wood is too prone to warping — with 3/4″ Baltic birch plywood typically being the go-to stock for sleds. Regular ply and MDF are other options.
For rigidity, the front and rear fences should be thick. They’ll hold the sled together after it’s essentially sliced in half. Here, we’ll laminate two pieces of 3/4″ ply together for 1-1/2″ thick fences.
This sled’s 3/4″ base is thick enough to incorporate T-tracks for hold-downs, but if you’d prefer a lighter, more basic sled without T-tracks, you might opt for 1/2″ plywood for the base instead.
Sleds can be any size. If you only do small work like decorative boxes or chessboards, a small sled will do the job and is easy to use and store. If you regularly crosscut wide or long stock, such as half-sheet plywood, make a bigger one. Proportions are totally up to you. I’ve based this sled on one of the most commonly available sizes of Baltic birch plywood — 24″ x 30″ — which results in a sled with a crosscut capacity of 22-1/2″.
Getting Started
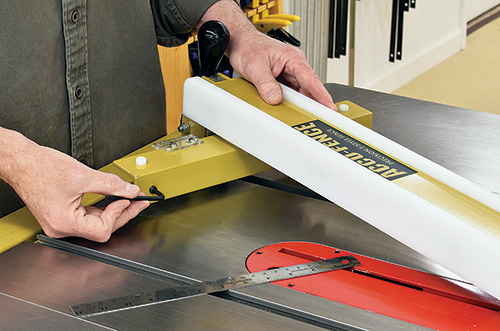
First, check your rip fence for alignment. Even though the finished sled rides in your table saw’s miter slots, we’ll use the rip fence during its construction. Make sure it’s parallel to the blade for precise cutting here.
There are three main components to the sled — the base and two fences — so start by cutting these to size. We’ll cover a fourth component, a rear-mounted safety guard block, later.
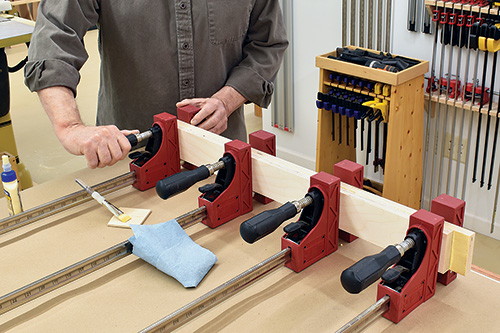
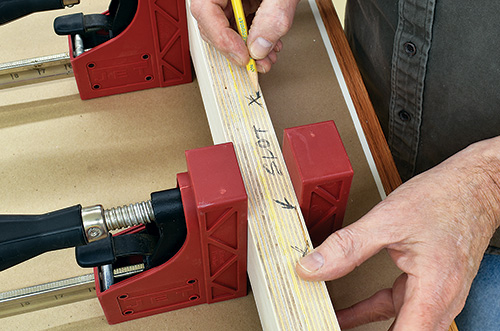
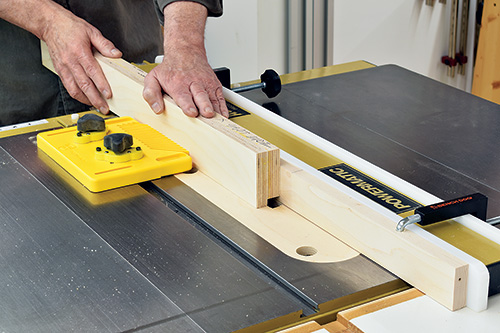
With the four 3/4″ fence workpieces cut to size, glue and clamp them together into two pairs. Baltic birch plywood has minimal edge voids, but they do occur. Check the plywood workpieces and note any voids with a pencil. Try to orient these pieces so voids don’t show. I found one on the rear fence, indicated by an arrow in the top right photo. No problem; I’ll eliminate it when adding a rabbet for the T-track.
Kerf Considerations
For most table saw sleds, the main kerf is generally located at the center, leaving equal sled surfaces on each side. But that’s not a hard-and-fast rule. Depending on how you work, your most-common crosscut chores may involve repeatedly cutting a particular-sized piece of stock or making certain parts regularly. Likewise, you may want to construct a sled specifically for a type of project you do frequently. In those cases, you may find that having the kerf offset to the right or left side of the sled is more useful. This is perfectly fine, and it’s a good example of how versatile these sleds can be.
Fences, Rabbets and Dadoes
Cut a 3/4″-wide by 3/8″-deep rabbet on the top back edge of the rear fence to accommodate a T-track for a flip stop. A 3/4″-wide dado set installed in your table saw handles this with ease, or you could use a router.
The front fence requires a groove for a clear acrylic blade cover. There can be a bit of variance in acrylic thicknesses; I’ve used nominal 1/4″-thick acrylic here, which is actually closer to 0.22″. To get that fence groove’s width right, cut the acrylic first so it can be test fit.
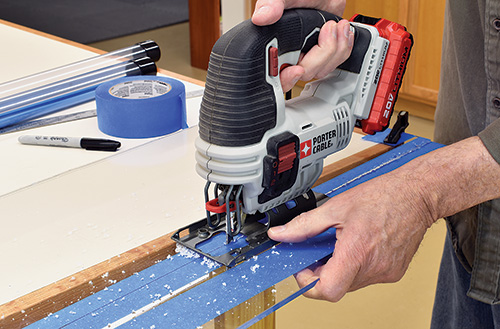
You can cut acrylic a couple of ways, but for this thickness I’ve had the best success with a jigsaw. Use the finest-tooth blade you have, and dial down the jigsaw’s orbital action all the way. If your acrylic still has the peel-off covering, leave it in place. If not, cover the face with masking tape to prevent scratches.
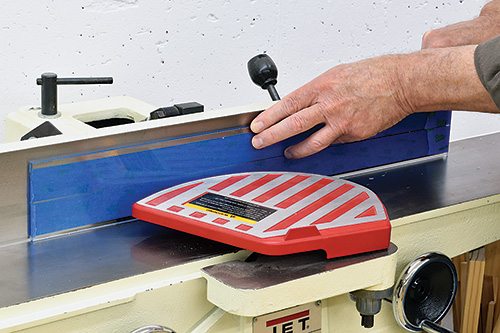
As is common with jigsaw cuts, edges probably won’t be perfectly straight and smooth, but you can flatten them just like a thin board on your jointer. Lower the cutterhead for a minimal cut and take multiple passes to ensure a clean, chip-free edge. Set the acrylic aside.
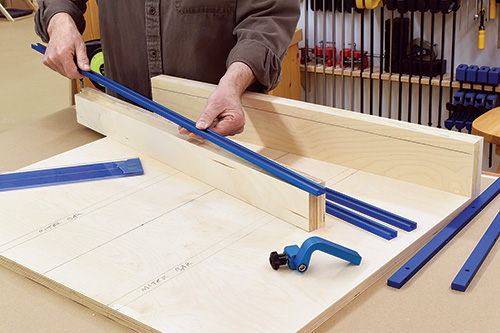
Take a moment to check all components before final cutting and assembly. Verify that the T-track fits on the rear fence, and measure and lay out locations for miter bars and T-tracks on the base. Note in the upper photo, below, that I’ve used the narrower rear fence itself to pencil a line at the exact height of the acrylic guard on the wider front fence.
Before changing out that dado cutter, mill the dadoes for the base T-tracks. I’ve designed this sled so the kerf is dead-center. I placed the marked-up top on my table saw and aligned it for that center kerf. Then I marked the base for the miter bar locations first, followed by the location of the T-tracks on the other side, being sure the tracks wouldn’t be right over the miter slots.
Not all miter slots are in the same place on all table saws, so the location of your T-tracks may be different. For my saw, I could place the T-tracks 3-1/2″ from each side of the blade kerf without interfering with the screws holding the miter bars on the base’s bottom face.
With the T-track locations determined, use that 3/4″ dado set to cut dadoes 3/8″ deep into the base’s top face. Now adjust the dado cutter to 3/4″ high, and cut a rabbet along the bottom edge of the front fence so it can fit over the front edge of the sled’s base.
Swap out the dado cutter for your regular blade to cut the groove for the clear acrylic guard. To do this, set your saw’s rip fence to 3″ and cut a 1/2″-deep groove the length of the front fence. Gradually move the fence in steps to widen the groove, and use the cut acrylic piece to check the groove’s width after each pass. Aim for a snug fit.
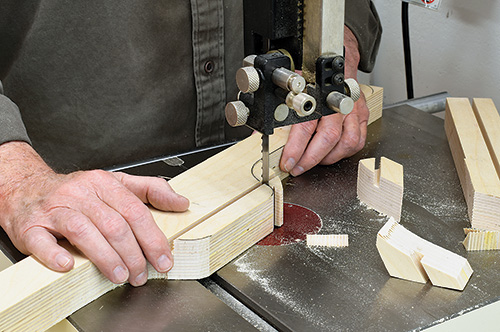
Use the Front Fence Drawing to lay out the curved shapes on the fence blank, and cut the profiles on the band saw. There are some tight inside curves, so you may need to clear those out with relief cuts. Refine and smooth the shape with a spindle or orbital sander.
Installing Bars and Tracks
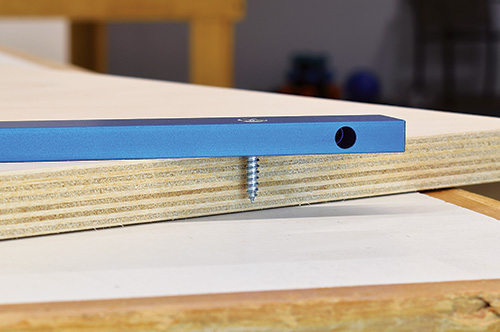
Now set and lock your saw’s freshly squared rip fence so it can serve as a stop for centering the sled base on the saw.
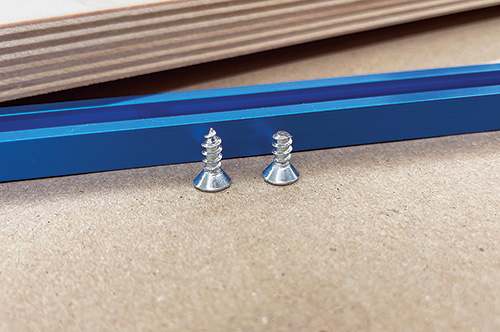
To attach the miter bars, we’ll use a combination of glue and screws. This is a good time to check the proper length of screws to avoid one coming through the other side. For 3/4″ plywood and the Rockler aluminum miter bars used here, #6 x 1″ flathead screws work well, but always check. Do the same thing with the T-tracks inside their dadoes. For those, I found that #6 x 1/2″ flatheads work best, but it will exceed the depth of the 3/8″ dadoes. Rather than bump down to a shorter screw, which would have smaller threads, I ground off the tips of the 1/2″ screws instead.
Lightly score the top (contact) surface of the bars. I used a rotary tool with a small sanding drum; coarse sandpaper or a file also works fine. Scoring gives the glue a better gripping surface on the smooth aluminum bars.
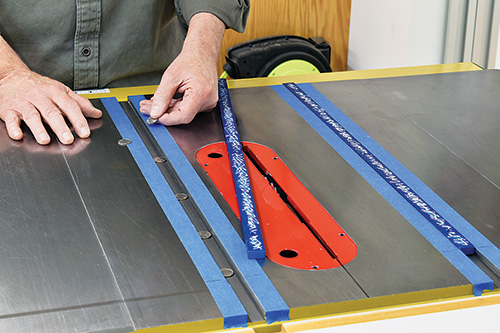
While we’ll go easy on the glue, apply masking tape along the sides of each miter slot anyway to protect the table. Now place some spacers in the slots — dimes are ideal — to raise the tops of the miter bars slightly above the table and align the miter bars with the back edge.
Run a line of glue along the entire length of the scored surface of the miter bars. I brushed on some 15-minute epoxy, but you can also use cyanoacrylate (CA) glue. I placed some tiny rare-earth magnets in the slots against the ends of the bars to keep them from moving.
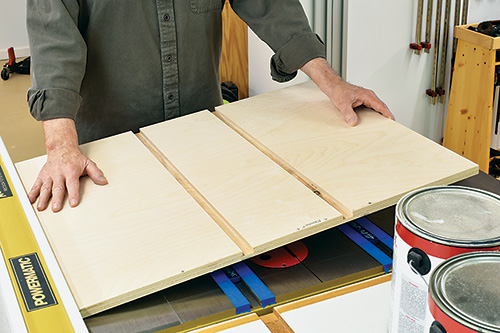
With the edge of the sled base held against the saw’s rip fence and aligned with the back edge of the saw table, lower it onto the bars. Weigh down the sled until the glue sets; gallon paint cans work great.
When the glue cures, flip the sled over onto your work surface. The epoxy I used is probably plenty strong by itself, but I also used a self-centering bit to drill pilot holes through the bars’ countersunk holes and added those #6 x 1″ screws mentioned earlier.
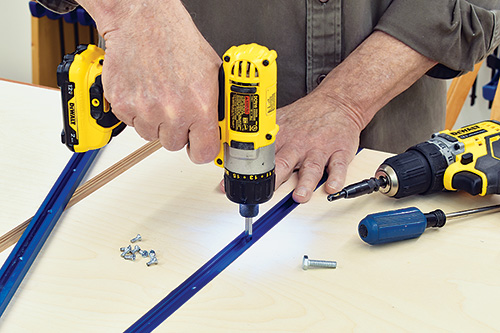
Now, flip the sled upright to install the T-tracks. (We’ll remove them later for final tweaks and finishing.) Drill pilot holes and drive in the shortened #6 x 1/2″ screws. After driving each screw, check the underside of the base to ensure it hasn’t come through. If it has, remove it, shorten it a bit more, then reinsert. Because the plywood is thin here, even if the screw hasn’t come through, you may get a veneer “dimple” on the underside of the base. Just sand these smooth.
Bringing Everything Together
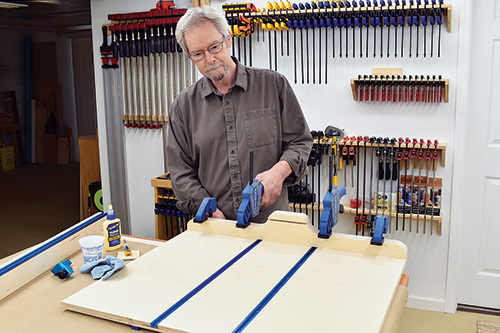
Begin final assembly by gluing and clamping the front fence into place. This rabbet joint is very strong, but add a couple of 2″ screws driven from underneath for extra insurance.
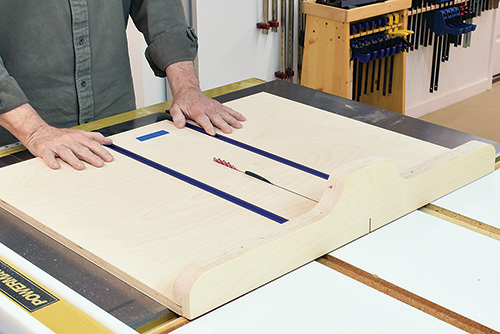
don’t cut all the way through the back of the base yet. Note the piece of tape indicating a good stopping spot
At your table saw, place the sled into its slots. Cut the main kerf across the base with your standard blade set to 0 degrees, but stop short of the rear edge by a couple of inches to keep that back edge intact for setting the rear fence.
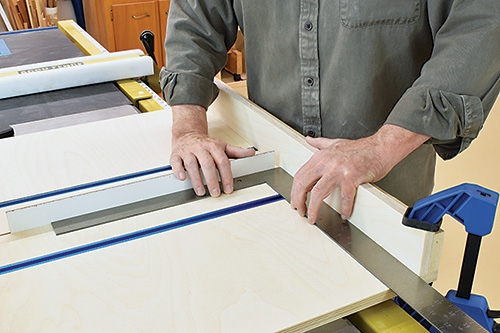
A sled is worthless if it doesn’t cut squarely, so set and install the rear fence carefully. You can do this with a lot of test cutting and math, but I’ve had success with an easier method. First, align the fence on the back edge of the base and clamp the parts at both ends. Drill a pilot hole up from underneath at the right corner, and countersink a 2″ screw to secure that one end only. Loosen the clamp on the left corner.
Slip a length of hardboard or other thin material into the center kerf so it’s standing up. If it’s loose, a layer or two of clear packing tape will snug it up. Use a reliable square to adjust the fence perfectly flush along the square and this reference piece in the kerf, and then tighten the left clamp. Add another clamp in the center of the rear fence, making sure it’s still square to the kerf.
Now drill a pilot hole up from underneath on the left corner, and drive in a countersunk screw. Remove the clamps and recheck for square again, just to make sure nothing moved. If all is good, countersink two more screws evenly along the fence’s length to secure it.
The rear fence isn’t glued into place for a reason: after prolonged use, the fence may go out of square. If so, remove all screws except the one on the right corner, recalibrate the fence for squareness, and redrill and drive new holding screws from underneath.
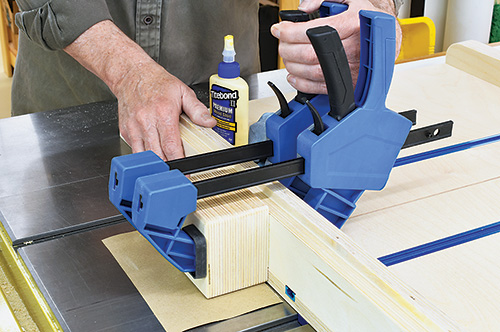
When using a sled, the blade will, of course, exit the back of the fence. Adding a guard block keeps the blade contained to offer added protection.
The guard block is a “sandwich” of four 3-3/4″ x 4″ plywood rectangles, glued and clamped together. When the glue joints dry, use a sanding block to round over all edges except on the front. Now, center and glue the block to the back of the rear fence, but don’t put glue on the bottom 3/4″ where the base edge is. I’ve slipped some construction paper underneath the block. This will add a tiny bit of clearance to reduce table friction and protect the cast iron from any glue squeeze-out.
Smooth Sledding
The sled is complete and ready for finishing, but there’s one last tweak. To easily insert and remove hold-down bolts, you’ll need a small access gap at the front of the T-tracks. For the T bolts on my hold-downs, a gap of about 1″ worked well, which I got by removing the T-tracks and shortening them at the front by 11⁄2″. Your hold-downs may differ slightly, so use your bolts to gauge the gap you need, and shorten the fronts by that much.
While the T-tracks are out, give the entire sled several coats of the finish of your choice. Polyurethane is a good option; the smooth surface it gives the underside of the sled can be waxed to decrease friction on the saw.
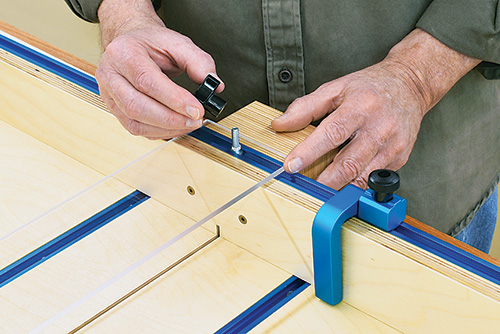
When the finish is cured, set the T-tracks back into place and screw them down, add a pair of hold-downs to the base, and slide the flip stop into the rear fence track. Now, slip the clear acrylic guard into the slot on the front fence, then center and drill a 1/4″ hole through the guard so it’s over the rear track. Use a 1″ hex bolt and star knob to secure the clear guard at the back. You should try to use the sled with that clear blade guard in place all the time, but for occasions where you need to slide the flip stop closer to the kerf, or for ease of placing large stock into the sled, it can easily be removed with a twist of that star knob, then replaced for future cuts again.
Click Here to Download the Drawings and Materials List.
Hard-to-Find Hardware:
Universal T-Track 2 Ft. (2) #22104
Universal T-Track 3 Ft. (1) #26420
Rockler Aluminum Miter Bar 24″ (2) #26232
Rockler 3″ Fence Flip Stop (1) #26991
Rockler Bit-Saver Hold Down Clamps (1) #63688
Rockler Easy-to-Grip 4-Star Knob (1) #59277


