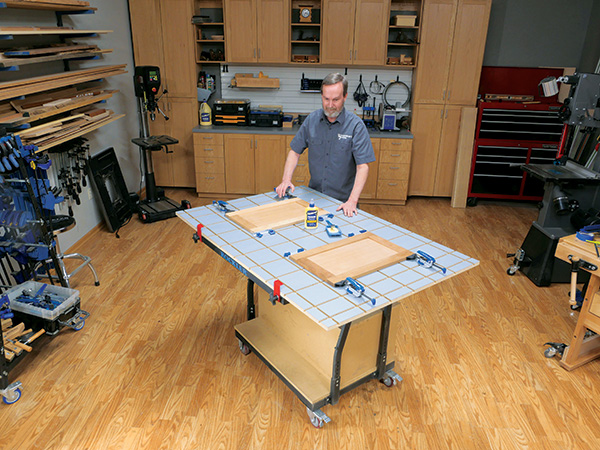
If you often could use a third hand like me when gluing and clamping larger components and panels together or carrying out routing and sanding operations, this clamping table might just be the ticket! Made from a sheet of 3/4″ MDF covered with high pressure laminate, it features a grid of T-slots that work perfectly with Rockler’s wide variety of stops, clamps and accessories that use T-bolts for attachment.
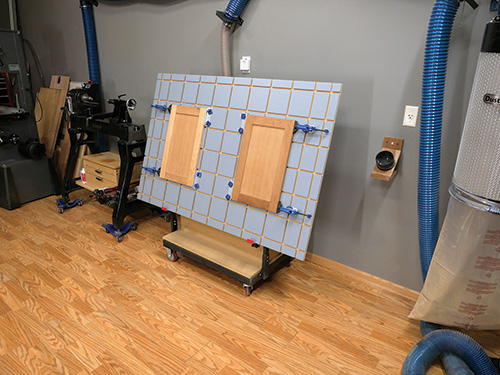
You can make this table as large or small as you like. I’ve sized mine to fit on top of Rockler’s Material Mate Panel Cart. The cart enables me to tip the clamping table down when I’m done using it to save space. But you could mount this project to a wheeled cart or leg base you make yourself or even to a couple of prefab cabinets you already have on hand. There are lots of options.
Sizing Down MDF and Laminate for Assembly
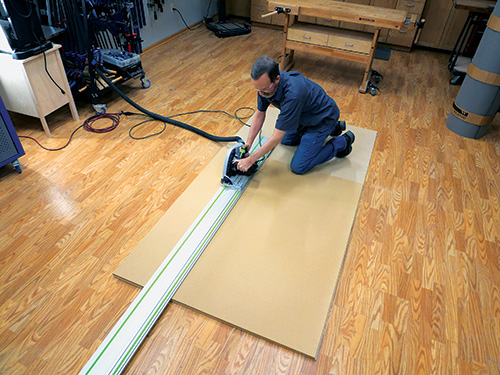
You can certainly cut MDF with an ordinary circular saw or on the table saw with a helper, but be advised that a 3/4″-thick 4 x 8 sheet weighs nearly 100 lbs! So, I laid a thinner piece of MDF on the shop floor to serve as a waste board underneath, then cut my 3/4″ substrate for the clamping table on top of that. A track saw yielded perfectly smooth, flat edges when I trimmed the MDF to my 40″ x 60″ table size — but again, the final dimensions are entirely up to you. The other benefit of the track saw was its built-in dust collection, because believe you me, MDF creates clouds of fine powdery dust in no time! If you don’t have a saw with dust collection, be sure to wear a dust mask when you cut this stuff. Or consider hauling your sheet outside to cut it there on a nice dry day.
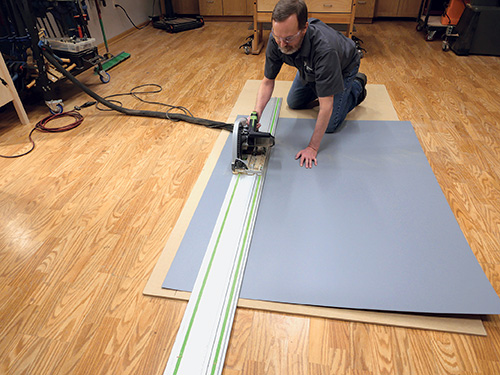
I’ll be using my clamping table regularly for glue-ups, so I wanted a durable surface for the project that would be easy to clean. High-pressure plastic laminate for countertops fills that bill nicely! I bought a 4 x 8 sheet of matte gray laminate from a local countertop supply company. I also bought a sheet of what cabinet shops call “cabinet liner.” It’s a much thinner plastic laminate that costs less. My reason for using it is that a backer piece of laminate will add durability to the bottom face of the table and creates a moisture barrier, like the top face. Balancing the panel helps the MDF from warping due to uneven moisture absorption.
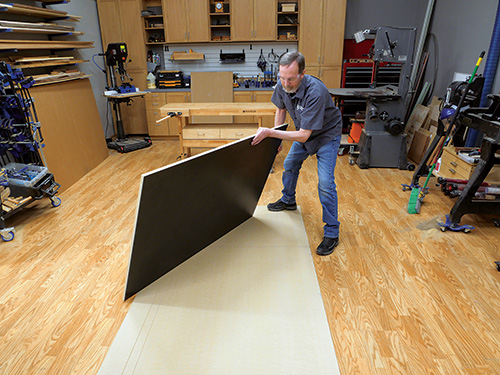
Trim two sheets of laminate so they’re oversized for the project by 4″ in both dimensions — you want a 2″ overhang all around to provide some margin for error when positioning the laminate on the substrate. After marking the size of my laminate, I set my track saw blade super shallow and cut the pieces to size. Be very careful when handling these cut sheets after you’ve trimmed them: cleanly cut plastic laminate will have razor-sharp edges. You won’t notice how sharp they are until it’s too late and you’re searching for Band-Aids! File or sand those edges now to make the sheets safer to handle.
Laminating the Substrate
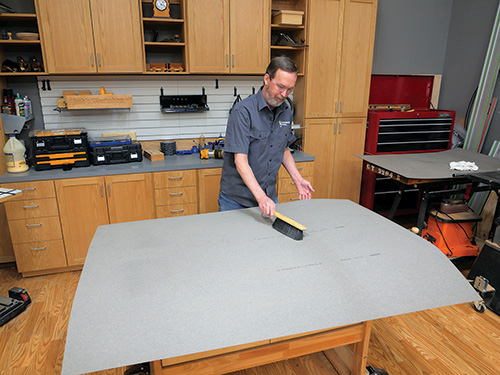
Applying plastic laminate isn’t difficult, and it’s a great technique to know for future cabinet or countertop projects. But before I explain the procedure, there are a few important things to cover. First, keep your work surfaces and laminate as clean as possible while installing it.
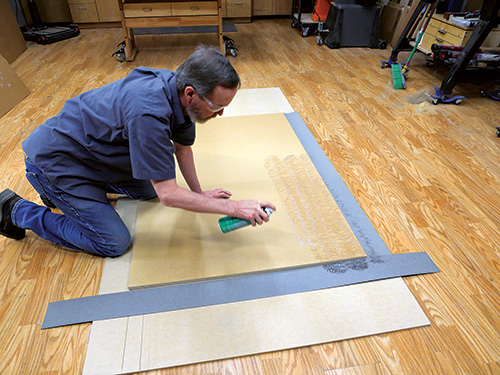
Any random sawdust or particles of debris can form bubbles under the laminate when it’s glued in place. They’ll not only show as a raised bump but are impossible to fix.
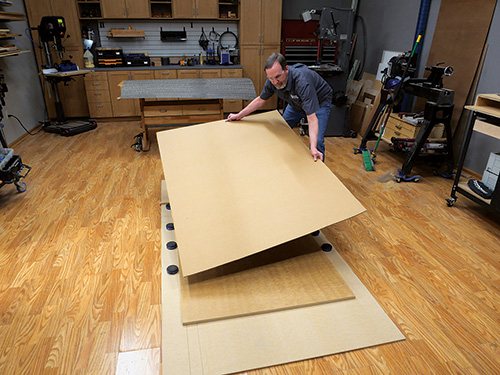
Second, whether you use 3M High Strength 90 aerosol contact adhesive as I did or a roll-on variety, once both surfaces have adhesive applied, they will stick together the instant they make contact, and undoing them is nearly impossible without breaking the laminate.
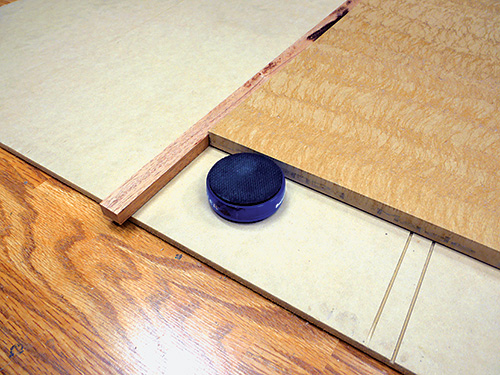
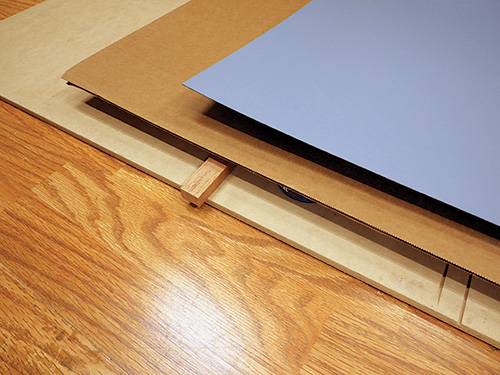
You’ll need to install a barrier or a series of spacers between the MDF and laminate in order to position them without accidentally sticking them together; I used a large sheet of cardboard as a barrier layer. But long dowels closely spaced will also work.
And third, if you use roll-on solvent-based contact cement, the fumes are harmful to breathe and flammable. Be sure to have adequate ventilation in the shop, wear a cartridge respirator and extinguish any pilot lights or open flame.
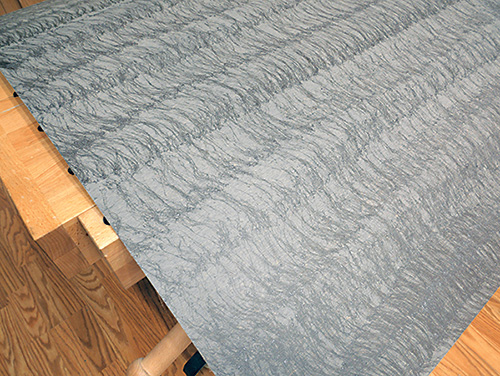
The photo series here shows how I installed the gray laminate to the top face of my clamping table, but the black cabinet liner is applied the exact same way. Start by vacuuming or brushing off the MDF and the back face of the laminate carefully — again, any debris will be problematic. Lay down drop cloths or use offcuts of laminate to protect from overspray if you use aerosol contact adhesive as I did. Then apply an even coat of adhesive over the entire back face of the laminate and the MDF surface.
The adhesive must dry to a tack before the parts are bonded together, so while you wait, consider how you’ll position the laminate over the substrate. Remember, the laminate is larger than the MDF, and it’s floppy to handle. I laid a long scrap stick against one end of my substrate so I’d have a visual reference for where this end was.
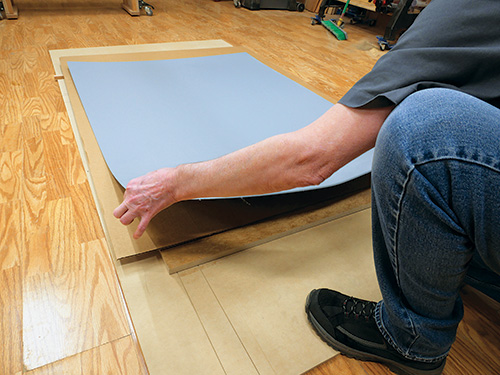
I also set several Bench Cookies along both sides of the substrate to serve as spacers for the cardboard along the edges. When the contact cement was tacky and nearly dry to the touch, I set the cardboard in place over the substrate. Then, I carefully laid the laminate on the cardboard (adhesive side down).
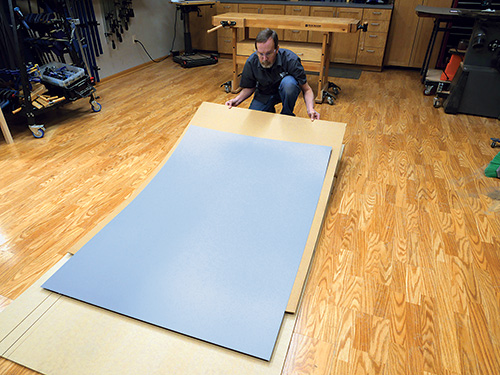
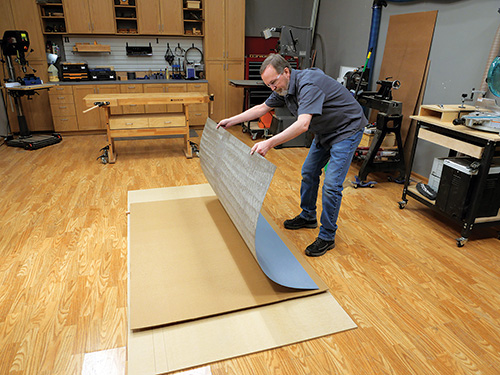
I adjusted the laminate and the cardboard to overhang the substrate, then pushed the cardboard and the laminate backward, exposing a couple of inches of the MDF. I carefully pulled just the laminate forward and stuck the laminate to the MDF. With that end of the laminate and substrate now stuck together, I could slowly pull the cardboard out from beneath the laminate to present both cemented faces to one another.
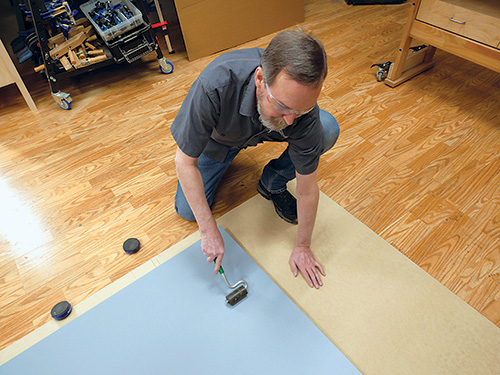
I used a J-roller to then roll the surface of the laminate thoroughly from the center outward, further bonding the adhesive. If you don’t have a J-roller, you can just wrap a towel around a piece of 2×4 or other large scrap and press the surfaces flat that way instead — it will work just fine. Take a few extra minutes to roll the edges of the table all the way around the perimeter so the laminate is fully bonded there, too.
Edge-trimming and Installation
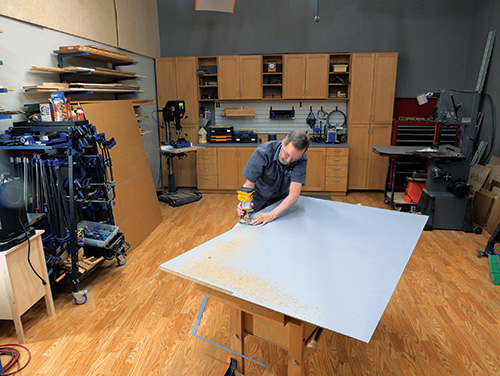
I gave the contact cement several hours to cure, then I trimmed off the overhanging edges using a router fitted with a piloted 1/16″ roundover bit. If you still have the table’s other face to laminate, do that now.
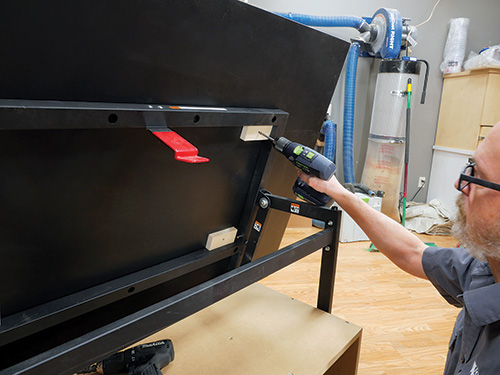
Since my tabletop was ready to go, I could attach the panel to my Material Mate Cart with four scrap blocks — they just friction-fit against the corners of the cart’s top metal framework so I can lift it off when needed.
Routing the T-Slot Grid
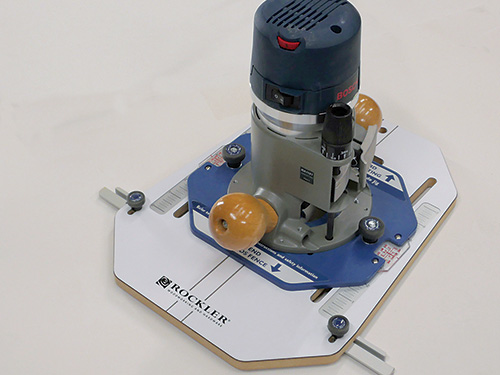
The T-slot grid in my table consists of 3/8″-wide, 3/8″-deep slots spaced 2″ in from the table edges, then 6″ from the ends and across the field area. Rockler’s Indexing Dado Jig, mounted to my router, made easy work of milling this series of slots with a 3/8″ straight bit.
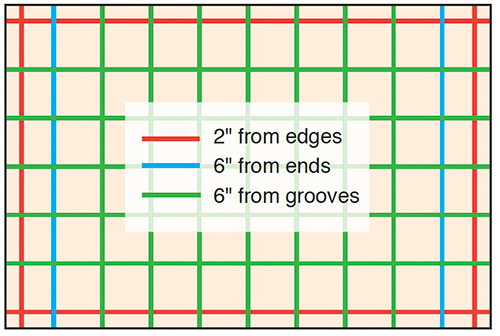
The colored grid shows how I set up the groove pattern. I routed the red slots first, then the blue slots, with the Dado Jig’s fence following the edges of my tabletop. From there, I could rout the rest of the green slots with the Dado Jig’s fence fitted inside the previous slot cuts.
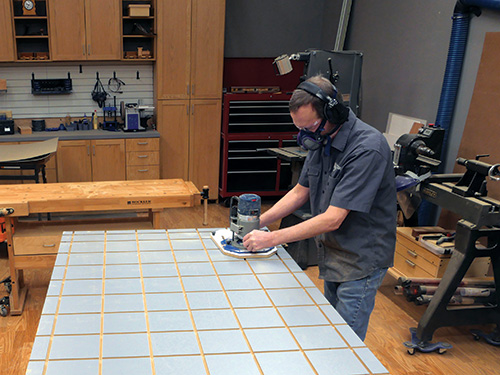
Once all the slots were routed, I swapped my straight bit for Rockler’s T-slot Cutter Bit and left the Indexing Dado Jig on the router. I adjusted the router’s cutting depth so the bottom of the T-slot bit was flush with the bottom of my groove cuts.
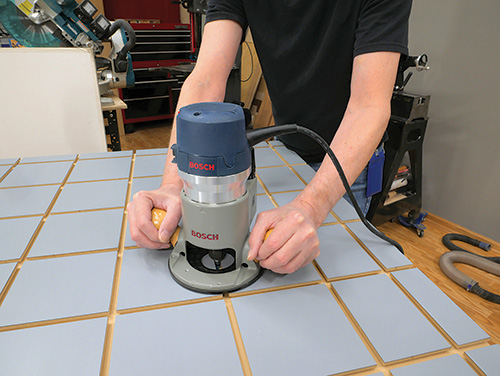
Then, I could simply repeat the routing process with the new bit to reshape the lower areas of the grooves into T-slots. It’s a dusty process, but it worked great, thanks to the jig!
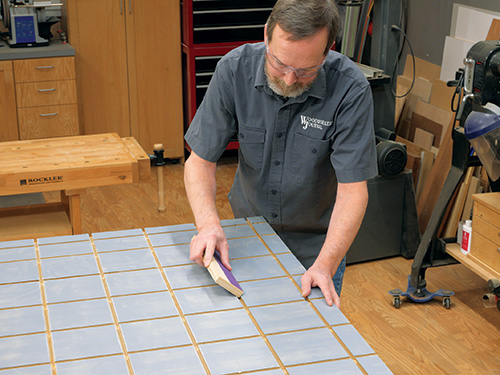
When I finished all of the T-slots, I knocked those razor-sharp laminate edges along the top of the grooves down with some sandpaper wrapped around a scrap to finish this handy shop project.
Advice for Using the Clamping Table
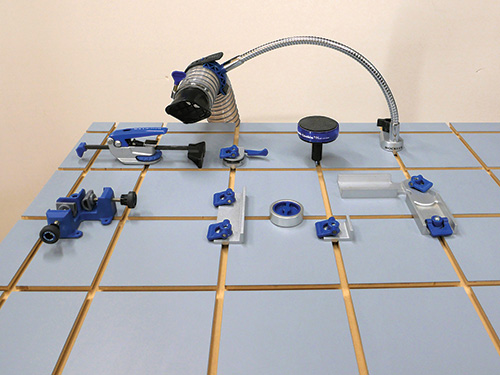
You now have a substantial grid of T-slots to help you for all sorts of project assembly or for other sanding and routing tasks! The more I use this accessory, the more applications are made easier by it. Here are a couple of tips I’ve learned to keep in mind. First, if you use Rockler T-slot clamps, choose the styles that push laterally, not the types that apply downward pressure. Those “downward” clamps can produce enough force for their T-bolts to lift and break the MDF, ruining the T-slot. Second, if you use this clamping table for glue-ups, you’ll invariably get some glue drips down in the slots. No problem! They’re easy to clean out by simply running the router and the T-slot bit through those slots again to whisk away the dried glue. Finally, I also use my clamping table for general assembly, which sometimes involves lots of small fasteners and other hardware that could get lost in the slots. In those situations, I just grab a larger scrap piece of sheet material and cover over the area of the clamping table I’m not using to hide that portion of the grid. It’s a simple way to keep those little items right where you can see them and out of the T-slots where they don’t belong.
Hard-to-Find Hardware:
Rockler Material Mate Panel Cart (1) #56889
Rockler Indexing Dado Jig (1) #59237
Rockler T-Slot Cutter Router Bit (1) #26099
Rockler Straight, 2-Flute Router Bit (1) #90462


