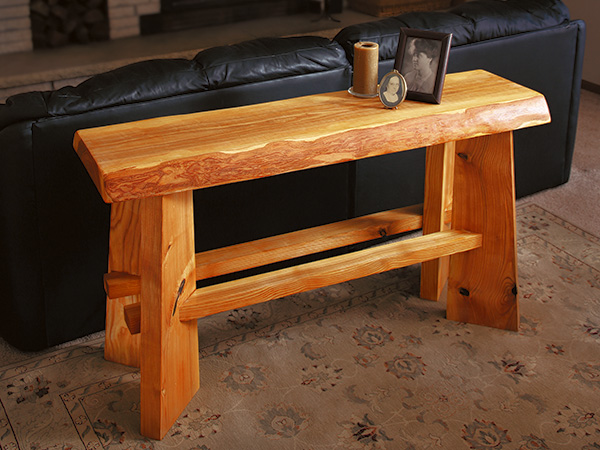
Working with thick waney stock was a treat that I had never done before. So, when the opportunity came to build this table, I jumped at it. At first I thought that the toughest task would be finding the 3″-plus thick wood to work with — but it turned out to be surprisingly easy.
Preparing the Stock
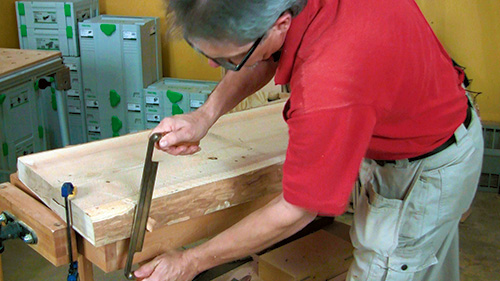
I selected the best looking section of the lumber to be the tabletop, and cut it roughly to length. Because this table has waney edges and is designed to be built with extra-thick stock, the width and thickness of your top may vary a bit from the dimensions found in the Material List. I decided that if I left the bark on the edges of the tabletop, my dusting time would increase significantly, so instead, I chose to remove most of the bark, leaving behind the underbark.
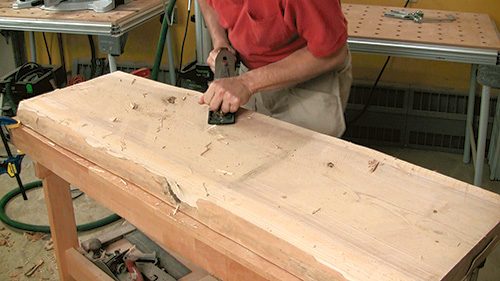
That remnant provided a color change on the edges that helped to define the top. Using a drawknife, I was able to slice the bark away in very short order. When that was done, I moved on to flattening and smoothing the top and bottom faces of the tabletop. As you might expect, the ash lumber was sold to me in a rough state, right off the saw. At 17″ wide, the width of the piece exceeded the capabilities of my planer and jointer. This left me in a bit of a pickle, but after a moment’s thought, I picked up my 07 hand plane and got busy flattening the tabletop. I planed at a diagonal to the grain, and found this method to be quite effective at getting a flat smooth surface, and it did not take an exceptionally long time. The surfaces were not mirror smooth (hey, I’m not Ian Kirby), but they were ready for sanding when I got done planing.
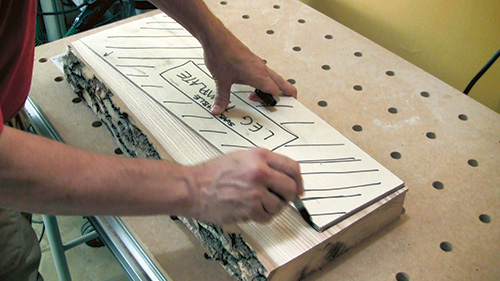
With the tabletop set off to the side, I moved on to the legs. These pieces were narrow enough that I could rip them roughly to width and put them across my jointer, then through the planer, to get them ready to be cut to exact size. I used a template to mark out the legs. They have a taper in them which gives the table a sense of style. I thought of the look as “Eastern” as in Japan or China; my staff identified it as “Western” as in Montana or Wyoming…such it is with beauty and the beholder.
Despite the fact that the legs are less massive than the top, they are indeed some big chunks of wood, so I joined them to the table using loose tenons. And because I own a Domino XL, that is the system that I used for this project. With that said, you could use any loose tenon method to attach the legs to the top — or you could use a more traditional mortise-and-tenon technique. Chop mortises into the underside of the tabletop, and raise tenons on the tops of the legs. You’d just need to add the length of the tenons to the overall length of the legs in that case.
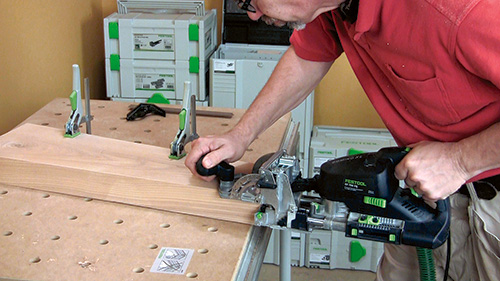
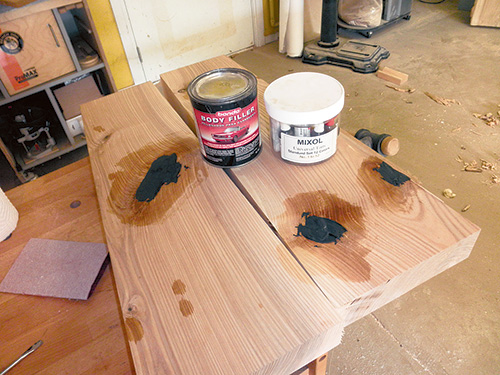
One challenge came to the fore as I was making the legs. There were several large knots that I could not avoid and they had material in them that I needed to remove. (The knot fibers were loose and the void looked bad.) To address the knotholes, I decided to fill them with Bondo®, colored to match other solid knots in the wood. I used universal colorant to mix the exact shade that I needed. One important point — if you look at the photos, you can clearly see that I applied some shellac around the holes that were to be filled. That shellac sealed the grain so that I did not get an unwanted halo of black Bondo squeezed into the open-grained ash. After I applied the Bondo, it cured quickly and I sanded it smooth in just a short while. Sanding also removed the shellac. With that done, I was able to lay out the mortise locations on the ends of the legs and then cut them as shown. Then I moved on to doing layout on the bottom face of the tabletop.
Locating the Legs
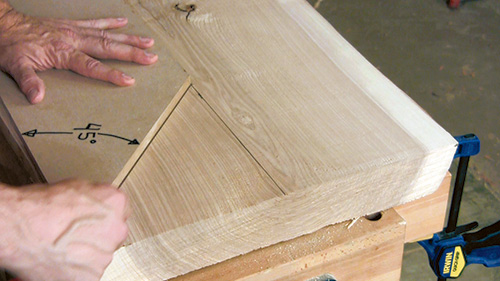
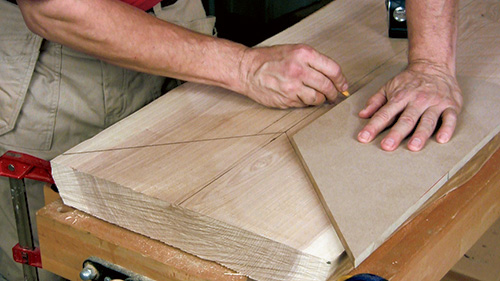
To accurately locate the legs on the underside of the tabletop, I first struck a line down the center of the table. I worked from a center line because the tabletop’s edges were not straight and I couldn’t accurately measure from them. I used a simple shop-made layout tool for the next steps. It is just a rectangular piece of 1/2″ MDF that has an accurately formed 45-degree cut on it. Align the mitered edge of the jig to the center line and strike lines for the outside edge of the legs. (See the Drawings for details.) Then measure the offset from the center line and use the jig to mark parallel lines to the centerline. The intersection of those lines locates the exact corner of the leg. Trace around the leg, take off the mortise locations, and you can chop the mortises into the bottom of the table.
At this point, you may have noticed an intentional quirk to the design of this table — that, while the table legs are connected to each other on each side of the table, they are not joined one side to the other, except by the tabletop itself. This is because the tabletop is so thick, it is more than strong enough to resist the forces that may have cupped a top of less hefty dimensions. (And seasonal expansion and contraction will not be hindered.)
With the legs and tabletop prepared, put the tabletop upside down on a work surface and test-fit the legs to the top. If you are satisfied with the leg joints, it’s time to move on to making the stretchers.
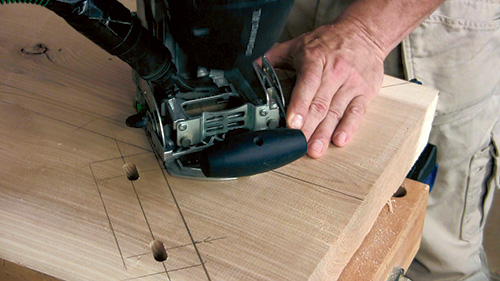
The stretchers fit between the legs and are joined to them with loose tenons to the inner faces of the legs. (See the Drawings for details.) Located on the outer face of the legs are faux tenon ends. They are attached so that it looks as if the stretchers pierce the legs. (Again, see the Drawings.) As a way to further this illusion, cut the material for the stretchers long enough so that you can cut the faux tenon ends off of either end of the prepared stock. That way the grain pattern and colors will look as if they flow right through the legs.
Once again, joining the stretchers to the legs was a task that I used the Domino to do — but if you are not using that system, a pair of dowels on the joining faces of the pieces would work just fine. After you have machined the joinery on the stretchers, dry-fit and clamp everything together. I used a band clamp around the stretchers and faux tenon ends, but I did not clamp the legs down to the tabletop. Their weight and gravity were sufficient to form a solid glue joint.
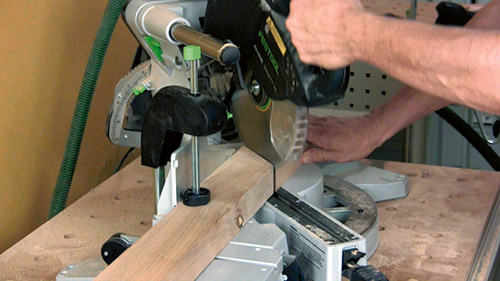
When everything fits just right, take the pieces apart and get ready for your favorite woodworking task — sanding. But before you sand, you may need to pull one more trick out of your sleeve.
If you, like me, used wood that is a bit thicker than 3″ for your tabletop, chances are that you did not have a circular saw blade that was thick enough to cut through the top in one pass. So you cut off the ends in two passes, and likely the cuts were not perfectly aligned. If that is the case, grab a router and chuck a flush-trimming bit into the machine. Then use the bit to trim a flush end to your tabletop. With that done, there is no putting off the sanding any longer. When you have worked up through the grits (I stopped at 180-grit), it’s time for assembly.
Assembly and Finishing
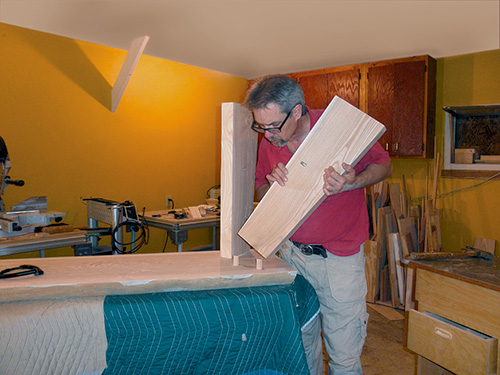
Because I had taken the time to dry-fit the pieces earlier, there were no surprises during the glue-up. I will say this, however: if I was going to make another of these tables, I would have a friend with me in the shop for the glue-up process. (Did I mention, this table is heavy? Really heavy!) An extra set of hands would have made this task much smoother and easier. The ends of the legs and the stretcher are end grain that is being glued to face grain. Be sure to apply enough glue to those end-grain areas to achieve good results. (A little glue squeeze-out here is not a bad thing — it will not easily be seen and you’ll know that you have enough glue coverage.)
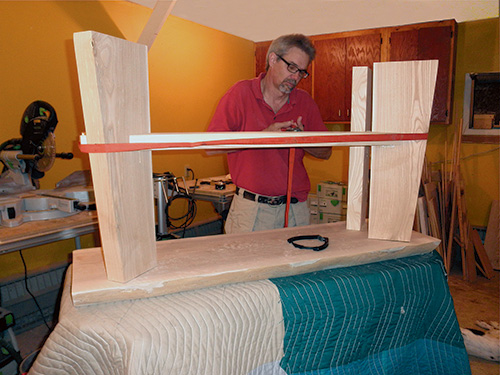
After the glue had cured, I used a chisel to remove the glue squeeze-out. A bit more hand sanding preceded a shellac finish. I mixed amber shellac and clear shellac mixed half and half right out of the cans. I applied it with a soft brush, denibbing between coats.
And that’s it. All you need to do when you’re done is find a couple of really strong teenagers to help you put the table exactly where you want it!


