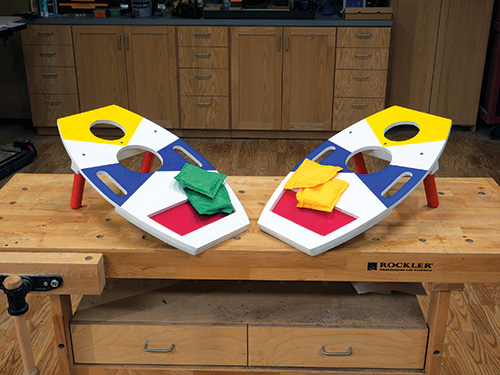
Bag toss games are crazy-popular these days. There are likely a lot of reasons for that. For one, they don’t require advanced athletic skill to participate, and almost any kind of beverage can be consumed as the game is being played. Unlike the lawn darts of my youth, there is little inherent danger, and neither gender will have any specific advantage.
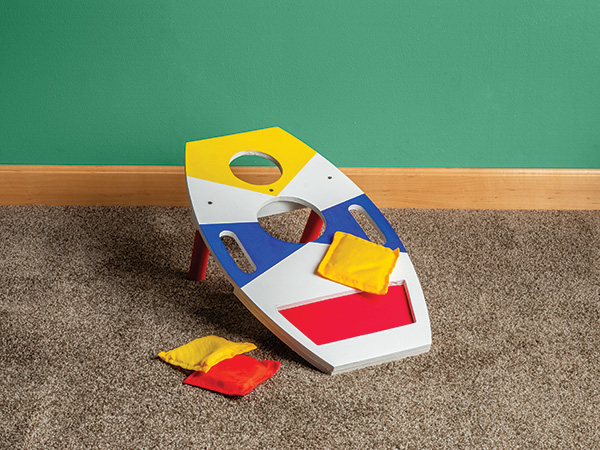
In the version that our art director, Jeff Jacobson, came up with here, there are three scoring options: a rhombus-shaped area that is worth negative-one point, a central hole that is worth one point and a smaller-diameter upper hole that is worth two points. Keeping score will require addition and subtraction, which will be great practice for kids. And the variety of scoring options will mean a more unpredictable and more competitive game. Jeff came up with the concept by thinking about the skee-ball arcade games of his misspent youth.
Starting with a Template for Accuracy
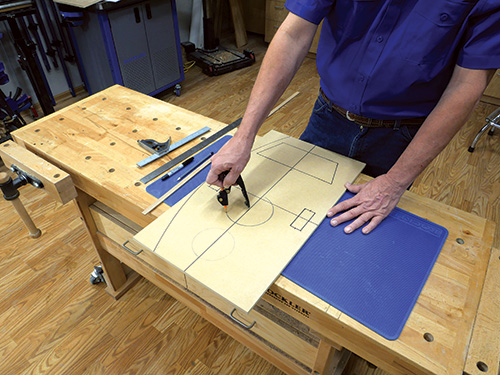
This is a perfect project for a template. You are making multiple holes through the plywood, and they all need to be placed accurately. In addition, these two game boards need to be identical. And as sometimes happens, when your friends or family members play the game, they might want one of their own. With a master template, you can get them done in short order.
I made my template from 3/8″ MDF cut to 14″ wide and 24″ long. Then I began to mark out the various shapes and holes that I would cut out to guide my router. Look at the Drawings for all of these details. I began by scribing a line down the center of the blank along its length. Then I drew a line across the width of the MDF at the center point of the handles. These two axes then allowed me to accurately locate all of the remaining details.
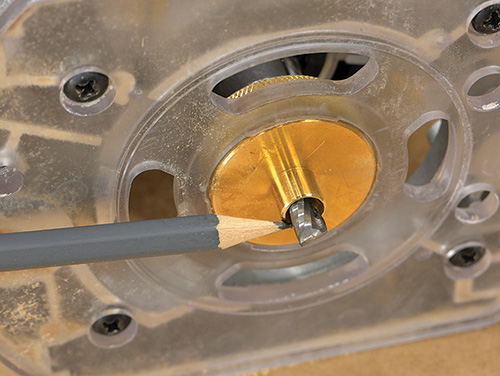
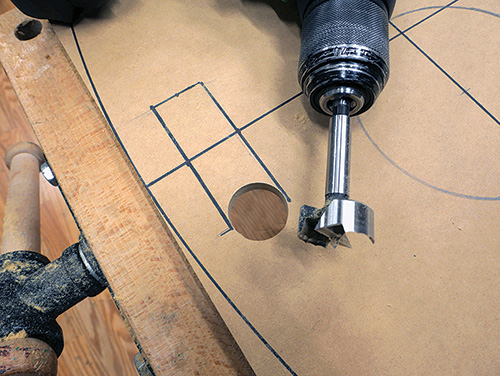
An important consideration here is how you are going to cut out those holes on the actual game boards. If you are going to simply trace the shapes onto the plywood and then cut out the openings with a handheld jigsaw, then create the template so that the marks you transfer to the plywood are exactly the size shown on the Drawings. If you are going to, as I did, rout out the openings and the curved sides, then figure out the off set of the rub collar you will be using. I used a 1/4″ bit in a 3/8″ O.D. rub collar. That left 1/16″ off set between the bit and the edge of the collar.
For that reason, I marked the diameter of the holes 1/8″ larger than the final openings. (Although I must confess that we are not talking rocket surgery here, the size of the holes can vary a bit and you’ll still have a usable game.) I only shaped one edge of the template and cut out one handle opening. I flipped the template over to form the second edge and the second handle hole on each board, which helped make the boards identical. I cut out the template openings and the curved shape of the edge with a handheld jigsaw.
Making the Game Boards
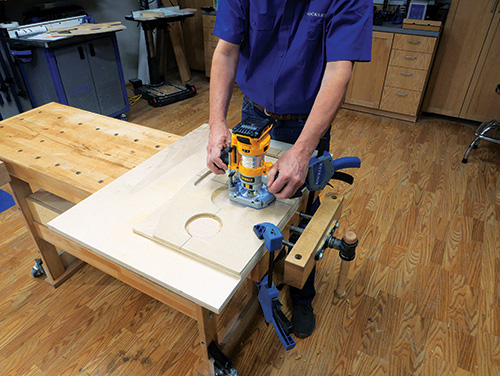
Start out by cutting three pieces of 1/2″ plywood to 14″ x 24″. Place a sacrificial board (I used some scrap plywood) on your workbench. Then put the plywood blank down and clamp the template over the top of it. Their edges should match exactly. Go ahead and cut out the openings with your plunge router, making two roughly 1/4″-deep passes. When you have finished machining both game boards, grab the third piece of plywood and rout it into the shape of a game board, but without any of the openings. Then cut off 9″ from each end to make the backer boards. They get mounted behind the rhombus-shaped openings to close those holes.
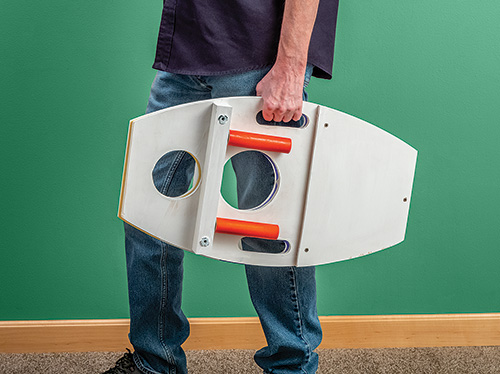
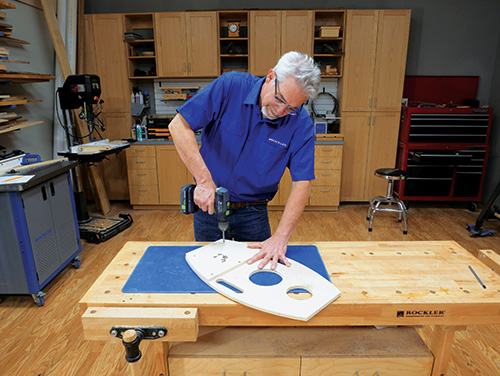
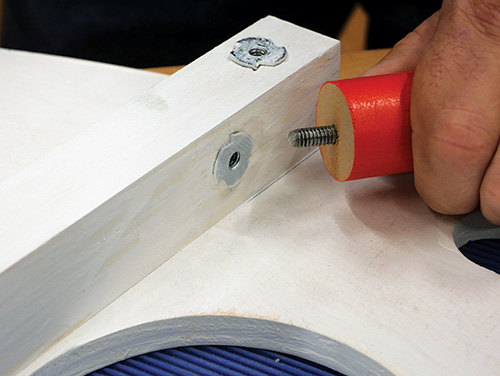
There are two leg mounting blocks yet to be made. They are 1-1/2″ x 1-1/4″ x 12″ in size and can be made of solid wood, or as I did, laminated up from three pieces of the 1/2″ plywood I had been using for this project. When you’ve made those pieces you need to drill 19/64″-diameter holes to mount the T-nuts in. See the Drawings for the hole locations. Pound the T-nuts home.
Adding Legs and Final Details
Just a few more things to consider and do before you are done. First, how are you going to finish the game? We chose to paint it white with bright accent colors. It just seemed right. But you could apply a clear finish and be happy with that. It’s up to you.
With that determined, go ahead and cut the legs to length from 1-1/4″-diameter dowel stock. Drill a hole in one end and screw a hanger bolt into the hole. If you are painting the legs, now is the time.
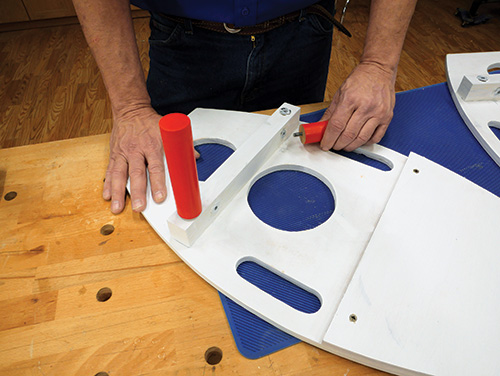
Mount the backer board behind the rhombus opening with screws driven in from the back. Secure the leg-mounting block to the game board with screws driven in from the top of the board. And with that your project is completed. Set the game up, prepare for some basic addition and subtraction and get started with the fun!
Hard-to-Find Hardware:
1/2″ American Birch Plywood, 24″W x 48″L (1) #62379
1/4″-20 x 1-1⁄2″ Hanger Bolts, 8 pack (1) #24406
T Nuts 1/4″ (#20), 8 Pack (1) #26054
Dowel Rod – Birch – 36″ x 1-1/4″ (1) #20800

