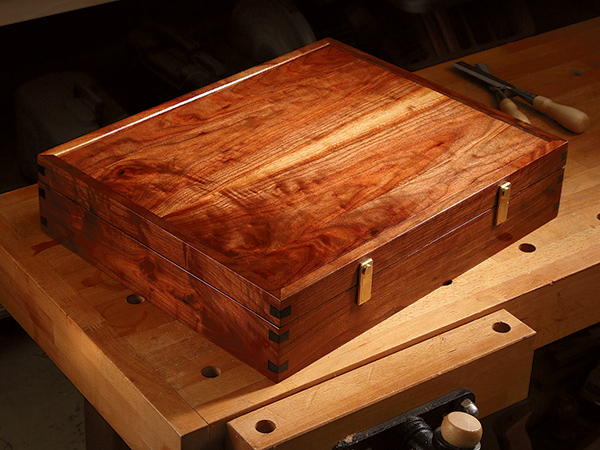
There are so many choices to make when it comes to starting a woodworking project. What sort of wood should I use, how will I join it, what sort of hardware should I employ (if any)? Of course, the whole thing starts by asking what problem you are solving with this project. (In this case, we needed a storage container for silverware.) And after you’ve got all that decided, you need to figure out how to make it, and do it with the tools that you have on hand.
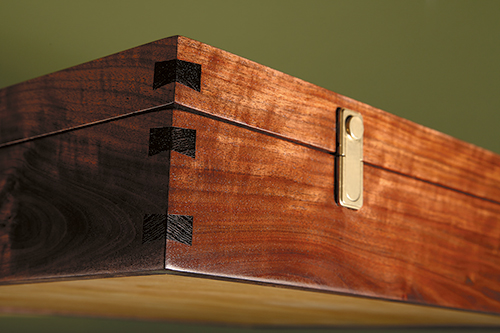
Once the basic design was conceived, built around a handy insert that included the anti tarnish cloth, the wood species was the next choice to be made. Here at the Journal, we have been examining sourcing wood from small local sawmills, and during that effort we procured some remarkably colored walnut with really attractive figure. One reason the wood had such rich coloration was that it had been dried using a combination of a solar kiln and old-fashioned air drying. By avoiding an industrial kiln — where they often inject steam into the drying chamber to prevent case hardening — it kept the walnut from shifting to the bland grey that is so often found in walnut today.
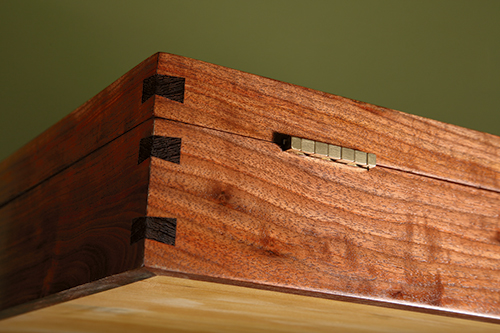
The final consideration was the hardware. Only a foolish woodworker would build a project without having their hardware in hand — the number of problems that can arise from failing to do that are legion. With the richly colored walnut selected, our art director, Jeff Jacobson, argued strongly for the solid brass hinges and catches you see on the chest. While they are not cheap, this heirloom project certainly supports the cost, and they really add to the overall look. That done, it was time to get down to making sawdust.
Breaking Down the Lumber
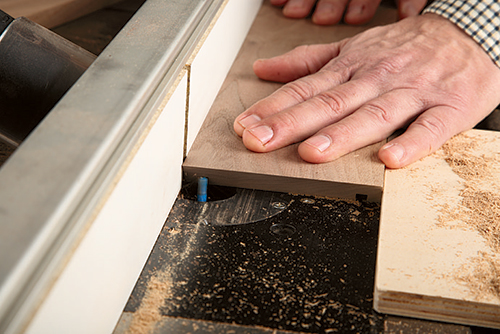
The process started with resawing the stock to approximate thickness, and then flattening the pieces with an 07 hand plane. A planer would have been faster, but it’s good exercise, and you can listen to the radio as you work. Then it was time to joint the long edge of the top and bottom panel pieces (pieces 1 and 2), and butt-glue them together. The top was constructed of book matched walnut, and the bottom from clear pine lumber. Find the dimensions for all the pieces in the Material List. You could also use 3/8″ veneer-covered plywood for these pieces, but for us, the look of the glued-up panels was worth the extra effort. With the panels in clamps, it was time to get started on the sides and the front and back (pieces 3 and 4). After being ripped to width, they were planed square and flat with the bench plane. As the pieces were being processed, the relationship of each piece was determined: the most attractive piece reserved for the front, the next most attractive for the sides, and so forth. With that determined, it was over to the chop saw to miter the pieces to size. Always check the accuracy of the miter cut on scrap lumber. Miters look deceptively simple, but if the setup is off by a degree or two, the joints look really bad.
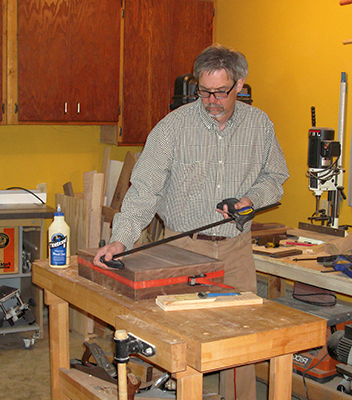
With the miters cut, it’s time to set up your router table to plow the panel grooves as shown in the Drawings.
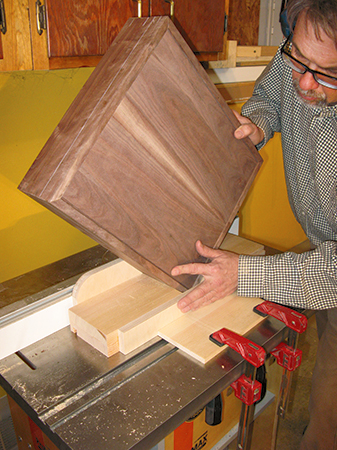
You are making some really solid progress now. Step over to the glued-up panels that you made earlier and take them out of their clamps. Scrape off the glue squeeze-out. Now you have another choice to make. The glue lines need to be leveled and the panels flattened. You can do this with a hand plane or a power sander. Either way works just fine.
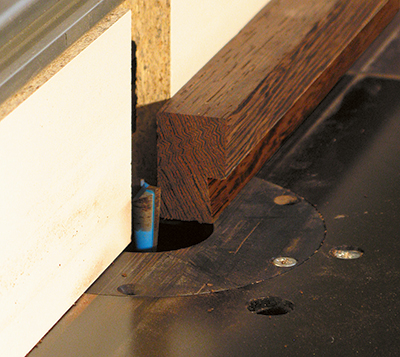
We started with a hand plane going across the grain, and then finished with a disc sander. When the panels are flat and smooth (sand through the grits), cut them to their final width and length. Now you are ready to machine the rabbet on their edges. Once again the router table is a great machining choice here, and a 1/2″-diameter straight bit works well for this task.
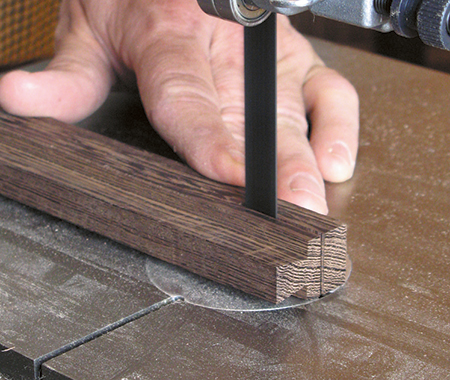
Again, it is wise to use scrap lumber to test how the rabbeted panels will fit into the grooves you plowed into the side, back and front. When you are comfortable with the fit of the rabbet, go ahead and cut it into the panels. Test-fit all six pieces of the box together before glue-up.
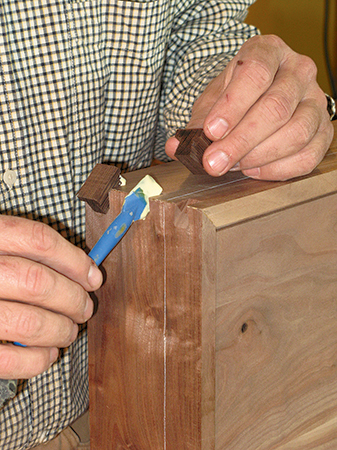
Remember, if you use solid wood in your panels as we did, they will expand across their width with seasonal humidity changes, so there needs to be room for them to expand in that direction. They won’t expand along their length, so that does not need any accommodation.
When you are satisfied with how the pieces fit together, it’s time to glue and clamp them. Put a thin coat of glue on the mitered ends of the sides, back and front, and a small dab of glue in the center of each side’s groove.
This will help keep the panels centered in the box over time. We used a band clamp and a few Quick-Grip® clamps to close up the joints and keep the whole assembly square. Let the glue cure completely before you take off the clamps.
A Simple Dovetail Key Jig
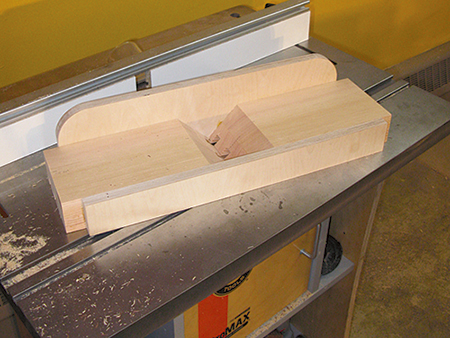
The dovetailed keys that help keep the miters strong over the years are easy to make and install, but you are going to need to build a jig to make them. The jig is stone-simple: as you can see in the Drawings, it is made from a thick piece of wood that is bisected at 45°. Flip over one of the pieces, secure them together as shown in the Diagram, and Bob’s your uncle.
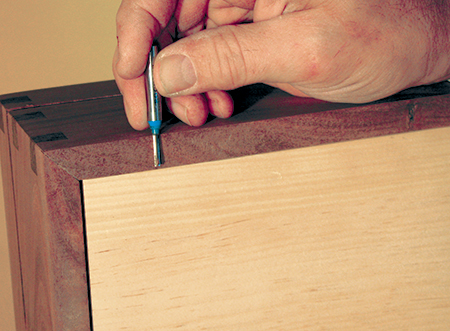
Next, chuck a 7°, 1/2″ dovetail bit into your router table. You can find the proper locations for the keyways in the Drawings, but as stated before, test the cuts on a piece of scrap. You don’t want to start the whole project over from scratch, do you?
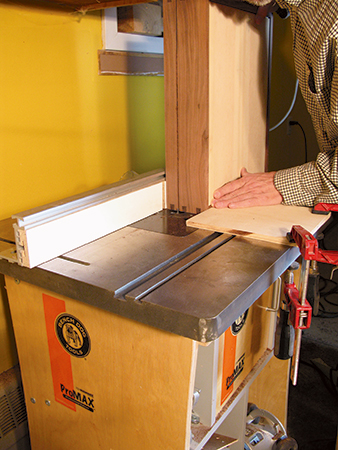
When you have the setup ready to go, and the glue has properly cured on the silverware chest, cut the keyways with one smooth pass through the corner. One setup will work for eight of the 12 keyways, then reset the router table fence and cut the last four. Now that you have keyways, you need to cut the keys. That is done in a long strip of 3/4″-thick stock.
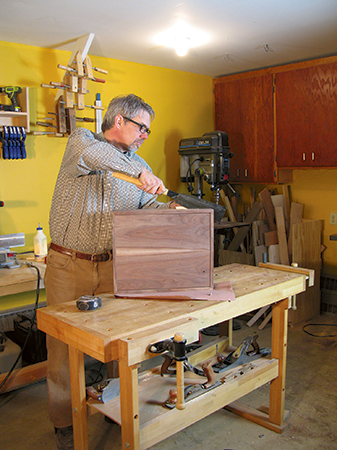
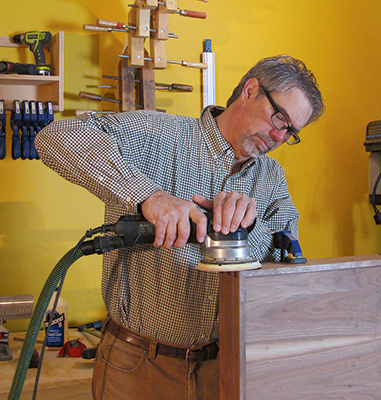
When you’ve got the shape correctly set up, form the strip of key-molding, and then cut the keys to length. Glue them in place (no clamping for this step) and let the glue cure. When the glue has dried, carefully trim away the excess material from the keys and then sand them flush. There is no need to pussyfoot around with this task; we started the sanding with 50-grit paper. When the keys are sanded flush, continue sanding the outside of the box up through all the grits, stopping at 180-grit.
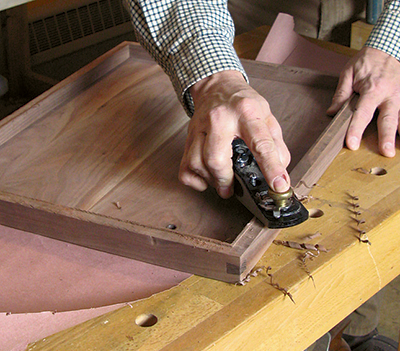
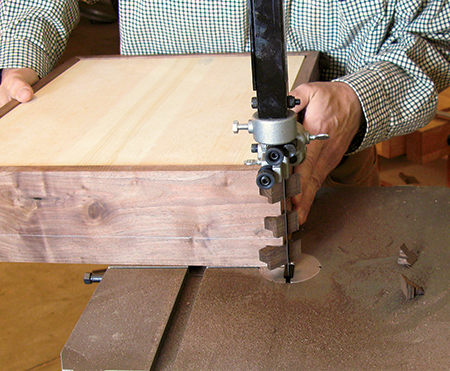
Now it’s back to the router table. To cut the top off of the six sided box, we used an 1/8″-diameter router bit. This version of our small shop does not have a table saw, so it was the best method. The little router bit was not long enough to cut all the way through the 5/8″-thick walnut, so we used a Japanese handsaw to complete the last of the cut. Because the handsaw blade was less than 1/8″-thick, there was a bit of waste to be removed. A sharp block plane made short work of that task.
Installing the Hardware
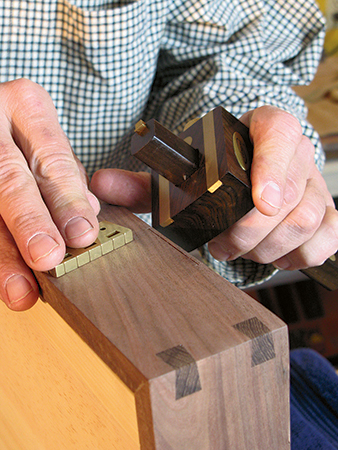
With the top cleanly removed, it is time to mount the hinges. Locate the hinges on the edge of the bottom as shown in the Drawings. Mark the locations with a knife. Then set a marking gauge to half the thickness of the barrel of the hinge, and use it to scribe a line on the back of the box, between the knife lines. Grab a fine-cutting handsaw (we chose the Japanese version we used earlier), and cut shallow kerfs down to the marked line as shown in the photo. Chisel the waste away, cutting cleanly to the scribed line until you have the hinge mortise completed. In this case, it spans the width of the 5/8″-thick walnut, making the whole process just a bit easier. Repeat the process on the box top and you are ready to mount the hinges.
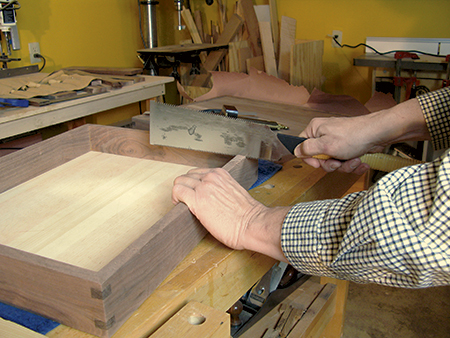
As you may have experienced, solid brass screws can break in the wink of an eye as you are putting them into hardwood. To avoid that, drill properly sized pilot holes (hold a drill bit in front of your screw, and just the treads should extend past). Drill the pilot holes a tad deeper than the length of the screw and then drive a steel screw into the hole. The hinges we used here provide that steel screw — which is a really nice detail. Then drive the brass screw home with a handheld screwdriver (if you use a power drill/driver, you’ll regret it).
Although it may seem an odd time to do so, we chose to apply the finish to the box before we installed the catches. (It keeps the mortises clear of finish.) Sanding the box pieces completely through 180-grit, and then hand-sanding with 220-grit, prepared the surface. The three coats of shellac (inside and out) from an areosol can put a beautiful finish on the piece. We de-nibbed between coats with 320-grit sandpaper.
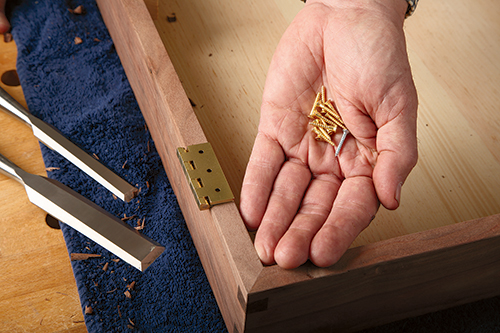
With all that done, you are on to installing the catches and close to the end of this project. As a precaution, take a moment to put a light coat of wax where the edges meet between the top and bottom of the box. This will keep the finish from melding together where it touches … not good!
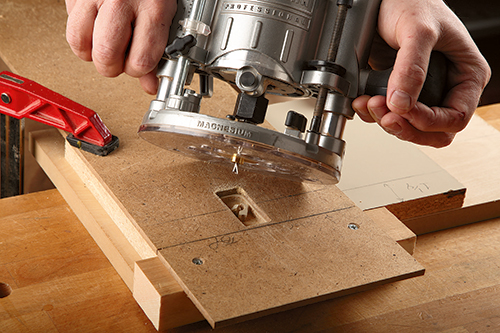
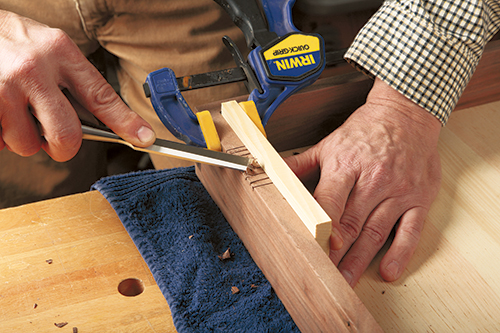
One odd detail about these specific catches is that they are not screwed in place; instead, they are secured with epoxy adhesive. You will need to make a jig like the one shown in the photo. Use a rub collar and 1/4″ straight bit installed on your handheld router. We made our jig so that it located the catch mortises by aligning the edges of the 1/4″ hardboard with the corner of the box. Test the cut — the catch should fit in the opening and sit deep enough so that the dimples formed in the sides of the catches are below the surface of the box. (That way, you can get some epoxy flowing into the dimples.)
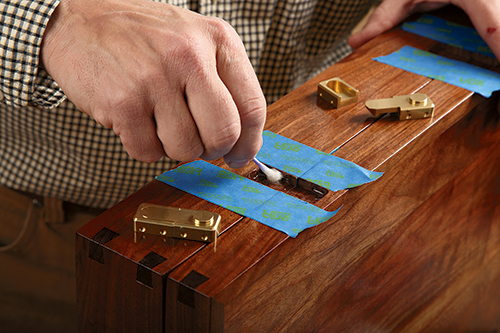
Note the orientation of the catches from the Drawings; you want the lower section of the catch to be the one without the button. Carefully rout the mortises into the box, but double check everything before you cut … this is not the time to mess something up! When you’ve completed that task, mask off the catch mortises as shown, apply a good coat of long open time epoxy (not the 5-minute stuff), and put the catches in place. Allow the adhesive to cure, and the silverware chest is done. After the finish has cured for about a week or two, apply a coat of clear paste wax and polish it out.
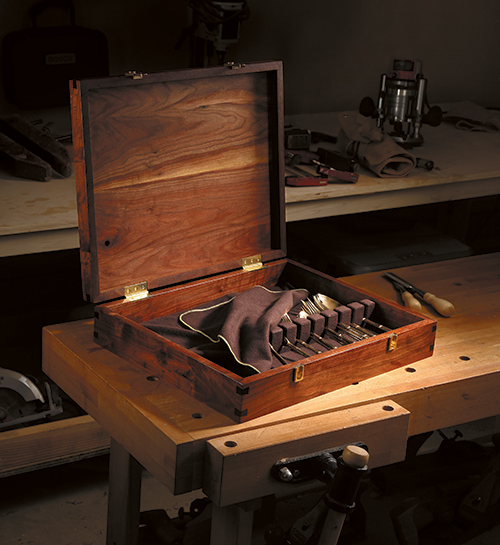
This silverware chest is not a complicated project, but by combining simple lines in proper proportions and adding beautiful wood with classic hardware, it is a real heirloom quality piece. And of course, at the end of the day, it is simply a box — so it could store other things than silverware. But in this case, we can’t think of anything else more appropriate.


