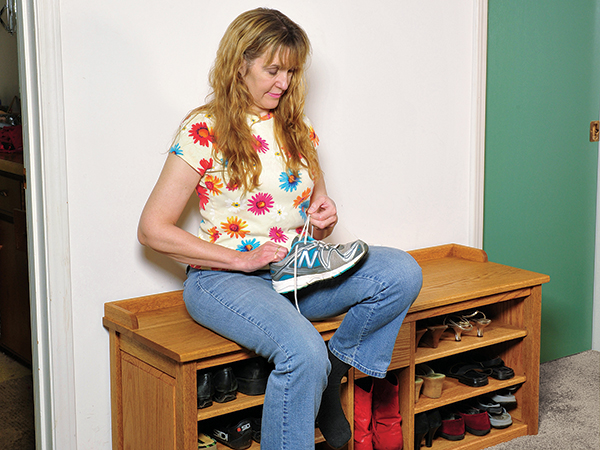
I’m not a particularly paranoid person, but sometimes, I think my shoes must be conspiring against me — I can never seem to find the pair I’m looking for when I’m ready to don them. This wastes a lot of time that could be better spent in the shop or strumming on my uke. Of course, this could have something to do with the fact that my shoes are usually scattered all over the floor of my closet…
When I finally got around to cleaning up my act, I thought I’d kill two irritating birds with one stone and build a bench that not only provides organized storage for all my shoes, but also affords a handy place to sit down while putting them on and taking them off. The shoe bench I came up with has enough storage space for a dozen pairs of men’s shoes (up to about size 13) or up to 18 pairs of women’s shoes. The shoes sit on open shelves that are adjustable for height, to accommodate different kinds of shoes: dress shoes, sneakers, low-top boots, etc. I added a tall central cubby between the banks of shelves just for my favorite pair of cowboy boots, and a small drawer for shoe cleaning supplies.
However, using solid wood did require some special construction details, to accommodate its natural tendency to expand and contract in response to changes in humidity. I’ll share those tips in this article.
Cut Out and Glue Up
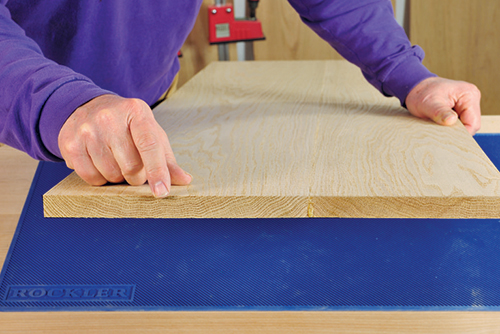
After purchasing enough stock for the project, the first task is to glue up all the wide parts necessary for the bench: the seat, bottom, bulkheads, side panels, drawer support and shelves (see the Material List). For parts that are the same width, such as the side panels, it’s easier to glue up a panel that’s a little more than twice as long, then cut the individual panels to length later. The tip shown in the photo above will help keep a panel flat if it wants to cup. Apply a nice, even coating of glue to all mating edges (I like to use a glue roller to spread the glue out). After clamping, check with a rule to make sure that each panel is nice and flat, and that the mating edges align evenly.
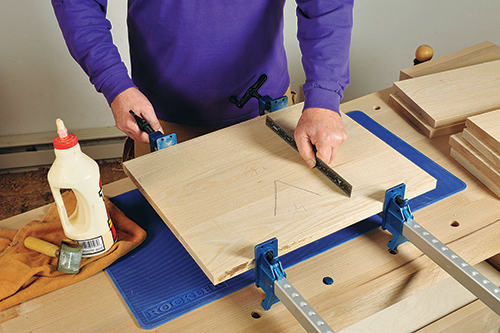
After the glue on each assembly dries to rubbery hardness, scrape off the squeeze-out and any drips that may have formed. Run each panel through a planer to bring it down to its final thickness. If you don’t have access to a planer with a cutterhead wide enough to handle the panels, glue them up from pre-planed stock; just make sure that each panel remains flat after it’s clamped up. Trim each panel to final width and length, taking care to keep all edges straight and square.
Legs, Rails and Side Panels
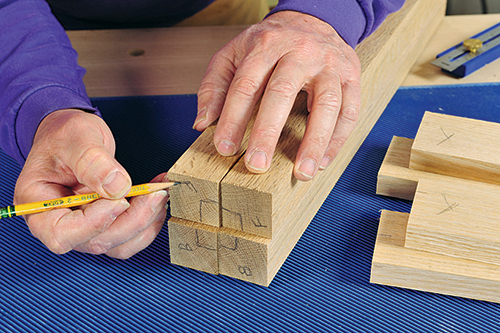
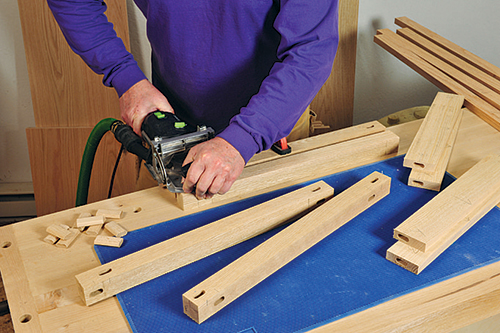
The sides of the bench are built with frame-and-panel construction. A pair of 1-1/2″ square legs are spanned by a pair of short rails at each end of the bench; long rails connect the end assemblies. These legs are mirror images of each other, left and right front legs and back legs. All rails connect to the legs with loose tenon joints (I used the Festool Domino system for this, but you could substitute mortise-and-tenon or dowel joinery if you wish). Start by cutting the legs and rails to size as per the Material List. To help you keep the orientation of the legs straight during numerous machining operations, mark the top of each one, as shown in the photo.
Chop the mortises for the long rails first, each sized for a 10 mm x 50 mm loose tenon and positioned as shown on the Drawings. Next, on the adjacent face of each leg, chop the mortises for the short rails, positioned as shown in the Drawings. Mortises, centered in both directions, are then chopped into both ends of all four long rails, as well as the lower short rails. Mortises on the upper short rails are offset widthwise as shown, so they won’t intersect the long rail mortises.
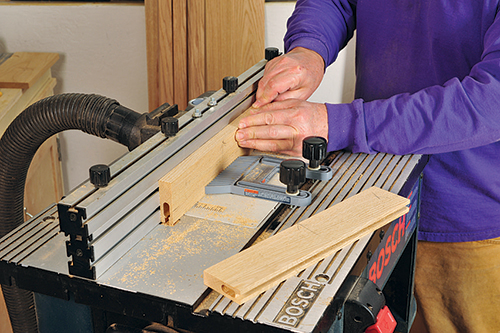
Now, using a router table, plow the grooves that hold the bench’s side panels into the legs and short rails. Fit a 1/4″ straight bit (preferably a spiral fluted bit) in the router and set the table’s fence so that there’s 3/8″ between the fence face and the centerline of the bit. Set the bit’s cutting depth to 5/16″ and rout a groove into the top edge of each lower short rail, as well as the bottom edge of each upper short rail.
Next, rout a groove into the legs that will hold the raised side panel. Set the bit’s cutting depth to 5/16″ and the table’s fence face so that there’s 3/4″ to the centerline of the bit. Rout a stopped groove into the same face of each leg as the short rail mortises are on. The groove should only span the distance between the two leg mortises. Using the same 1/4″ bit set to the same cutting depth, rout a groove into the rear legs to house the bench’s plywood back panel. Space the grooves 1/8″ from the back face of each rear leg.
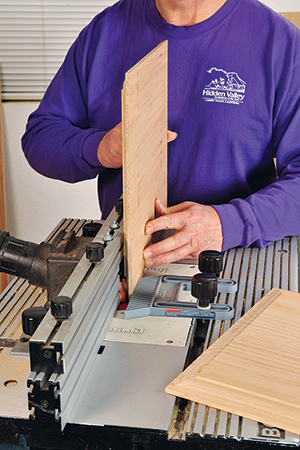
You raise the side panels’ edges on either a shaper or router table, using just about any style of panel-raising cutter/bit you wish. Just make sure to raise the panels in a series of passes: never all at once! During each pass, shape the short grain at the ends of each panel first, then shape its long grain edges. This helps prevent grain tearout and splintering. When you get close to the final pass (which should produce panel edges just a shade thinner than 1/4″), set up your shaper/router table to take a very light cut. This should minimize tearout and burn marks and produce a profile requiring very little sanding.
A few more routing tasks remain: First, rout a groove into the inside face of the lower rear long rail (this will mate with the bench’s bottom). Before routing, glue the two loose tenons into the ends of the rail and let the glue dry. Chuck a 3/8″-dia. straight bit into the router table set for a 3/8″-deep cut and spaced so the groove will be 3/8″ from the rail’s top edge. The groove should stop at the ends of the rail itself.
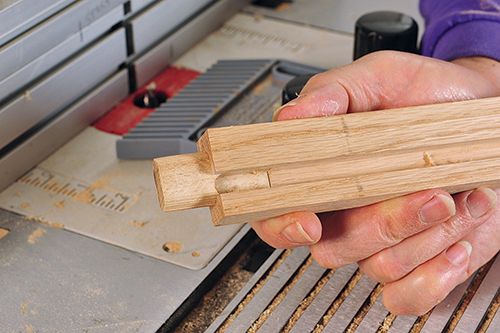
You can use the same bit to make the back stop strip: rout a 3/8″-wide, 1/4″-deep rabbet into the edge of a piece of 3/4″ stock, then slice off a 7/16″-thick strip.
To make the top buttons (used to fasten the bench’s seat), take a 1-1/4″-wide strip of short-grain stock and rout a 3/8″-deep, 1/2″-wide rabbet on one edge, then slice off eight 1-1/4″-long buttons.
Bottom, Drawer Support and Bulkheads
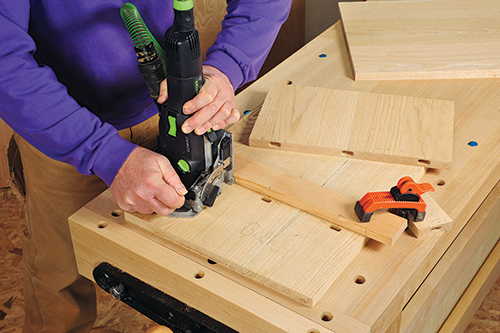
Once the bench’s bottom, drawer support and bulkheads have been glued up and trimmed to final size, there’s some machining to be done before the bench is ready for assembly.
Start by setting up a router with a piloted rabbet bit and pilot bearing set to take a 3/8″-wide cut. With the bit’s cutting depth set to 3/8″, rout a rabbet into the top back edge of the bench’s bottom. The resulting short lip will fit into the 3/8″ groove in the bench’s rear lower rail, to allow the solid wood bottom to expand and contract.
Loose tenons are used to join the bench’s twin bulkheads to both the drawer support and to the bottom. Chop three mortises (centered thickness-wise and spaced as shown) into the bottom ends of the two bulkheads and both ends of the drawer support; the back edges of these three parts should be flush. Next, chop the shallow mortises into the inside faces of the bulkheads and top surface of the bench bottom; the front edges of the bulks should overhang the front edge of the bottom by 1/2″. If you’re chopping these with a Domino, clamp a straight board to each part to act as a fence, and plunge cut these mortises only 15 mm deep.
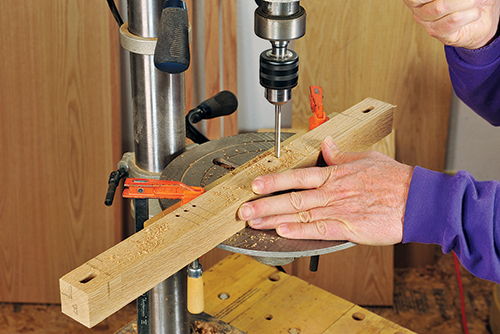
Now, using a table saw and a miter gauge fitted with a large fence, cut a pair of notches (sized as shown) into the front and back top edges of both bulkheads. These notches are for the upper long rails. Use a dowel jig and a portable drill to bore a single 3/8″ hole into the center of each notch, for the dowels that join the rails to the bulkheads.
To rout the grooves for the top buttons that secure the bench’s seat to the base (while allowing for wood movement), fit a router with a 1/4″ kerf-cutting bit set with its cutting edge 3/8″ below the router’s sub-base. Rout a pair of 3″-long grooves at the top edges of the two bulkheads as shown. Also rout a pair of grooves at the top edge of the inside-facing faces of the two upper short rails.
Next, drill the holes for the shelf pins that support the bench’s adjustable shelves. Chuck a 1/4″ bit (preferably a brad point or Forstner bit) into the drill press and bore a series of 3/8″-deep holes into the outward-facing faces of the two bulkheads, located as shown in the Drawing. Using the same setup, bore matching holes into the inside-facing edge of each leg.
Drawer Construction
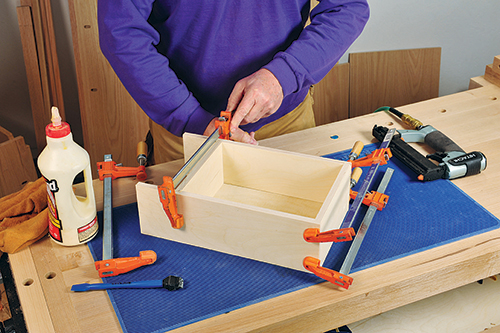
My original plan was to build the drawer of solid wood with dovetail corners, but frankly, I ran out of steam, so instead I used 1/2″ Baltic birch plywood joined with simple rabbet-and-dado joints. After cutting the parts out and sanding them smooth, I cut the 1/4″-deep joints using a 1/2″ dado blade stack in the table saw. I purposely located the back of the drawer box a full 3″ from the back ends of the sides, so that the drawer is supported when pulled out far enough to access the contents. The drawer’s 1/4″ plywood bottom slips into a 1/4″ x 1/4″ groove cut 1/4″ up from the bottom edge of the front and side pieces; it butts up flush to the bottom edge of the back. After gluing the drawer up and checking it for squareness, I reinforced each joint with a small nail, driven by a pneumatic pin gun. The 3/4″-thick oak drawer face is attached later.
Assembly
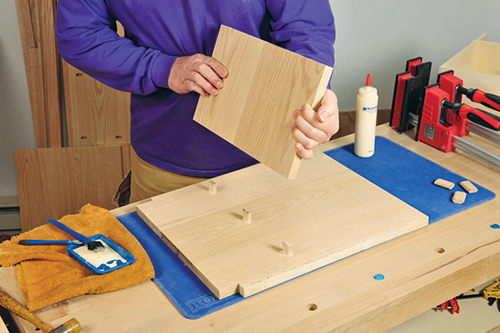
To make gluing up and clamping the bench’s base more manageable, the assembly is done in several stages. Start by gluing the spacer strips onto the inside-facing face of each lower short rail, with their ends and bottom edges flush. Also glue the front lower long rail to the front edge of the bottom, keeping the ends and top edges flush. I rounded over the top edge of this rail with a 1/4″-radius roundover bit; I used the same bit to round over the top front edges of all the shelves. Next, using a plate biscuit joiner, plunge cut a pair of #20 size slots into both ends of the bottom, and matching slots into the two spacer strips (these help keep the bottom flat, while allowing wood movement).
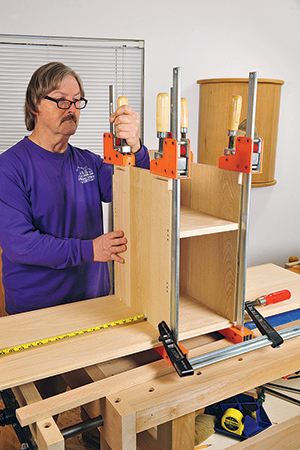
The ends of the bench are assembled first: Glue both the upper and lower short rails to one of the legs, joining them with 10 mm x 50 mm loose tenons. Take care to keep each part oriented correctly. After slipping the raised panel into its grooves (raised portion facing outwards — and no glue, the panels must float), apply glue and install the other leg. After applying clamps, use a straightedge to make sure that the faces of the legs (with the mortises for the long rails) are flat and parallel to each other.
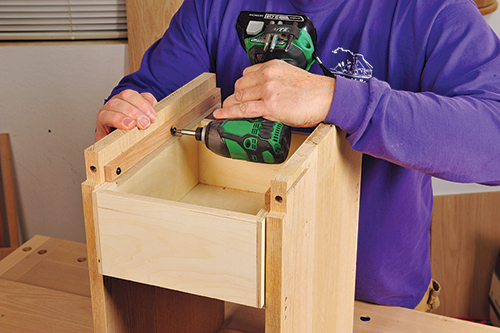
To assemble the bulkheads and drawer support, glue 10 mm x 40 mm loose tenons (you can cut standard 10 mm x 80 mm Dominos in half), first into the mortises in the bulkheads, then the drawer support. After clamping, the distance between bulkheads measured at the top and bottom should be the same. Glue the bulkhead assembly to the bench bottom next, once again using 10 mm x 40 mm loose tenons and applying clamps at the front and back edges of the bulkheads. After the glue has dried, screw on the two drawer guide strips onto the inside upper faces of the bulkheads. To do that, slide the drawer in place and lay a strip of cardboard on top of it, to act as a spacer. Now set the guide strip on top and screw it in place. The holes at the back of the strip should be slightly slotted, to allow for wood movement.
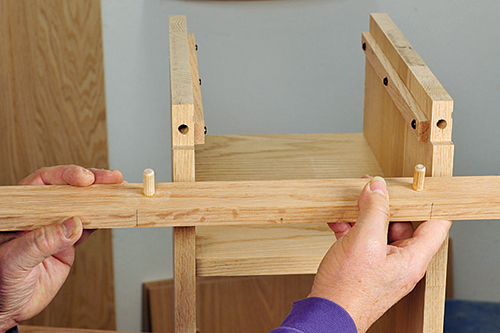
To assure that final assembly goes well, I do a dry fit with no glue. Before attaching the upper long rails, I press 3/8″ dowel center points into the four holes in the bulkhead notches. Once the rails are in place, I tap them against the points, then use the small indentations to drill 3/8″ holes 1/2″ deep into each rail. After unclamping all the dry-assembled parts, I glue the long rails into the bulkhead notches.
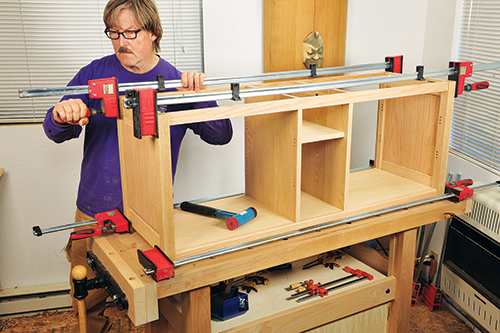
To begin final assembly, slip the lower rear long rail onto the lip of the bench bottom (no glue!), then apply glue to all the mortises in the ends of the long rails and legs. I also press (no glue!) #20 biscuits into the slots in the ends of the bottom. Glue the loose tenons into the long rails first, then press the end assemblies onto the tenons. Use four long bar clamps to apply pressure at each corner of the base, gradually tightening until all joints are fully seated.
While the base assembly dries, work on the bench seat. First, round over the front top edge of the seat using a 3/8″-radius roundover bit. Saw a 1-1/4″ radius curve onto one end of both short backrest parts, then join them to the ends of the long backrest piece with 3/8″ dowels. Once dry, round over the front-facing top edges of the backrest. After sanding these parts to final smoothness, mount the backrest atop the seat, centering it widthwise, and securing it with countersunk #8 x 1-1/2″ screws from below.
Finishing Touches
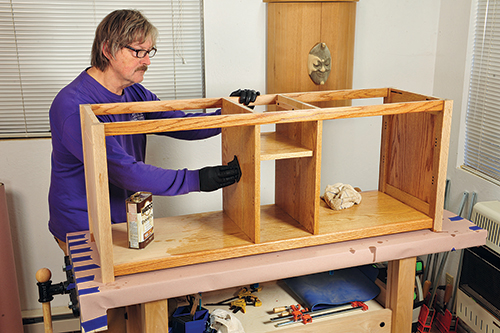
Once you scrape off any glue residue left after assembly, it’s time to do final sanding and apply finish to the shoe bench’s base, as well as the seat, back, shelves, drawer front and other small parts. I opted for several coats of a tinted Danish oil finish, in order to darken the light oak and give it a richer appearance.
When it dried, I set the seat upside down on my benchtop (covered with a towel to prevent damage), then set the base upside-down on top of it. After positioning the rear upper long rail flush to the back edge of the seat and centering the base side to side, fasten the seat by pressing the eight top buttons into their slots and screwing them down with #8 x 1-1/4″ washer head screws. Now slide the 1/4″ back panel into its groove in the legs, and secure it to the lower rail by nailing on the back stop strip. Nail the top of the back to the upper rail, then screw the center foot to the center on the underside of the bottom.
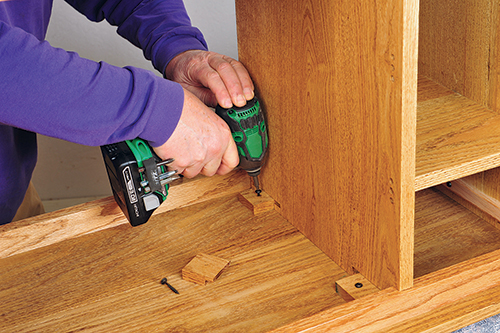
With the bench right-side-up on a low work table, I pressed the L-shaped metal shelf support pins into the appropriate holes and set the four shelves in place. To keep them from moving during use, I drove a #6 x 1/2″ pan head screw up through the holes in the two front support pins of each shelf. Slide the drawer in place, and mount the drawer face by screwing it on from inside the drawer box, locating the face’s lower edge flush with the bottom of the drawer support. Screw on a small, pendant style drawer pull.
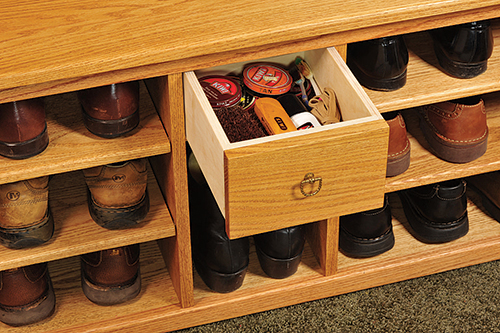
When the job’s done, it’s easy to sit down, take off my work shoes and pull on a pair of comfortable slippers.


