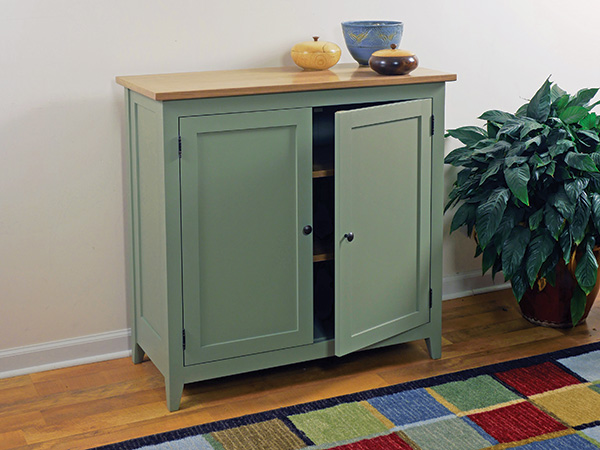
I’ve always had a soft spot for the clean lines and simplicity of Shaker-style furniture. So when my recent college grad daughter asked me to build a storage cabinet for her small apartment, my design sensibilities naturally turned to Shaker inspirations. A cabinet like this will never go out of fashion, and I think its two-tone cherry and milk paint theme, combined with some antique brass hardware from Rockler, give it contemporary flair. Building this cabinet will also put some good mileage on your rail-and-stile router bit set.
Building the Cabinet Sides
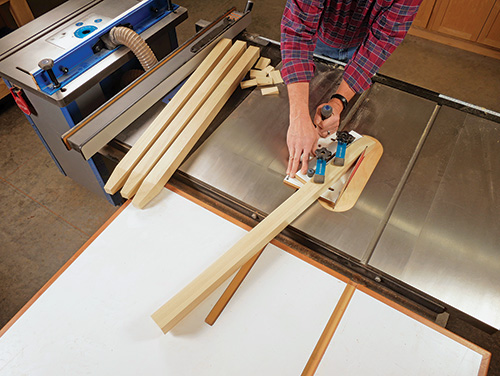
Mark the leg bottoms for short tapers on both inside edges of each leg. These tapers begin 3″ up from the bottom ends and reduce their thickness to 1″ square at the “feet.” Cut them to shape using a tapering jig, either at the table saw or band saw.
Set the legs aside for now so you can rip 2″-wide workpieces for the rails and stiles of the side frames from 3/4″ stock. Here again, I used affordable poplar. While you’re at it, prepare lengths of rail-and-stile stock for the doors, too. Make sure these door frame parts are harvested from straight-grained lumber and are jointed flat. They’re large doors, and you don’t want the frames distorting, or the doors won’t close properly.
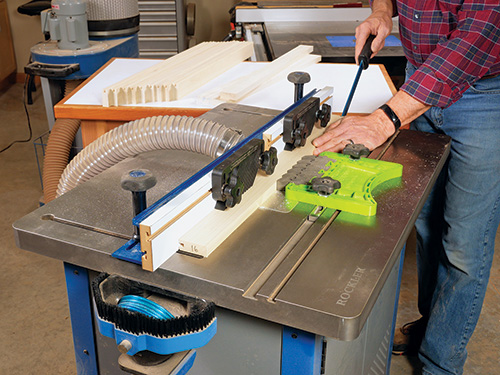
Install the stile bit in your router table, and mill the sticking profile along the inside edges of side frame and door frame stiles. Then repeat this process on the inside edges of all the side frame and door rail stock. Make sure to test the cut on a piece of scrap material first, to verify the router bit’s setting for accuracy.
Crosscut the side frame workpieces to final length. Note that in the Material List, the part lengths for the stiles include an additional 3/4″ to account for the coped joinery on their ends. Crosscut the door frame parts 1/8″ longer than listed for now. This way, you can trim the parts to final lengths when the doors are fitted to the cabinet’s exact opening.
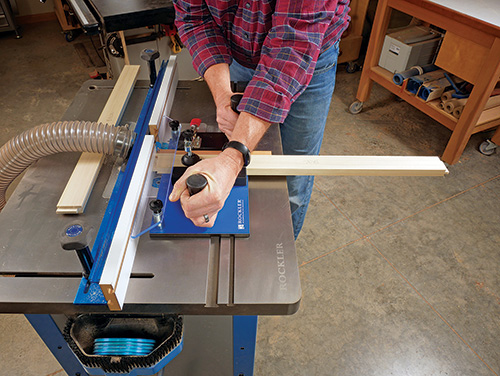
Replace the stile bit with the rail bit in the router table, and adjust it accordingly so its height matches the sticking profile you routed on the stiles and rails. Mill the cope profile into the ends of the side frame stiles. Leave the rail bit in the router table and set up as is, but don’t cope the ends of the door frame rails now. Set the door frame parts aside. You won’t need them again until much later in the building process.
Cut the side frame panels to size from 1/4″ plywood or MDF. Make sure they fit the panel grooves of the stile cutter snugly. Sand the legs and side frame parts up through the grits to 120. Go ahead and glue the rails, stiles and panels together to form two side frames. Don’t worry that the panels need to “float” in their frames. They can be glued in place, because they aren’t made of solid wood, so they won’t need to expand and contract seasonally.
When the glue cures, it’s time to install a side frame between each pair of legs. I used five 6 x 40 Festool Dominoes per side of each side frame for this task, but you also could use Rockler’s Beadlock loose tenons or even dowel pins, if you prefer. Whichever method you choose, lay out the position of the frames on the legs so they’re set 1/4″ back from the outer leg faces to create pleasing shadow lines here. Mill mortises or dowel holes for the joints in the legs and along the long edges of the side frames, and assemble the sides of the cabinet with glue and whichever loose tenon or dowel solution you’ve chosen. Clamp the side subassemblies to close the glue joints.
Assembling the Carcass
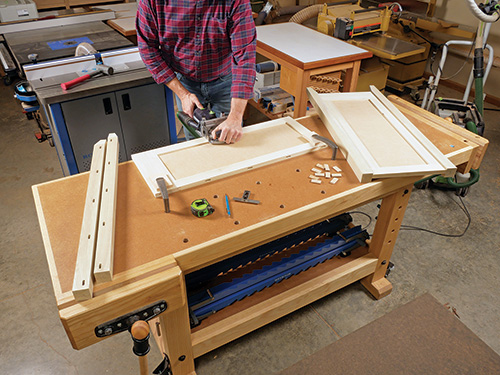
Next, rip and crosscut a pair of upper and lower front rails to size, and determine how you plan to install them in the cabinet. I used single 8 x 50 Dominoes for these joints and cut their mortises now. Position these parts so the top front rail will be flush with the tops of the legs and the bottom front rail aligns with the starting points of the taper cuts. These rails are also flush with the front faces of the legs.
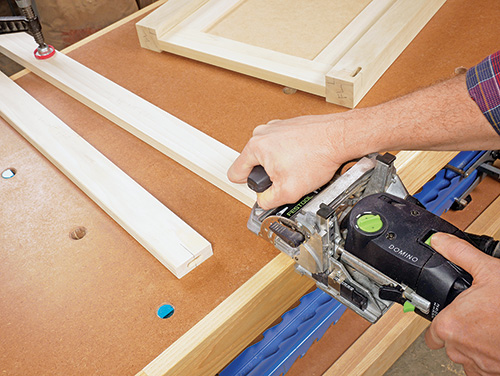
The back panel of this cabinet is made of 3/4″ plywood. You could also use MDF, but I opted for plywood because it’s much lighter in weight. Cut a blank for the back panel to size. A nice way to decorate a flat panel that will be painted is to add some V-grooves to it, simulating a traditional slatted back.
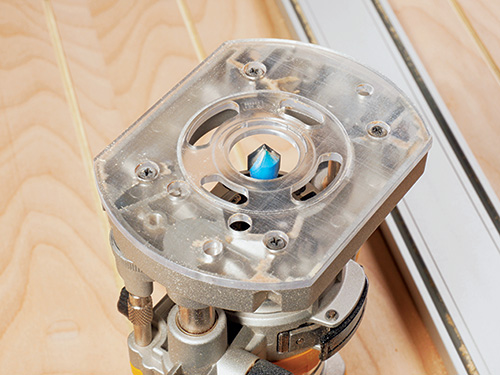
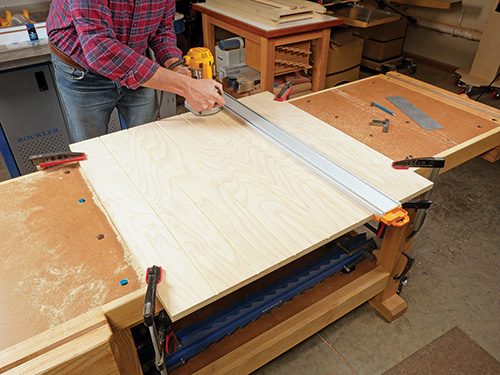
This back panel’s 32″ width makes those “slat” cuts easy to space apart at 4″ intervals. I laid out the pattern with a pencil and straightedge, then plowed 1/4″-deep grooves with a V-groove bit in a handheld router. If you do the same, guide the edge of the router’s subbase against a clamped straightedge to ensure the slat lines are perfectly straight and parallel with one another.
After that, I milled Domino mortises into the side edges of the back panel and followed with corresponding mortise cuts in the back legs. Position these so the back panel will be flush with the back faces of the legs. I also bored several screw pockets into the back face of the back panel to reinforce the long edge joints.
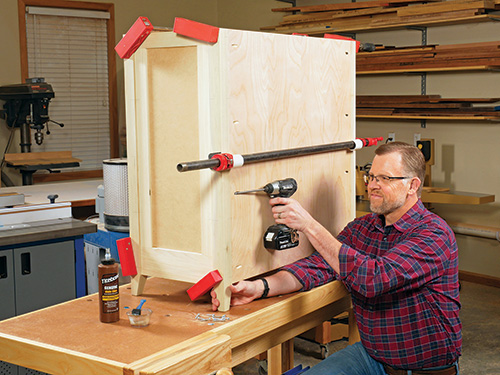
Finish-sand the back panel and sand the front upper/lower rails to 120-grit. Then dry-assemble the side frames, back panel and front rails to check the fit of these cabinet carcass components. While it’s clamped up, determine the range of settings for the cabinet’s two adjustable shelves, and mark the stiles of the side frames with shelf pin holes. I decided on seven holes, spaced 2-1/2″ apart, beginning 8″ down from the top of the side frames. Drill the shelf pin holes. Now, go ahead and glue and clamp the cabinet carcass together, making sure the overall assembly remains square when the clamps are tightened up. If you’ve added pocket screws to the back panel as I have, drive those 1-1/4″-long screws into place, too.
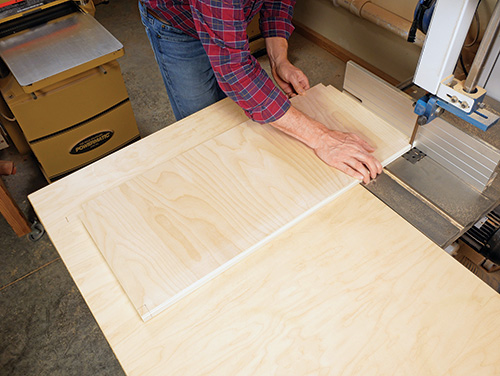
Next, cut a bottom panel to size from MDF or plywood. There’s a solid-wood edging strip that still needs to be glued to its front edge. This strip will hide the edge plies of the plywood or, if you use MDF instead, it will make the front edge of the MDF more abrasion-resistant. Make up this strip and glue it to the bottom panel’s front edge. Then lay out and cut notches in the four corners of the bottom panel so it will wrap around the legs. On all four corners, these notches should be 1″ deep where the bottom will fit against the back panel or bottom front rail but 3/4″ where it abuts the side frames. Sand the bottom panel smooth.
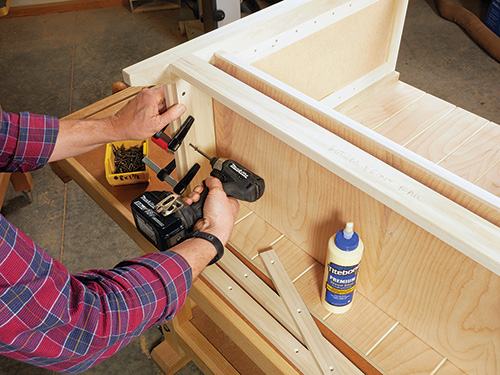
The bottom panel rests on two long and two short cleats, fastened to the bottom side frame rails, the bottom front rail and the back panel. Rip and crosscut these cleats to size from 3/4″ stock, and install them 1/4″ up from the bottom edges of the cabinet’s side and front bottom rails. The rear cleat installs flush with the bottom of the back panel. Glue and brad-nail or screw them into place, as you prefer. Then fit the bottom panel inside the cabinet on top of its cleats. Drive 18-gauge 1-1/2″ brad nails down through the bottom panel and into the cleats to secure it. Cover the nailheads with dabs of wood putty.
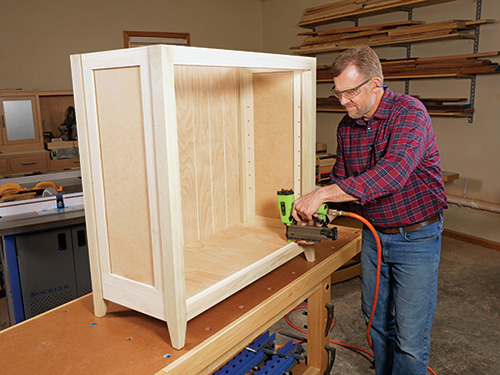
Next comes the top stretchers, so cut them to length and width. Notice in the Exploded View Drawing that the outside corners of the stretchers need to be notched to fit around the legs, so cut those 3/4″ x 1″ notches at the band saw or with a jigsaw.
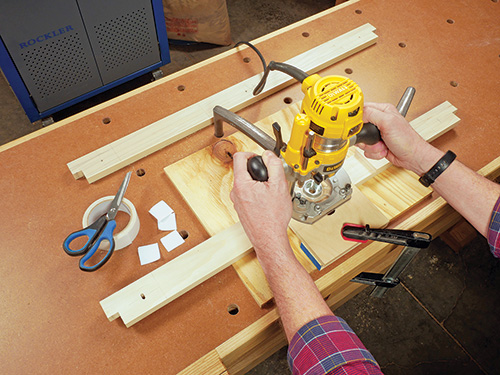
The cabinet’s top panel will need to expand and contract across its width with changes in seasonal humidity. To account for this, I routed three 3/16″-wide x 3/8″-long slotted holes through the front stretcher, orienting these holes perpendicular to the stretcher’s length. That way, the cabinet’s top panel will still be able to expand or contract when screws are driven through these slotted holes. (The rear stretcher, however, can have typical round screw pilot holes instead, in order to hold the panel stationary along its back edge.)
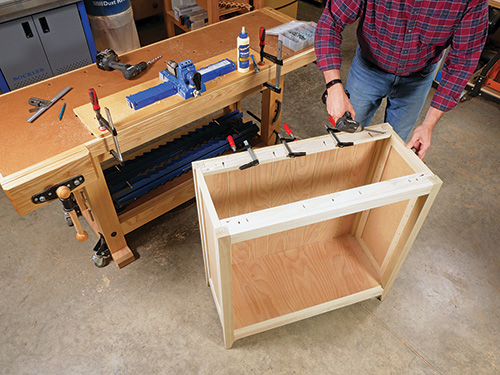
Drill a series of screw pockets into the top faces of the top stretchers so you can attach them to the top front rail and the back panel with 1-1/4″ pocket screws. Spread glue along the contact edges of the stretchers, position them slightly below the top edges of the cabinet and clamp them in place. Drive in the pocket screws to secure the stretchers. (The reason for positioning the stretchers slightly below the top edges of the cabinet is so the top panel installation screws will pull it down tightly against the cabinet when they are driven through the stretchers.)
Adding Shelves and Doors
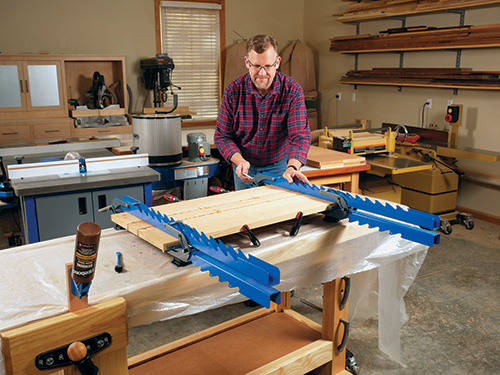
Glue up a panel of solid wood for the cabinet’s top panel. I used some clear cherry I had on hand, in order to contrast attractively with this cabinet’s sage-green painted finish and give the project some two-tone pizzazz. When the top panel’s glue joints cure, rip and crosscut it to final size, and ease its bottom ends and front edge with a chamfering bit in a handheld router. I sized these chamfer cuts to match the chamfered sticking profile on my rail router bit.
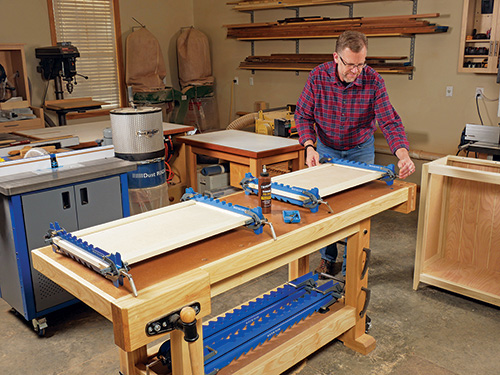
Next, make up the cabinet’s shelves from slightly oversized panels of solid wood. Again, I used cherry. When they come out of the clamps, rip and crosscut the shelves to final size. Notch all four corners so the shelves can fit around the inside corners of the legs, and test-fit them inside the cabinet with the shelf pins in place.
That leaves us with building the doors, so round up the door frame parts you made earlier. Determine the final length of the door rails, and crosscut them to size. When you make this calculation, keep in mind that it’s always better to start with doors that fit their openings tightly and trim or plane them to final size, rather than have the doors be too short or narrow for the cabinet opening to begin with. Head back to the router table so you can mill the cope profile into the ends of the door rails.
Dry-assemble the two door frames, and measure their interior openings for door panels. Cut two panels to these dimensions from 1/4″ plywood or MDF. Then finish-sand the rails, stiles and panels, and glue each door together.
When the doors come out of the clamps, carefully trim or plane them to final length and width. Allow for about 1/16″ of clearance between the top and bottom ends of the doors and the cabinet’s top and bottom front rails. Leave this same amount of spacing along the hinge edges of the doors and where the doors meet in the middle.
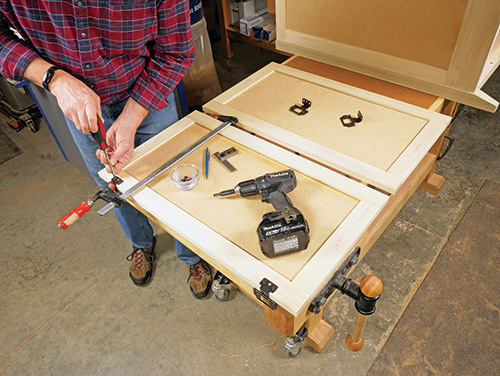
No-mortise hinges will make these doors easy to install. Start by attaching the bent “wrap-around” leaf of each hinge to the back of each door. I tend to align the top or bottom ends of hinge knuckles even with the inside edges of the door rails, as I have done here. Now lay the cabinet on its back and clamp a temporary spacer behind the top rail to act as a ledge so you can set the doors in the cabinet opening. Adjust them for even gaps all around. Carefully mark the locations of the flat “leg-side” hinge leaves on the inside leg faces. Then remove the doors and unscrew the hinges. Set the hinges into place on the legs, and mark the flat-leaf screw hole locations onto them. Fasten the hinges to the legs, driving a single screw into one of the slotted hinge leaf holes in each hinge for now. Attach the hinges to the doors again, and shift the hinges up or down on the legs to achieve an even gap above and below the doors. Once the gaps are dialed in, drive the rest of the leg-side hinge leaf screws.
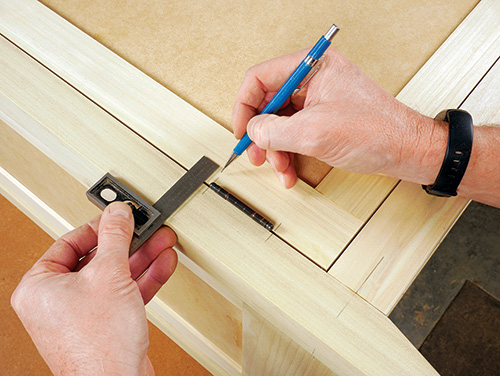
With the doors hung, add a door catch to each door. The magnetic catch hardware I used has a bent-steel receiver piece that mounts to the bottom edge of the upper front rail. The magnetic component fastens to the inside top back corner of each door with screws.
Finishing Up with Several Finishes
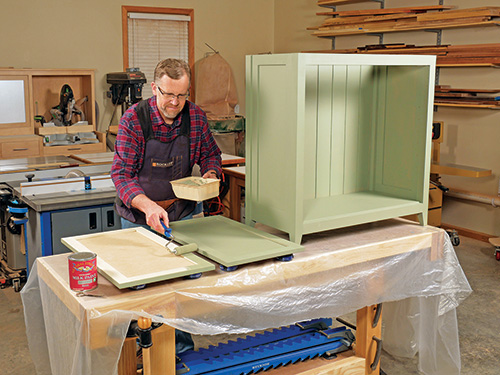
Remove the doors, hinges and catches to prepare for painting. I applied two coats of General Finishes Basil Milk Paint to the cabinet’s carcass and doors with a foam roller and brush. The top panel and shelf received three coats of General Finishes Enduro-Var II water-based satin urethane finish, also applied with a roller. Give the paint and clear finish at least eight hours between coats to fully dry.
To add even more protection to the painted areas, I rolled on a coat of General Finishes’ new Dead Flat topcoat.
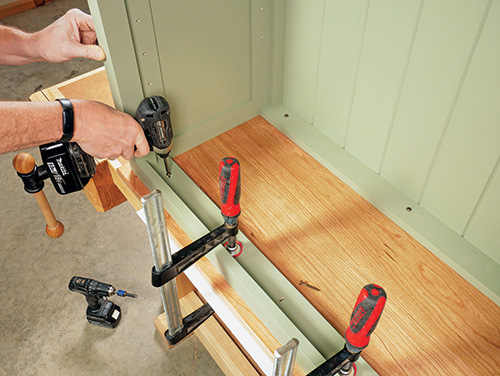
Once the finishing stage is behind you, set the top panel into place on the cabinet, adjusting it for an even 1″ overhang on the ends and front edge; it should be flush with the back of the cabinet. Attach it with wood screws driven up through the pilot holes in the back stretcher and the slotted holes in the front stretcher. I used 1-3/8″-long pocket screws here. Center the screws in the slotted holes.
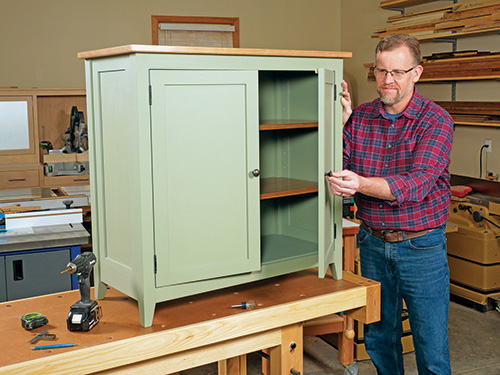
Your last task is to drill a through hole in each door for the knob hardware you’ve chosen. I centered mine on the lengths of the doors. Then rehang the doors in the cabinet on their hinges. Choose heights for the shelves inside, and install them with shelf pins. Mount the door knobs on the doors with machine screws to complete this helpful and handsome storage project.
Click Here to Download the Drawings and Materials List.
Hard-to-Find Hardware:
Oil Rubbed Bronze, Ball Tip, Partial Wrap-Around Hinge (2) #24720
Magnetic Catch For Inset Doors (2) #30546
Oil Rubbed Bronze Zachary Knob, 1-1/16″ (2) #52237


