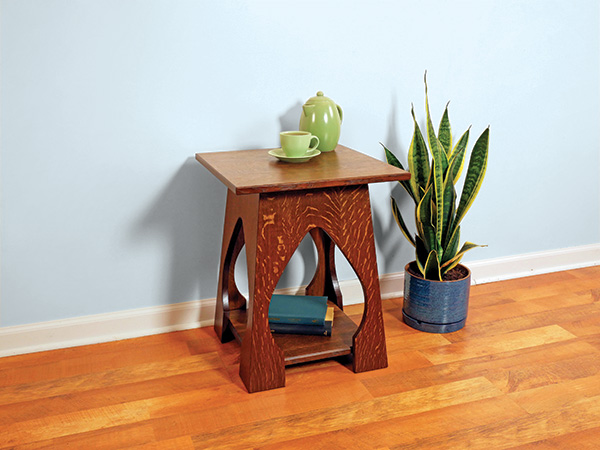
While this little taboret was a popular product coming out of the Roycrofters’ furniture shops back in the early 20th century, it doesn’t appear as a project plan very often these days. So we thought it was about time to offer our version with a unique cutout shape (an actual Roycroft taboret will have circular openings and no shelf). The table only requires about 15 board feet of 4/4 lumber, and you’ll have it built and finished in just a couple of weekends.
Preparing Six Project Panels
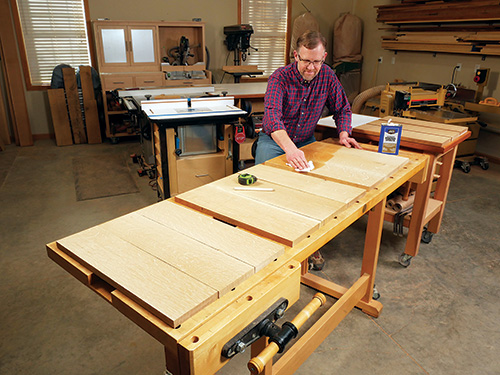
Select 3/4″-thick stock to make four side panels for the taboret’s base, plus a top panel and a shelf. If you go “traditional” and use quartersawn white oak as I have here, try to compose your panels with a fairly balanced ray flake pattern so no single board calls more attention to itself. Watch for lighter areas along the edges of the boards, which often indicate sapwood. Sapwood will fume or stain much lighter than heartwood and will stand out like a sore thumb along a panel’s glue lines. Glue and clamp each panel together. When that cures, plane or sand the seams flat. Rip and crosscut the six panels to their Material List dimensions. Then trim the four edges of the shelf to 6 degrees, sloping these cuts inward toward what will become its top “show” face. Wrap up your stock prep by finish-sanding all surfaces to 180-grit.
Building a Simple Sawing Sled
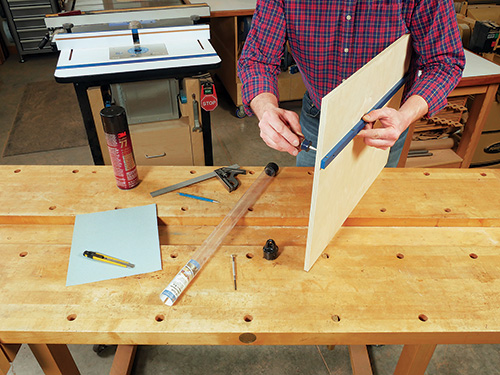
Because the taboret’s polyhedron base reduces from a 16-1/2″ square at the bottom to 11-1/2″ at the top, its four long vertical edges form compound bevel angles that will be challenging to cut without a purpose-built holding device. I settled on a simple sled that would enable me to rip those long angled edges by laying a panel on top, holding it in place and pushing the sled and workpiece through the cut. My sled consists of a 24″-long runner that fits in the saw table’s miter groove and is mounted to a piece of 18″ x 24″ scrap sheet stock. I used Rockler’s Aluminum Miter Bar for the sled runner. If you’d rather use a shop-made equivalent, a strip of 3/8″ x 3/4″ dimensionally stable hardwood would also work.
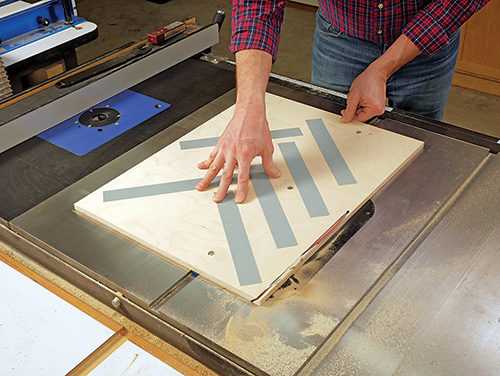
Fasten the sheet stock to the runner so there’s sufficient overhang on the left side of the runner to engage with the saw blade when it’s tipped to 45 degrees (assuming your saw is left-tilt). Then trim that near edge of the sled to this angle along its full length. Now you have an accurate way to align the taboret’s side panels with the blade for cutting those long beveled edges precisely. Apply several strips of coarse sandpaper to the top of the sled with spray-mount adhesive to ensure that the panels won’t shift during cutting. I’ve found that sandpaper substitutes well for hold-down clamps here.
Coloring the Wood “Old School” Style with Fumes
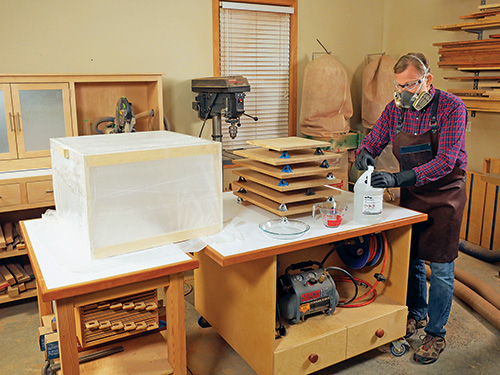
Ammonia fuming is a traditional finishing approach for Arts & Crafts furniture. And because this taboret is a small project, I thought it’d be an excellent opportunity to get out my jug of 25-percent (lab grade) ammonia and give it a fumed finish. Ammonia fumes will stain tannin-rich woods like white oak a dark gray/brown color. While 3- to 5-percent strength household ammonia will eventually fume oak, a stronger concentration is advisable to reduce the amount of time the reaction will require from a week or two to just a couple of days.
Angle-cutting the Side Panels
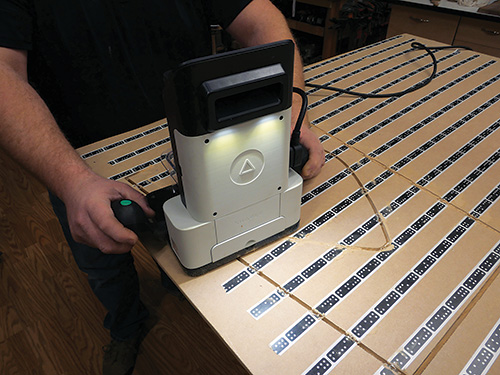
When our magazine staff designed this taboret, we created a “master” MDF template for the angled base pieces and the shaped center cutout. Rockler soon will offer this full-size template for sale in cardboard or MDF options. Or you can enlarge the drawing on the next page with a photocopier or reproduce it by plotting points on a full-size grid if you’d prefer to make your own template instead of buying one. Either way, you’ll need the template in order to proceed with this project.
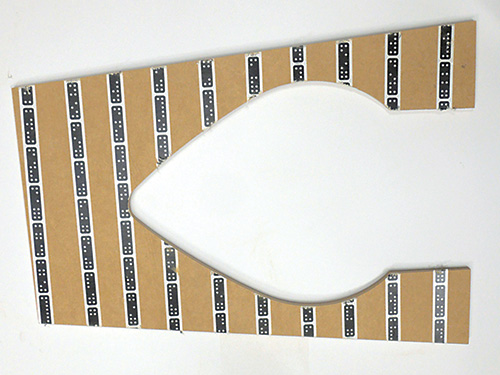
To prepare for cutting the long bevel angles on the side panels, I traced the template’s shape onto them and marked their faces as “Outside” and “Inside.” Then, using a combination square, I marked the top and bottom ends of the panels with 45-degree layout lines on bright green painter’s tape to indicate where the blade would need to enter and exit each cut. (Be sure to arrange these layout lines so the cuts will angle toward the inside faces of the panels.)
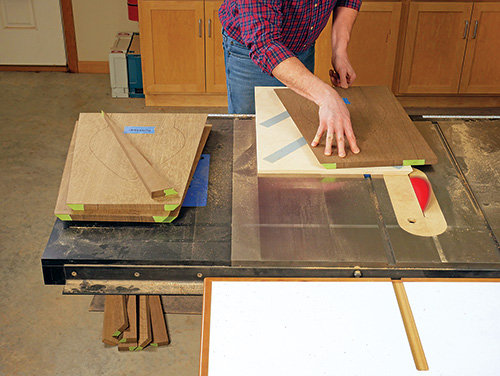
With your saw blade tilted to 45 degrees, rip the first bevel angle by placing a side panel on the sled — inside face down — and lining up the layout lines on its top and bottom ends with the sled’s sharp edge adjacent to the saw blade. Press the panel down firmly against the sled and make the bevel cut in one long pass. Then, spin the panel around to its opposite long edge (inside face still down), align the cutting layout marks and cut the second bevel.
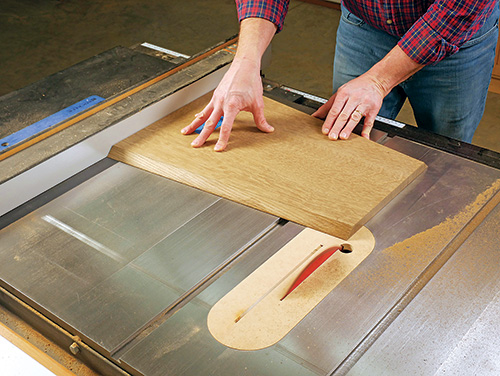
Once those cuts are done, there’s still the matter of cutting the top and bottom end of each panel so they’ll tilt inward, stand flat and create a flat top surface for the taboret’s top panel. Tilt your saw blade to 6 degrees. To make these cuts, I set and locked my rip fence so the blade would just cut across the ends but not shorten the panel lengths in the process. It’s important to keep the orientation of the panel faces in mind when making these cuts — the cut ends need to end up parallel with one another. So, when cutting the long bottom end, orient the panel with its outside face up. Then flip the panel so the inside face is up before trimming the shorter top end.
Tips for Gluing Up the Base
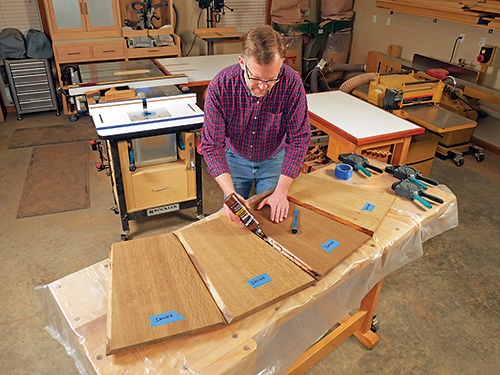
While it might be tempting to cut out the inside shapes of the side panels now, don’t do it yet. It would be difficult to reinforce the long edges of these compound-bevel joints with biscuits, dowels or Dominoes. So I decided to simply glue them together instead — they’re basically long-grain joints. Considering that they’re also very long, I wanted to make sure they’d close tightly all along their length. That’s why I left the cutout areas intact: full panels would enable me to apply maximum pressure across the joints with strap clamps.
On this tapering polyhedron shape, strap clamps will tend to creep upward when tightened. To prevent that problem, I installed three scrap blocks on each side panel — two in the cutout area with screws and one above it, adhered with CA glue to wide painter’s tape. With the clamp straps located underneath these blocks, they would stay put when tightened.
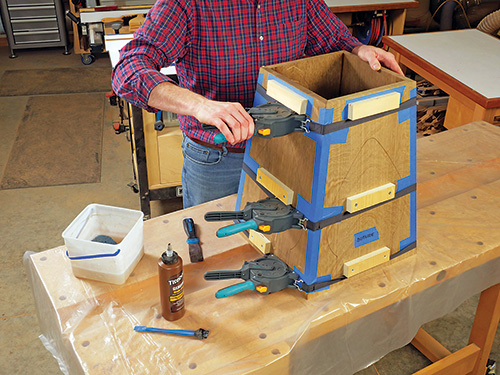
To assemble the base, I set the panels outside face up and together, edge-to-edge, in order to apply a strip of wide painter’s tape along each bevel joint to act as a temporary “hinge.” Flipping the whole assembly over, I could then spread hide glue along the panel edges, fold them closed on their tape hinges and install three strap clamps to pull the assembly together tightly. (Hide glue provides much longer open time than PVA glue, which can really help!) When the clamps come off the base, break the sharp edges of the bevel joints with a sanding block as needed.
Creating the Cutouts
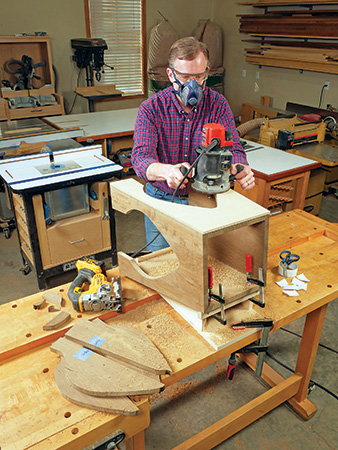
Now we can tackle those decorative cutout shapes in the base. To do that, use a jigsaw set to no oscillation and a fine-tooth woodcutting blade to remove the waste piece in the cutout area. I split mine up the middle first, then sawed out the halves to make the waste pieces smaller and easier to manage. Cut about 1/16″ inside the layout lines of the shape. Then fix your template in place with pieces of double-sided carpet tape, and template-rout the cutout profile using a handheld router equipped with a piloted pattern bit with spiral or straight cutters. Sand these cut edges smooth on a spindle sander or using sandpaper wrapped around a large-diameter dowel.
If you’ve fumed these project parts as I have, you may find that the fuming process only penetrated into the edges of the wood by 1/8″ or so, and the unfumed oak may appear as much lighter grain along the routed edges of the cutouts. No worries! Just put the base back into your fuming tent for another eight to 12 hours; the ammonia fumes will even out the mismatch in coloration without significantly darkening the rest of the fumed wood in the process.
Installing the Top and Shelf
Glue blocks have been used to reinforce wood joints for centuries, and they’ll serve a two-fold purpose here: they’ll strengthen the bevel joints of the table’s base while also providing attachment points for the top panel and shelf. I made up eight triangular-shaped glue blocks from a long piece of 3-1/2″-wide, 1″-thick white oak scrap. The short legs of each of these right triangles needs to be bevel-cut to 6 degrees. I accomplished that by first bevel-ripping one long edge of the scrap to 6 degrees. Then, with the saw blade still tilted and using my miter gauge, I trimmed the adjacent end of the scrap to 6 degrees as well. From there, I could slice off the glue block at the miter saw, with the blade swiveled to 45 degrees, to form the hypotenuse of the triangle. Each glue block received a pair of pocket-screw holes bored into the wider face and pointing toward the short legs of the triangles. I also drilled a countersunk screw hole through each block near its center. I fumed these blocks so they’d match the rest of the project and to prepare them for use.
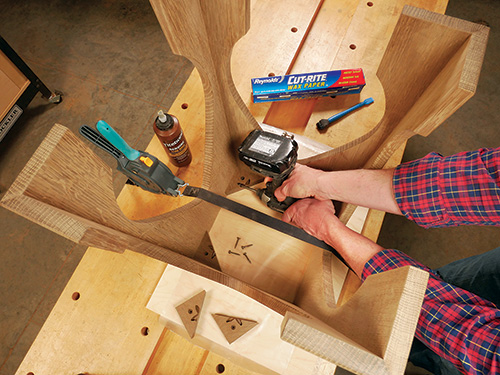
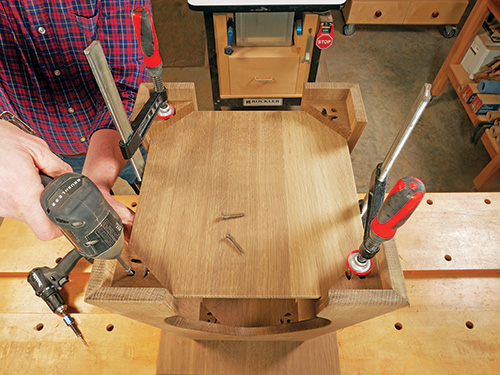
With the table base inverted, install four of the glue blocks inside each of the top corners of the base with glue and 1″ pocket screws. After those are in place, attaching the top is a simple matter of positioning the inverted base on the panel’s bottom face, centering it evenly and driving four #8 x 1-1/2″ flathead wood screws through the glue blocks into the top panel.
The shelf will rest on the other four glue blocks. To position those, I drew a pair of layout lines inside each bottom corner of the base, 2-3/4″ up from the feet and parallel to them. Now set the shelf into place in the base. It should fit about 3/4″ farther inside than the glue block layout lines. Leave the shelf in place while installing the four glue blocks beneath it with glue and pocket screws. Then attach them to the shelf with four 1-1/2″ screws.
Finishing Up with a Three-step Finish
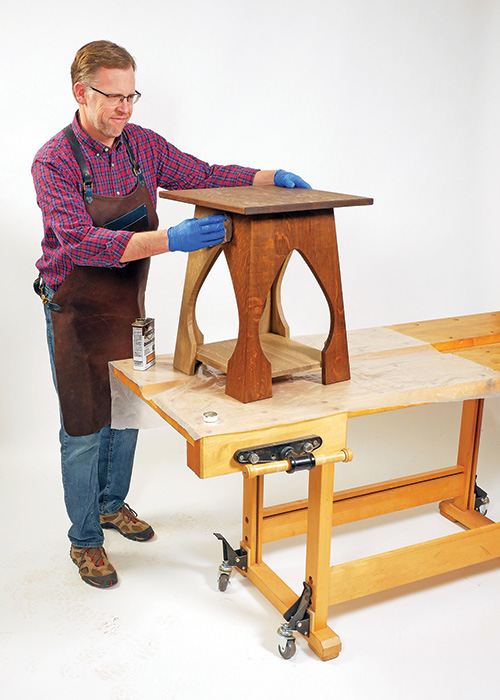
A simple wipe-on oil/varnish blend such as Watco, or one you mix yourself from equal parts boiled linseed oil, mineral spirits and polyurethane, will darken this fumed oak to a lovely chocolate-brown color without requiring any stain. I applied a heavy coat to the entire project with a rag, let it soak in for 10 minutes or so, then wiped off the excess with dry shop towels. The next day, I followed with a coat of shellac to help enhance the wood’s figure. Several light coats of spray lacquer came next, to knock down the glossiness of the shellac and give the taboret a satiny, low-luster sheen.


