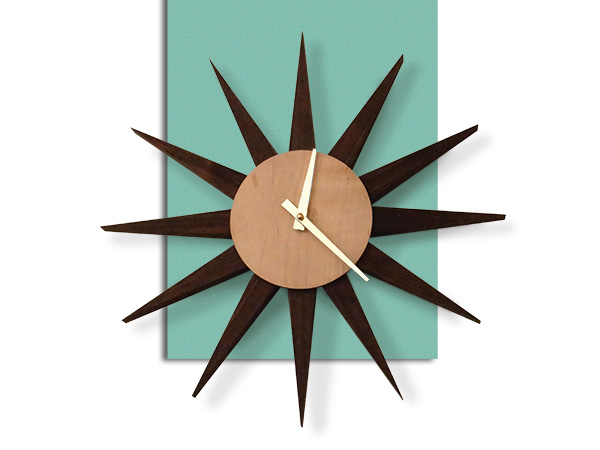
Outer space, and all of its futuristic promise, influenced Mid-century Modern design. And clearly, folks of that time period appreciated its celestial shapes, because if you do a web search for 1950s starburst clocks, you’ll find oodles of eclectic variations on this theme. When I shared my idea for this Retro Starburst Clock project with senior editor Chris Marshall, he immediately recalled the massive version of one that hung on the paneled wall in his grandparents’ living room. Made of steel with an array of scary-sharp points, he says if it had fallen off the wall unto the couch below, any unsuspecting person who happened to be seated there would have suffered some painful collateral damage.
Well, at a more modest 14″ across, my wooden version of this iconic timekeeper is much smaller and friendlier to handle than that metal relic he remembers. It’s also lots of fun to build. If you’ve got a band saw, router table and a tapering jig that works on either your table saw or band saw, this clock could be hanging on your living room wall and marking the hours after just a day or so of time in the shop.
Material Choices
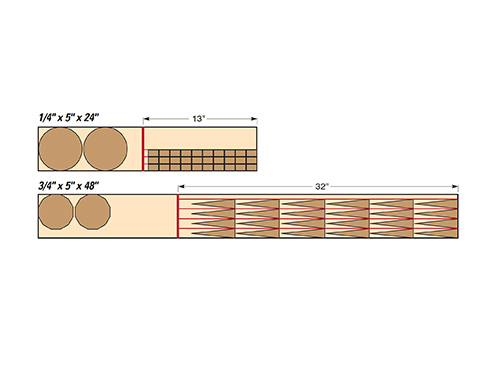
If you look at the Materials List, see that this clock has just four types of parts: a 1/4″-thick face, a 12-sided body piece behind it, a dozen pointed rays and loose tenons that connect the body to the rays. I made the face and body pieces from scraps of maple and the rays and tenons from walnut.
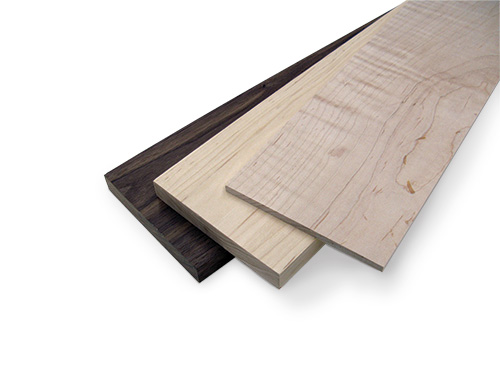
I like the contrasting wood tones, and the blonde-colored maple also makes the various pencil lines you’ll need to follow during the building process much easier to see. The project requires very little wood overall. If you’d rather use one wood species for the whole project, just two boards in the sizes shown above are enough to make two complete clocks.
Making a Template, Routing Jig
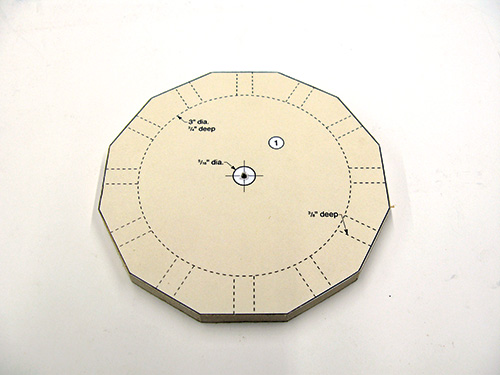
The trickiest part of building the clock is accurately routing slots in the body piece for the loose tenons. To do that, we’ll use a simple routing jig that registers and holds the body piece. And to make sure that the clock body fits into the jig properly, I’ll recommend that you first make a body template. You can find a copy of the template as a PDF at the bottom of this article. Cut out the paper pattern and adhere it to a piece of 1/4″ MDF or scrap with spray adhesive. Then very carefully cut out and sand the 12-sided template to shape.
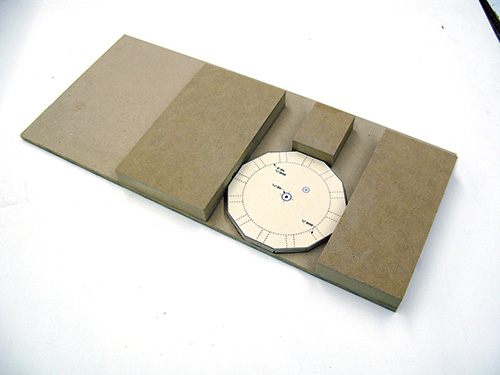
Now make a routing jig that looks like what’s shown below, using the template to locate the jig’s three support blocks accurately. I made my jig from a 6″ x 14″ piece of 1/4″ MDF for the base and three scraps of 3/4″ MDF for its blocking. The jig should fit around the clock body snugly so you can rotate it for routing the tenon slots but also hold it securely in each position.
Forming the Clock Body
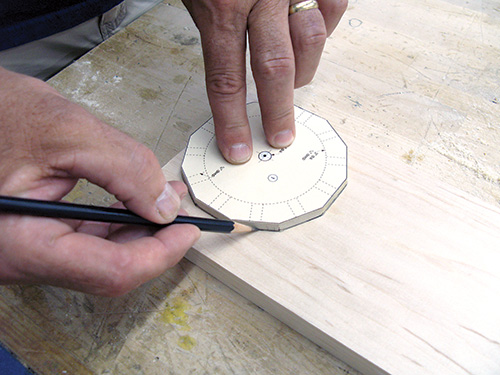
Next, use the template to trace the clock body onto your 3/4″ stock, and mark its centerpoint (I used a scratch awl driven into a tiny hole I drilled through my template).
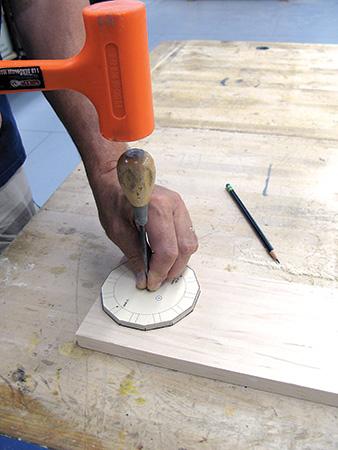
Align one side of the template flush with a squared end of your board and another side to the board edge before tracing the shape — it’ll take care of two of the body’s flat sides immediately.
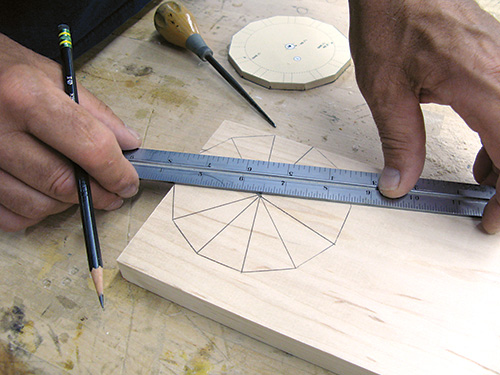
Then draw six lines across the body through the centerpoint, dividing the shape into 12 matching pie-shaped wedges. These layout lines will provide accurate references when sanding the body to final shape.
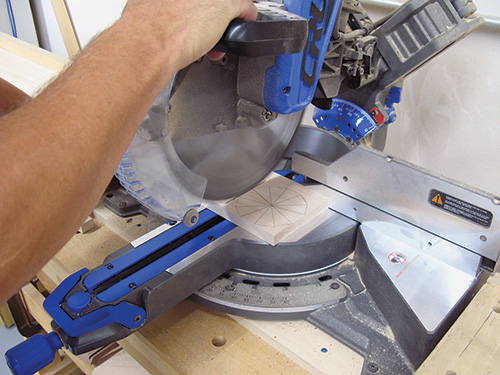
Once those lines are drawn, head over to your miter saw or table saw to slice the body off of the board with a square crosscut to define a third side of the shape.
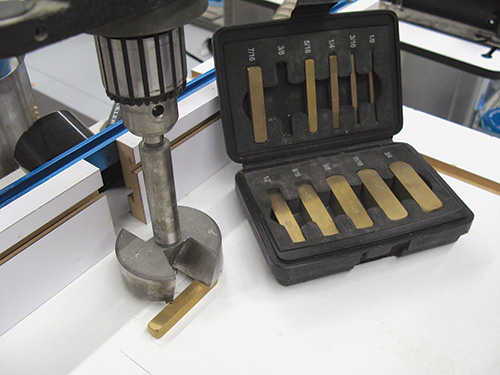
The clock’s quartz works will recess into a 7/16″-deep, 3″-diameter hole in the body’s back face. I installed a Forstner bit on my drill press for this step. I like to use my brass setup bars whenever possible, and here was a chance to put them to good use for setting the drilling depth. Slipping the 5/16″ bar size under the bit and lowering the bit until it touched the brass bar, I could lock the drill press depth stop, knowing that my drilling depth would be 7/16″ (3/4″ minus 7/16″ equals 5/16″).
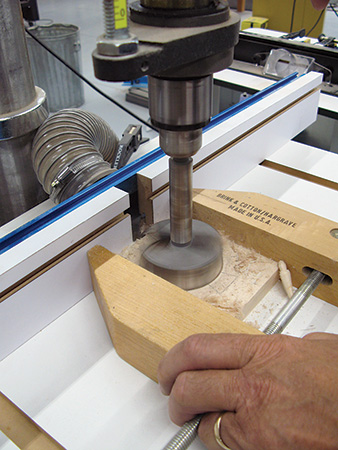
With that dialed in, I secured the body blank in a large wood screw clamp so I could hold it safely during drilling. After carefully lining up the Forstner bit’s centerpoint with the body blank centerpoint, I slid my drill press fence up against the back of the clamped blank and locked it in place.
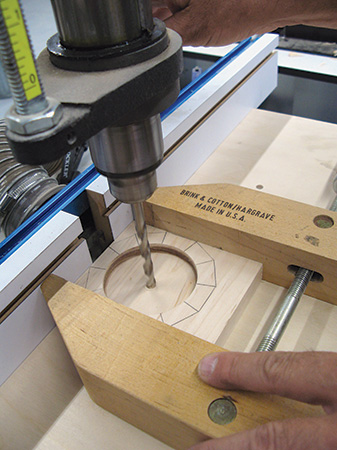
Once that was done, I bored the hole at a slow speed so the big bit could cut the recess cleanly. Without changing the fence setting, I then switched to a 5/16″-diameter brad point bit to drill a hole through the body’s centerpoint for the clockwork’s shaft to pass through.
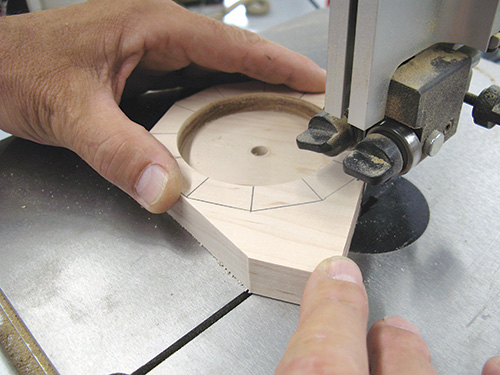
When you’re done drilling, you can unclamp the body workpiece. Take it to your band saw and, cutting just outside your layout lines, remove the remaining waste to form the other nine sides of the shape. When you do this, I’ll strongly suggest you don’t attempt to make these final cuts right up to the body’s perimeter layout lines. If you happen to accidentally cut one or more of these sides a bit too short, the body will fit too loosely in the jig during routing, and the tenon slots won’t be correctly centered on the sides.
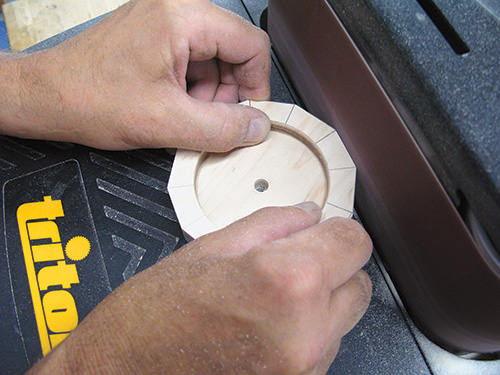
Instead, this is where your disc sander or stationary belt sander can come in very handy for refining the body shape. Working carefully, sand opposite sides until you’re splitting the outer layout lines.
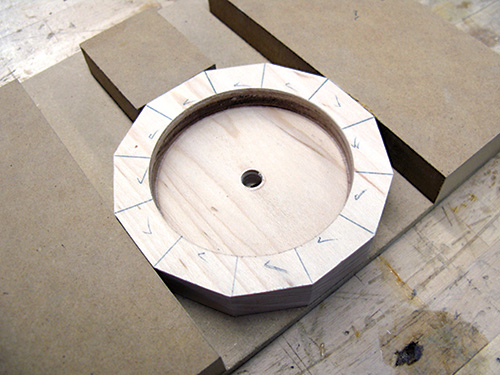
Be very careful not to sand too far; try to insert the body into your routing jig periodically as you sand opposite faces. You want the body to fit into the jig snugly so it doesn’t move. When pairs of sides fit into it well, pencil a check mark onto them to note your progress. Sand all 12 sides this way.
Ready for Routing
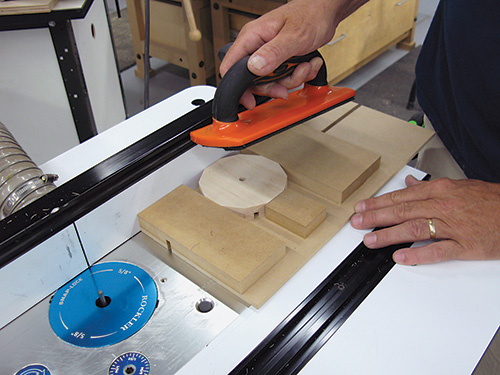
Prepare your routing jig for use by installing a 1/4″ spiral bit in your router table and setting the fence 1-7/8″ away from the bit. (This will center the tenon slots on each side of the body.) Then pass the jig along the router table fence to cut a slot through its base and blocking. Your goal is for the bit to cut 3/8″-deep tenon slots into the clock body at the bit’s final height. But to save wear and tear on the bit and to minimize tearout on the jig, cut its slot in two or three passes of increasing depth.
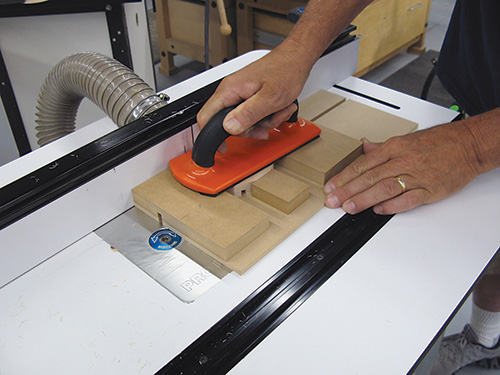
When the jig’s slot is finished, install the clock body in the jig with its back (recessed) face down, and rout the first two slots. Use a push pad to protect your fingers. Since these are “blind” cuts, feed the jig slowly over the bit so it can pass through both walls of the clock body without chipping the area around the slots as it enters and exits. Repeat this process five more times, repositioning the clock body in the jig each time, to cut the remaining 10 slots into it.
Creating the Rays
Follow the Material List to prepare a dozen blanks for the clock rays, plus a few extra to serve as test pieces.
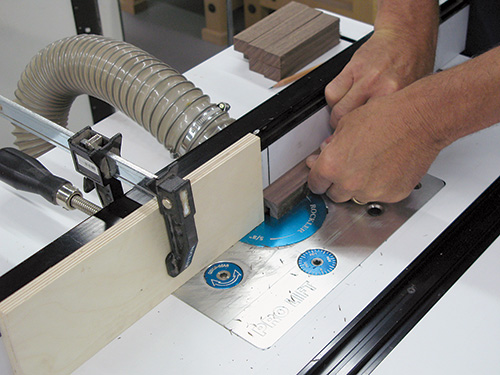
Head back to your router table to reset the fence for cutting a centered 1/4″- wide, 3/8″-tall tenon slot into one end of each ray. I clamped a stop block to the router table’s fence to limit the length of these cuts; I made my slots 5/8″ long. Test your setup on a scrap ray to make sure the slot is nicely centered on its width, and make any fence adjustments that are necessary. When you’re satisfied, mill slots into all 12 rays.
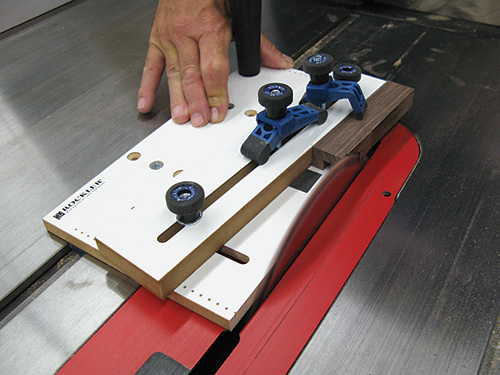
With that work completed, you can now slice the rays into their pointed shapes with two cuts on a tapering jig. (I used my table saw for this operation, but you could also use a band saw if you prefer. Either option will work fine, depending on your tapering jig style.)
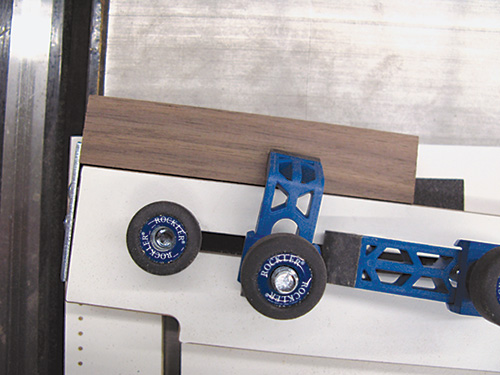
Mark both faces of a scrap ray with the taper angles, and adjust the fence on your tapering jig to support the first angled cut. Here, the fence is flush against the uncut side, and the slotted end of the ray blanks face down and forward in the jig.
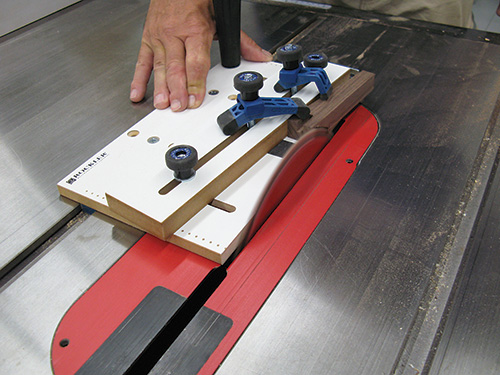
Once those first cuts are done, however, the second taper cut involves flipping the rays over so the tenon slots face up. At this point, the workpiece is too narrow on its back end to rest against the jig fence without also cutting into the metal backstop found on most tapering jigs. So you’ll have to rely on the pressure of your jig’s clamps to hold the blanks securely for the second pass. If you are uncomfortable making these second taper cuts this way, you could cut them freehand at the band saw instead, using a push stick to support the parts while keeping your fingers out of harm’s way.
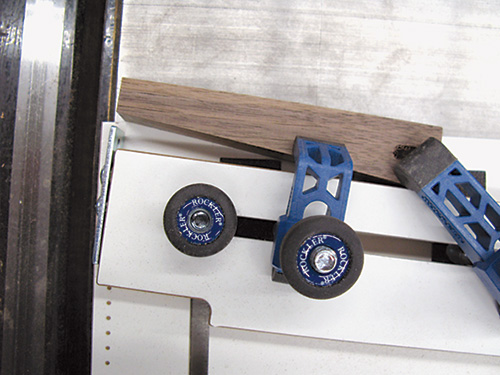
Now sand the rays up through the grits to smooth their edges and remove saw marks. Then go ahead and cut a dozen tenons to fit the slots. Draw a round clock face onto your 1/4″ stock with a compass, cut it round and drill a 5/16″ hole through its center. Sand the clock face and body up through the grits until smooth.
Final Assembly
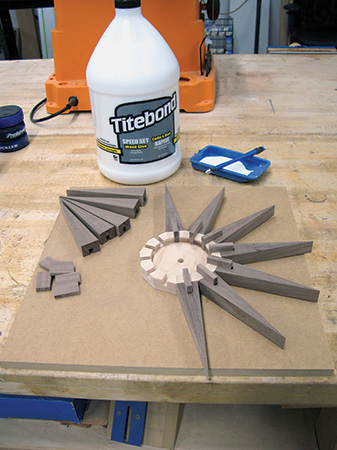
Assembling your clock is easy. Set the rays in position on the body, spread glue in the tenon slots and press the tenons home; they’ll stand proud of the clock back by 3/8″. When the joints dry, flip the clock over and glue on the face. After that was done, I applied two coats of a wipe-on finish to all the clock’s surfaces and let it dry thoroughly.
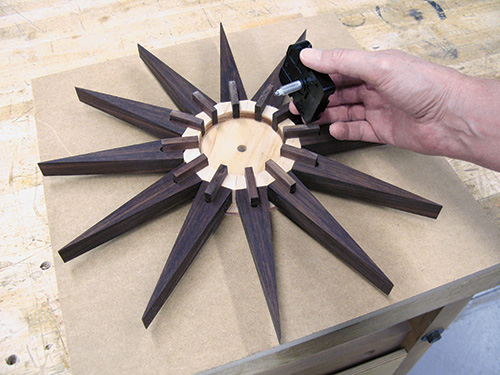
The last step, of course, is to install the clockworks on the body and attach the hands to the shaft. Then find a prominent spot above your couch to enjoy this timekeeping blast from the past.
Click Here to Download the Drawings and Materials List.
Hard-to-Find Hardware:
Walnut by the Piece, 3/4″ x 5″ x 48″ (1) #30922
Maple by the Piece, 3/4″ x 5″ x 48″ (1) #35385
Soft Curly Maple by the Piece, 1/4″ x 5″ x 24″ (1) #32892
Mini Quartz Movement 5/8″ Max Face Thickness (1) #28365
Clock Hands, Tapered, Gold 3-3/8″ (1) #60959


