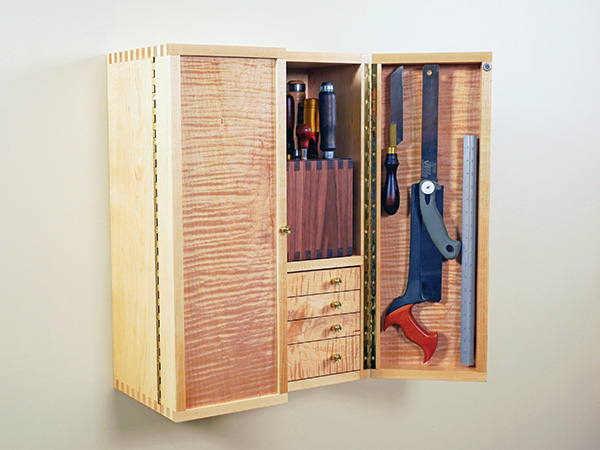
Precision measuring and marking tools, such as your trusty squares and various gauges, deserve a protected storage place when not in use. So do your fine-toothed handsaws and French curves or other layout tools to keep their edges and teeth in tiptop shape. That’s why I thought a special wall-mounted, double-door cabinet would be just the right home base for my “fine” tool collection. It has four shallow drawers, three of which are lined with foam organizers for those tools that don’t hang easily. Each door pocket holds larger but lightweight items with rare earth magnets, so they’re easy to see and simple to access. And while my cabinet has two racks of chisels in the large upper compartment, you could outfit this area however you like. For instance, a till for your hand planes might better suit your storage needs.
I had some curly maple boards left over from another project years ago, so I’m putting that beautiful material to use here as showy door panels and for the four drawer faces. The rest of the cabinet is mostly made of hard maple, 1/2″ plywood and 1/4″ MDF. But of course, feel free to use any solid wood or sheet stock that suits your tastes and budget for this project.
Building the Carcass and Doors
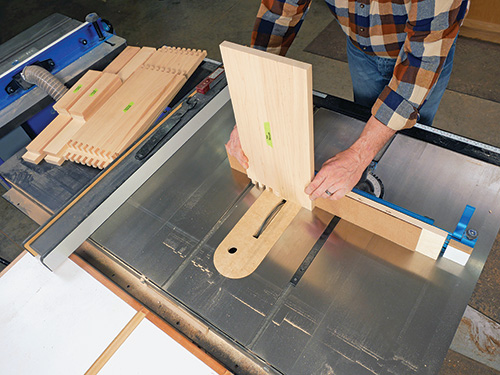
Let’s get this tool cabinet build underway by first ripping and crosscutting stock to size for the carcass top, bottom and sides, according to the Material List dimensions. Then rip stock to width for the four door rails and four stiles, and crosscut them to length.
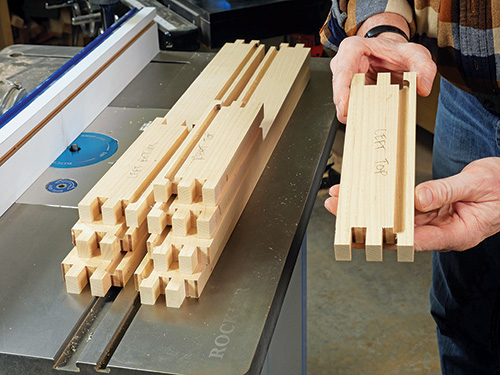
Next, cut 1/2″-wide, 3/4″-deep box joints into the carcass parts and door frame workpieces. You can carry out this joinery operation on the router table or at the table saw with a 1/2″-wide dado blade and a shop-made or commercial box joint jig. Notice in the Exploded View Drawing that the box joint pattern is unbroken from the back of the cabinet to the front of the doors. Both long edges of the carcass side panels have pins, but the door stiles have slots on either edge instead. Plan these box layouts carefully before cutting them.
With that joinery behind you, plow 1/2″-wide, 1/4″-deep grooves on the inside faces of the carcass top, bottom and side panels for the back panel. Locate these grooves 1/2″ in from the back edges of the parts. These grooves can run the full length of the side panels but must start and stop 1/2″ in from the ends of the carcass top and bottom panels so the grooves won’t show when the box joints are assembled.
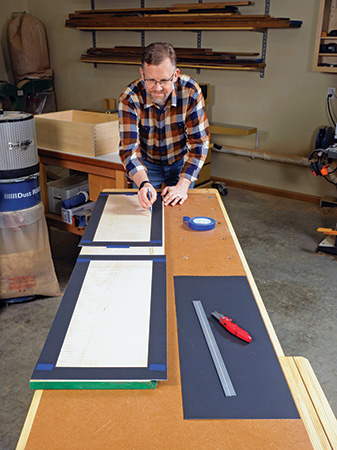
Switch to a 3/8″-dia. spiral or straight bit to rout 1/4″-deep grooves on the inside faces of the door frame parts for the door panels. Position these grooves 1/4″ in from what will be the outside “show” edges of the door frames. For this operation, both the rail and stile grooves must stop short of the part ends in order to be concealed when the door frames are assembled. Square up the ends of these grooves with a chisel.
Go ahead and plow dadoes across the carcass sides for the divider panel. Locate them 9-1/16″ up from the bottom ends of the pieces so the drawer compartment below the divider will be 8-5/16″ tall in the completed project.
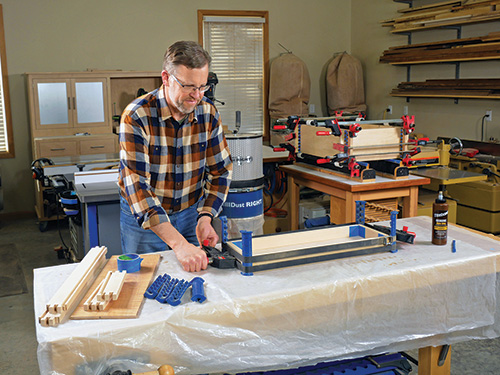
It’s time to dry-fit the cabinet carcass and door frames to double-check the dimensions of the back panel and door panels. Cut a plywood back panel to length and width. Then prepare two 3/8″-thick door panels from solid wood. Here’s a great chance to use some highly figured or book matched stock to give this tool cabinet some real curb appeal! Cut these panels 1/16″ narrower than a tight fit in the door frames to allow for seasonal crossgrain wood movement. This is particularly important if you’re building this project during the winter and the relative humidity is low.
Now dry-fit the cabinet’s top, bottom, sides and back panel together to verify that the box joints close completely and the back panel fits correctly. Do the same for each door frame with the door panels installed.
Take some time to finish-sand the cabinet and door parts you’ve made so far. Apply a coat of finish to the door panels now while their faces are fully accessible. Then glue up each of these three assemblies — the carcass and both doors — using clamps and cauls to close the joints. You can glue the back panel into its grooves. But be sure the door panels can float freely in their frames unimpeded by glue so they can expand and contract across the grain. I used Titebond Liquid Hide Glue for these glue-ups. It offers long open time for stress-free assembly, and any dried squeeze-out can be scrubbed away with water.
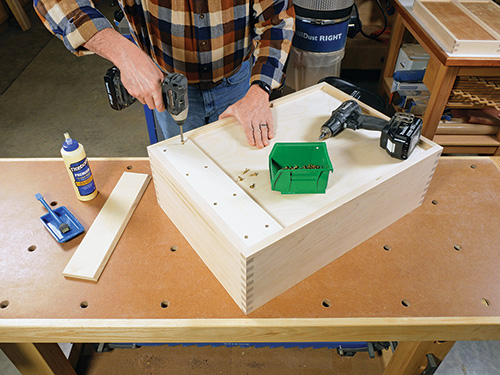
When the cabinet carcass and door frames come out of the clamps, clean off any residual glue and sand or plane the corner joints flush, as needed. Then make up a pair of French cleats — one for the cabinet and one to fasten to the wall. Either scraps of 1/2″ plywood or solid stock will work fine for these cleats. Bevel-rip one edge of each to 45 degrees; these edges will mate together when the cabinet is installed. Glue one French cleat to the top back of the cabinet, with its beveled edge facing down and in toward the back panel. Reinforce this glue joint with #8 x 3/4″-long flathead wood screws driven into countersunk pilot holes.
The last component to make on the carcass for now is a divider panel. Rip and crosscut it from 3/4″ stock, and test-fit it in its dadoes in the cabinet. Don’t glue it into place yet; we’ll do that after the drawers are hung to make their installation easier.
Making the Drawers
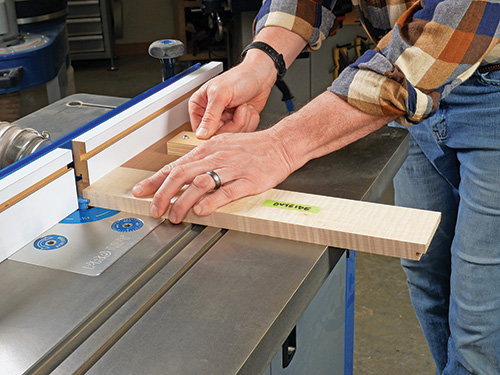
This cabinet’s drawers are inset style, with drawer faces that also serve as the front panels of the drawer boxes. Drawer lock joinery is a good machining option for drawers like these, because it creates an overlapping tongue on the drawer face to hide the end grain of the drawer sides. To learn how to set up and rout these joints.
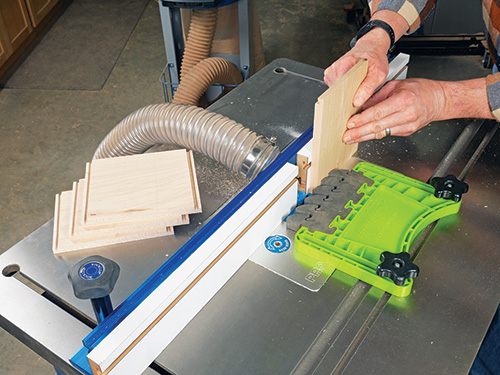
Prepare enough 3/4″-thick stock for the four drawer faces and 1/2″-thick material for the drawer sides and backs. Because the widths of the drawer parts are so narrow, it’s a good idea to machine their drawer lock joints on wider stock, in order to maintain stability during routing. So, I sized the width of my drawer component workpieces wide enough to yield several parts from each workpiece. That way, I could rout the joinery first, then simply rip the parts free and to final width afterward. Carefully measure and cut the drawer faces, sides and back workpieces to final length. Once the drawer lock joints are routed, it won’t be possible to adjust the drawer part lengths without also ruining the corner joints. Go ahead and mill the profile on both ends of the drawer fronts, then repeat these cuts on the drawer backs, using the same bit setup.
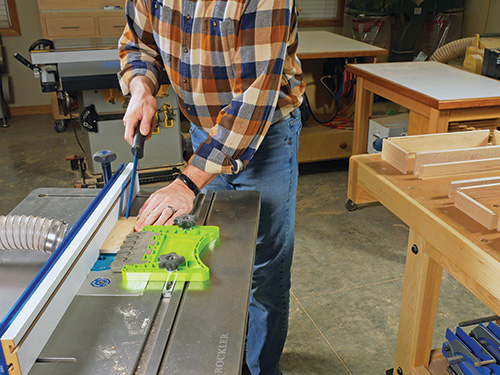
Change the fence setting so you can mill the corresponding drawer lock profile into the inside faces of the drawer sides. Once you’re done with that step, rip the drawer faces, sides and backs to final width.
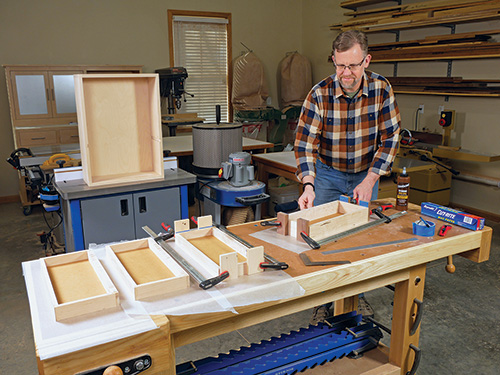
Switch to a 1/4″-dia. straight bit or an undersized plywood-cutting bit, depending on the drawer bottom material thickness you will be using for these drawers. Set the bit’s height and projection out from the fence to 3/16″. Plow the drawer bottom grooves along the full length of the drawer faces and sides.
Next, dry-assemble one of the drawers so you can measure between the grooves to verify the final dimensions of the drawer bottom workpieces. Cut four drawer bottoms to size from 1/4″ plywood or MDF. Sand the drawer parts up through the grits to 180, then glue the four drawer boxes together.
Hanging the Drawers
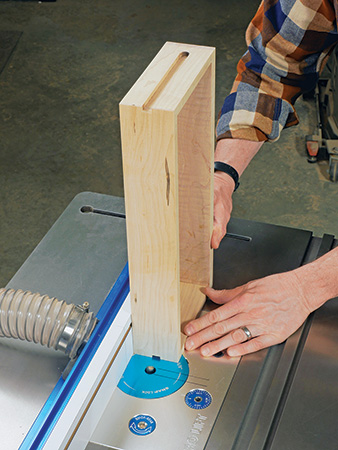
Notice in the Exploded View Drawing that this project’s drawers hang on simple shop-made drawer guides. They’re a classic solution, especially for light-duty drawers this small. We’ll plow a stopped groove on both sides of each drawer to fit the drawer guides using a 1/2″-dia. straight or spiral bit in the router table. Install the bit and raise it to 1/8″. Adjust and lock the router table fence 7/8″ away from the center of the bit to rout the drawer guide grooves in the three narrower drawers first. Mark the cutting limits of the bit with a strip of tape on the router table to tell you where to start or stop the cuts.
The goal for these grooves is that they are aligned horizontally, parallel with one another across each drawer and centered on the widths of the drawer sides. Their lengths should also match, at 6-1/2″, stopping short of the drawer faces by 1″. Mark their length on the top or bottom edges of the drawer so you can see them clearly as you rout. Then plow both grooves on each drawer, standing the drawer upright on the side being routed and feeding it along the router table fence. Make a pair of groove cuts on all three shallow drawers, then raise the bit to 1/4″. Repeat the groove cuts, plowing them to final depth.
Now lower the router bit back to 1/8″ again, and reset the fence so it’s 1-3/8″ from the center of the bit this time. Rout the drawer guide grooves on the deep drawer’s sides. Raise the bit to 1/4″ and repeat the cuts to deepen them. Select a piece of 1/2″-thick, dimensionally stable hardwood for the drawer guides. Shape one end of it with a 1/4″ roundover bit in the router table to match the round ends of the drawer guide grooves. Then rip it into 9/32″-thick strips, and crosscut eight of them to 6-1/2″ long. Bore three evenly spaced countersunk pilot holes for #4 or #6 screws through each drawer guide.
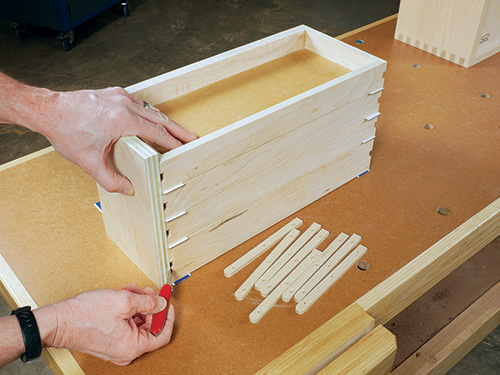
These drawers are sized to allow just 1/16″ of clear space above and below when they’re hung in the cabinet. That’s why installing the drawer guides accurately is paramount to the drawers working properly. I made this task easier by creating a simple installation jig for the guides that can both hold them in position relative to one another and keep them in alignment when they are fastened. It’s simply a scrap of plywood with four 1/2″-wide dadoes milled across it on both faces to hold four runners in position at a time. I determined the location for the jig’s dadoes by stacking the drawers in their correct arrangement with 1/16″ spacers in between each and underneath. I stood the jig blank beside the stack and transferred each drawer guide groove directly off the drawer stack onto the jig’s edges. Then, I plowed 1/8″-deep grooves across the jig at the router table, using the same bit that had cut the drawer guide grooves in the drawers.
When the jig is ready, set four drawer guides into it with the rounded ends all facing in one direction, and set the jig inside the tool cabinet, resting it on the cabinet bottom. I tacked the guides into place with 3/4″ 23-gauge pin nails first. Then I followed up with #6 x 3/4″ flathead wood screws driven into each pilot hole. Repeat this process to install the remaining four guides on the other side of the cabinet.
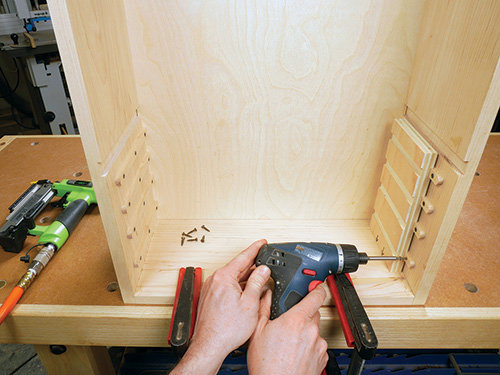
Next, mark the locations for two knobs on each drawer face. I located them 2-1/2″ in from the ends of the drawers. Install the eight knobs temporarily on the drawers with their machine screws. Now, cross your fingers, say a quick prayer and slide the four drawers into the cabinet. If you’ve worked carefully, they should fit into place with even spacing in between. If their sliding action on the guides isn’t as smooth as you’d like, you may need to sand the walls of the drawer guide grooves a bit to reduce the friction. When the drawer action meets your satisfaction, go ahead and glue the divider panel into its dadoes, because the drawer compartment is now done.
Installing the Doors
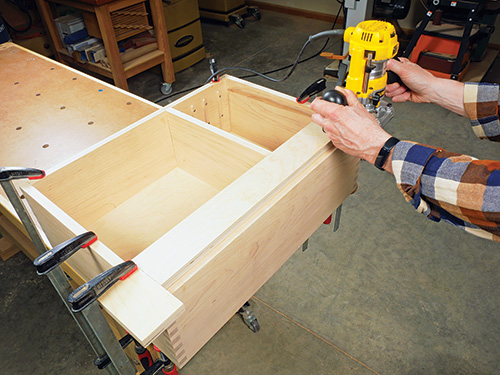
carcass.
We’re in the home stretch on this tool cabinet, as far as the tricky aspects of woodworking are concerned. But, there’s the matter of hanging the doors on their piano hinges. If you’ve worked with conventional butt hinges before, think of piano hinges as really long versions of butt hinges but with much shallower hinge leaf mortises and a lot more screws!
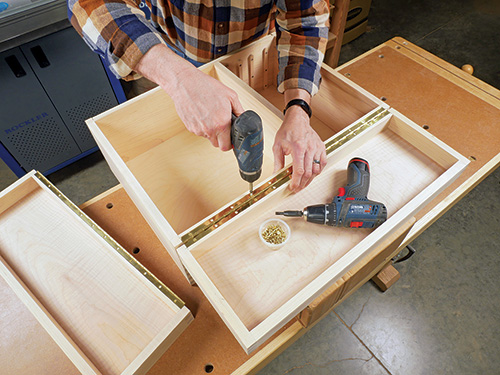
Mark a 1/2″-wide, 23-3/4″-long hinge leaf mortise on the inside edge of each door. (The mortises begin and end where the door rails cross the stiles.) Rout them 1/16″ deep, and square up the corners. Then mark and mill matching mortises on the front edges of the cabinet sides.
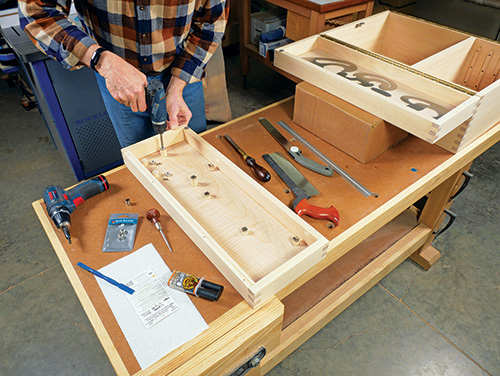
Cut the two hinges to length, and fasten one to each door with four or so screws spread out evenly. Make sure the hinge knuckle faces inward when each door is resting on your workbench before you drive in the hinge screws. Now lay the cabinet on its back and elevate the doors from underneath so they are flush with the front edges of the cabinet. (I used a couple of cardboard boxes under my doors.) Attach the cabinet-side hinge leaves with more screws to hang the two doors. Open and close them to check their action.
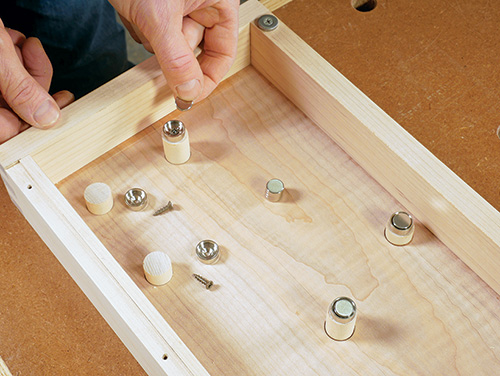
Given the fact that the narrow edges of these doors close flush against the front edges of the tool cabinet, and their frames align with the cabinet carcass, your options for catch hardware are more limited than with traditional cabinet doors. I opted for a simple rare-earth variation from Rockler. It has an angled steel bracket for inside the cabinet with a strong magnet attached, and the receiver piece for the door is simply a large, thick washer held in place with a screw. I mounted the brackets to the top inside face of the cabinet, one per door and centered on the cabinet’s width.
Outfitting the Interior for Tools
Before applying finish to your cabinet, now is a good time to consider how you’ll outfit the doors, upper interior and drawers for tools. Since I planned to store my chisel collection on two removable walnut racks, I decided to dedicate the doors to longer, lighter tools hung as simply as possible. One door holds a collection of three French curves. The other door stows three handsaws and an 18″-long rule. I used a combination of 3/4″-dia. dowel pieces in short lengths, steel magnet cups and 1/2″-dia. rare-earth magnets to hang the saws and the rule. Each dowel is secured with dabs of 5-minute epoxy in a shallow hole I drilled in the door panel. The magnet cups are fastened to the dowel ends. For the other door, my three stainless-steel French curves needed a different solution. I used two or three magnets and magnet cups per curve, fixed to the door panels just like the dowels. The curves are held in place with a second set of magnets on top, sandwiching them magnetically.
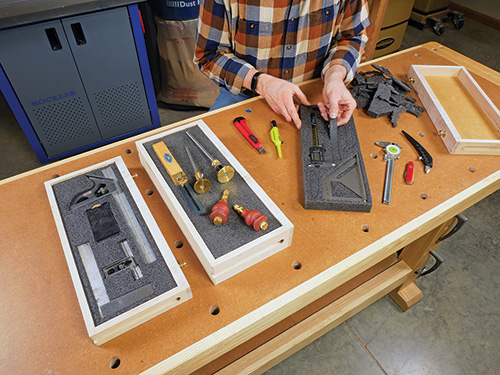
For three of the drawers, I wanted to isolate a selection of more fragile or sharp-edged/tipped measuring and marking tools to keep them from banging into one another when the drawers are opened and closed. Rockler’s 1-1⁄8″-thick Foam Organizer Sheet (item #80293) makes that an easy process. This foam is laminated in thin layers that can be scored with a sharp blade and peeled out to create a custom pocket for each tool. After cutting pieces of foam to fit the drawers (two sheets for the deeper drawer), I set each drawer’s collection of tools onto the foam to determine the best layout, traced their shapes with a marker and scored the foam along the layout lines. Peel away enough layers so each tool will be recessed in the drawers and not interfere with opening or closing them.
Finishing Up Those Last Few Assembly Steps
Once you have the interior outfitted for tools, remove the door hinges, catches and drawer pulls to prepare the project for finishing. Maple looks good with any clear finish, and figured maple really sparkles under a coat of shellac. I sprayed a coat of de-waxed shellac onto all the bare project parts. When that dried, I top-coated with several light coats of aerosol satin lacquer.
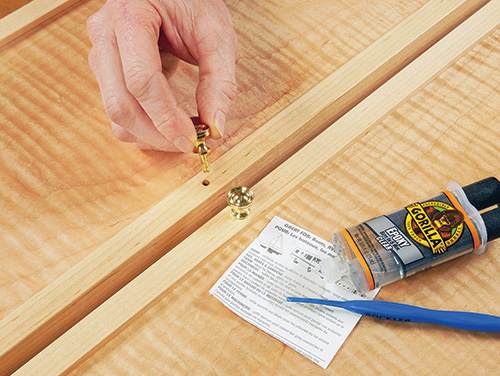
Give the lacquer at least 24 hours to cure before installing a brass knob on each door. I did that by threading their machine screws tightly into each knob, then cutting off the screwheads, shortening them into 1/2″-long threaded posts. I drilled 3/16″-dia. pilot holes into the edges of the door stiles deep enough to fit their posts. Then I dipped the posts into 5-minute epoxy and inserted them into their pilot holes. When the adhesive sets, rehang the doors on the cabinet, this time driving a screw into every hinge leaf hole. Install the magnetic door catch hardware again, too.
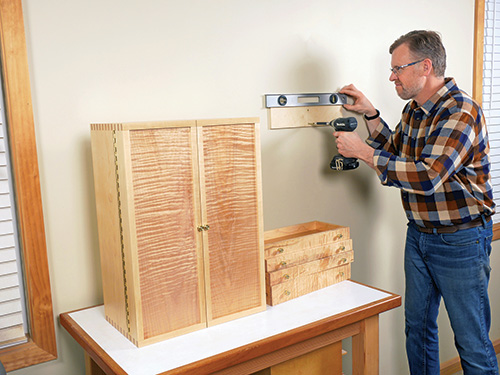
Choose a spot for hanging your new tool cabinet and mount the second French cleat on the wall. Orient the cleat so the bevel faces upward and inward. Mount it to a wall stud with 2″ flathead wood screws driven flush into countersunk pilot holes. Hang the cabinet on its cleats with their beveled edges engaging. Then remove the drawers and drive another long screw through the cabinet back near the bottom so it hits the wall stud. Doing this locks the cabinet in place. Reinstall the drawers, load the cabinet up with tools and enjoy this practical, attractive showpiece in your shop!
Click Here to Download the Drawings and Materials List.
Hard-to-Find Hardware:
Slotted Piano Hinge 1-1⁄16″ Wide x 36″ Long (2) #19241
Solid Brass Classic Knob, 5/8″ (10) #35451
Angle-Mount Magnetic Catch, 20 lb. Hold (2) #55146
Rockler Foam Organizer Sheet, 2′ x 4′ x 1-1⁄8″ Thick (1) #80293
Rockler Drawer Lock Router Bit, 1/2″ Shank (1) #22637


