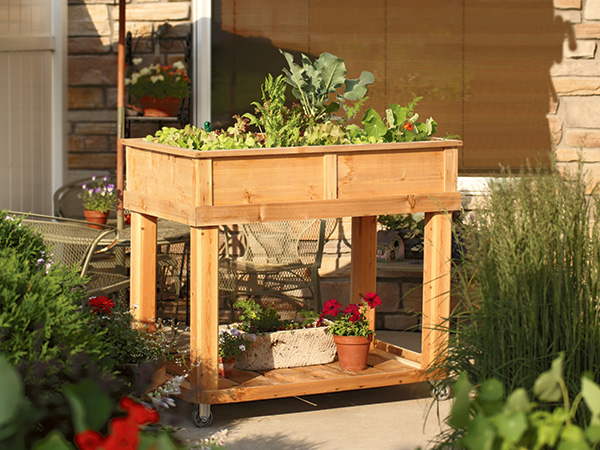
When one of my good friends found herself moving to a townhouse, she discovered that one of her only regrets was that her space to grow green things was so limited. So, between the two of us, we came up with this mobile planter cart as a solution to her problem.
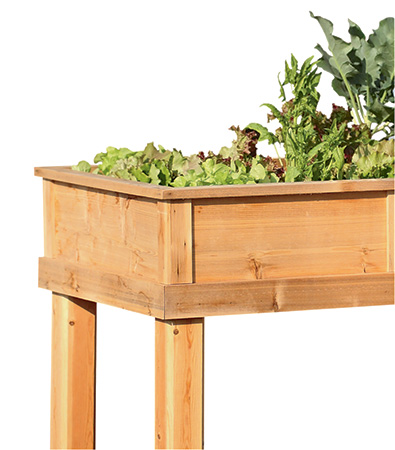
It is a bit like an oversized planter box on wheels, but it has some nice features that add to its usability. For one thing, you don’t have to bend over to “weed the garden”; at 42-1/4″ tall, you are working at a comfortable level. The mobile feature allows you to move the cart around on your patio to the most advantageous position in terms of sunlight, but move it out of the way if you are entertaining on the patio — also, it can travel into the garage or other shelter to avoid seasonal frost damage. It has ample storage underneath for additional potted plants or gardening supplies. The cart was a big success last season, with my friend receiving compliments on the cart’s attractive looks to go along with her veggies and flowers.
Getting the Cart Started
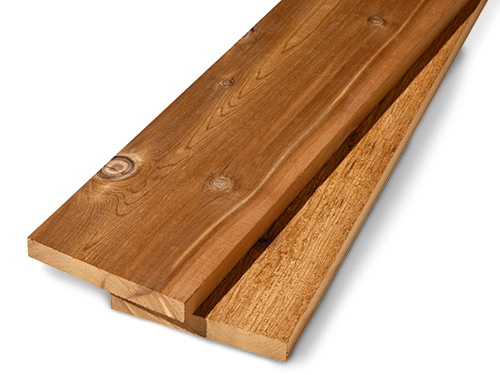
One nice thing about this cart is that it is made from dimension lumber that is easily purchased from any lumberyard or big-box home center. I used Western red cedar for all of the 1x material and was intending to use cedar for the legs as well. Cedar, as you know, stands up to the weather well and resists rotting in a moist environment, and it will also turn a lovely silver color as it ages if you don’t apply a finish to the wood. As will sometimes happen, I encountered a small hiccup the day I went shopping: the selection of 4 x 4 cedar was poor, mostly twisted and checked, so in this instance, I opted for Douglas fir 4 x 4s, and I was pleased with the results. If you, like me, decide to get your stock at a big-box store, take advantage of the fact that you can select your own wood and get the very best lumber that you can find. Stay away from large knots (small, tight knots are no problem), and avoid other problems by checking the lumber for twisting, cupping and other distortions. The time you take here selecting high quality stock will save you time and effort in the shop later — trust me on this.
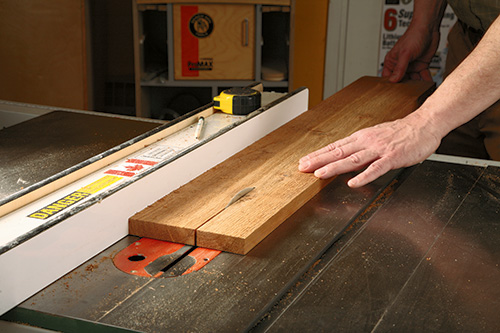
Which brings me to one of my first tips: dimension lumber is milled to specific widths and thicknesses, but those dimensions can vary a bit. To accommodate this variation, I ripped the pieces to size, even if I was using a “full-width 1 x 10.” This step meant I could trust that all my pieces would match up well as I assembled them later. You will find all the parts and their dimensions in the Material List. So go ahead and start making some sawdust!
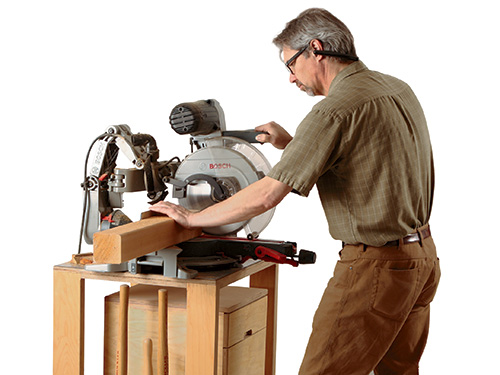
The sides, ends and cross braces (pieces 1 through 3) are the first components you will need to make. After ripping them to width, go ahead and cut them to length. I used a miter saw to cut most of the garden cart’s pieces to length, but a table saw, or even a handheld circular saw, will do the trick. Western red cedar 1x material is most commonly sold with one face surfaced smooth (but it’s not always 100% smooth; it is technically called hit-and-miss milling, and it means just what it says) and one face left roughsawn. I chose to orient the smooth face of the wood to the outside of the box — but that choice is up to you; if you prefer the rough side out, go for it. Another detail to know is that 1x hit-and-miss surfaced cedar measures out to 7/8″-thick, not 3/4″ like other softwood. If you choose to make your cart from pine or some other kind of wood, you will need to adjust some of the measurements you’ll find in the Material List.
The construction of this cart is blue collar, meat-and-potatoes joinery. Butt joints rule the day, aided by nails and screws where appropriate. I also added Titebond® III glue at times — it is virtually waterproof and supplied additional strength at some of these very simply constructed joints.
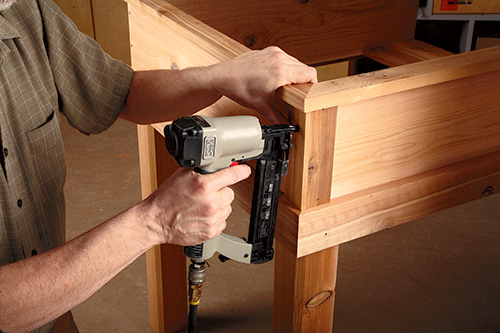
Nail (galvanized nails are the best here … no rust marks later on) and glue the ends to the sides to create a four-sided rectangle. Next, test-fit the cross braces to the opening in the rectangle. They need to fit snugly. There are three cross braces: one is located exactly in the center of the rectangle; the other two fit tightly into each end of the box. Apply glue on the long edges of those two cross braces where they abut the ends. I nailed the pieces in place, setting the subassembly aside until the glue cured.
While the glue is drying, take a few minutes to rip and cut the cleats (pieces 4) to size. Fit them between the cross braces, and then nail them in place. Their task is to provide a continuous level edge around the inside of the box; later on, you’ll attach the hardware cloth to this.
Moving on, grab your 4 x 4 stock and make four legs (pieces 5). The ends of the legs must be perfectly square to help align them on the cart. I formed chamfers on all four long corners of each leg. The chamfer measures 5/8″ across the flat and adds a bit of shape to the leg. It also removes some “visual mass” from the legs, which are big square chunks of wood and would otherwise look heavy and clunky.
Mechanical Fasteners
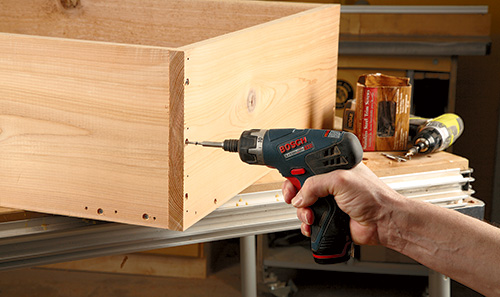
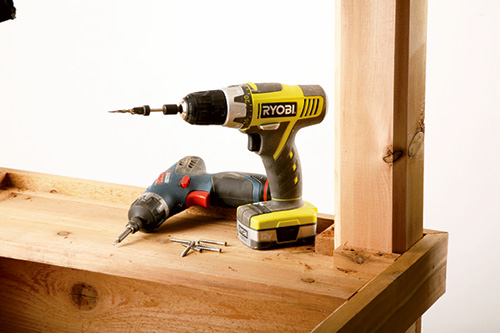
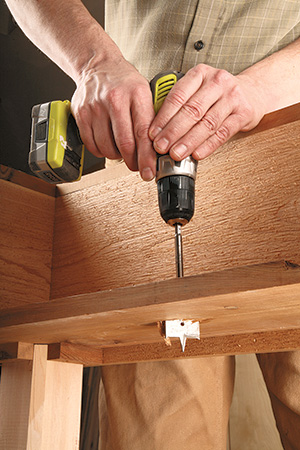
Before you attach the legs to the box subassembly, take a few minutes to add some screws to the equation. It is best if the screws that you use, like the nails, are the type that won’t easily rust. I used stainless-steel screws, but any type of coated screws designed for decks or outdoor use will work fine. As you can see in the photos above and below, I pre-drilled using a countersink-drill combination bit. Then I drove the screws home. All the screw and nail holes will be covered by trim of different sorts, so there is no need to plug them. Following that, miter and wrap the skirts (pieces 6 and 7) around the subassembly, securing them with nails.
Get ready for attaching the legs by ripping and cutting the leg anchors (pieces 8). They will act as braces, helping to secure the legs in place. Turn the box subassembly upside down, and check the Drawings for the anchor locations. Mark their locations, drill pilot holes and screw them in place. Then drill countersunk pilot holes up through the cross braces where the legs will connect. The next step is just awkward if you are doing it yourself — but if you have a friend to help, it’s not bad at all.
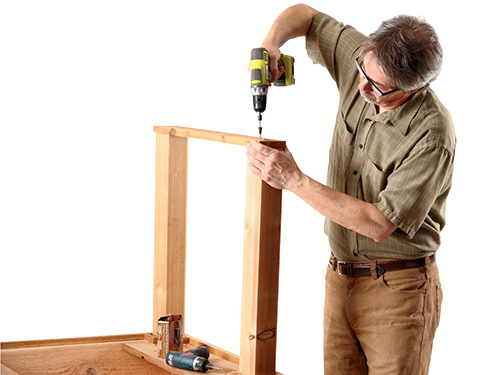
Using glue and screws, attach the legs to the box sub-assembly. When that step is done and with the box upside down, check the legs for square. Make any adjustments and then drive nails through the leg anchors into the legs. To complete the leg assembly (which is not a typical construction), glue and screw the bottom stretchers (pieces 9) to the ends of the legs as shown. Now you have really made some progress!
Trim, Wheels and Wire Cloth
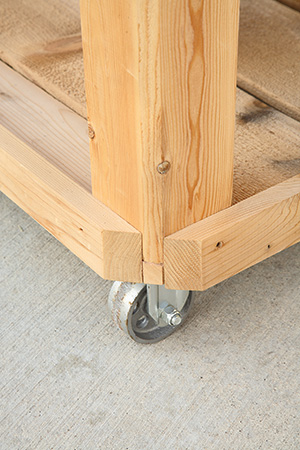
With the box and legs combined into one large subassembly, the pace of construction will really accelerate. Before turning the project upright again, rip and cut to length the long and short base rails (pieces 10 and 11) and nail them in place with glue. They might look a little odd now as they don’t quite meet, but in just a bit, you will trim their ends to align with the chamfer on the legs. It’s also the right time to install the casters (pieces 12 and 13). I chose all metal, 3″-diameter casters and purchased them from a big-box store. They work perfectly on a concrete patio. Depending on the surface that your cart will be rolling over, you may want larger-diameter wheels with rubber tires — especially if the cart will be on a deck, dealing with all those gaps between the decking. They’ll probably cost a few bucks more, but they would likely make the cart more usable. I used two fixed casters and two swivel casters, all of them plate-mounted.
With the casters mounted and ready to roll, go ahead and flip the cart over on its wheels. Once again, step over to your table saw and rip material to make the bottom cleats (pieces 14). Install them using nails — be sure that the nails are not too long, as the points will stick out of the long base rails. As long as you are working on this lower section of the cart, grab a hand saw and slice off the ends of the base rails and the little corner of the bottom stretcher to create a finished looking corner.
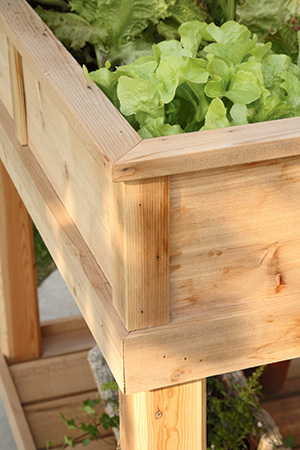
Enough of that working down by the floor; from here on out most of your assembly will take place closer to waist level … nice. The long and short top trim sit on the top edge of the sides and ends and form a picture frame-like accent to the cart. Miter them to fit, and then nail them in place. Once again, I chose the smooth surface of the cedar to face up (less chance for splinters, in my opinion).
The decorative trim (pieces 17) is the next set of parts that you need to make. If you use a thin-kerf blade on your table saw, you should not have a problem re-sawing the 3/8″-thick pieces from 7/8″-thick cedar. All 10 pieces are secured to the box with brad nails as shown. If you don’t have a nail gun that shoots small nails, the old-style brad and hammer system still works great.
That’s it for the outside aspect of the cart … from here on in, you will be modifying the interior of the planting box. Start by drilling 1-1/2″ drainage holes in the cross braces. See the Drawings for locations, although exact placement of the holes is not critical. Next, cut and fit the screen retainers, both long and short (pieces 18 and 19), but don’t install them yet. The hardware cloth (piece 20), which is very heavy-duty wire screen material, can also be found at big-box or hardware stores, and it is the next part to be made. Using a pair of aviator snips, cut the piece to size, fitting it from end to end and side to side inside the planter box. Now grab the screen retainers and use them to secure the hardware cloth in place. I used short nails for this task.
The final parts to make are the slats (pieces 21) which, when placed on top of the bottom cleats, form a shelf in the lower section of the cart. There should be small gaps between the slats when all six are in place to allow for drainage.
While I did sand the smooth faces of the cart and broke the sharp edges, I chose not to apply a finish of any kind to the wood. This was not due to laziness (well, at least not completely), but rather due to the fact that cedar weathers the elements well and its hue changes to a nice silver color if left unfinished.
And that is it — the garden patio cart is done in the workshop. Fill it with dirt and plant some seeds!
Laying Down the Layers
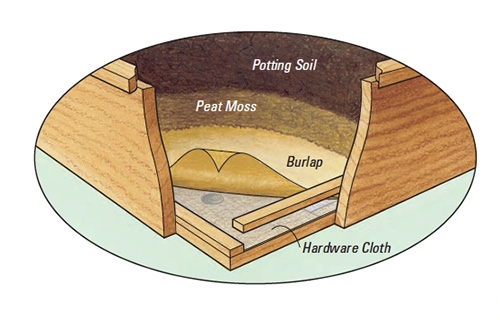
To build up an effective growing medium, start by putting a layer of burlap over the hardware cloth at the bottom of the planting box. Then put a 2-inch layer of peat moss (available at most garden centers) on top of that. Finally, fill the rest of the planting box with potting soil mixed with a bit more peat moss. Fill it right to the brim as it will compress over time.


