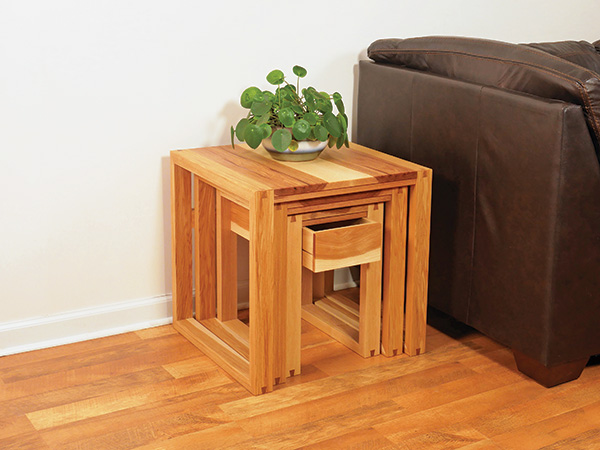
Over the 20+ years that I’ve been a staff er on this magazine, I’ve never had the occasion to use hickory for project lumber. So when the decision was made to make these minimalist nesting tables from one of America’s sturdiest lumbers, I was excited by the prospects of using it. Turns out, hickory is no more diffi cult to saw, plane, rout, glue or finish than any other native hardwood. If you’ve worked with ash or hard maple before, you’ll be right at home with hickory. Notice that the smallest table includes a drawer, which could be handy for storing TV remotes or other little stuff . You can include the drawer if you like or build the small table without it.
Preparing Rough Parts
Get these tables underway by jointing and planing enough 4/4 stock for the three tabletops, and glue up three slightly oversized panels. Hickory is a variably-colored hardwood, with a mixture of both creamy colored and darker brown areas. I decided to compose the panels to take full advantage of this beautiful color variation. When the panels come out of the clamps, trim them to final size, according to the Material List. Set them aside for later.
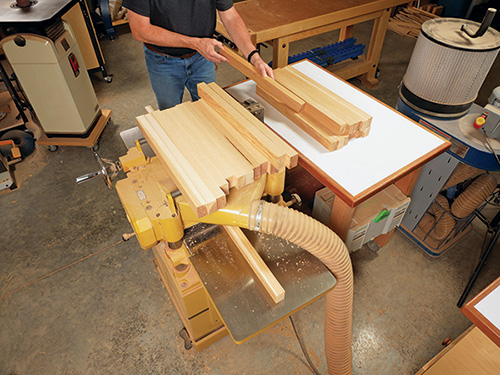
Each table has a pair of leg frames that consist of front and back legs connected by top and bottom rails. There’s also a back brace to help prevent the tables from racking side to side. The legs, rails and back braces are all made of 1-1/4″ thick x 2″-wide stock. I crosscut some 8/4 hickory into overly long blanks for each of the three tables’ leg, rail and back brace sizes, then ripped the legs to 2-1/4″ wide at the band saw to allow for minor distortion. (A band saw will cut this thick, super-hard hardwood more easily and with less burning than a table saw will.)
Next, I flattened one face of each leg, rail and back brace at the jointer, then jointed an adjacent edge square. I used these reference surfaces to rip all 27 workpieces to 1-3/8″ thick at the band saw. It saved time and effort over what I would have spent at the planer to reduce the part thicknesses that way, and it also cut down on the wear and tear to my planer and jointer knives. Once the band-sawing was behind me, I hauled the parts to the planer and surfaced them down to their final 1-1/4″ thickness. After that, I stood everything on-edge with the last band-sawn edge pointing up, and I ran the parts through the planer again, reducing the workpieces to 2″ wide.
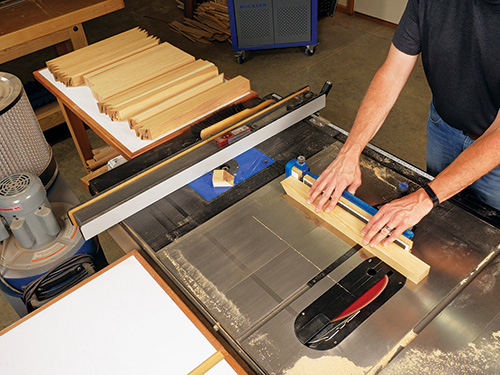
Notice in the Drawings that the ends of the legs and rails are mitered at 45 degrees to hide their end grain. Cutting those miters is your next task, and you can tackle it either at the miter saw or on the table saw. I opted for the table saw, using my Rockler Precision Miter Gauge with a built-in flip-stop system to set the part lengths accurately. Whichever saw you use, be sure to dial in the miter angles very carefully so the joints will come together at exactly 90 degrees and the leg frames will close properly. These cuts also bring the legs and top and bottom rails to final length.
Swivel your saw blade back to square again so you can trim the three back braces to length. Those should match the widths of the three tabletops. Then finish-sand the inside leg faces and all four faces and edges of the back braces.
Building the Leg Frames
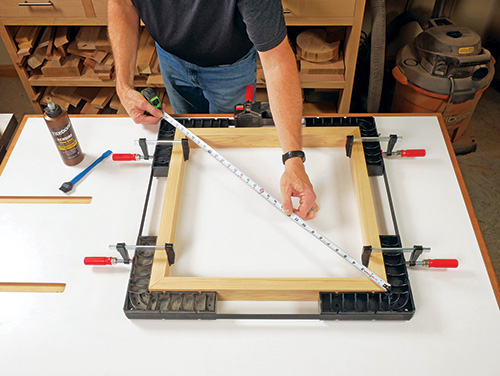
Miter joints assembled with glue alone aren’t very strong, because the end grain surfaces of the mitered faces absorb extra glue, which weakens the connection. So I decided to add dovetail splines, made from pieces of darker hickory, to strengthen the leg joints while also adding some decorative detail to the corners of the leg frames. Even if glued miter joints are lacking in strength, the first step of the leg frame assembly process still involves gluing those mitered corners together. For that job, I used a combination of strap clamps, Rockler Clamp-It Assembly Squares and smaller F-style clamps. A strap clamp is a great way to pull mitered joints together, because it applies clamping force evenly to all four joints simultaneously while capturing the parts inside a closed loop. After applying glue to the mating parts of each leg frame and setting the legs and rails into position, I placed an Assembly Square against the outside faces of four corner joints, then installed my strap clamp over the top of the Assembly Squares and tightened it. The net effect enabled the squares to tweak the corner joints as needed while also pressing the mitered corners of the parts tightly together. A few small clamps ensured that the Assembly Squares remained centered on the widths of the legs and rails while the glue dried.
With even four Assembly Squares, a few little clamps and one strap clamp, you’re all set for this operation. You’ll just need to assemble the leg frames one frame at a time. I had more clamps and Assembly Squares to use, so the process went pretty quickly for me.
Rockler’s Router Table Spline Jig makes an awkward task like this easier because an adjustable plastic sled stands the leg frames up at the correct angle while also sandwiching them securely inside the sled’s adjustable locking fences.
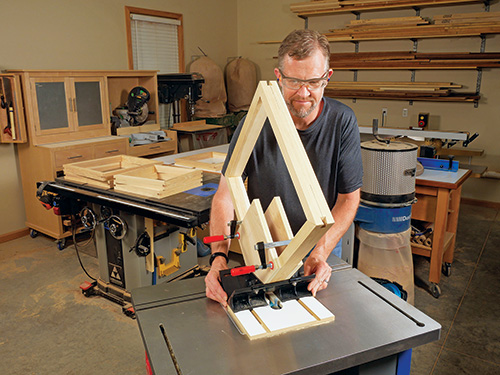
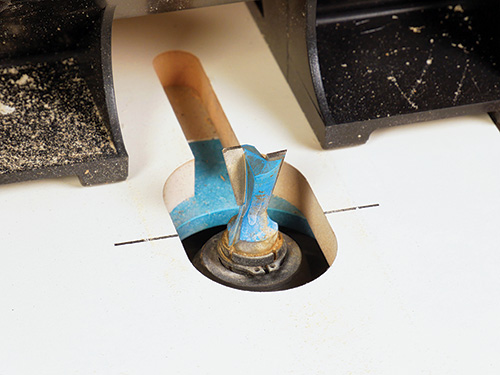
To prepare the jig, I first installed a couple of scrap plywood supports inside the sled to provide more stability for the tall leg frames. Then I set up the spline jig on my router table so the bit would cut the slot across the middle of each joint. I chucked the dovetail bit in my router table, set its cutting height to 7/16″ and slid the jig’s sled slowly but steadily over the bit to cut the dovetail spline slots in a single pass. It didn’t take long to run all 24 miter joints through the bit.
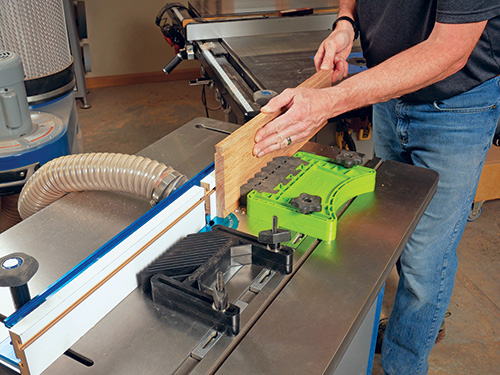
Cutting the dovetail splines involves using the same dovetail router bit as before but running the spline stock along the router table’s fence to create the dovetail shape instead of using the spline jig. Rockler’s instructions detail how this process works. Suffice to say, you’ll need to start with scrap stock and make fine adjustments to your router table fence’s position until the spline stock you make slides into the slots of the miter joints snugly but easily.
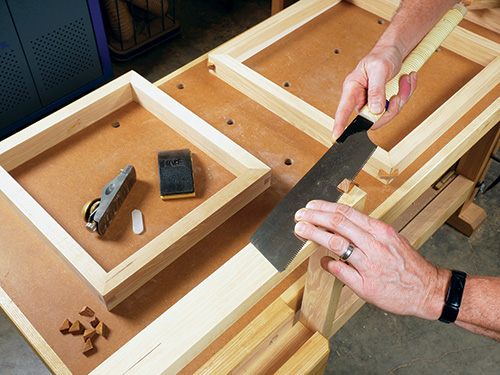
I decided to use sections of darker hickory to make my spline stock so they really stand out on the lighter-colored leg frames. Once they were machined to shape, I ripped the splines free from the larger workpieces and crosscut 24 lengths to 1-3/8″ long. Glue the splines into their slots, and trim off the excess with a flush-cut saw when the glue dries.
Assembling the Tables
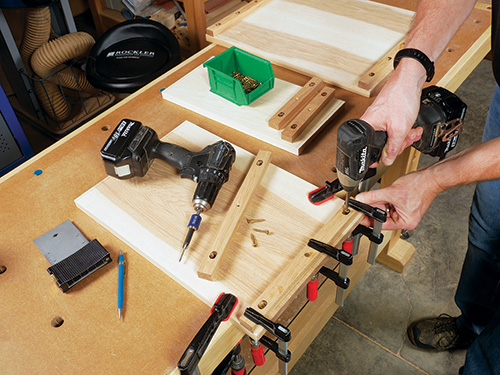
While these three tabletops aren’t particularly wide, the front and back edges don’t benefit from cross rails or the usual aprons underneath, which would help stiffen them and counteract cupping. So, we’ll install a 1″-wide subtop beneath the tabletops, both in front and back, to serve the purpose. The subtops also add some visual “heft” to the thickness of the tabletops, without actually adding much weight to the tables. Rip and crosscut 3/4″ stock to the Material List dimensions for the three lengths of subtops required for the tables.
Now is a good time to finish-sand all the table components you’ve made up to this point to 180 grit before proceeding further with assembly.
Attaching the subtops beneath the tabletops creates a crossgrain problem that must be accounted for, but it’s easy to solve. Attach each subtop with a countersunk 8 x 1-1/4″ screw driven up through it, centered on the width of the tabletop and the subtop’s length. Then create pairs of slotted holes near the ends of the subtop in order to drive a couple more screws up through the subtop to secure it. Make the slotted holes about 3/8″ to 1/2″ long, and orient them to run with the grain of the subtop (lengthwise). That way, when the tabletops expand or contract across their width, the slotted holes enable the top panels to move while still allowing the subtops to remain securely installed. Locate the subtops 1/4″ in from the ends of the tabletops. Don’t use any glue for their installation.
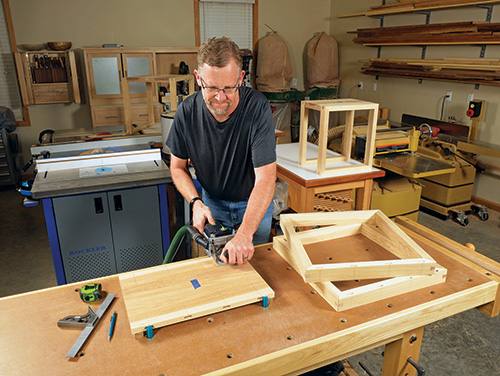
At this point, assembling these three tables is simplicity itself, especially if you don’t plan to add the optional drawer and aprons to the small table. A loose-tenon system, such as Festool Dominoes or Rockler’s Beadlock tenons, is ideal. But dowel joints also could work. Effectively, the leg frames just attach flush against the long-grain edges of the top panels, and the back braces install between the back legs. I used the 8×50 sized Dominoes, spaced evenly along the joint lengths. I installed five along the joints for the large table and four for the medium and small tables.
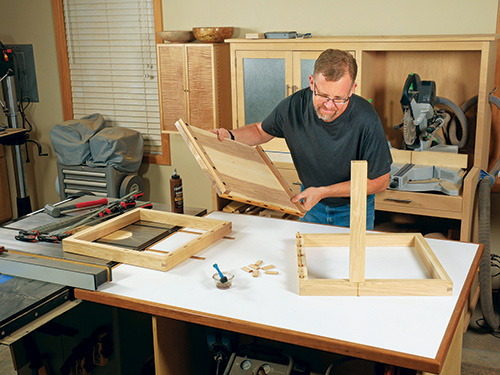
While you’re cutting mortises for your loose tenons (or drilling dowel holes), be sure to mark each back leg for the back braces and add mortises or dowel holes there, too. Lay out those brace locations so their bottom edges are 12″ up from the bottoms of the leg frames. Glue and clamp the leg frames, back braces and tops together with the loose tenons or dowels in place.
Adding an Optional Drawer
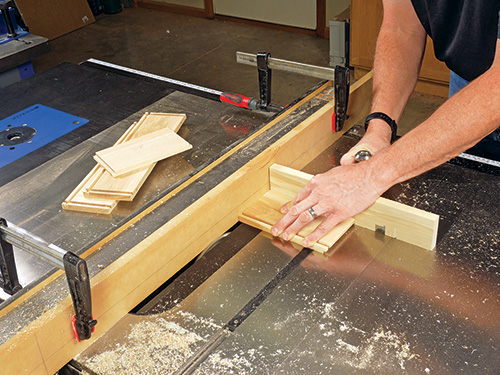
Installing the little drawer between the legs of the small table provides some discreet storage for your entertainment system remotes, decks of cards, a bottle opener or any other odds and ends you might need in the room where these tables will go. I built the drawer box using 1/2″-thick hickory for the front, back and sides. The part sizes in the Material List account for the fact that I assembled the drawer box with simple but sturdy rabbet-and-dado joints. The ends of the drawer’s front and back pieces receive a 1/4″ x 1/4″ rabbet. The drawer sides require a 1/4″-wide, 1/4″-deep dado, located 1/4″ in from the part ends, to fit the tongues of the rabbets. I formed the rabbets and dadoes at the table saw with a 1/4″-wide dado blade, but you could also mill them on a router table with a 1/4″ straight or spiral bit.
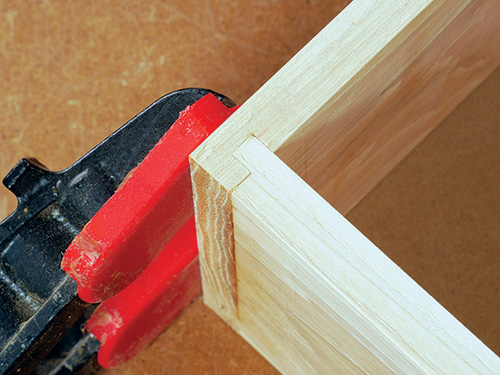
Plow a 1/4″-wide x 1/4″-deep groove along the inside faces of the drawer front, back and sides, 1/4″ up from the bottom edges, for the drawer’s bottom panel. Then cut one to size from 1/4″-thick MDF, hardboard or plywood. Dry-fit the drawer box together to make sure the corner joints close. Also, check that the assembled drawer fits easily between the legs of the small table. If everything checks out, finish-sand the parts and glue the drawer box together. Check its diagonal measurements for a match to be certain the drawer box is square.
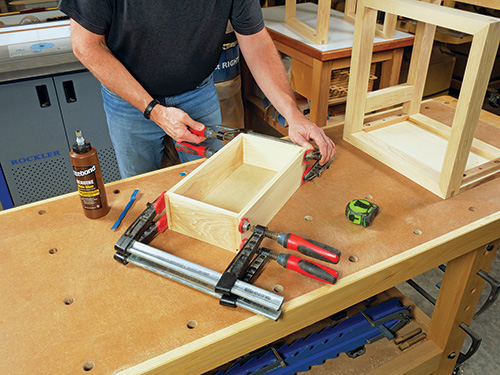
While those glue joints dry, rip and crosscut a pair of aprons from 3/4″ stock. Set their length so they fit snugly between the small table’s front and back legs.
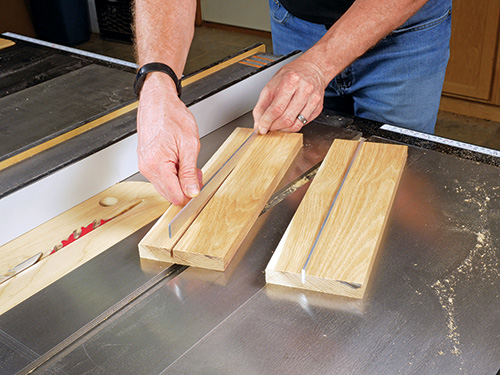
I decided to hang the drawer for my table on the aprons using two lengths of 1/8″ x 3/4″ aluminum bar stock as runners. You can find aluminum bar stock at most home centers or hardware stores in the same bin with various sizes and options of steel. It offers a simple drawer “slide” solution for lightweight drawers like this. Cut two runners to 13-1/2″ long.
Take the aprons over to your table saw so you can plow a 1/8″-wide x 1/2″-deep groove along the inside face of each workpiece. Position these grooves 2-1/2″ down from the tops of the aprons. Test-fit the runners in them, and adjust the width of the grooves, if needed, so the runners are easy to push into place.
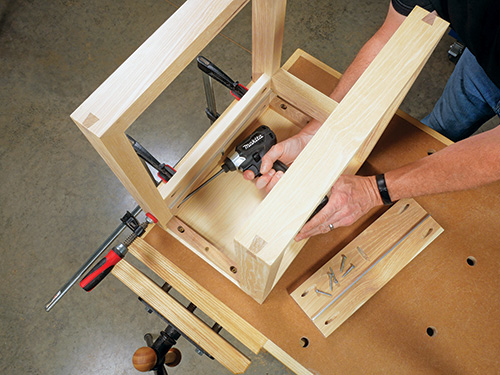
Pocket screws will be an easy means of mounting the aprons between the table legs. So take a few minutes to bore several pocket-screw holes into each end of the aprons on their inside faces and along the top edge. Then sand the aprons up to 180 grit.
Clean the aluminum drawer runners with lacquer thinner or denatured alcohol to remove any manufacturing residue before installing them in their apron grooves with 5-minute epoxy. Once the epoxy cures, file the front corners of the runners into small radii so the drawer is easier to fit into place, and attach the aprons between the legs with pocket screws. Position their inside faces flush with the inside edges of the leg frames.
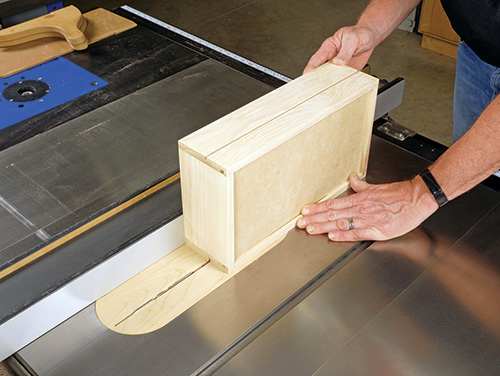
With that done, it’s time to hang the drawer. So head back to your table saw to cut a 1/8″-wide x 3/16″-deep groove into the sides of the drawer to receive the drawer runners. Locate these grooves 2-3/16″ down from the top edges of the drawer. Then slide the drawer into place between the aprons to check its action. Widen the drawer grooves slightly, if needed, so it slides in and out smoothly.
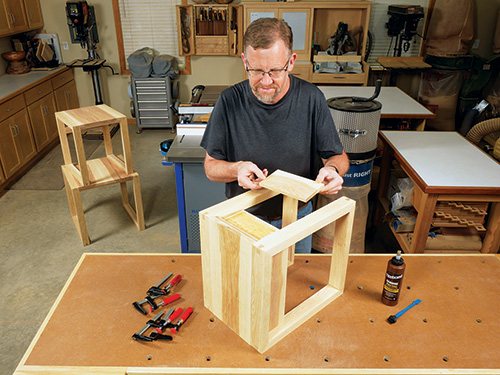
Now rip and crosscut a 1/2″-thick drawer face to size. I simply glued it onto the drawer front, positioning it carefully for an even spacing in the drawer opening and clamping it in place.
Your last step is to apply a durable topcoat to complete these tables. I settled on several coats of a wipe-on polyurethane finish, which is easy to apply and lets the hickory’s natural color tones really shine!


