
Are you ready to give your table saw a rigorous workout? Standing behind that machine is where you will spend the majority of your time if you decide to build this beauty of a coffee table.
Getting it Going
We chose black walnut wood, but cherry would be another good choice. Bring your lumber into your shop several days in advance, and procure at least 30% more than you think you’ll need.
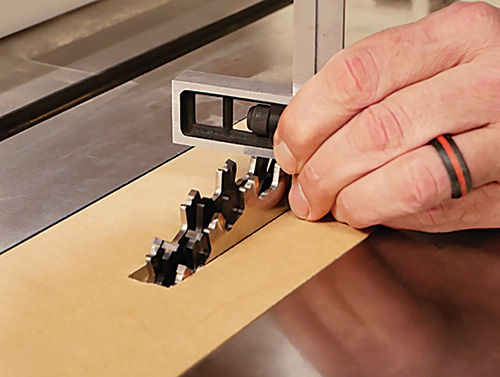
Once your stock is at the proper thickness, you can proceed to break it down to the component parts of the tabletop — there are a lot of pieces. With a very sharp blade in your table saw, start by ripping the hardwood to width. (See the Material List for sizes.) It is a good idea to use a zero-clearance insert if you have one. When the ripping is done, crosscutting begins, but here is an important note: cut the pieces slightly overlong by at least 3/4″. The reason is that, with the many cross-lap cuts you will make, if your setup is off even 1/64″ or less, that can add up to nearly 1/4″ over 14 cuts. You also will want to make a couple more extra slats than you need in each length. Think of it as working smart, not hard.
With that done, remove the standard blade and set up a dado stack in your table saw to make a 3/4″-wide cut. Make a test cut with that setup, and be sure its width matches your stock thickness.
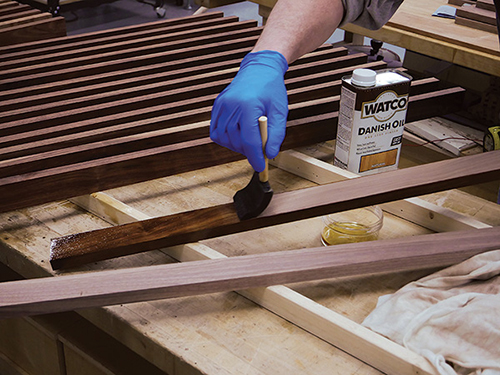
Now, before you go any further, apply a coat of WATCO® Oil finish to all the slat blanks. The finish will make gluing up the tabletop easier — and removing hardened glue much, much easier. (Again, working smarter …)
Notching, Notching and Notching
You may think you’ve exercised your table saw pretty well up to now, but you’re just getting started.
Have a look at the Drawings. If you think about the number of notches you are about to make and how exposed the cross-lap joints will be to view, it only makes sense that you will want the cuts to be sharp and with as little tearout as possible. Two steps will help with that goal: first, use another zero-clearance insert in your saw, and second, use a cross-lap jig with a fresh backer board. While you can build one for this task, the Rockler Cross Lap jig is what we used — read more about it later.
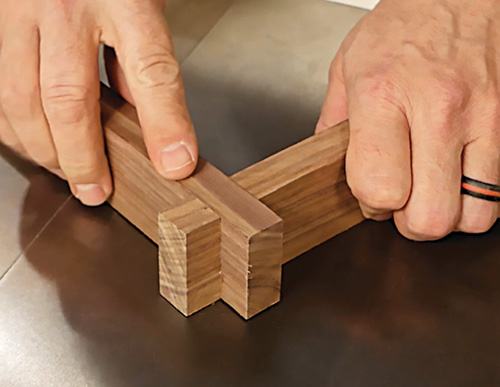
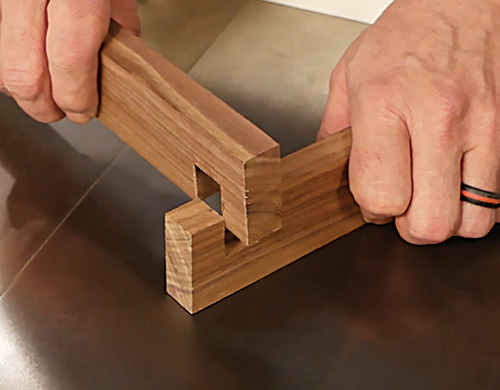
By surfacing your stock thickness down to match the width of your dado stack cut, you have already achieved 50% of the setup required to form an accurate cross-lap. Now you need to raise the dado stack up to form a notch that is exactly half of the width of the slats: 7/8″ in this case. Test the setup on scrap pieces of the tabletop stock. Two notches mated together form a cross-lap joint, so every adjustment of the cutter, up or down, will double the effect on the joint. When you get the height of the cut dialed in, you are ready to make some serious sawdust!
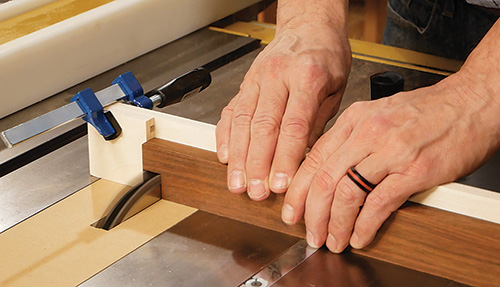
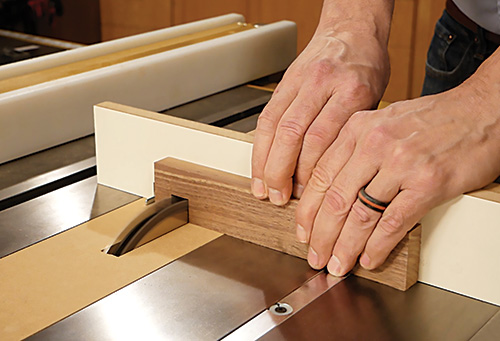
Every slat, whether long or short, will have a notch cut exactly at the end. For that task, we outfitted our miter gauge with a sacrificial fence and used a stop block to perfectly position the notch. Then we cut all the slats including the extras.
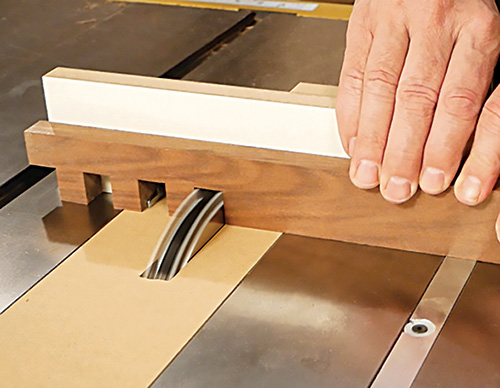
With that done, set up your jig to cut the notches into the long slats. The Rockler Cross Lap Jig has a couple of real advantages here, starting with the adjustable indexing key that accommodates the width of the cross-lap notch you are forming. It also has an adjustable fence so the repetitive cuts are easy to lock in. On the long slats, the cuts are set at 8-1/2″ from the key to the dado head, for a total of five more cross-lap joints in each long slat. Go ahead and make those 70 cuts — and don’t forget to turn on your dust collection, first!
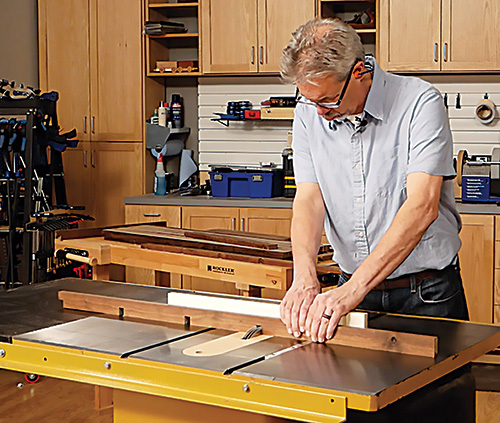
When the long slats are machined, it is time to turn your attention to the short slats. The spacing of the cross-lap joints in the short slats is 3/4″, the same as the thickness of the slat lumber. Adjust your cross-lap jig to make those cuts, and get busy machining the remaining notches. (You should be getting really good at it by now!)
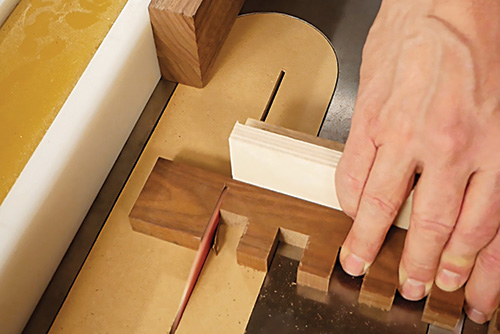
With that task behind you, the final step in making the long and short slats is to cut them to their exact length. We did that on the table saw again, employing our miter gauge, after replacing the dado stack with the regular saw blade. A properly set up miter saw set would do the job just as well.
Rockler Cross Lap Jig
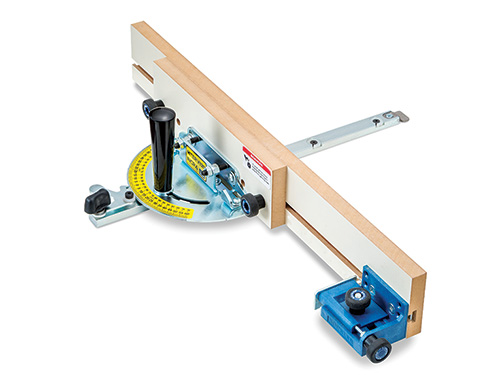
Rockler’s easy-to-use Cross Lap Jig (item 56372) mounts to a standard miter gauge. Its fence is adjustable so the operator can quickly change notch spacing.
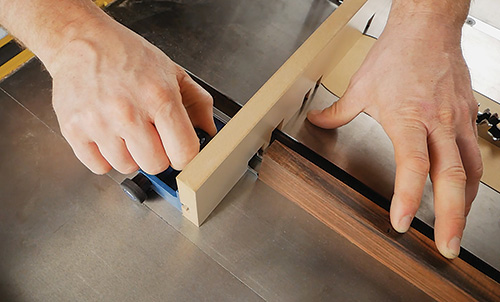
The jig’s unique adjustable registration key is a super handy feature that makes a huge difference. No longer do you need to try to create your own key, perfectly sized to hold your stock, while also not so tight that it is annoying to use.
Assembling the Tabletop
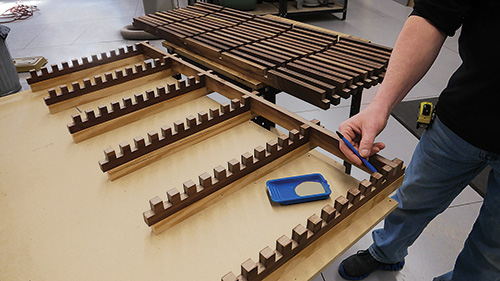
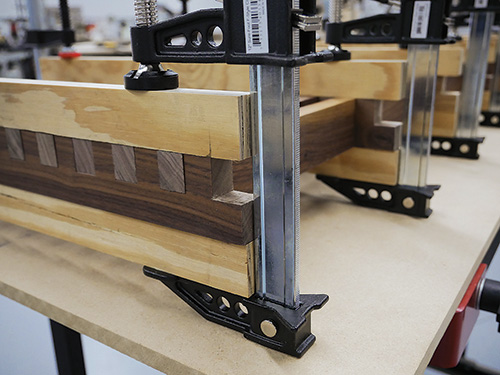
While this tabletop is not a difficult piece to put together, it will work best if you do a couple of things: first, carry out a complete dry assembly. Now create 12 clamping cauls (or battens, if you will). They should have a very gentle curve on one edge, so that when you clamp the tabletop together, pressure will be applied to the slats across the center as well as those on the perimeter.
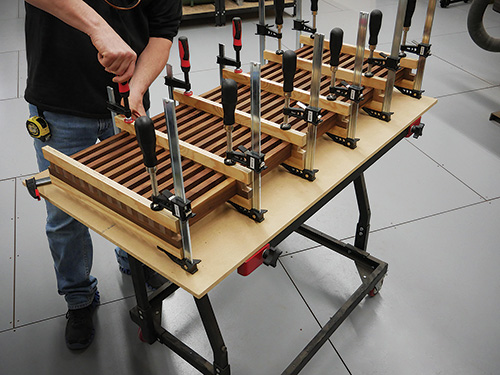
Add the cauls to your dry assembly, clamping it up as if it were the real glue-up. Figuring out where you will need your clamps and how to make them work with the cauls is worth the time. (Really worth it!)
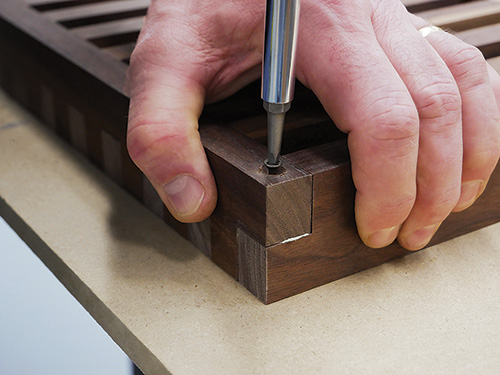
If it all fits together properly, take the top apart, but keep the pieces in the same order as they went together in the dry assembly; this will avoid surprises when you start actually applying glue. At this point, drill a countersunk hole in the endmost notches of the short slat (see the Drawings for details). These pilot holes are for the #6 screws that will help secure the outer long slats to the short slats. The screws plus glue at those corner joints provide a rock-solid connection.
Now you are ready to put the pieces together. While it is not required, having a friend help with a complicated glue-up like this one is always a good idea. Another tip: Titebond® III wood glue has a longer open time than other options, and that’s why we used it here. Apply glue to the joint surfaces on the slats with a brush, but do not install the outer slats at this time. Assemble the whole tabletop with the clamping cauls in place. Let the glue cure well. After the glue is dry, remove the clamps and install the two outer slats with more glue. Drive the screws home to secure them to the short slats.
Attention to Details
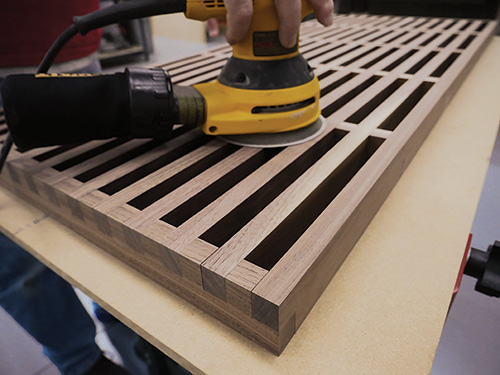
When the glue has cured, get ready for a tedious task. As with any gluing and clamping operation, there will be glue squeeze-out. In this case, however, there are 65 rectangular openings in the top where the excess glue could be hiding. So there is no other option but to get in there and get rid of any glue drops you might find.
We found the spatula end of a Rockler Silicone Glue Brush was perfect for prying the glue off without scratching the surface of the wood. This is where applying that first coat of WATCO Oil finish has come to your rescue: the glue will be so much easier to remove.
When you are done with that job, you might need to use a random-orbit sander on the outside face of the tabletop to level any uneven intersections of the joints on the exposed edges. But, don’t worry about sanding the initial finish. Just apply at least three more coats of WATCO Oil to blend things in and build up a more durable final surface.
Legs are Next
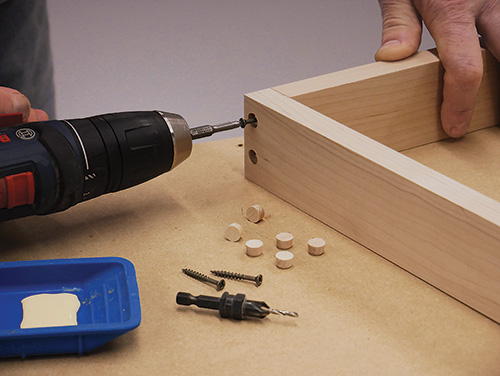
The legs we built are a true homage to the Nelson Bench look of the project. With that said, you don’t need to follow our lead here.
To make our rhombus-shaped leg assembly, start with some solid hardwood lumber. Since we painted our legs, yellow poplar was a great choice. First, rip the 3/4″ stock to the width, following the dimensions in the Material List. Next, lean your table saw blade over to 8° (or tilt your miter saw over at 8°). Cut the leg components to length.
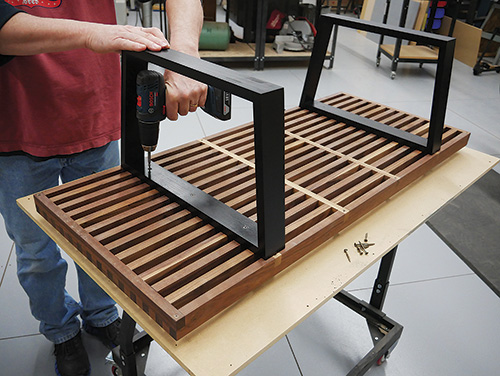
Grab the leg uprights, and drill counterbored pilot holes for #8 x 1-1/2″ screws at both ends of the pieces. (See the Drawings for details.) A drill bit with a counterbore collar is a great way to get this done. Assemble the rhombus-shaped assemblies with glue and screws at each corner. Allow the glue to cure, and hide the screw heads with wooden plugs glued into the counter bores. Trim and sand the plugs flush. Break the sharp edges of the leg assemblies with sandpaper. Then take the time to sand the assemblies to 150-grit.
You’re ready to paint the legs, which is pretty easy. Start by putting a coat of primer on the raw wood. Inspect the legs after the primer coat dries, and fill any cracks, defects or holes with spackle or wood putty. Sand the primed leg assemblies with 180-grit paper, and then apply the paint.
We used an aerosol spray can of black enamel on our legs, and it worked extremely well. Two coats of the enamel will provide a smooth, lovely finish to the table legs you build, too.
Metal Leg Options
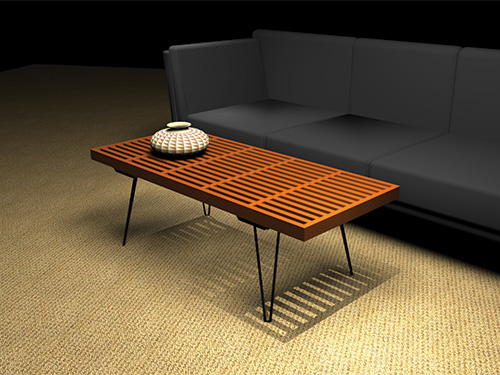
This classic tabletop looks great with a variety of legs holding it up. Hairpin legs are the real deal when it comes to Mid-Century design, and they are easy to use and elegant to look at.
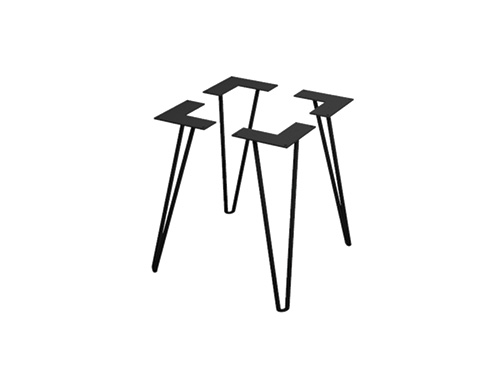
The more substantial metal tube legs offer a rectilinear reflection of the top’s shape. They can be painted various colors and provide a similar visual effect to the wooden rhombus legs that we designed for the table.
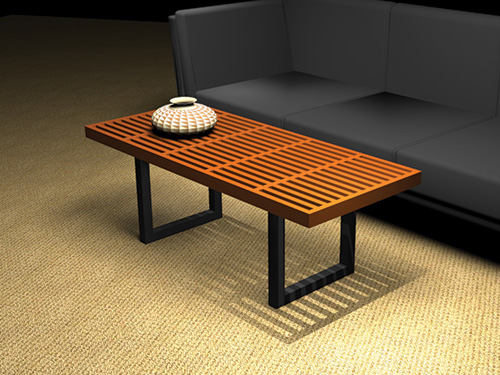
If you choose to go with either of these two options (both available at rockler.com), you will need to add a wooden platen across the bottom of the tabletop so that you have a solid surface for mounting the metal legs.
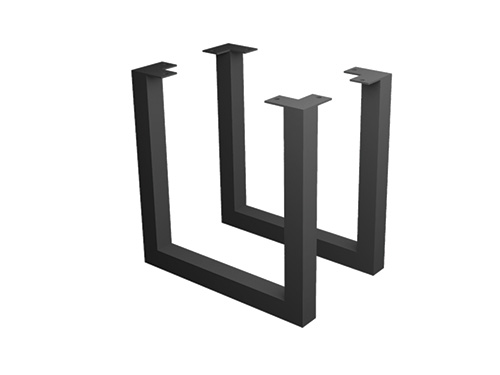
Keep the platen thin, in the 3/8″-thickness range, and mount them with sufficient screws to hold the legs firmly.
Final Details
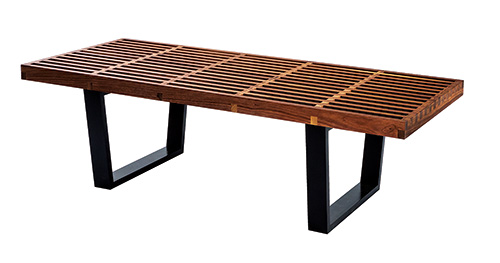
Attach the legs by screwing through their upper crosspieces into the walnut tabletop. We used five screws per crosspiece. That may seem like a lot, but these mechanical joints will need to stand up to the wear and tear of being pushed, pulled and occasionally sat on. Surfaces like this that are low enough to serve as quick “chairs” should be strong enough to bear that weight — better safe than sorry!
Here’s one last suggestion: apply a coat of paste wax to the tabletop, both for some protection and to create a pleasant texture.
This little coffee table is lovely to look at and will be a project that will be enjoyed for years and years to come.


