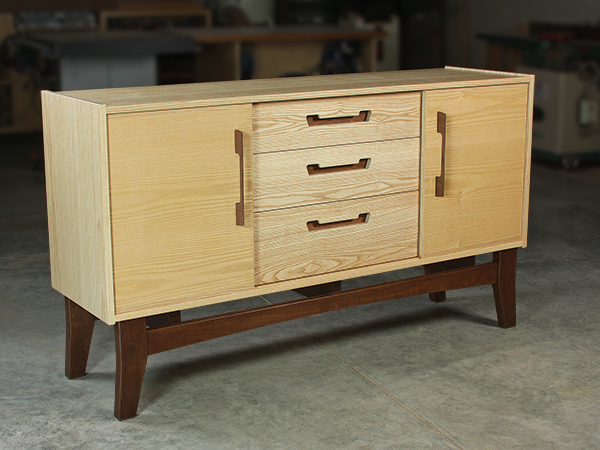
A close family friend is a fan of Mid-century Modern furniture, and when she asked if I could build her a dining room sideboard in that style, she didn’t have to twist my arm to say yes. Jeff Jacobson, our senior art director, drafted this contemporary design. Collectively, we settled on ash and ash plywood for the cabinet and drawer faces but walnut for the base, door pulls and — surprise! — even the drawer boxes and shelves. My friend is excited by the prospects of showing her dinner guests the sideboard, then opening the drawers to reveal the unexpected color contrast of light-colored drawer faces hiding rich, chocolate brown interiors.
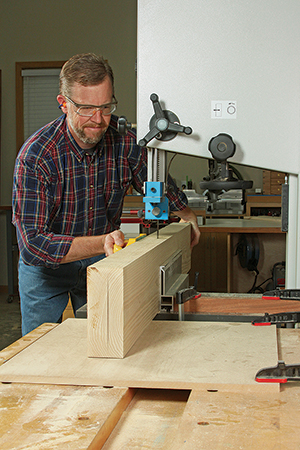
In terms of the woodworking involved, this sideboard looks pretty simple to build: it’s a rectangular cabinet with sliding doors and three drawers. We’ve also kept the joinery straightforward: mortise-and-tenons, dadoes, grooves and rabbets hold it all together.
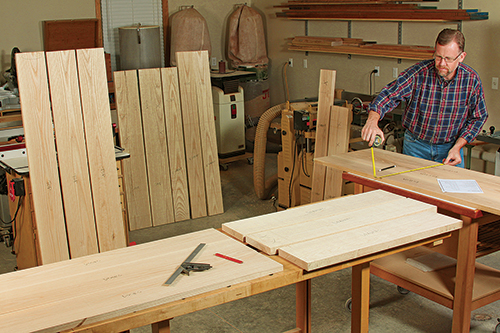
But, believe you me, you’ll want to set aside plenty of weekends to build it, because it will take you more time than you might think — it did for me. Still, the end result is well worth your efforts, and it’s an excellent opportunity to dabble with two beautiful North American hardwoods. Let’s get started!
Assembling the Cabinet Carcass
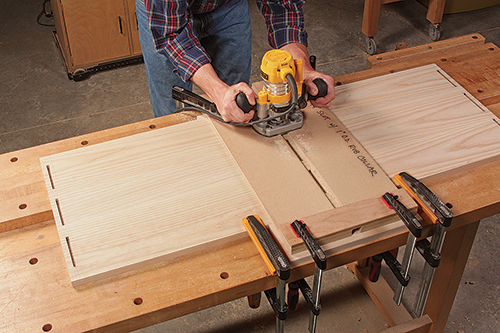
Follow the Material List to prepare panels for the cabinet’s top, bottom, sides and vertical supports. When you study the Drawings, you’ll see that the top and bottom panels attach to the side panels with three 4″-long tenons per corner, spaced 1-1⁄2″ apart. Start by routing the joints’ stopped mortises in the side panels. They are 1/4″ wide, 1/2″ deep and 4″ long. Inset them 1-1⁄2″ from the edges of the panels and 1/2″ in from the top and bottom ends. I used a plunge router, 1/4″ spiral upcut bit and a slotted jig to make these mortises. Mark them carefully to start and stop the cuts accurately. When all 12 mortises are routed for these joints, chisel their ends square.
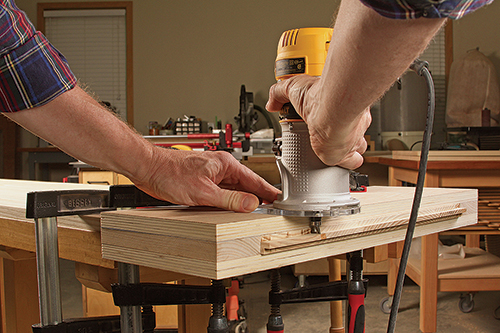
With those done, cut tenons on the ends of the top and bottom panels to fit the mortises. Given the size of these big panels, it will be easier to cut the tenons with a handheld router than at the table saw with a dado blade. You could use a rabbeting bit set for a 1/2″-wide cut, but I used a shop-made “wraparound” jig instead. Its four guide edges ensure that the shoulders of the tenons will be uniform all around the panel ends. I used a short piloted mortising bit to hog away the material, shifting the jig backward after each pass to avoid overloading the router and bit. Whatever method you use, these long, continuous tenons should be centered on the thickness of the top and bottom panels.
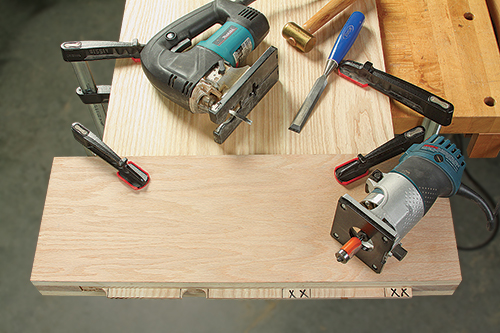
Now, mark and trim each long tenon into three 4″ lengths, removing the 1-1⁄2″ waste in between them. Be especially careful when cutting the front-most waste area away, because it creates the front corners of the panels that will show when the sideboard is assembled. Test-fit the top, bottom and side panels together to make sure the joints close properly.
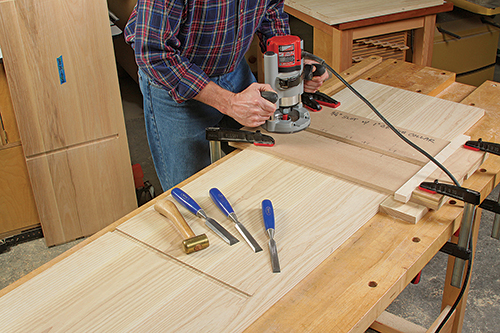
A pair of vertical support panels divide the carcass into two end cabinets with a drawer compartment in between. Cut 3/4″-wide x 1/4″-deep dadoes into the top and bottom panels to house these dividers. I used the same slotted routing jig as for the side panel mortises to cut these long dadoes, only this time I switched to a 3/4″-dia. straight bit to mill them. Cut the dadoes 16-1⁄2″ long, starting from the panels’ back edges. Then, square up their front ends with a chisel.
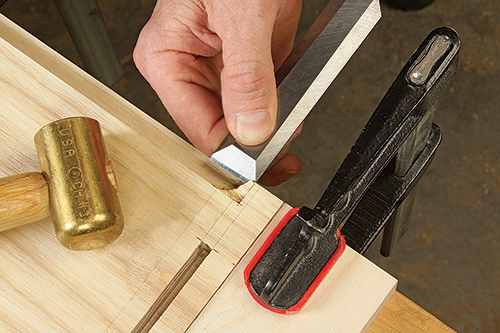
Reassemble the top, bottom and side panels, and measure the span from the bottoms of the dadoes you just cut to determine the actual length of the vertical supports. Trim them to this length. Then cut 1/4″ x 1/4″ notches into their top and bottom front corners with a jigsaw or band saw. The notches enable the panels to fit over and around the front ends of the dadoes in the top and bottom panels.
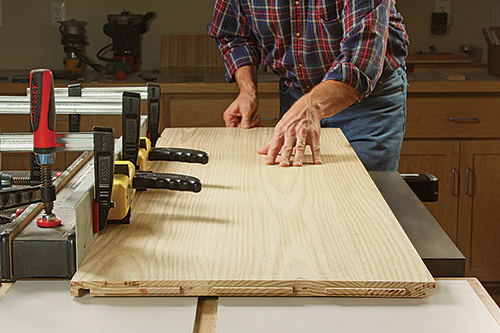
The sideboard’s 1/2″-thick plywood back panel fits into a 1/2″-deep x 3/8″-wide rabbet around the inside back edges of the top, bottom and side panels. These back rabbets are easiest to mill now, while the carcass panels can still be laid flat. You can cut the rabbets in the top and bottom panel from end to end. But the rabbets in the side panels must stop 5/8″ tape will be applied to the bottom of the bottom panel groove, later, to ensure that the wooden doors will slide smoothly. Position both tracks 3/8″ in from the front edges of the top and bottom panels. You can cut the tracks on a table saw with a dado blade or with a handheld router, straight bit and an edge guide. Make the bottom door track 3/16″ deep and the top door track 3/8″ deep.
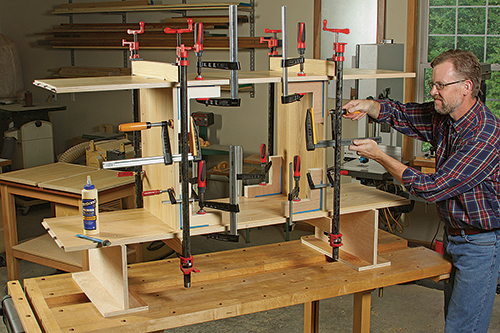
Next, drill rows of shelf pin holes on the inside faces of the side panels, the left face of the left vertical support and the right face of the right vertical support (facing into the shelve cabinet compartments). I also added pocket screw joints to the vertical panels, placing these holes on their “drawer-side” faces where they won’t show once the drawers are hung.
Now is also a good time to drill installation holes through the bottom panel for attaching the sideboard’s base assembly with screws, later. If you’re making this project’s cabinet from solid wood as I did, it will expand and contract across the grain as the humidity changes. But the base won’t, so you need to account for that fact. Draw three lines across the width of the bottom panel that mark the positions of the base’s three cross supports. I machined a round counterbored screw hole at the front and two slotted screw holes at the center and back, for each line of screws. These holes will fix the bottom panel in front but still enable the cabinet to expand backward while remaining attached to the base.
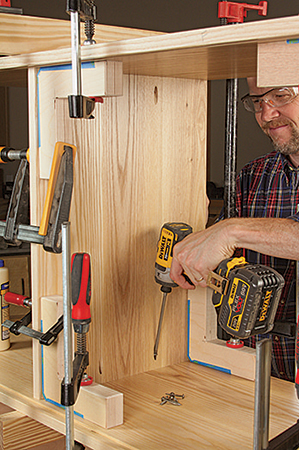
You’re ready to finish-sand the top, bottom and side panel up to 180-grit. Mask off the joint areas to keep the wood bare here, then apply finish to the carcass panels. When it dries, glue and clamp the vertical supports to the top and bottom panels first. Be sure the vertical supports meet the top and bottom at 90 degrees. Then add the side panels and clamp up the carcass. Check the whole assembly for square by measuring the diagonals — it’s crucial that the carcass is square in order for the doors and drawers to function properly.
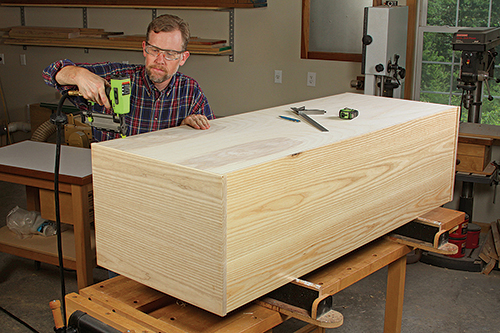
Complete the construction process on the carcass by cutting a plywood back panel to size, and sand its faces. Apply finish to both faces, and when that dries, install the back panel in its rabbets with 1-1⁄2″-long, 18-gauge brads.
Building the Drawers
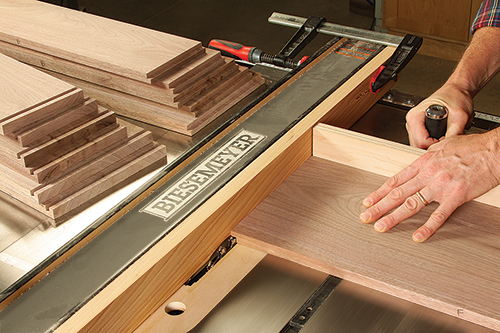
Follow the Material List on the next page to prepare enough 5/8″-thick solid stock for the fronts, backs and sides of the drawer boxes. Before you cut the fronts and backs to length, however, double-check the inside distance between the vertical supports of your sideboard cabinet — if it isn’t 26″, you’ll need to adjust these part lengths. The lengths of the drawer fronts and backs should be the distance between the vertical supports minus 1-5⁄8″.
Take a close look at the Drawings to see how the drawer box joinery is constructed. The drawer fronts and backs have 5/16″ x 5/16″ rabbets on their ends that fit into matching dadoes in the drawer sides, forming a strong, interlocking joint. Cut the drawer-side dadoes by installing a 5/16″-wide dado blade in your table saw and setting the rip fence exactly 5/16″ away from its closest face. Raise the blade 5/16″ above the table. Back up the drawer side workpieces with your miter gauge, equipped with a sacrificial fence, to minimize tearout when the blade exits these cuts. Then cut a pair of these dadoes on the inside faces of all six drawer box sides.
Now clamp a sacrificial facing to your saw’s rip fence, and adjust the fence so the facing is aligned flush against the blade. Cut a rabbet on the end of a test piece of the same thickness as the drawer fronts and backs, and see if this rabbet fits into the drawer side dadoes. Adjust the blade height, if needed, to create a slightly thinner or thicker rabbet tongue — you’re aiming for a snug, friction fit here. Then mill rabbets on the ends of the drawer fronts and backs.
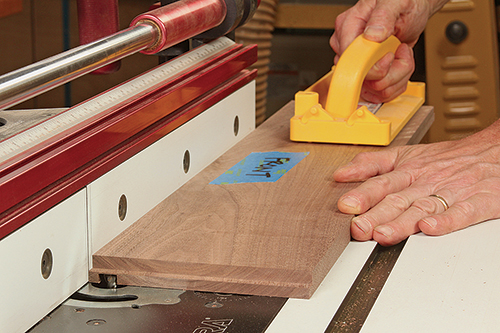
The drawer bottoms fit into 1/2″-wide, 1/4″-deep grooves in the drawer boxes, 1/4″ up from their bottom edges. Notice that these grooves run the full length of the drawer fronts and backs, but I stopped them when they intersected the dadoes on the drawer sides. I plowed these grooves on my router table. But, if you use a dado blade instead, go ahead and cut the grooves the full length of the drawer sides, just like the fronts and backs. Stopped or continuous grooves both work fine.
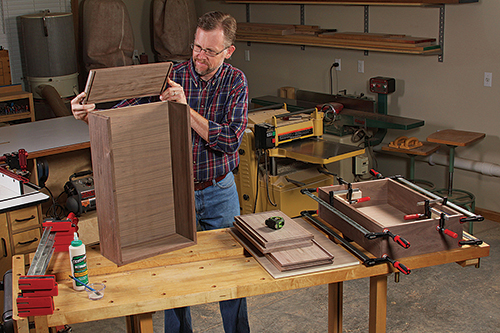
Grab the parts for one drawer and dry-assemble them. Carefully measure the spans between the drawer bottom grooves to determine the final proportions of the drawer bottom panels. Cut the three panels to size, and sand them and the other drawer parts to 180-grit. Now dry-assemble all three drawers to be sure the parts fit together fully, then spread glue along the joints, and assemble each drawer with clamps.
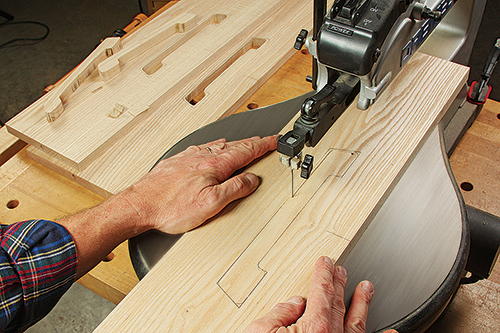
Chuck a 1/2″-dia. flush-trim bit in your router table to clean away the remaining waste inside the drawer face cutouts. To do that, secure the template with pieces of double-sided carpet tape to a drawer face so the template lines up with your cutout layout lines again. Adjust the bit height so its bearing contacts the template on top, and rout away the waste material. Feed the drawer face clockwise around the bit. Repeat the process on the other two drawer faces. Then, clean up any burn or chatter marks from the bit left in the rounded corners of these shapes with sandpaper wrapped around a small dowel.
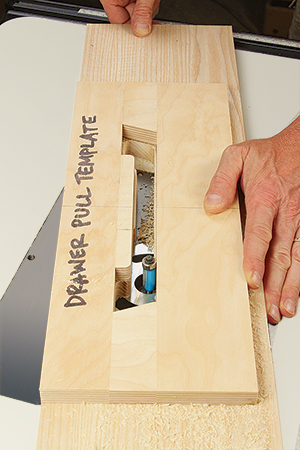
Cutting out the shape is the first step. Now we need to add the “pull” aspect by creating a finger recess behind the indented portion of the cutout along its top edge. I used a 5/8″-dia. core box bit in the router table. Since it has no pilot bearing, I needed to use the fence to guide the cut. In several rounds of deepening passes, I removed material behind this inset area until the front edge was reduced to 3/16″ thick.
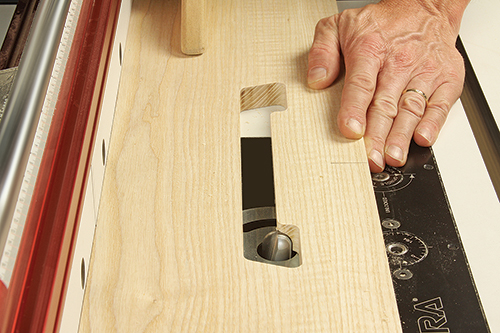
When doing this, it’s very important that the bottom edge of the drawer faces are against the fence and not the top edges. Here’s why: the bit should only cut wood using the edge closest to the operator — not between the back edge of the bit and the router table fence. In that configuration, the bit will grab and pull the wood through at blazing speed, instead of pushing against it. It’s a dangerous climb-cutting circumstance you want to avoid at all costs! So, rout carefully.
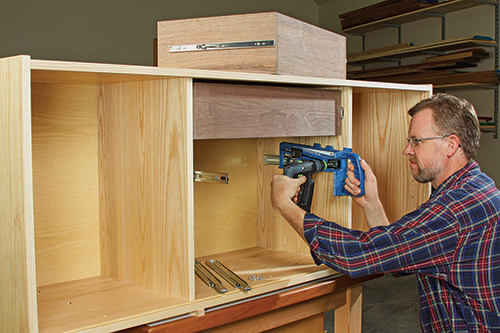
Next, let’s install the three sets of metal drawer slides inside the cabinet’s center compartment. Position the front edges of these slides 3/4″ back from the front edges of the vertical supports. Locate the centerlines of the slides 4-5⁄8″, 12-5⁄8″ and 19-1⁄8″ up from the cabinet bottom. Now temporarily attach the drawer portion of the slide components on the sides of drawer boxes, centered on their widths. Use a few screws to hold them in place. Hang the drawers inside the cabinet, and test their sliding action to make sure they glide smoothly in and out. If they do, remove the drawers and their slide components and apply finish to both the drawer boxes and faces. But, if the drawers seem to bind on the slides, you may need to make them slightly narrower. In these instances, I skim an even amount of material off the faces of the drawer sides with a few passes at the jointer or with a smoothing plane. When the action is smooth, complete the finishing process.
Adding the Doors
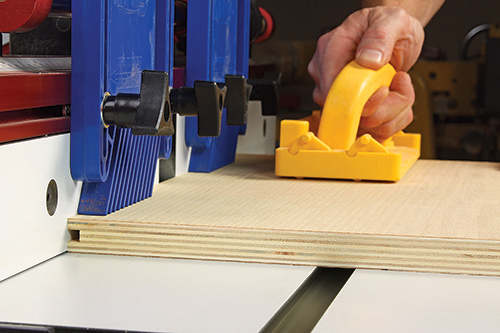
The cabinet doors consist of a slab of 3/4″ ash plywood with the face veneer grain running horizontally. The top and bottom edges of the plywood have solid wood trim strips that provide a more durable wear surface for sliding the doors in their tracks. Two thin strips of wood edging on their left and right ends hide the edge plys and cover the ends of the thicker top and bottom wood strips. Start by cutting two plywood blanks for the doors that are the correct height but an inch or so longer than necessary.
Prepare some 3/4″ solid stock for the top and bottom edging strips. Attach these strips to the plywood blanks with tongue-and-groove joints. I used a 1/4″-wide slot cutter in the router table to tackle this work. Center the cutter on the thickness of the plywood, and adjust the router table fence so the bit will cut a 1/4″-deep groove. Plow a groove along the top and bottom edges of both plywood door blanks, flipping the panels from one face to the other and repeating the cuts to center the slots exactly.
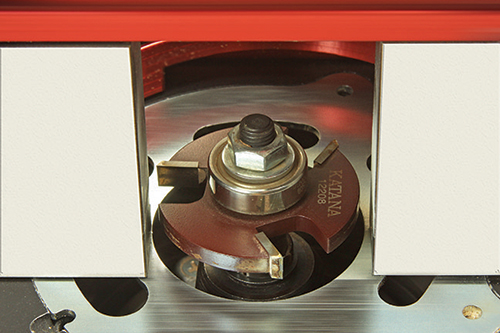
Now adjust the bit either up or down by 1/4″, but leave the fence setting the same. Round up your top and bottom trim stock and, in two passes, flipping from one face to the other, cut a centered tongue along one edge of each piece to fit the slots in the door blanks. Then glue and clamp these edging strips to the doors.
Next, trim the doors to 18″ long (their horizontal length). Rip and crosscut four thin strips from 3/4″ solid wood for the doors’ side trim, and glue these to the left and right edges of the door blanks to cover the remaining exposed edges of the plywood and the ends of the top and bottom trim strips.
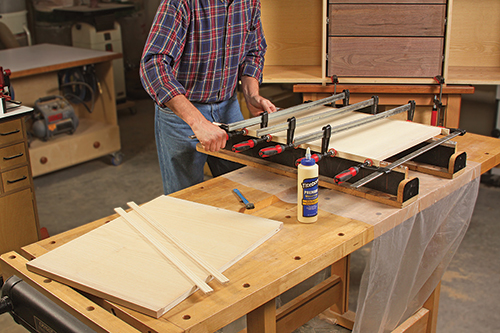
Measure the vertical span between the bottoms of the door tracks in the cabinet to determine the final top-to-bottom length of the doors, plus the clearance that will be required in order for them to be inserted and removed easily. The overall “height” of the doors should be 3/16″ less than the span distance. If necessary, trim material away from the tops and bottoms of the doors evenly to achieve this length while also keeping the width of the top and bottom trim strips the same.
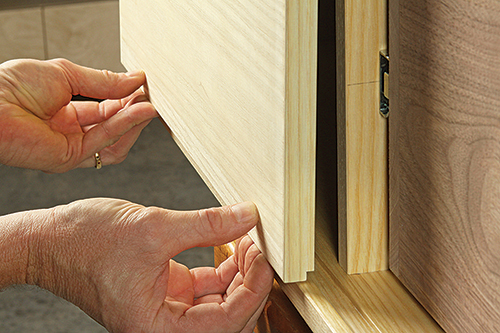
You’re now ready to form rabbets into the back top and bottom edges of each door so they’ll fit the door tracks. I cut these at the table saw with a wide dado blade partially buried into a sacrificial fence facing. Raise the blade to 1/4″, and set the saw’s rip fence to cut a 3/8″-wide rabbet along the top door edges. Shift the fence to cut a 1/4″-wide rabbet into the bottom inside edges of the doors. (Note: it’s necessary for the top rabbets to be wider than the bottom rabbets in order for the doors to be inserted into their top tracks, then lifted a bit farther still, so the bottom door edges will clear the bottom of the cabinet and swing into the bottom door tracks.)
After you’ve cut these rabbets, install the doors in the cabinet and check their sliding action. If they bind at all in the tracks, use a rabbeting or shoulder plane to shave material off the back face of the rabbet “tongues” until the doors slide more smoothly. Then, sand and finish the doors.
Completing the Leg Base
The walnut base consists of four legs joined by two long front and back curved rails. Three cross supports connect the rails, in lieu of short side rails between the legs. Start construction by cutting four 4″ x 12″ leg blanks from 1-1⁄2″-thick stock. You’ll also need two 57-1⁄2″-long blanks of 1″-thick stock for the rails. Cut these to 3-1⁄2″ wide — it’s wider than necessary, but I found the extra width useful, later, when cutting their bottom curves. Also make up three cross supports from more 1-1⁄2″ stock that measure 4″ wide and 16″ long.
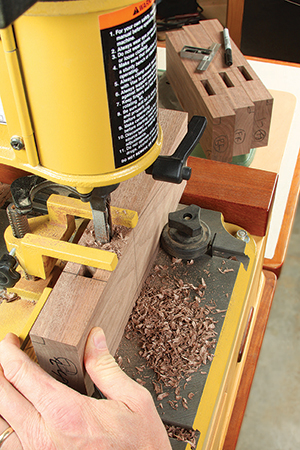
Follow the Drawing to lay out the leg shape on one of the leg blanks, but don’t cut it out yet. Now lay out the position of the rail mortise on all four leg blanks. They are 1/2″ wide and 2″ long, starting 2-1⁄2″ down from the top ends of the legs. Center the mortises on the leg thicknesses. Mill them 1-1⁄2″ deep using whatever method you prefer. I used a hollow-chisel mortiser for this job, but you could drill them out with a Forster bit, rout them or even chop them by hand.
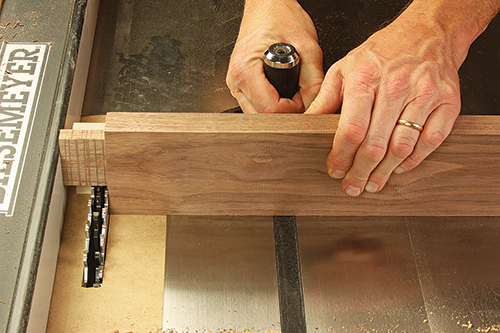
Now cut out the leg you’ve already drawn to shape at the band saw, and smooth its edges. Trace this leg’s profile onto the other three leg blanks. Cut those to rough shape, too, then use the first leg as a “master” for template-routing the other three to a perfect match with a long flush-trim bit.
Set those aside so you can mill 1-1⁄2″-long tenons on the ends of the rail blanks. They’re 1/2″ thick, so stack a wide dado blade in your table saw, and position the rip fence 1-1⁄2″ away from the face of the dado blade that’s farthest from the fence. Raise the blade to 1/4″, and cut the broad side cheeks of the tenons using your miter gauge with a long fence attached, to back up these cuts. When those are finished, crank the blade up to 1/2″ and cut the tenons’ top short end cheeks next. Cut the bottom cheeks last, raising the blade to 1″ this time (to account for the extra 1/2″ of material you’ve left along the bottom edges of the rails). The final width of these tenons should be 2″. Check to be sure they fit properly in the leg mortises.
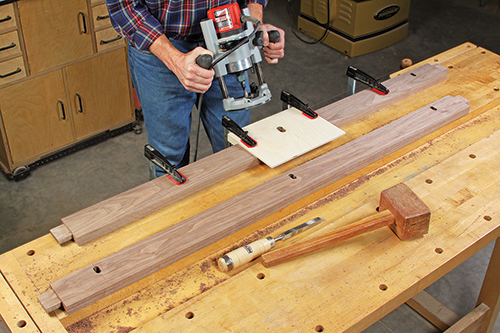
The inside faces of the rails require three 1/2″ wide, 1″-long mortises oriented vertically that will house tenons on the ends of the cross supports. Two mortises are centered 6-3⁄4″ in from the ends of the rail tenons, and the third is centered on the rails’ length. Start these mortises 1/2″ in from the top edges of the rails, and make them 3/4″ deep. I cut these with a scrap-made router jig to limit the router’s path, a guide collar and 1/2″ spiral upcut bit. You could run your router against a clamped straightedge instead, if you like, and skip the jig.
The bottom edges of the rails are contoured into a long, gentle curve. This curve reduces the width of the rails at their centers to 2″. I used a thin scrap of plywood as a flexible batten to draw the curve onto one rail, then cut the contour at the band saw and faired it smooth on my drum sander. That rail then became the “master” for template-routing the other rail’s curve to match it — just as I did for machining the legs.
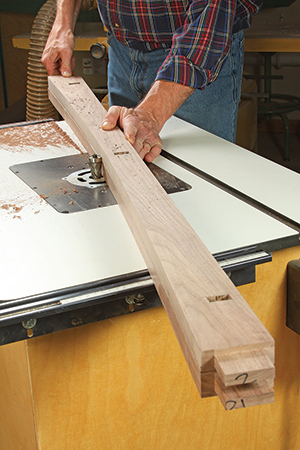
There are still 1″-wide tenons to raise on the ends of the cross supports: they are offset on these parts, starting 1/2″ up from the bottom edges of the workpieces. I formed the bottom and side cheeks of these tenons with a wide dado blade, just like the rail tenons. But the top-end cheeks of these tenons are a full 2-1⁄2″ down from the top edges of the workpieces. So, I switched to a standard blade and, with the rip fence in the same position, made these deep cuts with the workpieces oriented top-edge down and backed up against my miter gauge. A quick final cut at the band saw trimmed the tenons to width and freed the waste pieces on top.
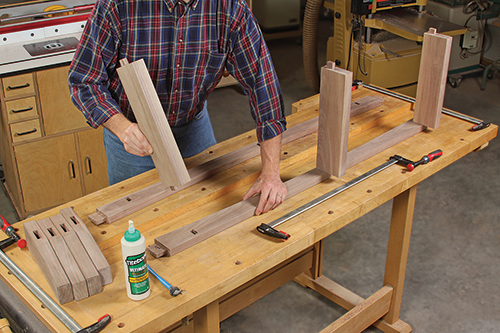
Sand the legs, rails and cross supports up to 180-grit. I eased the sharp edges of all of these parts with tiny chamfers that I cut with a palm router. Then glue and clamp the cross supports between the rails. Make sure their top edges project 2″ above the top edges of the rails. Inverting the assembly topside down on your workbench is a good way to check to make sure the cross supports are all even with one another. When these joints dry, glue and clamp the legs in place, again making sure their top ends align with the top edges of the cross supports. Apply finish to complete the base.
Finishing Up
The only components left to build are four cabinet shelves. While the finish on those dries, center the cabinet over the base and drive #10 x 1-1⁄2″ screws down through the cabinet and into the cross supports to attach these components. Then, install the drawer faces on the drawer fronts, trimming them as needed to fit neatly between the vertical supports. Apply finish to them, and fasten them with #8 x 1-1⁄4″ countersunk wood screws driven through from inside the drawers.
Mount the shelves on their shelf pins, and install the walnut pulls on the doors. To help ensure that the doors will slide smoothly in their tracks, I applied a strip of 1/2″-wide adhesive-backed nylon tape along the full length of the bottom track. It’s not essential, but with the help of this tape, the door action is slippery smooth. Once that’s done, this sideboard is ready to take its rightful place in a dining room.
Hard to Find Hardware
Full-Extension Drawer Slides – Centerline® 3612 #44506
1/4″ Shelf Pin Supports #22765
Nylo-Tape Friction-Free Drawer Slide Tape #56620
Walnut Sleek Pull, 224 mm CTC #59207


