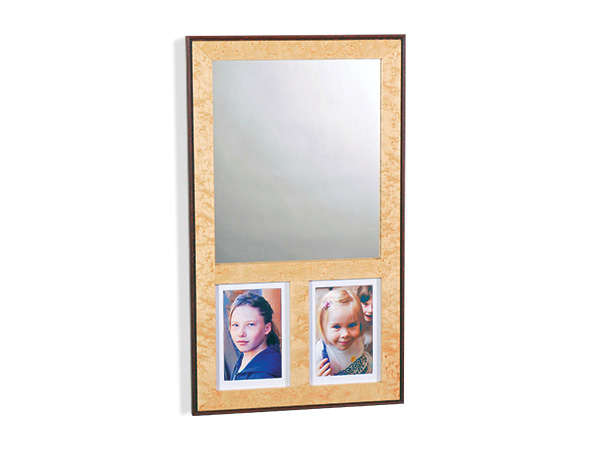
This compact wall mirror will help you take one final check of your hair or makeup before leaving for work in the morning, and its two 5×7 photo frames can serve as a reminder of special people, places or pets in your life. Hopefully this project will provide a pleasant reflection that puts you in a good frame of mind as you head out into the world.
While mitered and regular half-lap joints can be made any number of ways, Rockler’s new Router Table Half Lap Jig makes quick work of them with a spiral upcut bit. You’ll need to mill eight of these joints to build this mirror frame, so we’ll put this innovative jig to use here as a helpful introduction to its capabilities.
Preparing Narrow Frame Stock
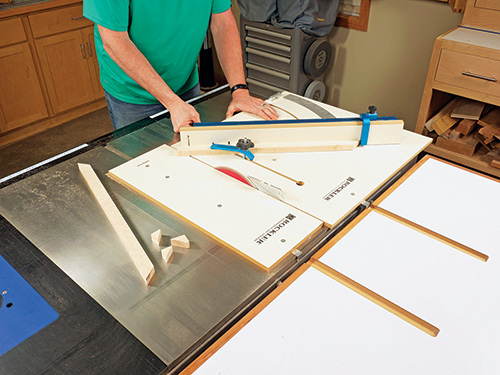
Joint and plane a piece of 4/4 hardwood flat and square along its width and length, and reduce the board’s thickness to 3/4″. I decided to use bird’s eye maple for the primary parts of this project, because its attractive “spotted” grain pattern is sure to capture attention! But you can select any hardwood that suits your preference and budget. A piece of 5″ x 36″ stock will be sufficient for making the frame’s top, bottom, sides, rail and stile. Because the components of this modified mirror frame project are so narrow — just 1-1/8″ wide — choose your stock carefully. Give the wood at least a few days to acclimate to your shop before surfacing it to help minimize potential twisting, bowing or cupping.
Next, rip workpieces for the top, bottom, two sides, rail and stile to 1-1/4″ wide, and give the parts a night to allow for any minor warpage that might still occur along their length after ripping them. The next day, flatten one edge of each on the jointer again, and rip these parts to their final 1-1/8″ width.
Crosscut two frame workpieces to 12-3/8″ long for the top and bottom of the mirror frame. Crosscut two more to 22-1/2″ long for the sides of the frame. These side pieces are overly long because their ends will be mitered; the extra length will allow you a margin for error when sawing those angles. Crosscut the frame’s rail and stile to rough length, too — leave these at least 1/4″ longer than necessary.
Study the Exploded View Drawing to familiarize yourself with the mitered half-laps that form the corner joints of this picture frame. Notice that the top and bottom frame members (pieces 1) have 3/8″-deep recesses with a 45-degree shoulder on each end of the parts, and these recesses are removed from the front faces of the workpieces. The back tongue of the half-lap remains square on the end. Conversely, the side frame workpieces (pieces 2) have mitered ends. A 3/8″-deep recess is removed from the back faces of these frame parts instead, creating a front-facing mitered tongue with a square shoulder. The front and back tongues of the four corners of the mirror frame overlap to create strong mitered half-lap face grain joints.
At your table saw, set the fence on a crosscut sled or a miter gauge carefully to 45 degrees, and miter-cut the ends of the side frame pieces. Or, use a miter saw to make these cuts instead. Have these cuts trim the side frame workpieces to their final 21-7/8″ lengths. Do not miter-cut the ends of the top and bottom frame pieces.
Routing Mitered Half-Laps
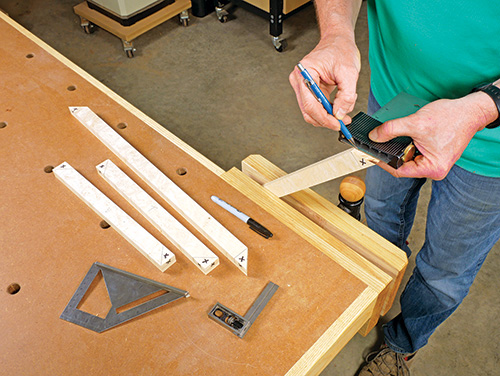
Rockler’s Router Table Half Lap Jig has a repositionable fence for plowing square or 45-degree half-laps accurately and safely. It requires the use of a 1/2″-diameter upcut spiral bit to remove the waste material on both halves of the joints. And to that end, you will be removing exactly half the stock thickness to create the overlapping connections. So, take some time now to mark the side frame workpieces on their back faces and outside edges with square layout lines to indicate the recessed areas that will be removed next to form the half-lap joints. It also helps avoid confusion if you mark the waste areas with X’s. Mark the top and bottom frame workpieces as well with a 45-degree layout line on each end on the front faces of these parts. Then mark the outer edges of these waste areas with layout lines to show how much stock must be removed there.
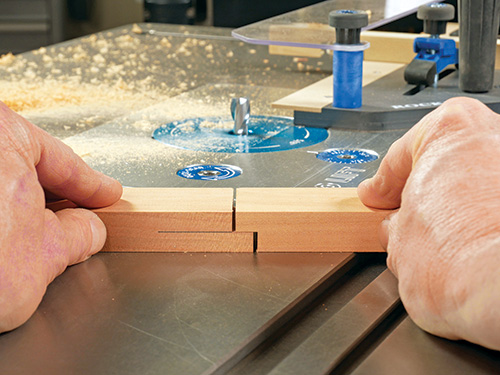
Step over to your router table and install the upcut spiral bit in it. Carefully follow the instructions that come with Rockler’s Router Table Half Lap Jig to set the bit height accordingly. The process involves using two test pieces that match the thickness of your frame stock and routing a matching rabbet into the end of each one. Adjusting the size of these rabbets until their tongues meet in the middle when the rabbets are fitted together ensures that the router bit will cut to the exact center of your frame workpiece thickness.
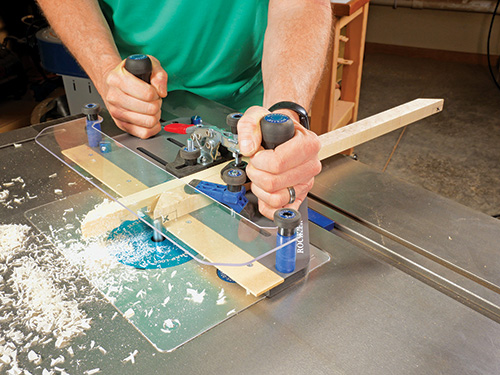
Next, set the fence on Rockler’s Router Table Half Lap Jig to the 90-degree position. Rout away the waste on the back side of the frame side pieces at each end of the parts to form the four mitered tongues of the half lap joints. Be careful when approaching the shoulders of these joint cuts to not rout too far; trim just to your layout lines.
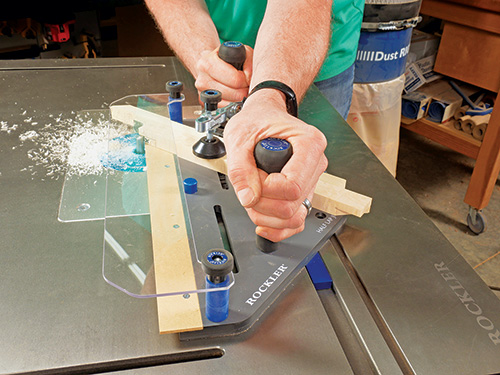
Now swivel the fence on the jig to 45 degrees. With the workpieces oriented face-down, carefully cut the mitered recesses on the top and bottom frame parts, removing all the waste material you laid out initially.
When all four mitered half-laps are routed, set the four frame parts together to check the fit of the joints. Ideally, the edges and faces of the joints should meet flush when fitted together. If they don’t, carefully consider how the joint fit could be improved. If the joints don’t quite close completely, you might be able to adjust their fit by routing away a sliver of more material from the shoulders of the cuts.
Adding the Rail and Stile
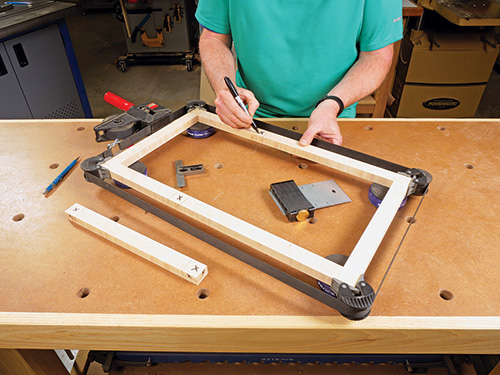
Install a strap clamp around the frame to draw the corner joints together tightly. Take a measurement of the outer width of the frame; this is the length to crosscut the rail to, so do that now. Then, on the front face of the rail, lay out a 1-1/8″-long x 3/8″-deep recess on both ends, and mark these waste areas with X’s.
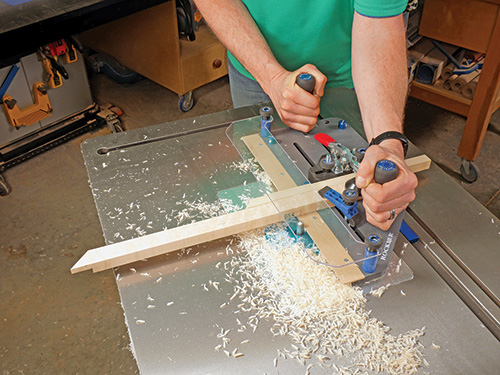
Now refer to the Frame (Front View) Drawing to mark the rail’s location on the back face of the frame side pieces. Remove the strap clamp and disassemble the frame so you can lay out these 3/8″-deep dadoes where the tongues on the ends of the rails will fit into the frame sides.
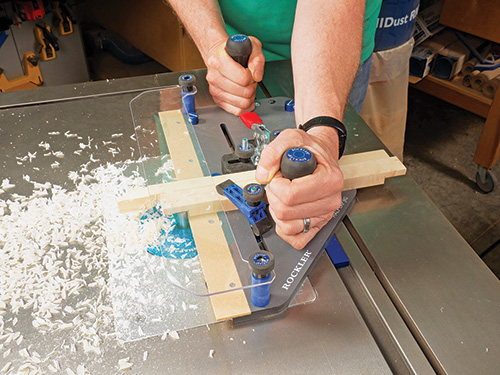
Head back to the router table to mill the “regular” half-lap joints on the side frame pieces and the ends of the rail. This time, the fence on Rockler’s Router Table Half Lap Jig remains in the 90-degree position for removing the waste on all three workpieces. Be careful when approaching the layout lines during routing to avoid cutting away too much of the layout lines. The goal is for the rail to fit snugly between the two frame side pieces, with the seams of the half-lap joints meeting flush. Any gaps between the ends of the rail and the frame sides will be really obvious on the front of the frame when it’s assembled.
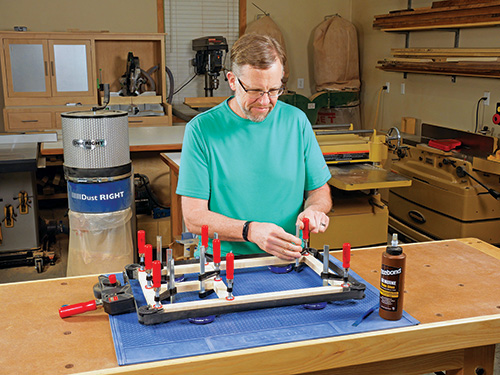
Dry-assemble the parts again so you know exactly how long the stile needs to be, and crosscut it to this length. Then repeat the layout process for centering the stile between the frame sides — it sets the 4-1/2″-wide openings for the two 5×7 photo spaces in the frame. As with the rail, lay out the stile so the tongues of its half-lap joints will be on the back of the stile, not the front. Mark the back faces of the frame bottom and the rail for 1-1/8″-wide, 3/8″-deep dadoes to house the stile. Rout these two half-lap joints in the three frame parts.
With all the joinery cuts done, go ahead and glue the top, bottom, sides, rail and stile together. Use the strap clamp and small clamps at each joint to hold the parts together while the glue cures.
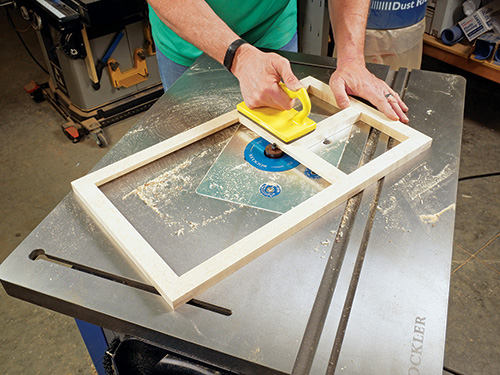
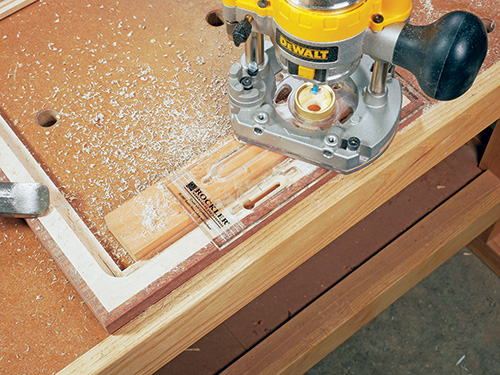
When the frame comes out of the clamps, clean off all excess glue and sand the faces and edges up through the grits to 180. Then install a rabbeting bit that cuts 1/2″-wide rabbets in the router table, and set its cutting height to 1/4″. With the back of the mirror frame facing down, plow a rabbet around the inside edges of the frame in the mirror area only to begin creating the recess for the mirror backer piece. Reset the bit to 3/8″ high and make a second routing pass to deepen this backer piece recess.
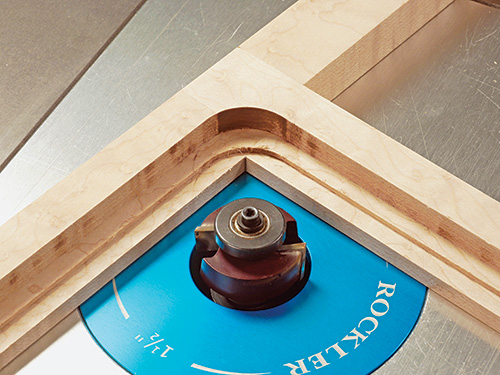
Now switch to a rabbeting bit that cuts 1/4″-wide rabbets and set it to about 1/2″ cutting height (the exact depth will depend on the thickness of the mirror glass you’ve chosen). Make a third routing pass around the mirror opening to create a deeper “step” at the bottom of the recess for the mirror itself. Creating a larger opening for the backer than for the mirror will enable you to install the backer with brad or pin nails driven into the frame around the mirror, which will strengthen the frame as well as hold the mirror in place.
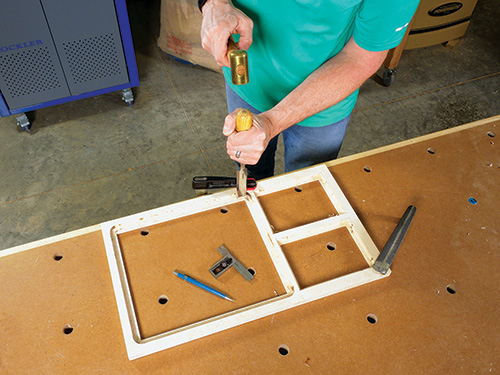
Lower the same 1/4″ rabbeting bit to 1/4″ cutting height, and this time rout recesses around both picture frame openings in the back face of the frame. Then raise the bit to 1/2″ to deepen these recesses. Finish up this work by squaring up the rounded corners of the mirror and photo recesses with a sharp chisel.
Applying Decorative Beaded Moldings
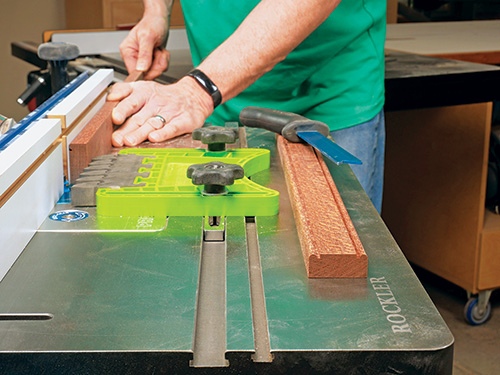
You could choose to leave the outer edges of the frame as they are in order to see the edges of the lap joints you’ve made. But a banding of beaded moldings around the frame will add even more pizzazz. I made them from lacewood using Rockler’s Edge Beading Router Bit with a 1/8″-radius bead profile in the router table.
Rout the profile into the face of a couple long pieces of 3/4″-thick x 2″-wide stock — sufficiently long to create the four pieces of molding you’ll need to wrap around the frame. Make two routing passes into opposite long edges of the same face of each molding workpiece.
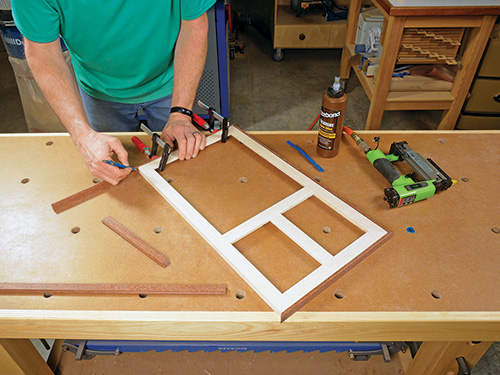
Now rip both of these profiled edges free, with the table saw’s rip fence set 5/16″ away from the blade, to create long strips of molding with a tiny recess next to the beaded edge. Sand these strips lightly to remove any routed burn marks or irregularities. Carefully miter-cut them into four pieces to wrap around the outer edges of the frame; arrange the molding so the larger beaded edge will be on the outside and the recess abuts the frame. Install the moldings with glue and 3/4″-long pin nails.
Installing Mirror, Photos and Backers
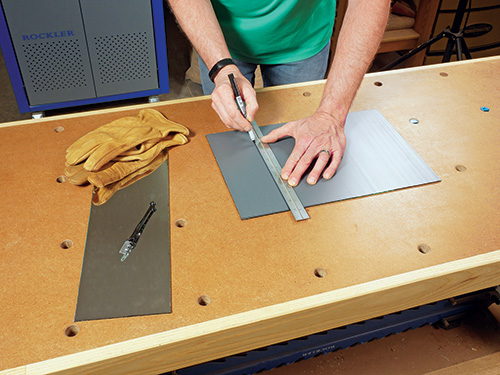
Cut three backer boards from 1/8″- or 1/4″-thick hardboard or MDF to fit the photo and mirror recesses. Insert the glass and mirror into their openings, and choose a couple of photos.
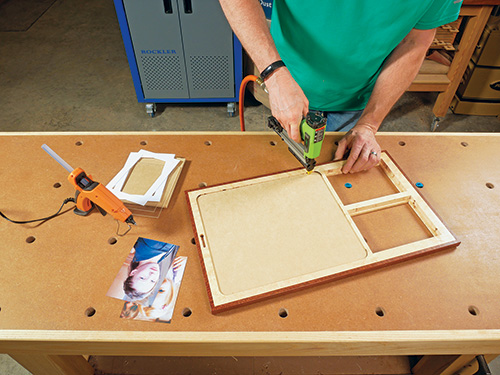
I installed the mirror backer with 1/2″-long, 23-gauge pin nails driven through the backer, about 1/8″ in from its edges. I switched to short beads of hot-melt glue for attaching the photo backers to the frame. It offers enough strength to hold the backers in place but also is fairly easy to peel off, should the photos need to be changed in the future.


