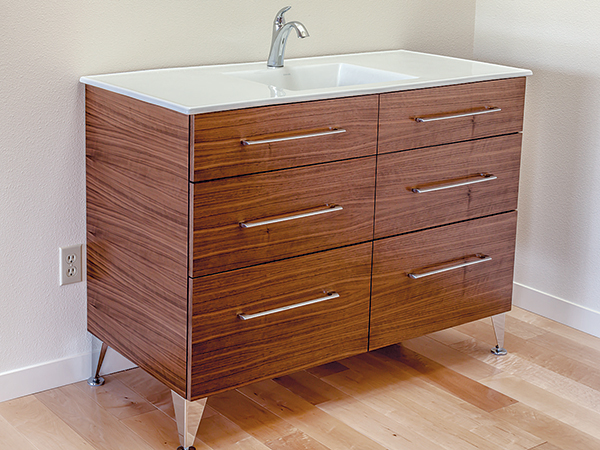
Any cabinet that shares space with plumbing is a compromise between utility and storage. When I needed to replace an aging bathroom vanity, I was determined to get the most out of the available space as well as build something with a little more pizzazz. After some research into the latest products on the market, I discovered that a lot had changed in vanity design since I last looked. So I set out to build a modern furniture-style cabinet with lots of storage.
The key design features include a prominent horizontal grain pattern wrapping all three faces and graduated drawers. To give the piece less of a built-in look, it is elevated off the floor on a set of adjustable chrome legs. Inside, drawers wrap around the sink bowl and plumbing supply and drain lines, providing easier access and making better use of the space.
Since this vanity was going into a master bath, I raised the height slightly, to 36 inches at the counter, a much more comfortable height for most adults.
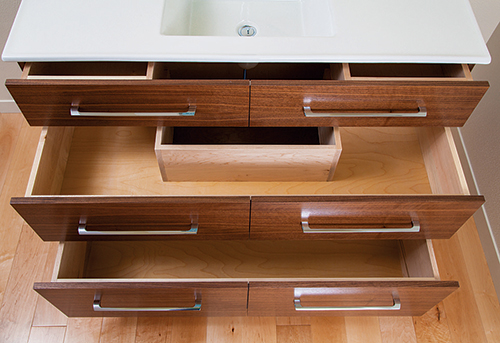
This particular piece has quartersawn walnut plywood for the show parts of the cabinet, although the same effect can be had with a number of other woods in a rift or quartersawn pattern. And although it looks like there are six individual drawers, there are only three banks; the false fronts are split down the middle for more pleasing proportions and reveals.
Build the Carcass First
In my view, there is no faster and stronger way to build furniture than with Festool Dominos. The tooling is a bit pricey, but I’ve gotten my money’s worth out of this machine a few times over. That said, pocket-hole joinery or biscuits are great options, too.
The carcass requires most of one sheet of furniture-grade 3/4″ plywood for the sides and false drawer fronts. The bottom is built with less costly 3/4″ birch, and the back and drawer bottoms require 1/2″-thick birch plywood.
To work with plywood, I long ago gave up on a table saw. For one, my workspace is too small to keep a dedicated cabinet saw with the requisite large outfeed table. Two, it’s always easier to bring the tool to a heavy piece of material than the other way around. My cutting tool of choice is a track saw. The best of these machines will give you perfect, tearout-free cuts in one pass.
Trick to Accurate, Repeatable Cuts
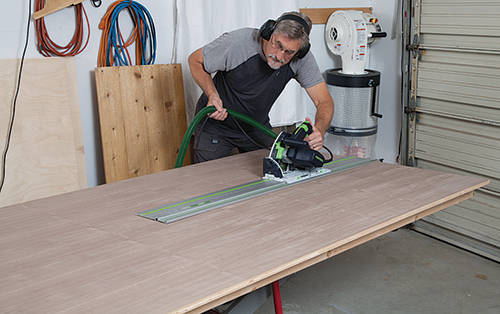
There is no shortage of track saw accessories to help make all types of cuts with a high degree of accuracy. I’m not in that deep with gadgets (yet) and have found a number of workarounds. Unlike a table saw fence, a basic track saw and guide rail have no means to ensure accurate repeatable cuts when cutting multiple components. Setting up the guide rail for each cut using a tape measure leaves a margin for error. I have two cheap solutions: an adjustable drywall square and drill bit.
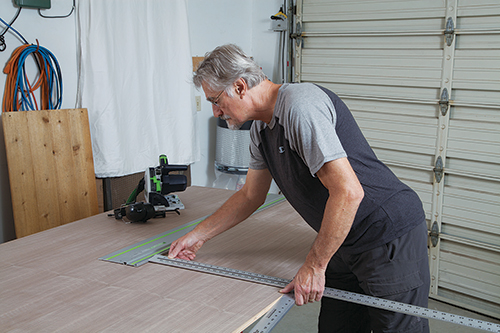
I use the drywall tool like a woodworker’s combination square to set the guide rail in place for repeatable cuts of large components. First, use a tape measure and mark the width of the cut to be made. Then position the guide rail (saw blade side) right on that mark. Now set the adjustable leg of the drywall square for the distance between the stock edge and guide rail (for narrow pieces, a combination square is all you need). Fine-tune the position of the guide rail by using the square to check the position fore and aft. It usually takes a bit of fiddling.
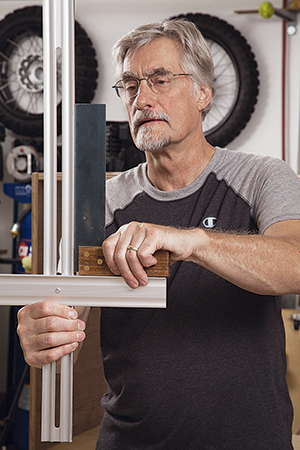
Given their intended purpose, a drywall square isn’t a precision instrument like a woodworker’s combination square, so use your finer tools to check the big brother for square when setting up and occasionally during use.
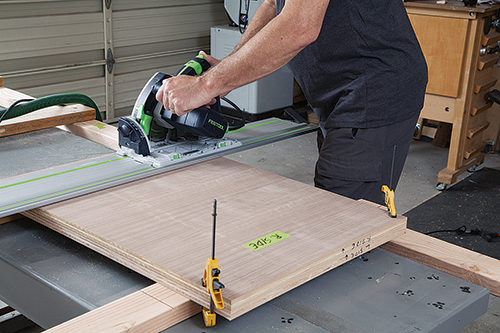
While one can use a drywall square or a framing square to align a guide rail perpendicular to an edge, there is a chance that for a long cut, the rail may be positioned off just a hair, so that’s why I use the above-mentioned method for cuts longer than 16″ or so. Experiment and see what works for you. When cutting parts with 90° corners, I regularly check the diagonals to make sure error hasn’t crept in.
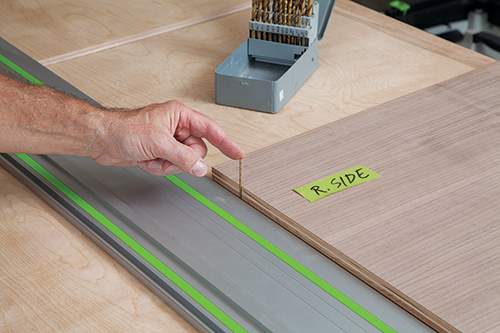
Now for the drill bit tip: To make a matching rip cut to an already cut component, take the finished piece, line it up with a good edge of the sheet good to be cut, then place a drill bit the size of the saw’s kerf (3/32″ is pretty close) between the guide rail’s cutting edge and the finished workpiece.
Note: This technique is only as accurate as the saw guide rail’s replaceable splinterguard. If it’s beat up, replace it.
Making the Cuts
For clean cuts, plywood needs a flat, stable support surface underneath. One easy solution is to place a piece of rigid foam on the ground as a cutting table. For a more comfortable and durable solution, I built a collapsible cutting grid out of two-by-fours. (I got the idea from builder Mike Sloggatt, who has a YouTube channel with other DIY tips.)
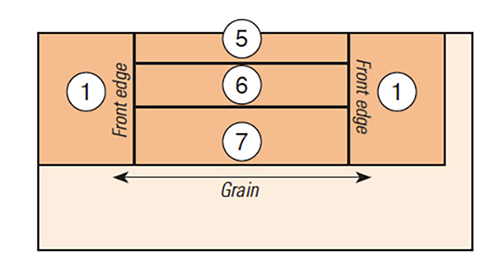
To get the wraparound grain effect for this cabinet, lay out the parts according to the Diagram. Basically, imagine unfolding and flattening the front and sides of the cabinet and lay out accordingly. These are the most critical cuts, so take time to think it through and measure carefully. Cut off the factory edges of the plywood if they’re chipped or marred in any way.
While an 8-ft long saw guide rail could be handy, I still haven’t invested in one. Plywood cabinet components are typically no longer than three or four feet, usually less, so a long rail isn’t needed.
I start by ripping off the section I won’t be needing, then crosscutting the sides, leaving them a hair taller than what I’ll need for their final dimension.
Next, I stack the two side pieces, and cut them at once to the desired height. Stacking ensures a perfect match. Remember to set and reset your saw for different depths of cut. I usually set the saw to cut about 1/8″ deep into the cutting grid below the workpiece.
Rip the drawer fronts to their respective heights, allowing for the thickness of edge banding. You want the top drawer a hair below the front edge of the cabinet. Leave the drawer fronts as three pieces for now; crosscut them to final size after the carcass is assembled in case of any slight deviations from the plan. In general, this is a good practice. Build and measure in stages. Accept a little adjustment here or there. Don’t be a slave to a cutting list.
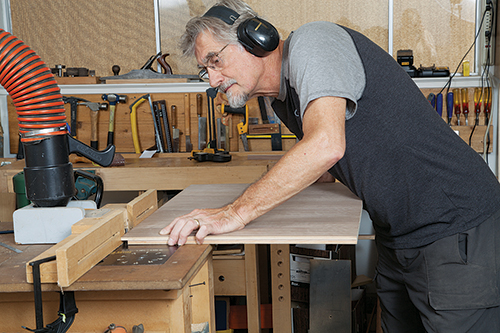
Cut two top rails for the carcass and the bottom, all at the exact same length. Here is where I used a case side to set up the guide rail (using a drill bit to mark the kerf) to ensure the bottom and rails were identical in length.
Next, cut rabbets in the sides, bottom and rear top rail to accept the back panel.
Then, cut the joinery for the carcass. I used Dominos, size 5 mm by 30 mm, for all the joints. Dry-fit the cabinet and prepare the pipe clamps (a helper comes in handy at this point, as this is a large cabinet, and it’s a lot easier for two people to work together on assembly than to try to do it all by your lonesome). Then I measured for the back panel and cut it 1/16″ undersize.
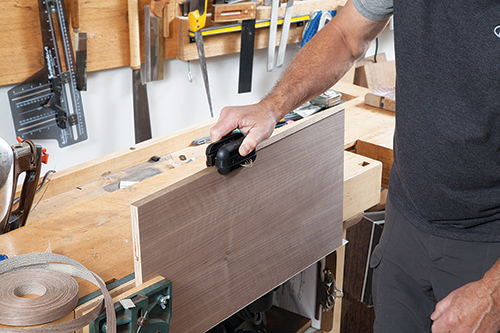
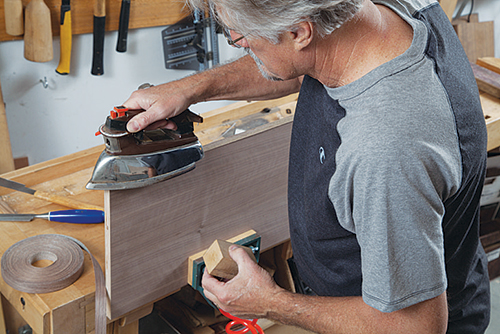
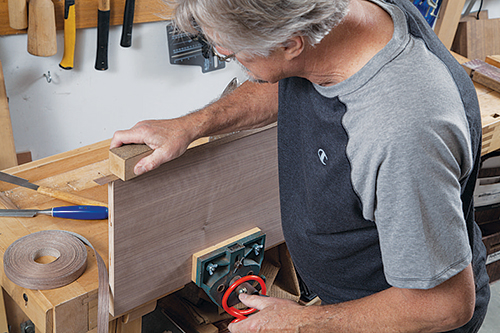
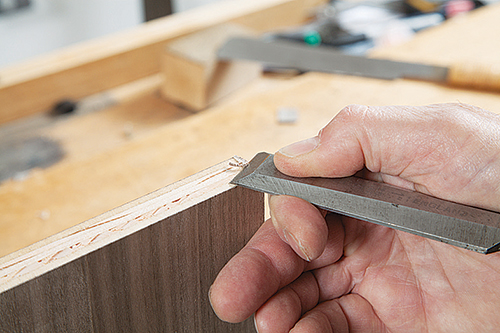
Next, attach the edge banding to the front edges of the cabinet. Be gentle when trimming the banding to avoid marring the good face of the plywood.
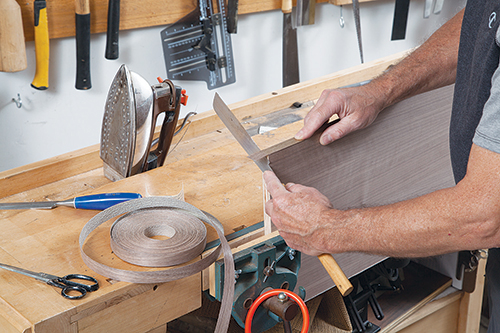
Finish off with a very light sanding to ease the edges. The case sides also get a light hand sanding, with the grain. Remember that plywood skins are thin.
At this juncture, there are two ways to go. The cabinet can be glued up, and finish can wait until all the components are ready. Or, the carcass parts can be finished before assembly, laid flat, to avoid runs and drips.
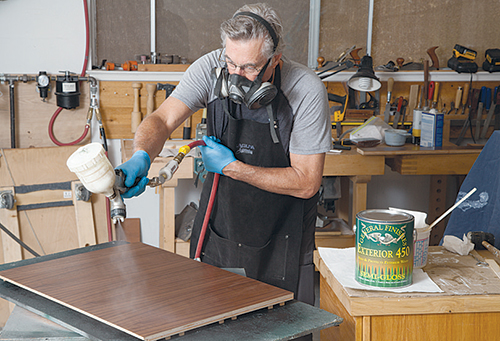
I prefer the latter method. I only worry about the outside faces; a less-than-perfect finish on the inside won’t matter, as drawers will eventually hide any slight flaws.
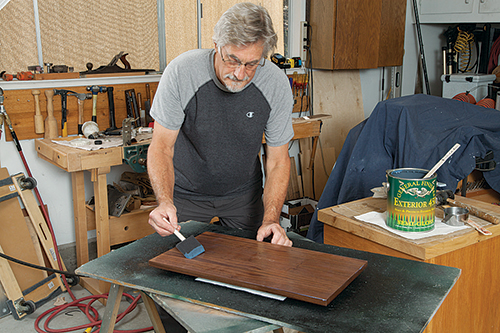
Once the show faces are finished, glue up the cabinet and enjoy the first big accomplishment. For legs, I used chrome corner legs with adjustable feet. The front legs can be flush to both edges of the cabinet, but for the rear, be sure to set them inward enough to allow for a baseboard.
Tips on Using the Domino Joiner
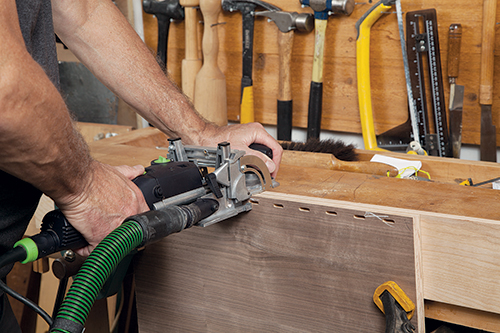
I’ve used the Domino to join everything from large cases to doors, drawers and furniture legs. The machine has a lot of great options to make work fast and accurate.
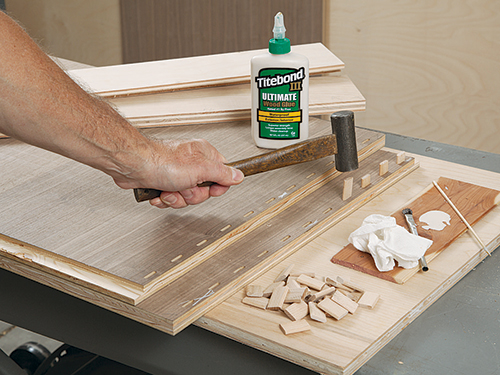
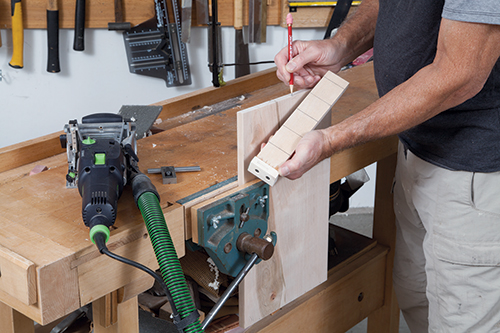
For example, retractable pins on the face allow for automatically starting mortises from the edge of a workpiece, then spacing mortises apart at even intervals. This often works fine, but sometimes those registration points fall in the wrong place. When I need to mark locations manually, I make up a marking tool (story stick) with centerlines for all mortises.
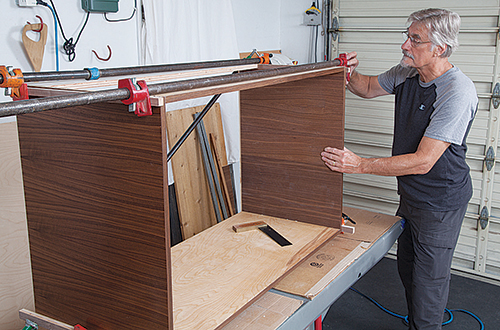
When using the marking tool, remember to always measure from a common edge. For example, when making drawers, register the stick to common edges (i.e., top OR bottom) of all parts and keep in mind the location of the dado for the bottom panel. Also, when cutting the mortises, be sure to always register the machine to common faces of the parts (outside is most common for case goods and drawers). Last, always make test cuts; not all joints can be cut to the same depth. For example, when building the drawers, I had to cut deeper mortises on the fronts and backs, and shallower mortises on the sides, so that I wouldn’t cut through the 5/8″-thick material.
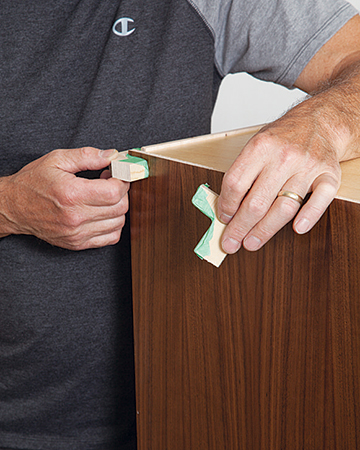
It’s a good idea to have a little wiggle room for assembly, especially when there are long rows of mortises. If just one is off, that can wreak havoc during glue-up. To solve that, cut mortises for one set of mating parts at a slightly wider setting. That allows parts to be shifted a bit for perfect alignment, much like with biscuit joints. For cabinet cases and drawers, this method will not compromise the strength of the joint. I would not recommend it for table or chair legs, where the joints should be spot-on due to racking forces during the lifetime of the piece.
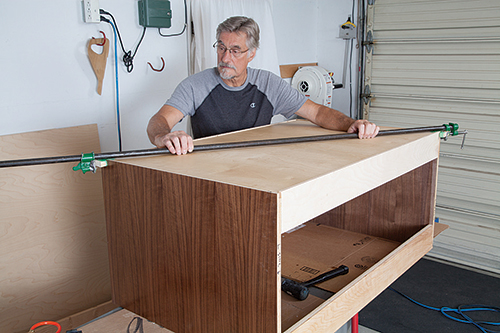
In preparation for glue-up, I prefer to first glue the Dominos into one set of parts and let the glue set. That way, I can check for squeeze-out and go through a stress free dry-fit.
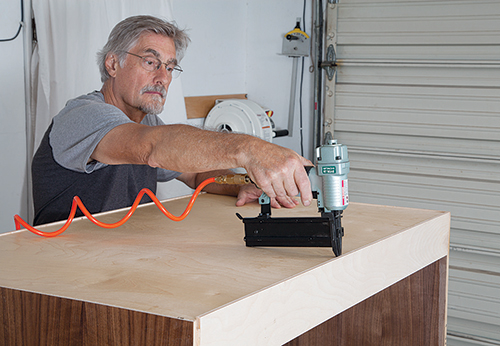
It’s not uncommon for something on a large case to be off just a hair; pounding on the joint or reefing on a clamp can break parts. Use a chisel or file to fine-tune any Dominos that don’t easily find home or are proud. But don’t overdo it. Parts should fit snugly.
Measure For; Build the Drawers
From the outside, there is no hint of how differently all three drawers are built. The top bank is a set of two individual boxes joined by an additional full-width false front; the center bank is U-shaped; and the bottom one is a traditional rectangular box but with a cutout at the rear to clear the P-trap.
Before going down this route, it’s best if the plumbing is centered (or close-to) with the cabinet centerline and compactly positioned (water supply lines close to the drain line). That way, the design can be symmetrical and drawers can be of a generous size. But it’s not a deal breaker if things don’t line up perfectly; the drawers can be sized asymmetrically. It may not be worth the cost to reroute plumbing only a few inches.
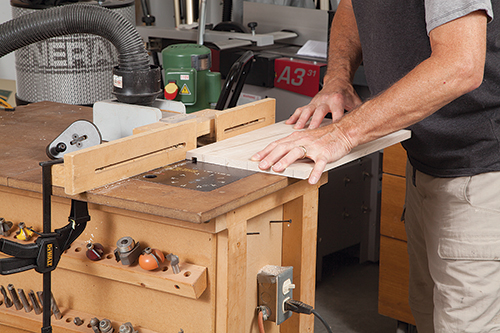
Before starting, it’s best to have on hand all the other parts: counter, sink, drain and supply lines. I chose a one piece counter with integrated sink, but the options are endless. To consistently mark all the parts and have all the dimensions of plumbing components at hand, I made up a story stick. Don’t forget to account for a change in floor height if the final floor is not yet in place. Design the drawers accordingly. I leave a good inch or more clearance on each side around the sink bowl and plumbing.
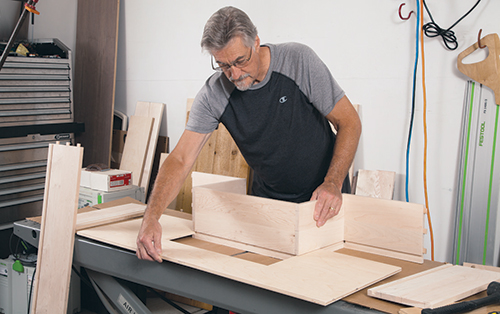
I used soft maple for the drawers, planed down to 5/8″ thickness (maximum for my slides). Because of the large size of the bottom two drawers, I wouldn’t recommend 1/2″-thick premade plywood drawer components as they aren’t as stiff as solid wood. Drawer bottoms are all 1/2″-thick plywood.
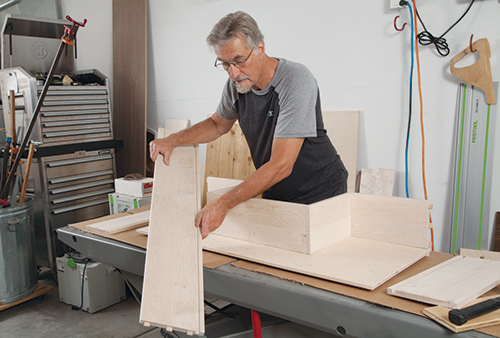
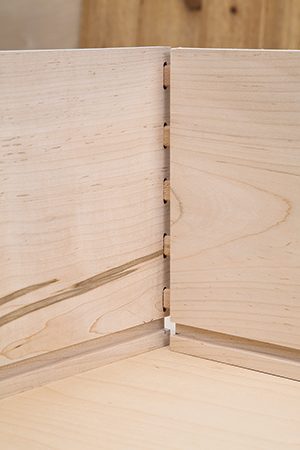
I used Dominos for joining the sides to the backs, and dadoes to connect the bottoms. You could also use dovetails or another method of joinery you choose.
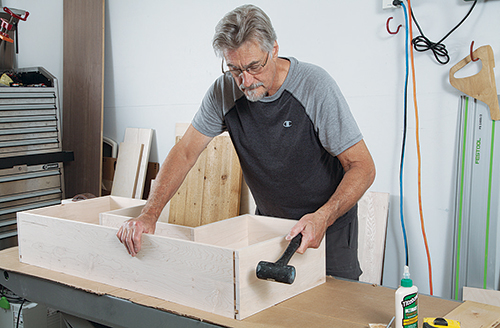
The center drawer takes a little more effort to build accurately. The trick is to first build and dry-fit the box without the bottom. Then check for square and measure for the U-shaped bottom, and cut it shy about 1/16″ all around to leave a little wiggle room. During glue-up, assemble the center section first, then position the front face and attach the ends.
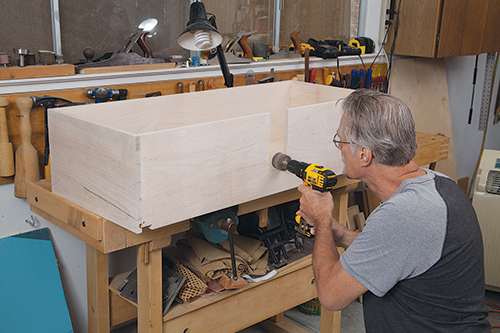
Regarding milling marks and other flaws: To save effort, I don’t spend a lot of time sanding parts that won’t show, such as the back sides of drawers or the outside face of the false fronts, which in this case had terrible tearout from the planer. I put all my effort into the parts that can be seen, such as the drawer insides and, of course, the outside of the case. Remember, the plywood drawer fronts will cover up any imperfections on those parts of the drawers.
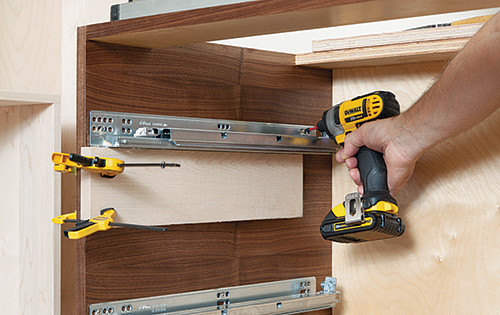
Once the drawers are glued up, I set the slides — in this case Blum Tandem with Blumotion. The slides have a nice self-close feature as well as some adjustability after installation. The most import aspects of installation, besides not accidentally drilling through the case sides, are making sure that pairs of slides are at the same height, perpendicular to the case edge and with the proper setback. I use a story stick instead of a tape measure for reliability. But don’t stress too much; misplaced slides can be easily repositioned. A few extra screw holes inside the cabinet will not be seen by anyone except the plumber. Plus, the Blum slides have micro adjusters to allow for a little tweaking after all parts are assembled.
Finishing the Piece
I used two products to finish the piece: General Exterior 450 semigloss water-based finish, and General Seal-a-Cell Clear wipe-on sealer.
First, sand all the parts to 180-grit, then vacuum the dust and wipe down using a rag lightly dampened with alcohol. In between coats of the sealer and topcoat, sand with 240-grit or 320-grit.
The sealer is not water-based and it reduces the amount of grain-raising as well as warms up the tone of the walnut. I used two coats of it on the show faces. This product is easy to wipe on with a rag. Give it 48 hours to fully dry before going to the top coat.
For the top coat, the General 450 finish can be sprayed or brushed (use a foam brush). I tried both methods and was impressed with how easy the product laid down. Use two coats minimum for a good water-resistant finish.
One tip regarding finishing, whether by spray or brush, to eliminate runs: Apply the finish to all show faces of parts as they are laid out flat, before you assemble the project. Be sure to wipe off any drips along the edges. If you’re finishing your surfaces with joinery, make sure to tape off those regions before you apply the finish.
Installing False Fronts
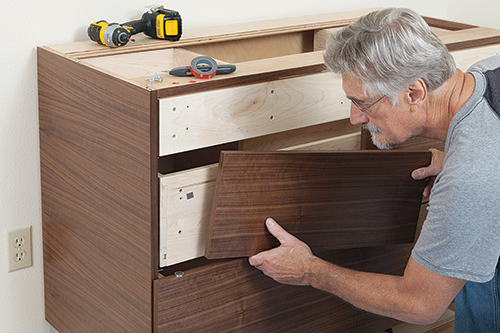
There are any number of ways to install false fronts. For example, a product called drawer front adjusters allows for some wiggle room once attached. You can also use 1/2″ double-sided weather-resistant tape, which has amazing holding capacity, and washer head screws.
If you choose this route, start by marking the locations for screws to hold the false fronts in place, keeping in mind the eventual location of drawer pulls. Drill four oversized holes per false front.
I prefer to install one false front at a time. Place two small pieces of double- sided tape on the drawer front and set the false front in place, eyeballing the first one, then using some sort of spacers for the subsequent ones. Attach it with two washer head screws. Continue until all drawer fronts are in place. Then I remove them, peel off the tape (it holds so well that it’s tough to make fine adjustments) and reattach. At this time, I make the final adjustments for even reveals and gaps. Sometimes I need to enlarge a few holes even more. Once I’m satisfied, I add the other two screws to each drawer. It goes without saying: use screws 1/4″ shorter than the total thickness of the false fronts and drawers, and remember that the top drawer will need longer screws where the box and additional false front meet up. Don’t mix up those different length screws!
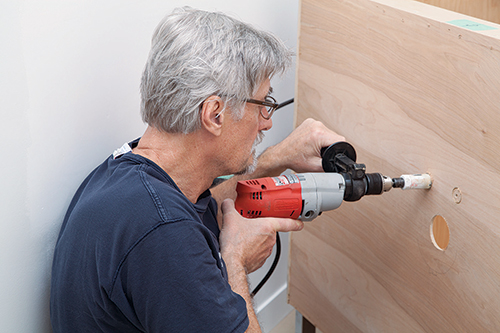
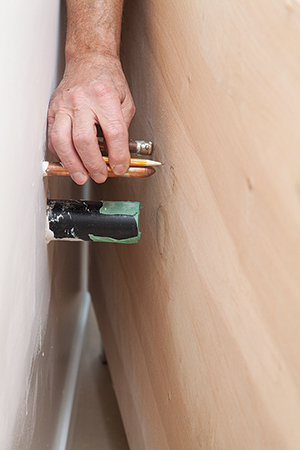
Install the pulls of your choice once everything is lined up. Then pull out the drawers, take the piece into the bathroom and mark and cut the plumbing holes. Last, attach the back to the wall at stud locations using at least four long screws.
You’ve now got a fine-looking vanity — try not to be too vain about it.
Click Here to download a PDF of the related drawings.
Hard to Find Hardware
24” x 48” Walnut Plywood, 3/4″ Thick #49934
24” x 48” Maple Plywood, 3/4” Thick #45301
Walnut 15/16″ Peel & Stick Edge Banding, 50’ Roll #1074185
Blum Tandem Full Extension 18″ Drawer Slides #47648
Contemporary Metal Furniture Legs #35955
Drawer Front Adjuster #28936
FastCap Quad Edge Banding Trimmer #45318
General Finishes Exterior 450 Varnish #33028
General Finishes Original Seal-A-Cell Clear #56507
– Anatole Burkin, former editor and publisher of Fine Woodworking, is a freelance journalist and woodworker in northern California.


