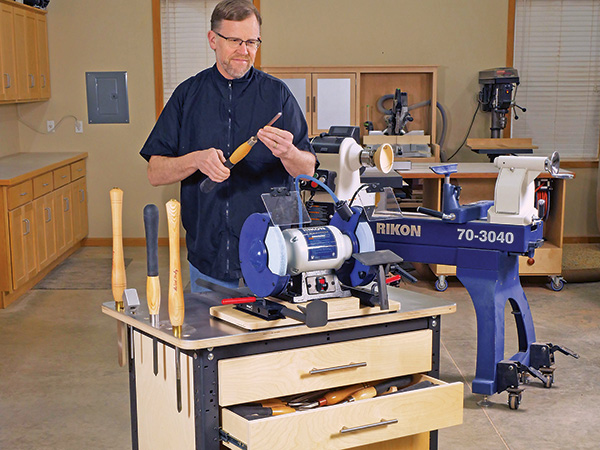
I’ve been using a ONEWAY Wolverine Grinding Jig mounted under my 8″ grinder for nearly 20 years to sharpen my bowl and spindle gouges and scrapers. It’s arguably the fastest, easiest way to keep lathe tools ready for action. I love mine! Trouble is, my grinder is located across the shop from the lathe, so touching up my bowl gouge a half dozen times or so on a Saturday morning might help me get my steps in for the day, but it’s a bit inconvenient. The closer the sharpener is to the lathe, the more the sharpening process becomes a natural part of the turning process, which makes for cleaner, easier cutting.
That’s why I think this Lathe Tool Sharpening Station is really going to streamline things. Designed with Rockler’s new Rock-Steady Shop Stand Kit as its framework (32″ W x 20″ D x 32″ H), I can roll it over to my lathe easily, so sharpening will only be a few steps away from the action. Its worktop has an aluminum facing to protect against sparks, plus six holes and a long slot for storing the lathe tools I’m either sharpening at the moment or using while I turn. Two 4″-deep drawers have racks of semicircular holders that can stow a big collection of short or long lathe tools between uses. And a closed cabinet below that can store other turning accessories too.
Assembling the Stand
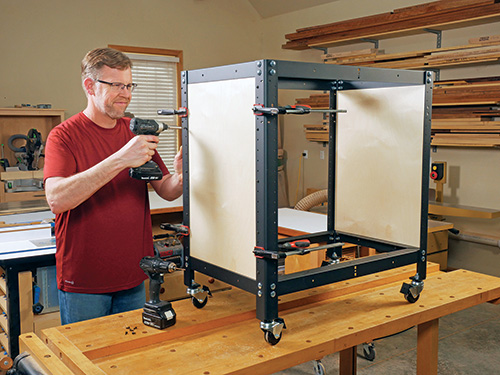
The first step to building one of these stations for your shop is to assemble the Rock-Steady Stand Kit, according to the instructions that come with it. Add the swiveling, locking casters now as well.
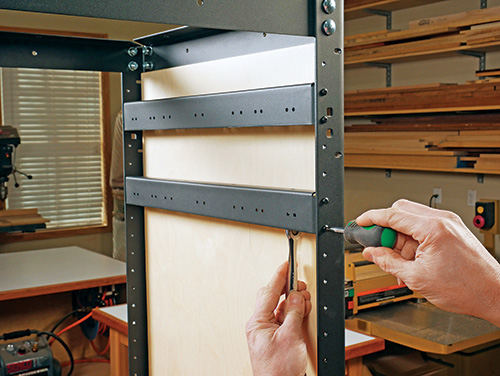
I wanted the sides of my station to hide the drawers and enclose the lower cabinet, so I cut two side panels to size from 1/2″ Baltic birch plywood, sanded them and applied a water-based polyurethane finish for durability. Fasten the side panels to the legs with some 1/2″ panhead sheet metal screws, fitting the panels into place from inside the stand. Incidentally, I discovered that my local home center stocks screws with a “black chrome” finish. They blend in nicely with the stand’s other black machine screws.
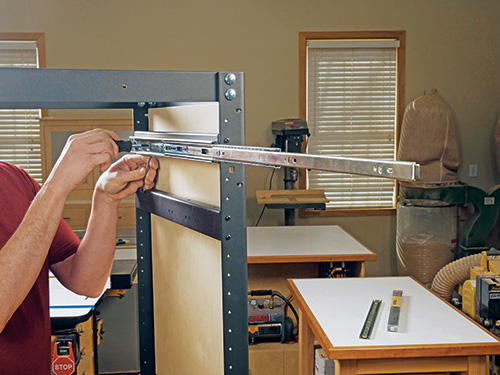
With the side panels in place, you can add two pairs of Rockler’s Drawer/Shelf Brackets. I mounted them to the second and third, then sixth and seventh small holes on each of the stand’s legs, counting down from the top ends. The brackets are pre-drilled to accept standard 20″ full-extension drawer slides, which are the next pieces of hardware to bolt into place. Position the slides flush with the front ends of the brackets. When you’re installing both the brackets and slides, it may seem difficult to hold the small nuts in place behind the hardware while you thread in the screws. I found that sticking the nuts to a small piece of double-sided tape attached to my index finger made this process much easier!
Building the Drawers
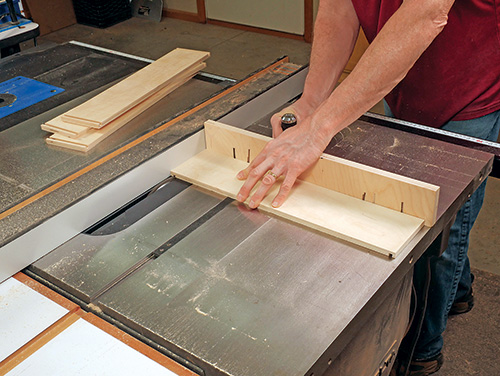
Shop projects like this should have durable drawers that are easy to build. So I settled on rabbet-and-dado joinery to assemble both boxes. Carefully cut four drawer fronts/backs and four sides to size from 1/2″ plywood. Then install a 1/4″-wide dado blade in your table saw, and raise the blade to 1/4″. Position the rip fence so the distance from the outside face of the dado blade to the fence equals the actual thickness of the 1/2″ plywood you’re using (it likely will be closer to 15/32″ thick or maybe even a tad less). Now you’re set to plow dadoes across the inside faces of the drawer sides at each end, backing the workpieces up with your miter gauge for added support.
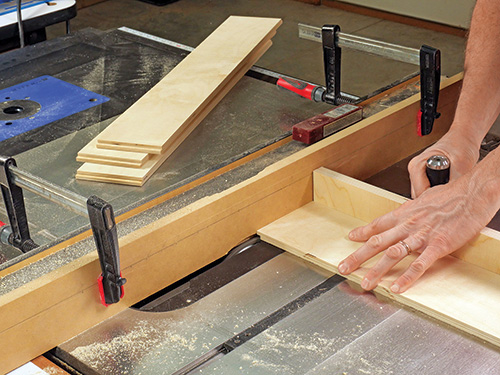
When those are done, clamp a sacrificial facing to your rip fence. Slide the fence over so the blade’s full 1/4″ width projects out from the fence facing. This sets up the rabbet cuts you need to make on the ends of the drawer fronts and backs. But before you commit to cutting the actual workpieces, make a test cut on scrap of the same thickness as your plywood to see if the resulting rabbets will fit the dadoes. You may need to raise or lower the blade just a smidgen, or shift the fence slightly, until the rabbets slide into their dadoes with a nice friction fit but without force. If you need to force the joints together, you’re likely to break off the wall of the dadoes at the ends of the drawer sides, so work gently. When the “test” rabbet fits well, mill a rabbet into each end of the drawer fronts and backs. Dry-assemble the drawer boxes to double-check the joints and mark their inside faces where the drawer bottoms will go to avoid confusion.
On drawers this large, I’ll often use 1/2″ plywood instead of 1/4″ to stiffen them up, and that’s what I did here, too. I also positioned the drawer bottom grooves 5/16″ up from the bottom edges of the fronts, backs and sides, rather than 1/4″. It’ll add a bit more strength to the bottom walls of these grooves. Plow the grooves with your 1/4″-wide dado blade and the rip fence set 5/16″ from the closer face of the blade. (When cutting either the drawer sides or the fronts/backs, go ahead and run the blade all the way through the workpieces — there’s no need to stop any of these cuts short.) Then, reset the fence farther away from the blade for a second round of cuts that will widen the grooves to the actual thickness of your drawer bottom plywood. Check this setting on scrap first.
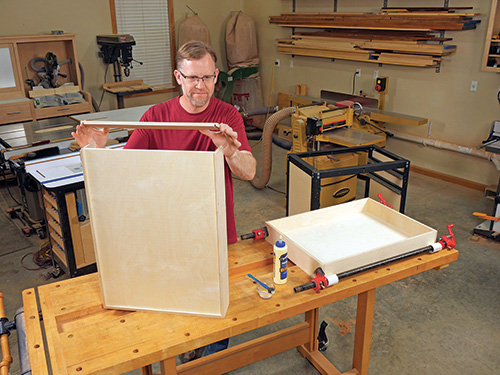
Switch to a standard blade to cut the drawer bottoms to size, sand all the drawer parts up to 180-grit and glue and clamp each drawer box together. Once the joints dry, ease any sharp edges to prevent splinters — Baltic birch plywood is notorious for them! Then apply a couple coats of finish to the drawers.
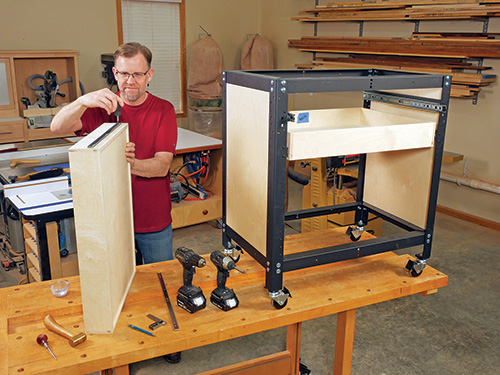
You’re ready to mount the drawer slide hardware and hang these boxes in the station. Locate the “drawer side” slide members flush with the fronts of the boxes, and position their centerlines 1-1/4″ up from the bottom edges of the drawer sides. Wrap up the work for the drawers for now by cutting two drawer faces to final size from 3/4″ plywood or solid lumber. With the drawers installed in the station, I positioned and stuck the drawer faces to the boxes with pieces of double-sided tape. Adjust them for an even spacing of about 1/16″. When you’re satisfied with their arrangement, drive countersunk flathead wood screws through the drawer boxes and into the drawer faces to secure them. Sand their faces, edges and ends to 180-grit, and ease the sharp edges and corners. Apply finish. When it dried, I installed the longer size of stainless steel bar pulls to the drawers, centering the pulls on the drawer faces.
Adding the Laminated Top Panel
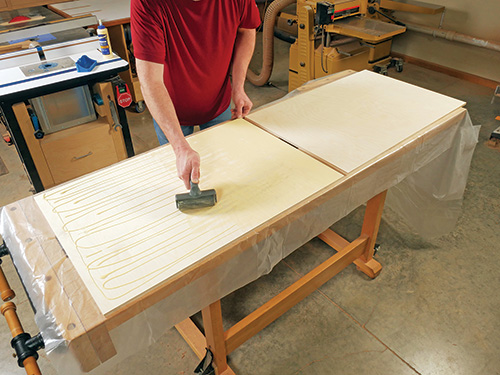
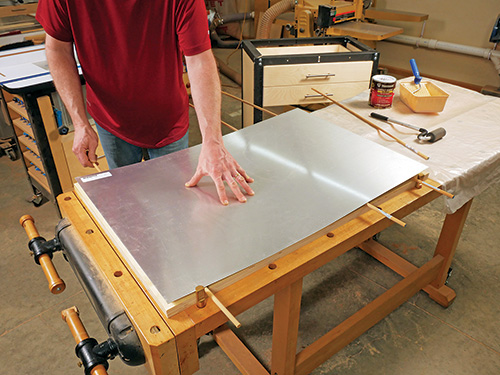
I like having the various tools I’m using for a turning session close at hand but not in danger of rolling off the bench. So I decided that the top for this project would have holes through it to stage tools and prevent those dinged cutting edges. To that end, I started by laminating two pieces of 1/2″ Baltic plywood together and trimming the top to 24″ x 36″. Dry-grinding turning tools does produce sparks, of course, so facing the top panel with metal offers more peace of mind. I opted for a sheet of .04″-thick aluminum that I first roughed up with coarse sandpaper, then adhered to the plywood substrate with contact adhesive. I rounded the corners of my top to 1-1/2″ radii, trimming off the waste with a jigsaw and a fine metal-cutting blade.
Next came those holes for the tools. I milled them with a router and guide collars, using a scrap-made jig with a fence fixed to it to align the hole pattern. Routing ensured smooth holes and clean cuts through the aluminum. My jig has a 1-1/8″-diameter hole through it plus a 3/4″-wide, 6-1/4″-long slot. This way, a 1/2″ straight or spiral bit and three sizes of guide collars could take care of all the holes I’d need for the top panel, using the two openings in the jig as patterns.
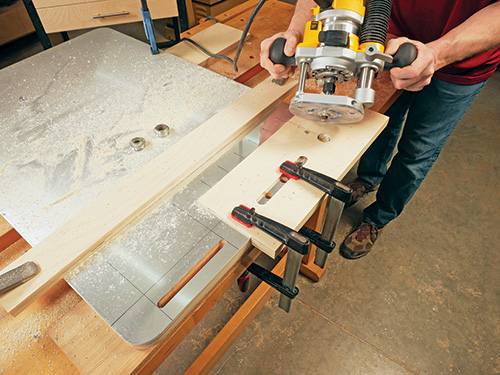
To begin, I used a 3/4″ O.D. guide collar for plowing the 1/2″-wide, 6″-long slot through the top in a series of deepening passes. Then, switching to a 1″ O.D. guide collar and using the jig’s round hole, I could “drill” three 5/8″-diameter through holes for smaller lathe tool shanks. Switching to a 51/64″ O.D. guide collar created three more holes that are just a tad shy of 7/8″ in diameter (about 13/16″). I spaced all of these openings 2″ apart.
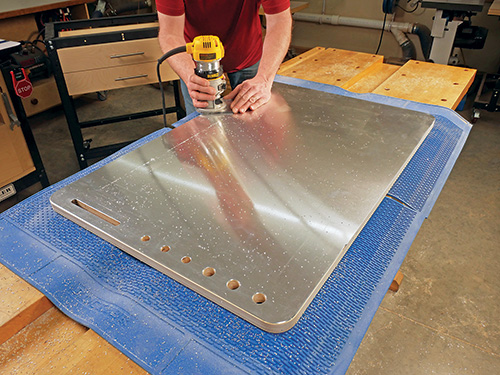
Once the holes were done, I switched to a piloted chamfering bit with a small bearing to ease the sharp rims of every hole and around the top’s perimeter. Apply finish to the bare wood, then mount the top to the station’s base with #12 x 3/4″ hex or panhead machine screws. I offset my project’s top so the “tool hole” side extends 2-1/2″ from the side of the base for extra clearance. The front and back edges have 2″ overhangs.
Completing the Lower Cabinet
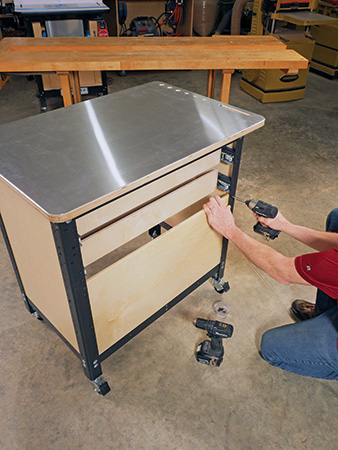
Now it’s time to close in the bottom of the station. Cut a 1/2″-thick back panel and a 3/4″-thick bottom shelf to size. You’ll need to trim the front corners of the shelf to fit around the front legs and bring its front edge flush with them. Sand and finish these two panels. When the finish dries, install the back panel with 1/2″ panhead screws as you did for the side panels. Tip the project on its back to drive more screws up through the bottom framework to attach the shelf.
Rockler offers steel Hinge Brackets for these Rock-Steady stands. Before installing two pairs of these brackets on the front legs, I attached the mounting plates for Blum Snap Close Inset Hinges to them with machine screws and nuts. Then I attached the brackets using the second and third, as well as ninth and tenth holes (counting up from the bottom) on the front legs.
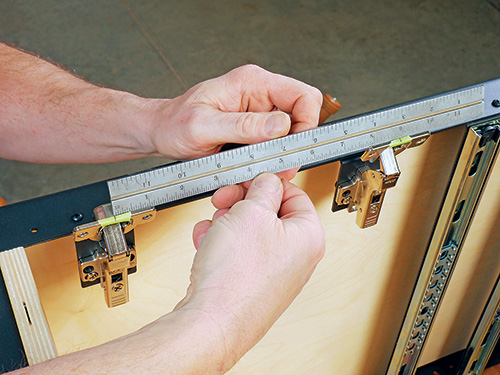
Clip the cup hinges onto their mounting plates so you can measure the span between the hinges from center to center. Cut a pair of doors to size from 3/4″ plywood, and bore 35 mm holes for the hinge cups into the back face of each door. Make sure their spacing matches your hinge span measurement. I located the top hinge cups 3″ down from the tops of the doors.
Sand and finish the doors before attaching the shorter stainless steel bar pulls to them. Then mount the doors on their hinge cups with screws, and tweak the hinge adjustment screws until the doors hang evenly with uniform gaps.
Finishing Up with Tool Holders
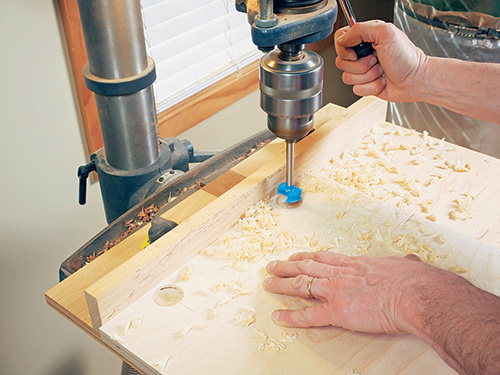
The lathe tool holders for these drawers are simple to make. Start with 3/4″-thick scraps that are 4-1/8″-wide and long enough to fit between the drawer fronts and backs. Bore a series of 1-1/2″-diameter holes through them, using the Tool Holders Drawing on the facing page to lay them out.
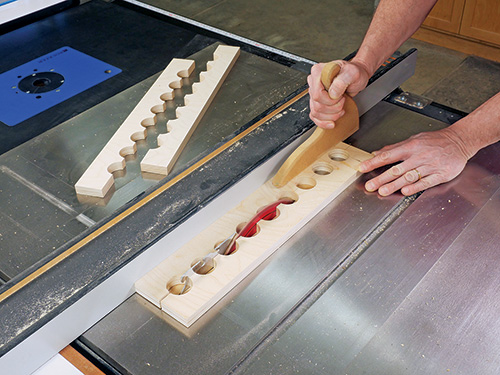
The offset pattern between the two holder styles will enable you to stow shorter tools in an alternating configuration, if needed. Saw these blanks down the middle to form two holders with half-circle cutouts. Sand them smooth, soften the sharp edges and apply finish to them.
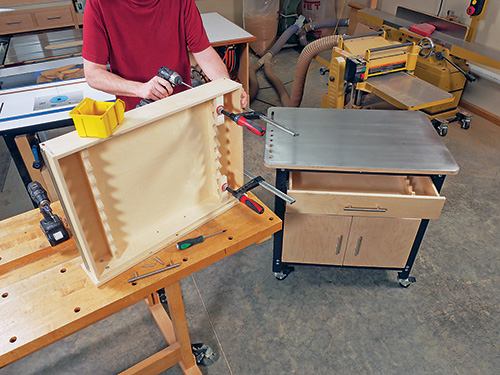
Then, mount the holders inside each drawer by driving 1-1/2″ screws up through the drawer bottoms and into them. I installed one nine-tool holder in my upper drawer for long tools and one of each style in the lower drawer for shorter tools. I spaced the holders 3″ in from the drawer sides.
Click Here to Download the Drawings and Materials List.
Hard-to-Find Hardware:
Rockler Rock-Steady Shop Stand Kit (1) #64351
Drawer/Shelf Brackets, 20″L (2) #55788
Hinge Brackets (2) #35961
Caster Set for Steel Shop Stands (1) #47034
75-lb. Full-Extension Drawer Slides, 20″ (2) #47758
Blum 120° Snap Close Clip Top Hinges (2) #55809
Stainless Steel Bar Pull, 5-1/4″ (2) #24418
Stainless Steel Bar Pull, 7-3/8″ (2) #1006392


