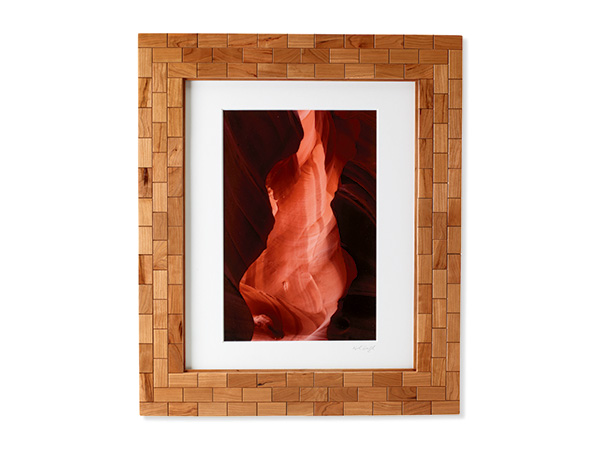
Professionally made picture frames come in two types: the chintzy-looking cheap ones, or the really great looking expensive ones. I decided that I would like to build my own and come up with a really great looking frame that was inexpensive (but definitely not cheap!).
This picture frame makes use of small tiles of hardwood that are glued to a plywood substrate underframe. The beauty of this idea is that the various tiles each have their own grain pattern contained within their border. The accumulation of all those tiles and their differing grain patterns creates a frame that is both geometrically regular, but texturally diverse. The effect is quite attractive. As I place my tiles on the frame, I take time to enhance that feature by looking for subtle changes in hue and figure, and placing them in such a way that it creates interesting patterns. You can think of it as a mosaic, with Mother Nature as the artist. Another thing that I find attractive regarding this design is that by using many little pieces, I can make use of stock that others would have to throw away — and, for that reason, I can buy my materials quite inexpensively.
With all that said, if the prep work of slicing many little pieces from many small blocks of wood is a degree of activity that you might want to cut down on, you can buy 1/4″-thick hardwood stock in bigger pieces, which will make the prep work go a bit faster. Either choice works fine on the frame.
Early Design Decisions
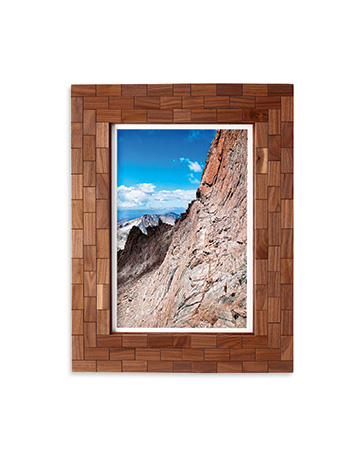
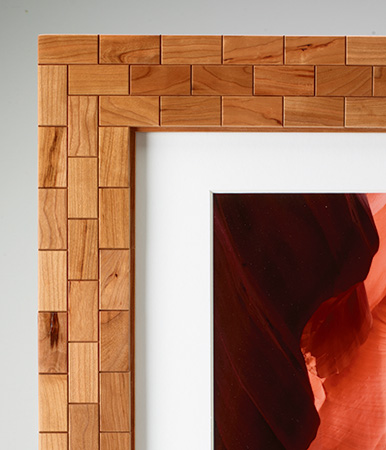
The frame that is built by the dimensions found on the Material List creates a 16″ x 20″ opening — a standard size. Proportionally, I decided on a 3″-wide frame, which allowed me to use three rows of 1″-wide tiles. The typical 2″ length of the tiles evolved from the corner detail. I wanted the tiles on one row to be bisected by the tile butting in from the next row over (this visual effect is sometimes called bonding). In practice, the tiles are placed from all four corners, working inward. When I got to the middle tile position(s) of each row, the length of those tiles had to be slightly adjusted to fit the opening.
The plywood frame is made of 3/8″ Baltic birch overlaid with 1/4″ Baltic birch. The combination of butt joints, lap joints, glue and screws makes this underframe basically bulletproof.
Begin with the Plywood
To begin this project, use your table saw to rip the plywood stiles and rails to width and length (pieces 1 through 4). I am sure that any good quality saw blade will work for you, but I use a Freud 80-tooth crosscut blade for all of this work (even the ripping steps). I find that it provides a silky-smooth edge, and that means less sanding for me! Now grab a 1/4″-thick piece of hardwood (I used walnut in this case) and rip enough stock to create the stile and rail edging (pieces 5 and 6). Next, glue and clamp the edging to the front rails and stiles — you’ll find that they’re the same length. While you are waiting for the glue to dry, go ahead and move back to the table saw to rip sufficient material to make the perimeter trim (pieces 7 and 8). The following construction process is stone simple, but I recommend that you take a bit of time to look at the Drawings and to check out the photos — it’s very important that you follow the right sequence.
Once the glue has completely cured on the front stiles and rails, take them out of the clamps, scrape away any excess glue, and sand them smooth. I prefer a 3″ x 21″ belt sander for this task because it levels the hardwood edging perfectly even with the plywood face.
Now it is time to put the plywood frame pieces together. The plywood pieces fit together with the hardwood edging lining the opening in the frame. The back stiles and rails simply butt together as do the front stiles and rails. But the front stiles and rails overlap the butt joints in the lower layer, essentially making a built-up lap joint. If you are confused by this, check out the Lap Joint Detail Drawing. I used screws and glue to secure the plywood pieces one to another. Lay out and pre-drill the through holes in the front stiles and rails, adding a countersink to each location. I used 1/2″ x #6 screws and I prefer Titebond® glue. To help me glue and then precisely place the stile and rail pieces together, I used short pin nails fired from a 23-gauge nail gun to tack the pieces together. Then you can drive the screws home, being certain that the heads are seated just a hair below the surface of the front stiles and rails.
Even though I took exceptional care to line everything up accurately, the outside edges did not align perfectly. So, after the glue had cured, I stepped over to my table saw and trimmed the long edges just a tiny bit. The only thing left to do to the plywood frame subassembly is to glue a 1/4″-thick border of hardwood all around the perimeter, using the trim that you cut earlier. Glue and clamp the trim in place and allow the glue to cure. Wrap up by using your belt sander one more time and sand the face flat.
I’m betting you’ll notice early on that one of the nicer features of this construction plan is that, because the front and back stiles and rails are different widths, when they are put together, this size difference creates a perfect rabbet just behind the front stiles and rails. It is into this rabbet that your picture will eventually be placed.
Tiling Time
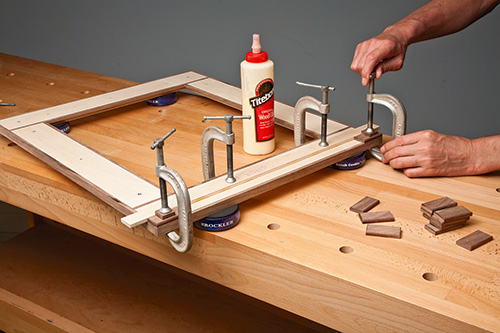
However you decide to make your tiles, whether it be from a pile of scrap lumber you have in your shop or from 1/4″-thick lumber that you have specifically ordered for this project, or even shop-made resawn lumber, you need to make a whole bunch of tiles. The number of tiles indicated in the Material List (pieces 9) is an approximate number. It is actually a few more than you will need of that specific size, but in this project making those few extra pieces just makes sense. It gives you a better choice of tiles as you select them for placement. The center tiles (pieces 10) will need to be adjusted to their proper length after you have put all the tiles of that row in place … then you will need to measure the opening.
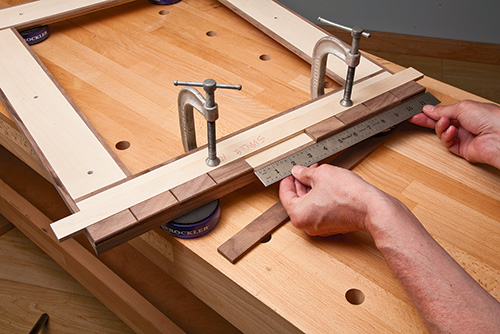
You may ask: Why can’t I just divide up the space of a row and cut all the tiles perfectly sized so there is no variation? Here’s the answer: even if you wanted to work that hard, it’s extremely difficult to machine pieces that accurately. The detail that will come around to devil you is called accumulated error. Let’s say that you make your tiles very uniform, but they are off of their length measurement by 1/64th of an inch. While it’s a minute amount, on the 12 tiles that form the outside row, that error will add up to 3/16″ in a big hurry! OK, try even harder and get to within 1/128th of an inch … and you will still miss your mark by almost 1/8″ — so you can see why it is better to adjust that middle tiles in each row to fit.
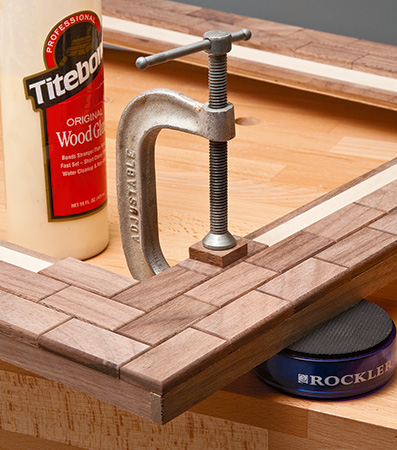
Make certain that your stock is of uniform thickness before you start cutting the tiles — this will save you a major headache later on. Then go ahead and cut your tiles to size. When working with stock this thin, make every effort to be extremely safe in all of your cuts. Use a zero-clearance throatplate, featherboard and push stick when appropriate. Despite trying very hard to avoid it, some of the edges of my tiles became burned during the cutting process. Take note of this discoloration: you can deal with it in the glue-up stage, but you need to be aware of the burned sections.
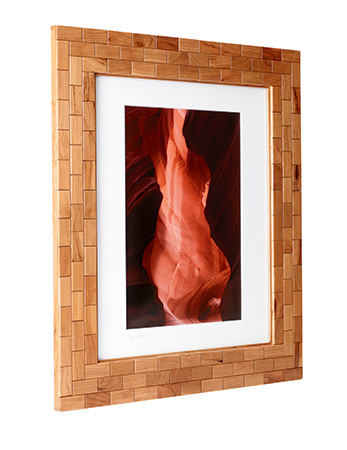
These next steps are going to take a bit of time. First, sand the show face of each tile. I simply turned a 1/4 sheet sander upside down and held each piece to the platen. You might think of a quicker way … if you do, send me a letter as soon as possible! The next step is to chamfer the edges of the tiles. I used a 1/8″ roundover bit in my router table. I made a special zero-clearance fence for this task, to keep it a safe operation. Use a small push stick, too; I came up with two pencils taped together and used the eraser end to move the tiles. You are now ready to start gluing your tiles in place.
Start by carefully gluing the first few tiles in position. Keep filling in, hiding the burned edges as you place them. The exposed inside frame edge should be burn-free. Do a bit of hand sanding, and you are good to go on to the last details.
The Big Finish
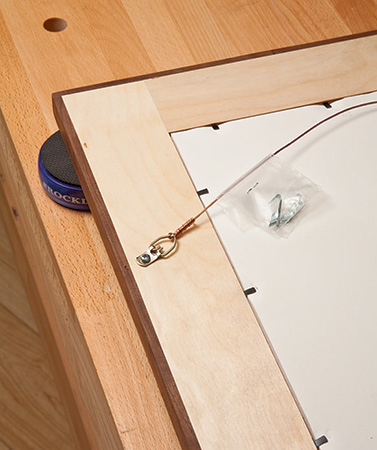
I used a can of spray lacquer to finish the picture frame — be sure to spray from each side to get coverage on the tiny chamfers. I used light coats and de-nibbed with steel wool between applications.
When that is done, cut the back panel (piece 11) to fit, and then mount the hangers (pieces 12). And that wraps things up. All you need to do now is find a nice photo to go in the frame … and, in my case, I will try to find someone to buy it!


