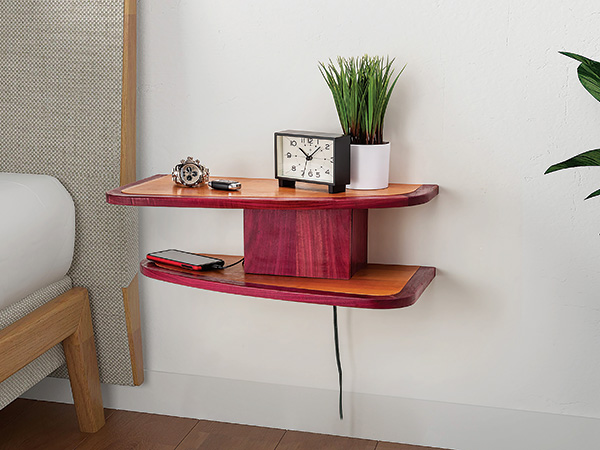
Sometimes the challenge of trying a new technique compels whole project designs, and that’s what happened in a roundabout sort of way with this Floating Bedside Shelf. I wanted to see whether edge V-groove router bits can be used to wrap solid wood trim around the edge of a curved shelf as well as a straight one. The short answer is yes, they can! Quite elegantly, actually, as you can see in the curves of the purpleheart shown above. But here’s the kicker: doing that will involve making three very precise templates to guide these bits around those curves, primarily so the purpleheart hugs the edges of the plywood shelves seamlessly.
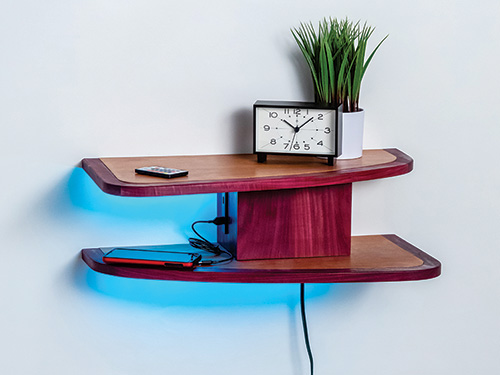
And if you’re willing to test your template-making skills, this alternating, double-shelf project is well worth the effort. Its small cubby in between the shelves can stow a wallet, jewelry or other small valuables behind the front door. I outfitted the project with a strip of low-cost LED rope lighting to cast a soft glow under each shelf. Mine also contains a USB outlet for charging smart devices. The project mounts to a wall stud with screws driven through the cubby’s back panel.
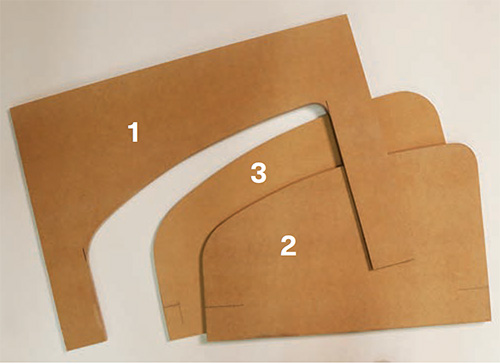
If you like the look of the project but aren’t yet up to the challenge of tricky template-making (or investing in the edge V-groove router bit set), you could simply make the plywood shelf cores larger and wrap their edges with thin veneer edge tape. But that won’t be as durable as solid wood in the long run, nor will it give the same effect as this contrasting, wide purpleheart will. So, why not test your skills and build it just as I have!
Making Subassemblies of Trim Blanks
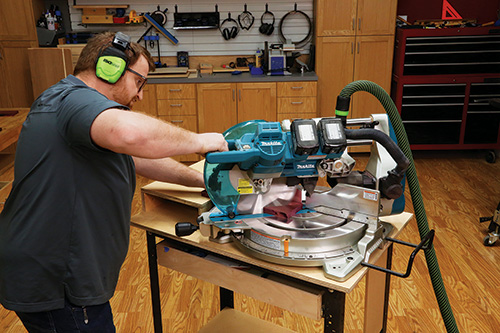
Let’s get down to business by assembling pieces of long and short side trim to the front trim pieces. I ripped my purpleheart stock to 4″ wide, then headed to my miter saw to crosscut the pieces to rough length. Now, study the Trim Subassembly Drawing for miter-cutting these trim pieces correctly. Why miter them, you ask? Well, mitering will eliminate nearly all of the end grain that would take finish more darkly than the side grain will. You’ll also help to blend the face grain more uniformly all around the shelves, which will look much better when viewing the shelf trim from above.
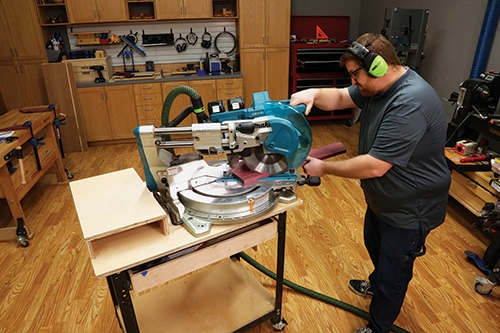
Notice how the short and long side trim pieces are mitered at 45 degrees on one end. The long front trim piece is miter-cut at 29.5 degrees on one end but 60.5 degrees on the other end. I could make that last cut happen because my Makita miter saw swivels to 60.5 degrees. Some saws do. If yours doesn’t, you might have to tackle that cut in a different way with another saw instead.
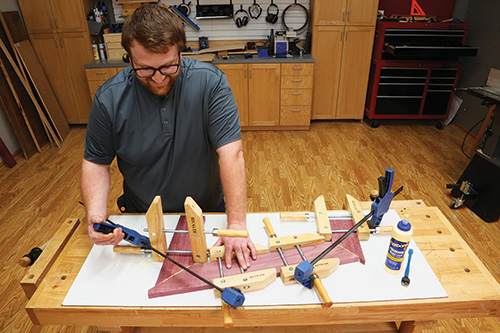
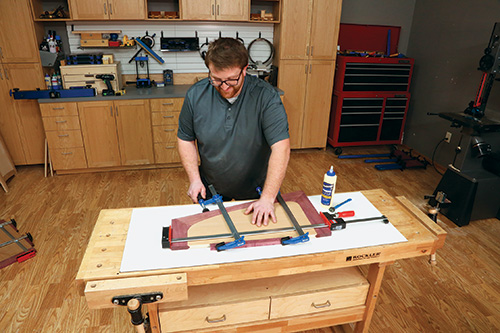
Glue and clamp the three trim pieces for each subassembly together. You can see in the photo at right that these are simply glued butt joints. Any reinforcement across the joints (dowels, floating tenons, biscuits) would become exposed when the trim is finally cut to width. But no worries, because in this application, reinforcement isn’t crucial. Glued miter joints will be strong enough for machining, and once the trim wraps the shelves, joint strength will come from the routed V-groove joints between the plywood and purpleheart anyway.
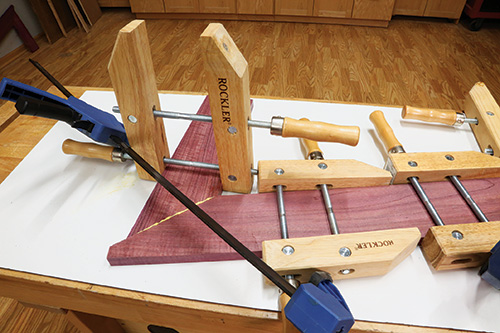
Get ready for some challenges gluing the funky mitered ends together, however. I used both wood screw clamps and bar clamps for that job. The wood screw clamps actually became attachment points for my bar clamps. Kind of unusual, sure, but it worked! When the clamps come off, sand or plane the joints flush.
Making Template #1: Inner Trim Edges
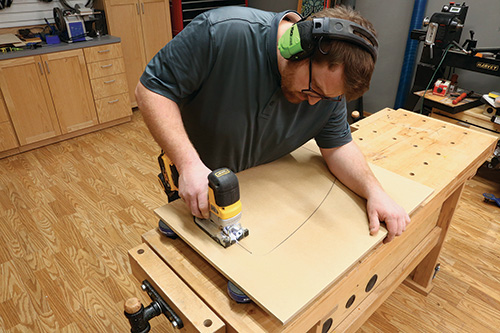
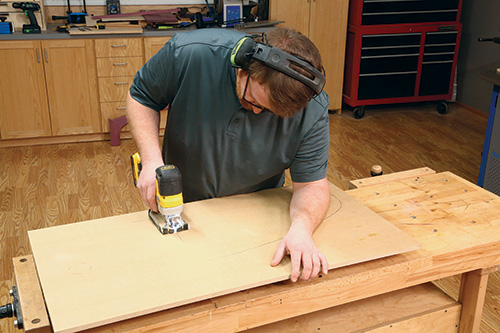
Draw a full-size version of the Shelf Template on a large piece of 1/2″ MDF or other sheet material. Make sure your template workpiece is at least a couple inches wider on both sides than the gridded shape. You also want the “legs” of the template on either side of the shelf shape to be 2″ longer than necessary. Use a flexible batten or large French curves to draw a smooth layout line for this template, centering it on the template material. The line represents the inside edge of the purpleheart trim. I used a jigsaw to cut out the center waste of the template, sawing just inside my layout line.
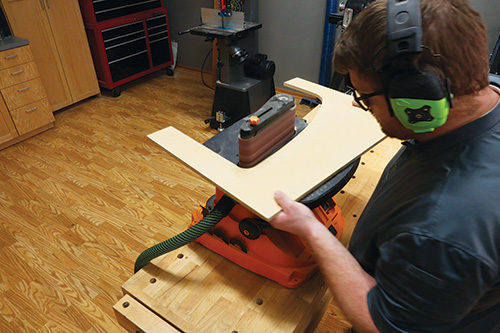
Then I took the template over to my benchtop oscillating spindle sander to smooth and fair its sawn edge. Go the extra yard here to make sure this inside edge of the template is perfectly smooth and even by working it further with some careful hand sanding.
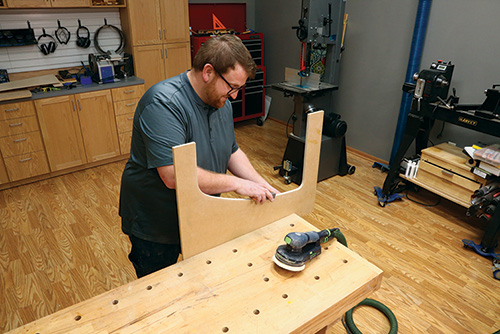
Mark the 2″ template leg extensions on their inside edges so you can line the template up accurately on your glued-up trim subassemblies.
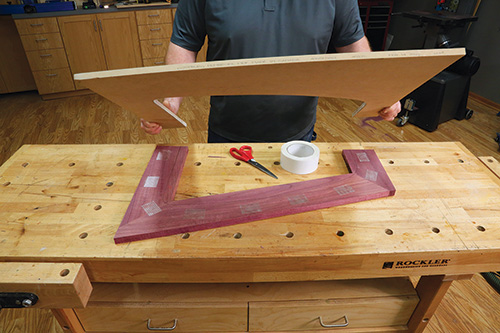
The next step will depend on your confidence at the band saw. I attached the template to the first trim subassembly with short pieces of double-sided tape, took it to the band saw, and sawed away the inner purpleheart waste. I was careful when attaching the template that I would be removing about the same amount of trim material all the way around.
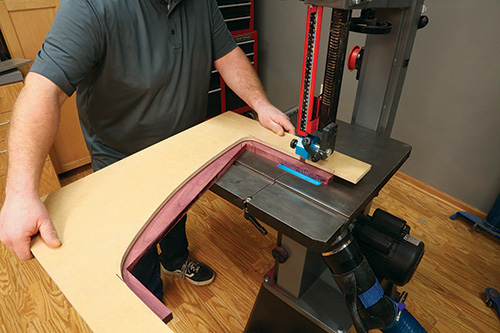
If you fear you might accidentally cut into the template doing it this way, then just trace the template’s inner profile onto the trim subassemblies instead and band-saw the waste away. There’s no risk of damaging your template this way, so play it safe if you wish.
Forming the Routed Profile on the Inner Trim Edges
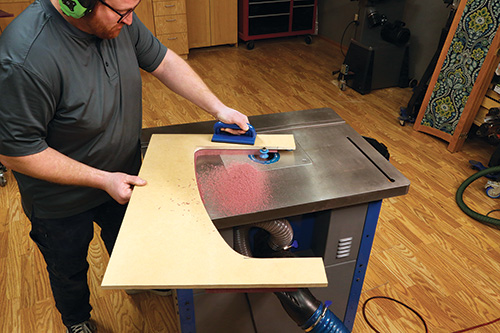
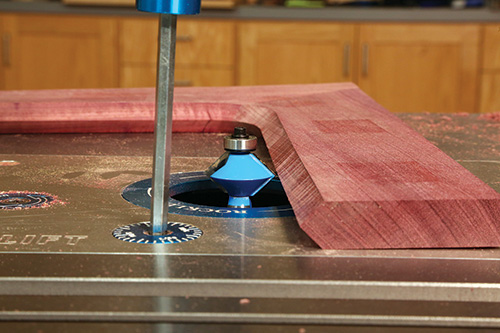
With the template attached to the first trim subassembly, install the concave edge V-groove bit (the one that looks like a bird’s mouth) in your router table. With the router unplugged, set the motor to a medium/ high speed and adjust the bit’s height so the midpoint of the bird’s mouth profile will be centered on the thickness of the trim material.
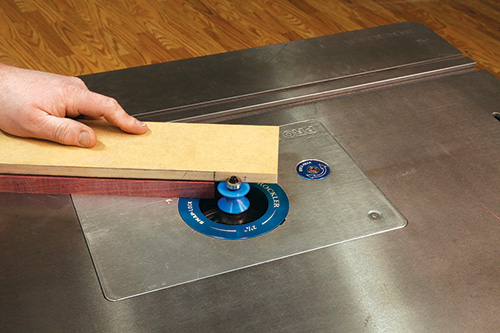
The router bit’s top pilot bearing needs to be able to roll along the cut edge of the template, too. Then start the router and, beginning with the bit’s bearing on the template’s right “leg,” feed the template and trim subassembly clockwise around the bit to remove the rest of the inner waste. This bit reforms the inner edge of the purpleheart trim into a sharp chisel point.
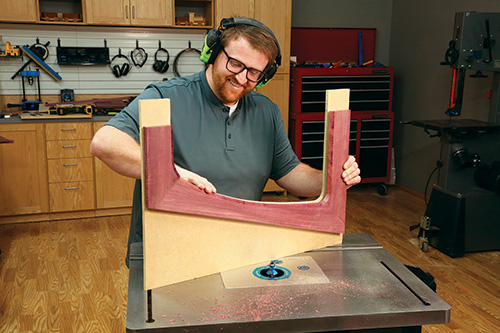
Detach the template from the first trim subassembly carefully, then mount the template to the second trim subassembly with more double-sided tape, and repeat the routing process.
Making Template #2: Outer Edge of Shelves
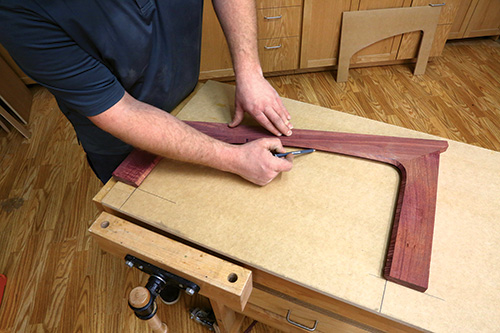
The good news about doing a really careful job of making the first template is that it will improve your odds for laying out the second template accurately. This one, also made of 1/2″ MDF or plywood, will form the outer routed profile of the shelf cores to mate with the chisel-pointed profile on the purpleheart trim. Here’s how to lay it out. Start with a piece of oversized MDF, and mark it 2″ in from one long edge to serve as an extension of the template past the shelf during routing. Now lay one of the trim subassemblies on it so the bottom square ends of the side trim pieces intersect your 2″ layout marks. Take a very sharp pencil or a fine leaded mechanical pencil and trace around the bottom edge of the trim’s routed profile, right where it touches the template surface. This line represents the outer perimeter of what will be the plywood shelf. It’s SUPER important to trace this layout line accurately.
Grab your jigsaw and cut just outside of this layout line (only the portion inside the layout line is the template this time). Very carefully, sand the template up to the layout line. If you sand the line away, the fit between the plywood and the trim might be too loose and create a gap on the shelf. If you don’t sand enough, the trim will fit too tightly around the plywood and could break at the mitered joints when it’s installed. Take your time and be fussy with this sanding.
Fitting the Routed Shelf Edge to the Trim
Cut two plywood panels for the shelves, and then cut one or two more that you can use as test pieces. Why? Because at this moment, we still don’t know if the second template will produce shelf cores that fit the trim correctly. So, there’s some experimentation and refinement ahead of us! It’s the nature of the beast … don’t ask me how I know.
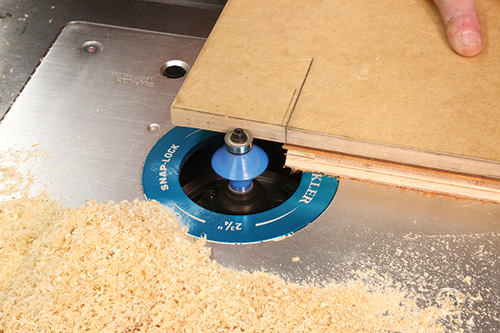
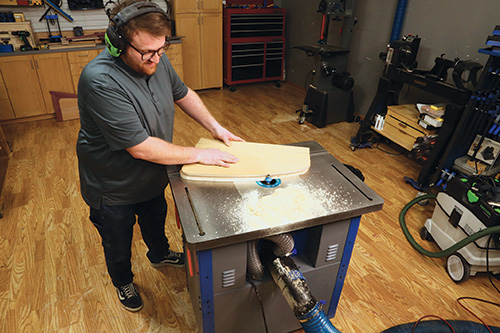
Get one of your plywood test pieces, and trace the shelf template onto it. Band-saw the test shelf about 1/16″ outside the layout line. Now chuck the convex V-groove bit (with the pointed center tips) in your router table. Adjust its height so the bit’s tips line up with the inside routed edge of the trim subassemblies. Once that’s dialed in, mount template #2 to your plywood test shelf with double-sided tape so the shelf’s contoured edge overhangs the template’s edge evenly. Make sure to also align the back “flat” edge of the shelf with the template’s 2″ overhang marks. Start the router, and rout all the way around the shelf to reduce its size and form the concave, mirror image to the trim’s convex chisel-edge profile.
Remove the template from the shelf, and clean off any whiskers left by the router bit along the routed edge. Now very carefully and gently, try to slide one of the trim subassemblies into place on the test shelf. Don’t force the parts together, or you could break the miter joints. Do the routed joints fit together? Are there any gaps, or is the fit too tight? Either way, if the shelf and trim don’t come together well, it’s time to make little adjustments to the shelf template’s perimeter and rout another test shelf. Keep working at the template’s shape until it produces a shelf that fits the trim.
My cherry plywood was slightly thinner than my purpleheart trim, so I readjusted the bit height so the best face of each shelf aligns flush with the best face of each trim subassembly. Keep in mind that if you need to do the same thing, these shelves will face in opposite directions on the final project. Go ahead and rout your actual shelves. Then glue and clamp the trim to each shelf. Remember to tighten those clamps carefull so as not to over-stress the miter joints.
Making Template #3: Outer Perimeter of Trim
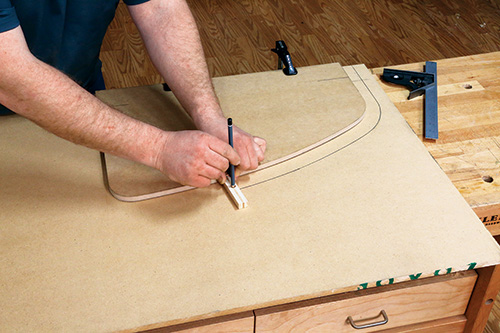
It’s time to bring the overly-wide purpleheart trim down to its 1-1/4″ final width, and we’ll do that with a third template. To make it, I first created a simple scribing jig for my pencil.
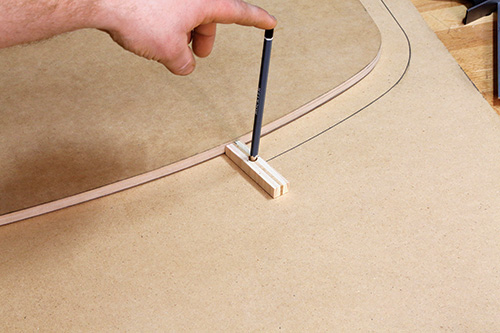
It’s just a scrap with a flat edge that rides against the shelf template to trace a layout line 1-1/4″ larger than the shelf onto a piece of MDF.
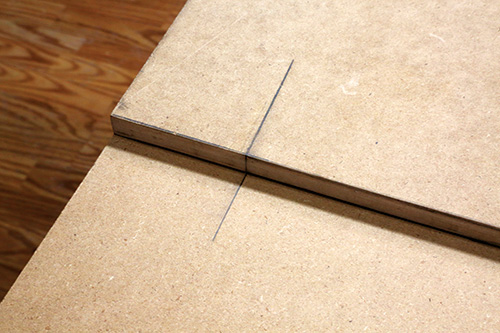
Create this template with the same 2″ extension as the other two templates.
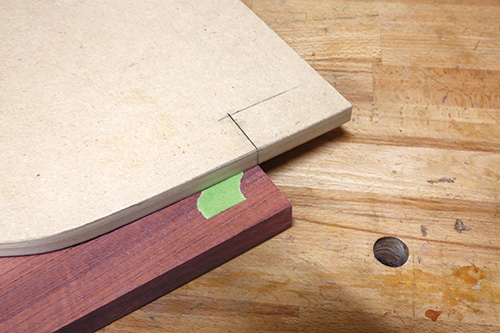
Cut the template out, sand its outer edge smooth and use it to trace the outer perimeter layout line onto both trim subassemblies.
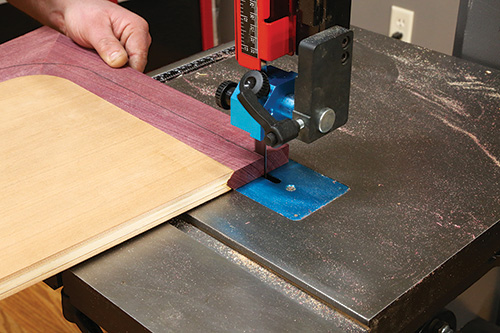
Cut them to shape at the band saw or with a jigsaw.
Grain Direction Precautions
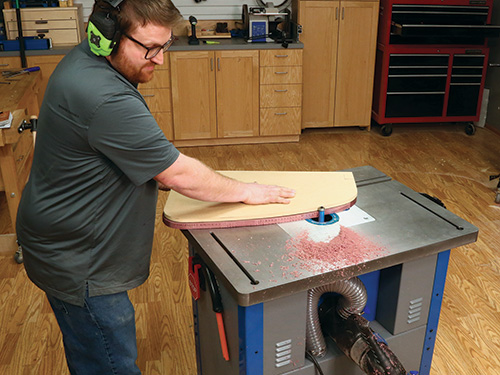
Refining the outer edge of the trim with template #3 is our next step, but it’s a bit tricky because the grain direction of the purpleheart comes into play. Flush-trimming around the corners could mean you’ll be routing with the grain and then inadvertently against the grain from one piece to the next, depending on your stock arrangement. So to help mitigate problems, I installed a double-bearing flush-trim bit with a shear-cutting angle (Rockler #27867). After sticking each trim subassembly to the template, I started the routing process with the template on top, riding against the bit’s top bearing.
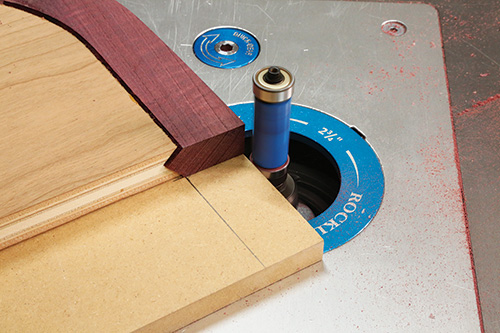
But, if the purpleheart started to chip, or the bit’s cutting action began to feel choppy, I stopped the routing pass, flipped the template over, and raised the bit to use its bottom bearing against the template instead. That way, I could reverse my feed direction and rout with the grain again. Your template-routing experience will help you assess how best to flush-trim these edges in order to rout with the grain direction as much as possible. But I definitely recommend preemptively using the same shear-cutting bit as I did, or one similar to it. It really helped here!
Finishing Up the Shelves
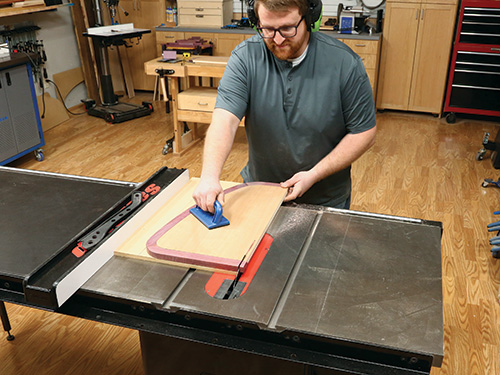
Once the trim was flush-cut to final width, it was time to trim the shelves to their final front-to-back width of 12-1/4″ at the widest point. I did this by mounting each shelf temporarily to a flat-edged panel of MDF that was wider than the shelf. That way, the panel’s flat edge could follow my table saw’s rip fence while I trimmed the waste off of the back flat edge of both shelves.
Wrap up work on the shelves by hand-planing or scraping and sanding the trim flush with the plywood cores. Be careful to not overdo it and cut through the plywood’s thin face veneer. And when you’re satisfied with your shelves, you can also be happy that you’ve completed the hardest part of this project!
Building the Middle Cubby
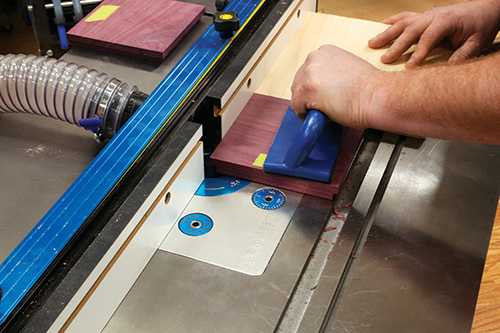
I made the cubby so that all the visible parts, when viewed from in front, would be purpleheart. So, the cubby’s sides and door are solid purpleheart. But the top and bottom panels are maple with a 3/4″ x 3/4” strip of purpleheart glued to their front edges because those components aren’t as obvious. That way, when the cubby’s door is opened, the carcass looks like purpleheart all the way around.
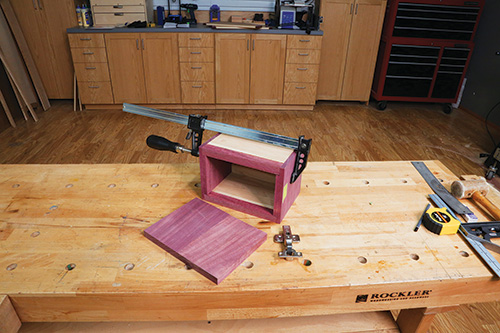
Use a wide straight bit in the router table or a dado blade in your table saw to plow 3/8″-deep x 3/4″-wide rabbets along the top, bottom and back edges of the side panels so they wrap over the ends of the top and bottom panels.
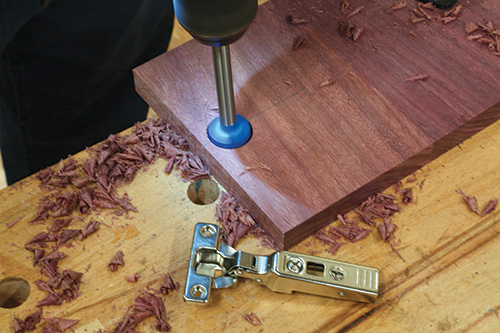
I decided to install the door with a single Mini Blum® 26 mm Frameless Overlay Hinge (Rockler #38385) that snaps closed, because this door is so tiny as to not need two hinges. Follow the instructions that come with the hinge to bore a stopped hole in the back of the door for the hinge’s cup. Dry-assemble the cubby with clamps so you can install the carcass-side component of the hinge on the cubby’s side panel.
Tricking Out the Project and Installing It
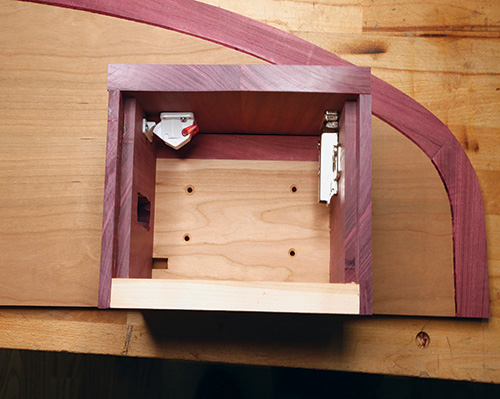
There are several doodads you can choose to add to your project as I have to make it even more useful, and now is the right time to consider them. I like the white Tot-Lok Mechanism (Rockler #63164, #63172), because it enables a door to be unlocked with a magnetic key from the outside. So, I mounted this hardware to the back of the door and to the cubby side opposite the hinge. I also thought LED lighting might be a nice touch. I picked up an inexpensive 6-ft LED rope light, and I routed a channel in the cubby top, bottom and back to feed the LED through from inside the cubby to the bottom faces of the shelves. If you’d like USB ports in the cubby too, you’ll need to chisel an opening for that hardware in the cubby side as I have.
All of this work happens before gluing the cubby together. When I was finally ready to assemble everything, I glued the cubby top and back panels to the side panels first, but I left the bottom panel unglued so I could remove it for installing the cubby to the top shelf. When this glue-up dried, I centered the cubby’s top on the bottom face of the top shelf with the back of the cubby flush with the back edge of the shelf. I fastened the cubby to the top shelf with four #8 x 1-1/2″ screws driven into countersunk pilot holes. Then I could glue the cubby’s bottom panel into place and install the bottom shelf to it (facing the opposite direction to the top shelf) when the glue dried. To verify the alignment of the two shelves before attaching the second one, stand the project on a workbench and use a couple of combination squares held against the ends of the shelves to see that their ends align. I made a few adjustments, then drove four screws up through the bottom shelf into the cubby bottom to attach the parts.
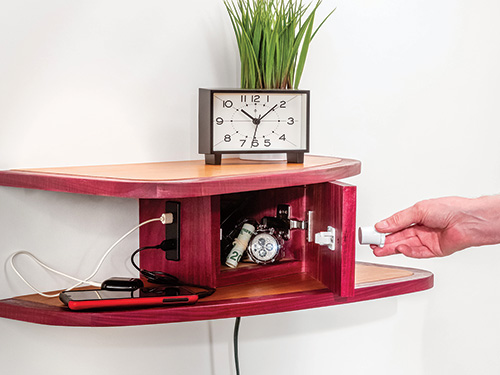
At this point, I went ahead and applied a couple of coats of poly to the whole project. After it cured, I installed the LEDs and USB hardware, then hung the shelf on the wall near an outlet to power everything up. A few long screws driven through the cubby’s back and into a wall stud will provide plenty of structural support to secure this project at the height you need it.


