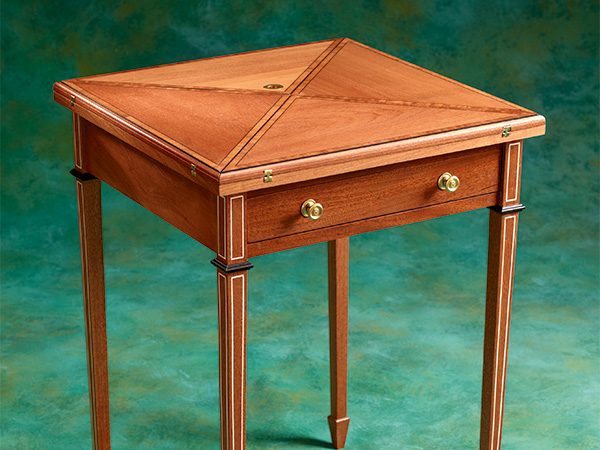
Card games have long been a source of social entertaining, and the current popularity of poker continues that trend. There are many plans available for poker tables, but a dedicated poker table might not fit your home’s space or design. That is why I wanted to build this Edwardian Envelope Table.
When not hosting a card game, it is an elegant side table of modest size, just 22″ square. But turn the top 45 degrees, open up the leaves, and it becomes a 31″ square game table complete with felt playing field and pockets for the chips.
As you may have guessed, creating a table that will go through this transition involves a bit more work than a traditional table. There is the fairly standard apron, but it houses a captured “sub-top” that provides the structure and strength to support the spinnable tabletop as well as its folding leaves. When they’re closed, the table’s leaves resemble an old-style folded envelope, giving the table both its name and its unique look.
Mahogany is the traditional material of choice for this project. Look for rich color and consistent grain. The material that is used for the folding leaves should be selected carefully to match when folded closed. The hidden elements such as drawer sides and runners can be made of whatever secondary wood you have available.
The inlay strips that surround the table leaves should be 3/8″ wide for proper proportion, and the stringing should be 1/8″ wide or less. It is important to have the stringing (and the leaf inlay) on hand prior to milling their respective grooves to be certain of a tight fit. They can be bought pre-made, but are not that hard to make for yourself.
Making the Legs
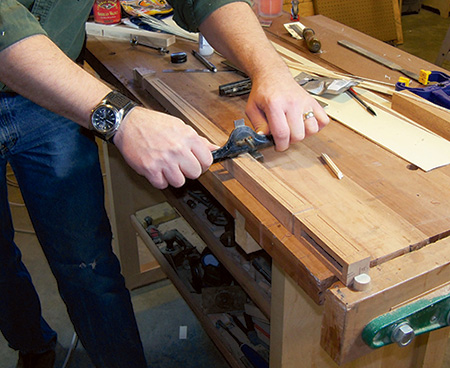
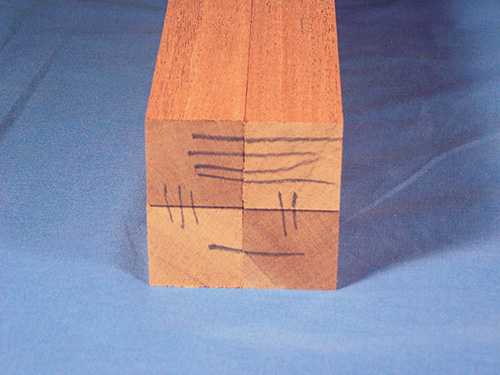
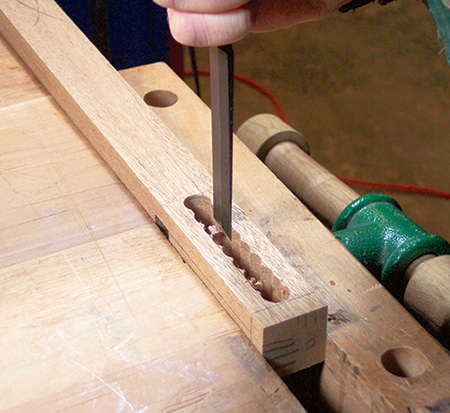
To begin prepping the legs, select straight grained stock and, after preparing it on the jointer and planer, mill them to 1-1/4″ square. Arrange the pieces to present their best faces outward, and mark them. This will help ensure that the faces get mortised in the proper locations. Cut the mortises according to the plan — none for the top stretcher across the front, which will be secured using a dovetail (see the Drawings).
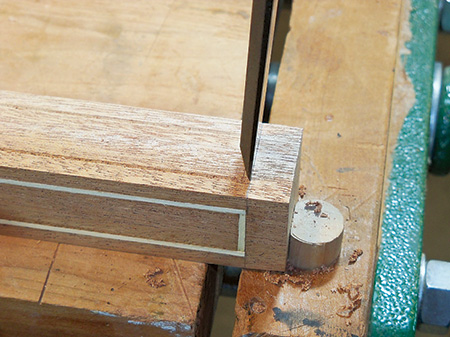
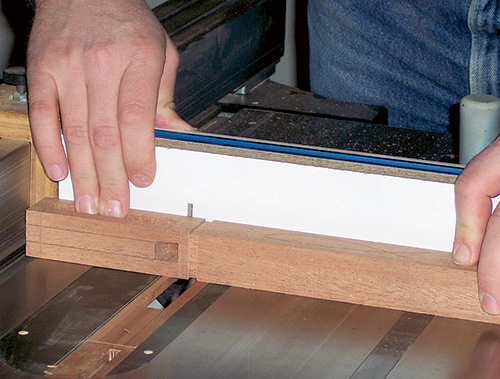
As you can see in the lead image and the Drawings, there is a small molding detail just below the apron. To locate and mount the molding, a shallow dado is milled around the leg to receive it. My dado blade and miter gauge made short work of this task.
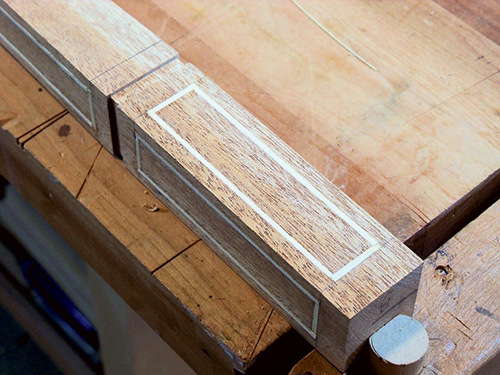
The first step in forming the spade foot shape at the bottom of the leg is done by a point-cutting roundover bit. Following that, I stepped to the table saw and used a tapering jig to complete the spade foot form.
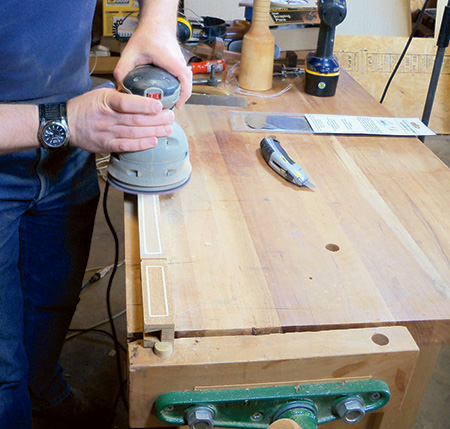
Now you are ready to make the longer tapers on all four sides of the legs. Mark them from just below the molding dado to the top of the foot, and carefully cut them on the band saw. Then sand or scrape them smooth.
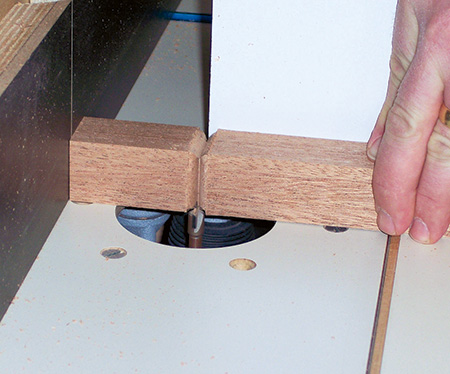
With the legs properly shaped, you can add the stringing. The outside two faces of each leg get these string details. I used a hand beader, but a scratch stock or trim router with an edge guide would be equally effective to make the shallow grooves along the length of the tapered leg section and at the square top segment of the leg.
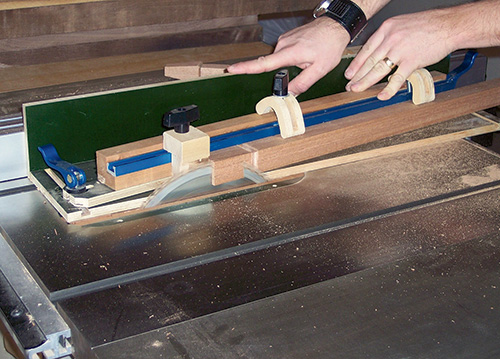
The cross grooves are easy to cut with a sharp chisel. Obviously, these grooves must be carefully cut to the width and thickness of the stringing to look good. While this process does take time, it really lifts this project to the next level. When you are done with this task, sand the legs and the stringing up through the grits. Set the legs aside for now and move on to the aprons and stretchers.
Milling the Apron Details
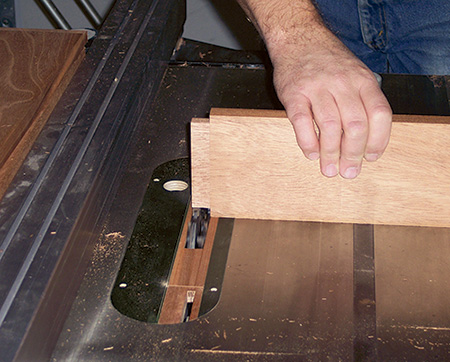
The three aprons and two stretchers are next on the agenda (pieces 3 and 4). The stretchers and the drawer front are all cut from one slightly oversized blank. This is done to ensure a consistent grain pattern running through the drawer front and the stretchers. A nice touch.
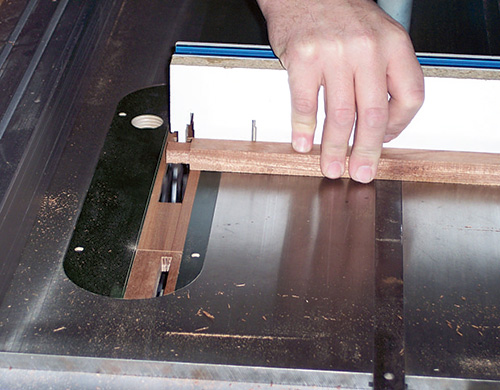
Start out by ripping the top stretcher from the blank, then reset the fence to rip the drawer front, then set the saw one more time to rip off the bottom stretcher. Go ahead and cut the stretchers and drawer front to their final lengths. The other three aprons can be cut and ripped to their proper size.
The three apron pieces and bottom front stretcher need to have mitered tenons raised on their ends to match the mortises you’ve chopped. (The top front stretcher gets dovetails formed later.) Look to the Drawings to find the details regarding the tenons. Test fit them to their respective mortises as you go.
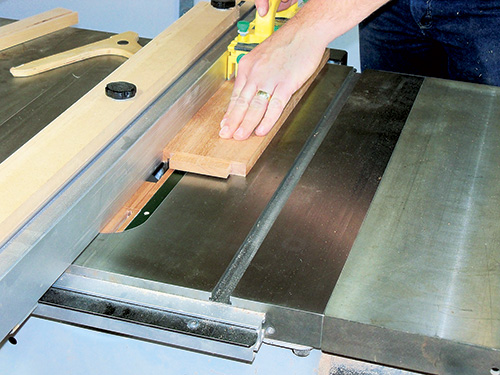
The sub-top mounts inside the aprons employing a tongue and groove joint, and the grooves need to be cut at this stage. Set the dado blade up for a 1/4″-wide cut, 3/8″ deep, and set the rip fence to groove the parts 1/4″ down from the top edge. All three aprons and the top stretcher need to be grooved.
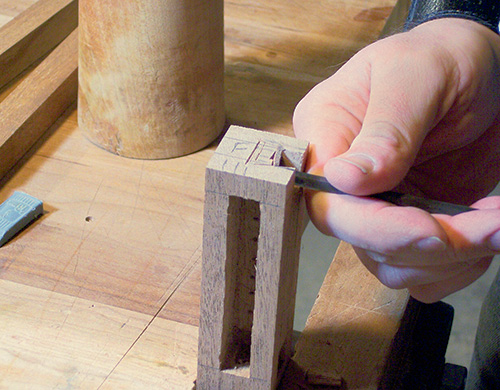
Using a very traditional bit of table joinery, I chose to dovetail the top stretcher into the legs rather than using a mortise and tenon. Since there are only two small joints, they can be easily marked out with a knife and hand cut to fit. See the Drawings for details.
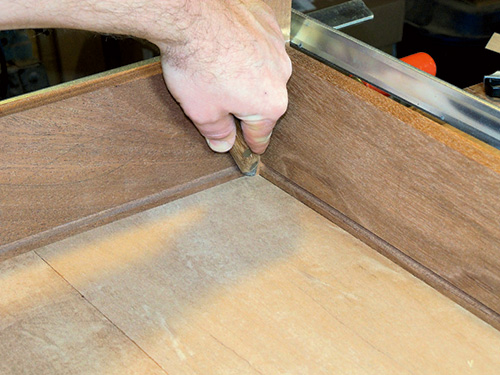
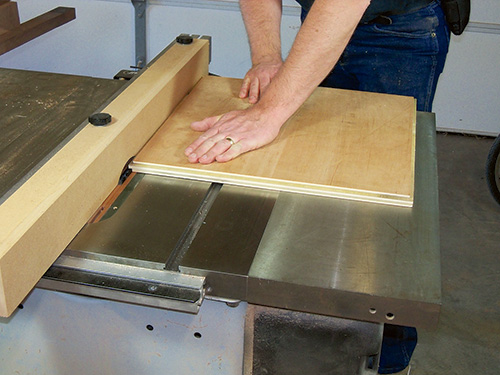
The table frame can now be dry-fitted, and the sub-top dimensions confirmed. Clamp the assembly together, ensure it is square, and measure the inside dimensions. Ideally, the sub-top should be 18-1/2″ square including the tongues, but adjust as needed to fit snugly inside the dry fit you’ve made. My sub-top was cut from 3/4″ mahogany veneered plywood I had left over, but any good quality ply can be used since the sub-top is only glimpsed when opening the leaves.
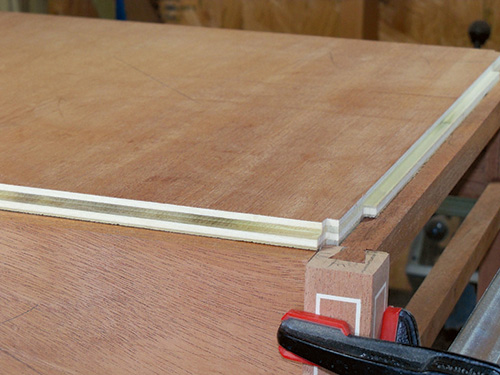
As you can see in the Drawings, cut a 1/4″-thick x 3/8″-long tongue around the edge of the sub-top. The corners of the sub-top will need to be notched to fit around the legs. Flip the dry-clamped subassembly over, center it on the subtop, and mark out the notches.
The tabletop pivots on the sub-top around a 5/16″ carriage bolt, so the sub-top requires a 5/16″ pivot hole and counterbore marked out in the exact center of the sub-top. The hole and counterbore should be sized to contain a 5/16″ fender washer and nylon lock nut. Be very sure to test the fit of the frame and sub-top, ensuring that they are snug and square. Once everything is set, glue the frame and sub-top together.
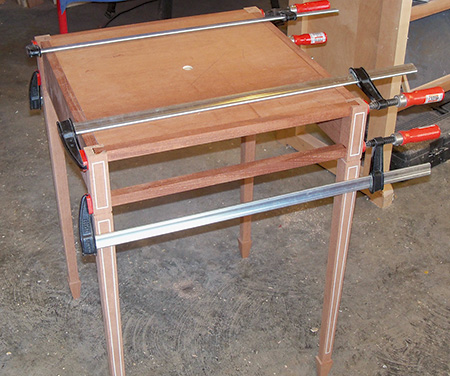
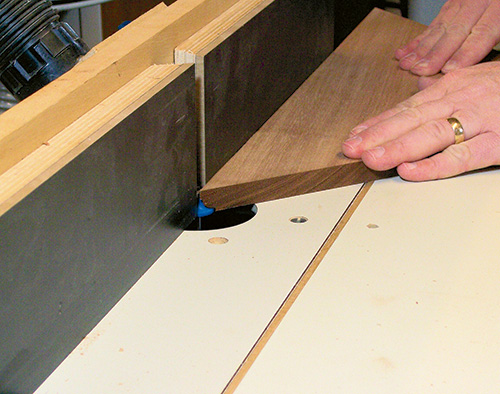
With the base assembled, the trim molding can be wrapped around the legs. The trim molding was milled on the router table from a wide piece of clear maple for safety. See the Drawings for the molding profile and dimensions. The profile for your molding just needs to be close to the one illustrated — it does not need to match perfectly. Key to the process is a kerf that is cut top and bottom on the maple board which will form a boss (a small raised section almost like a tenon or a tongue), fitting the dado in the table legs you made earlier. Once the moldings were cut from the blank, I dyed them black. Then I mitered the pieces and applied them to all four of the legs with glue, clamping them securely.
Here’s the Safe Way to Form Those Small Moldings
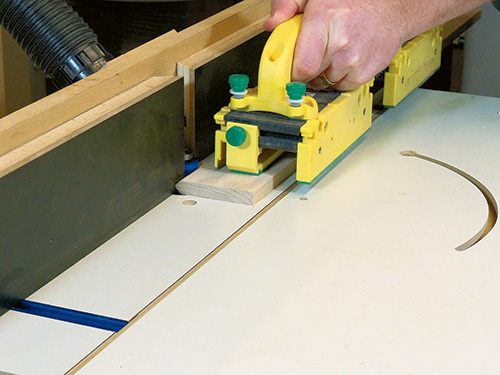
Small details can make a big difference in your projects…but sometimes small can be dangerous.
The small molding details on the legs of the game table are made from maple stock — so you may ask why they look like ebony. The answer is simple: India ink. It creates a jet black color.
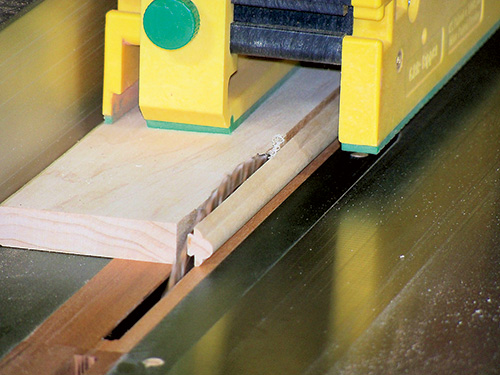
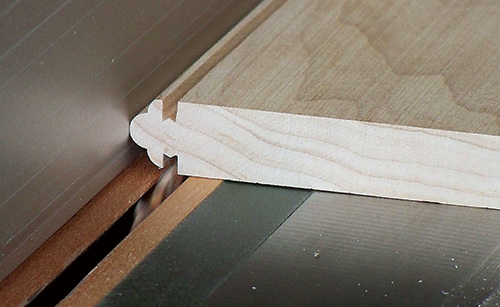
To make the molding, plane a piece of approximately 3″-wide maple lumber to 1/2″ thickness. Next, set up your router table with a profile cutting bit; our author used a Provincial edge bit for the task. Test your setup on scrap lumber before you make the actual cuts, and then form the molded shape on both edges of the prepared maple lumber.
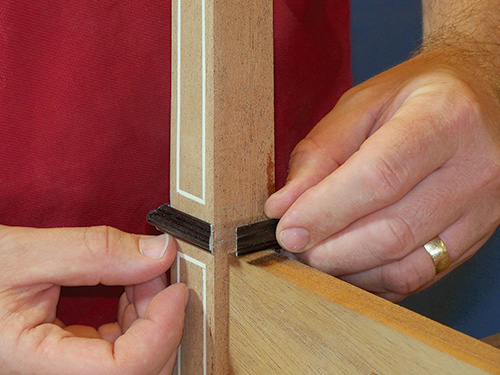
With that done, move to your table saw and form a small saw kerf on both faces of the stock, just behind the molded edge. This will create a boss — a small raised section — on the back of the molding, which will fit into the dado on the leg. Now rip the molding off of the lumber and apply the India ink as a dye. Allow it to dry completely before you miter the molding to fit.
Making the Fold-open Top
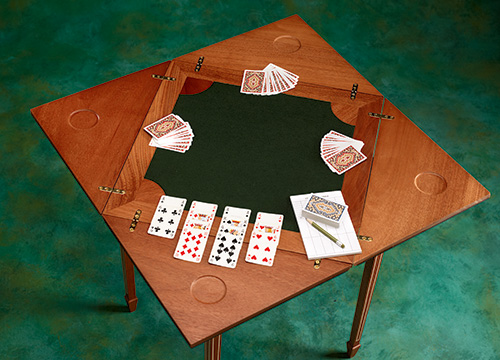
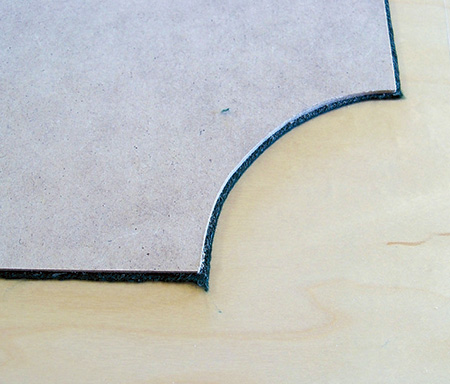
The hinged top of this project really provides a “wow factor,” and not just because it rotates and opens. When opened up for play, the top shows a mitered mahogany frame with quarter-round corner blocks surrounding a felt playing surface. As mentioned earlier, select the stock for these parts with an eye to matching grain and attractive figure. Start by milling the frame parts to thickness and width, but go ahead and crosscut them a little over-long. Miter the four frame parts to size, testing their fit. Next, glue and clamp them together. While the glue is drying, make the corner blocks. Their grain runs diagonally into the corners. To achieve this, I made an MDF template with a trued-up curve. The corner blocks are cut square, and then the curve was rough-cut on the band saw. To make them identical, I pattern-routed the corner blocks using the MDF template. The problem was, these parts are too small to safely flush-trim on the router table. My solution was to do the task with a handheld router instead. I mounted the template to a block with glue and a screw, then clamped it into my bench vise. Next, I attached the corner blocks to the template with double-sided carpet tape and trimmed the blocks with a hand router and a pattern-routing bit — to ensure uniform size, fair curves and square corners. The corner blocks are clamped in place (with glue) using notched scraps to protect the frame corners. When the glue had cured, I took it out of the clamps and sanded it smooth. As shown in the Drawings, the frame gets a 1/2″-deep, 3/8″- wide rabbet milled all around the underside to accept the field base.
When completed, the top frame will capture two layers of plywood (or MDF) that combine to support and form the playing surface. One is a 1/2″ thick layer that forms the base, and the other is a 1/4″ sheet that is the substrate for the felt playing surface. Use the frame opening to mark their shapes by tracing right onto the sheetstock. Carefully cut the felt substrate shape, using a table saw and band saw: it must fit the opening very closely, so it will likely require some sanding or rasp-work to fit it properly. After you are done fitting it, go ahead and set it aside until later. Next, trace the base layer shape (onto your 1/2″-thick sheetstock) using the frame opening as a guide. You will need to add 3/8″ all around so it fits inside the frame rabbet. Cut out the piece on your band saw and then sand the edges smooth so the base fits snugly, and pocket-screw in place. While your pride may drive you to shape this piece with precision, a perfect fit is not necessary, as it will not be seen by anyone but you. Lastly, measure and mark the exact center of the subassembly and drill a 5/16″ hole and counterbore for the carriage bolt pivot.
Creating the Triangular Leaves
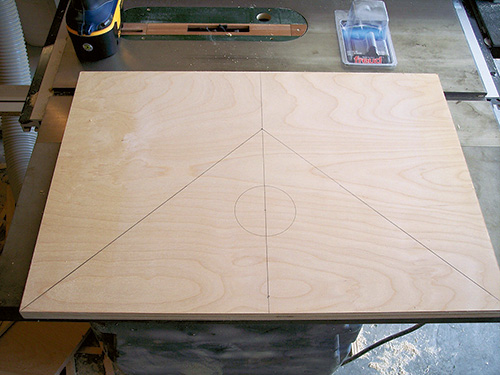
After building and assembling all of those parts, you’d think that you should be done about now. Well, not quite…
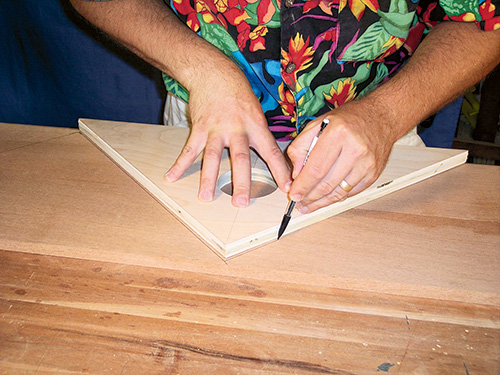
The four leaves that form the top of the table need to be quite accurately made, so once again I decided to use a template routing technique to ensure the required uniformity. Because it is inexpensive and exceptionally stable, I used plywood as the template material. To create the leaf shape, first cut a perfectly straight edge onto an appropriately sized piece of plywood and mark a 22″ line on the prepared edge.
Then, find the exact center of that line and extend a vertical center line at 90° that is 11″ long. Connect the ends of the lines to form the triangle. This layout must be exceedingly accurate. If the template is not symmetrical, the leaves will not fit well when the table is folded. Take care when cutting out the template and, when you have finished, lay out and cut a circular hole where indicated for the chip pocket (see the Drawings for details).
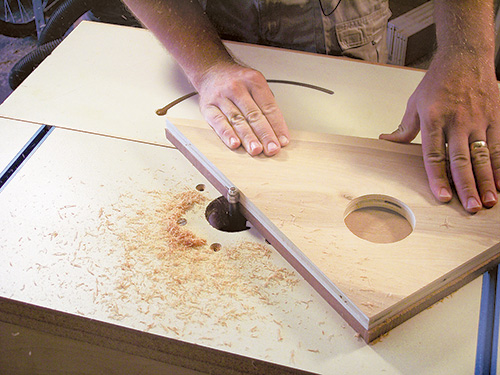
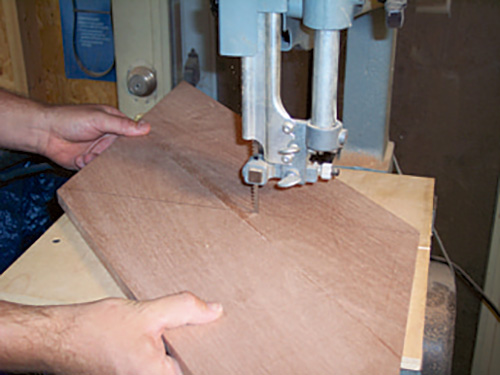
With template in hand, use it to lay out the leaves. Ideally, all four should be cut from the same board, but if not, take care to keep the color and grain consistent. Rough-cut the parts slightly oversized with a band saw or jigsaw. Then, once again taking advantage of double-sided carpet tape, secure the pieces to the template you just made and flush trim them to final size on the router table.
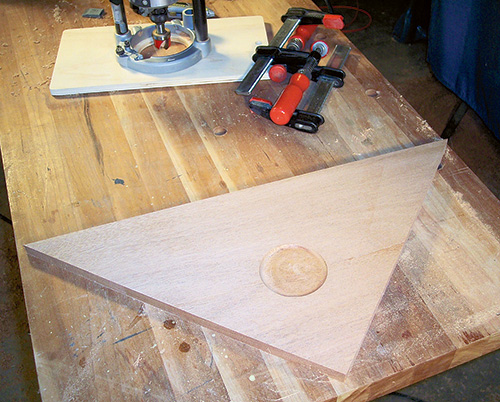
Before you take the template off the leaf, set up a handheld router with a dish-carving bit or core box bit to mill out the shallow depression in the underside of the leaf for the chip pocket. As you can see in the photo at right, I mounted a small piece of plywood to the base of my router, to add stability and control during this cut. When you are done with that step, it is time to flip the leaves over and start to add some classic decorative touches.
Hinges and Decorative Touches
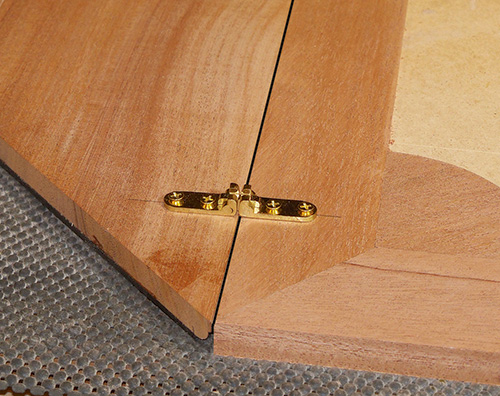
The outer edge of the closed table has a 5/16″-radius stepped bead profile that I cut on the router table. To achieve that, each of the leaves gets milled along the base leg (the long edge) of the triangle. Before plowing the grooves and adding the inlay, you need to take some time to mill the hinge mortises. Fitting the hinges and leaves at this stage makes it possible to refine the fit of the leaves, trimming a little from the edges if needed, without damaging the inlay.
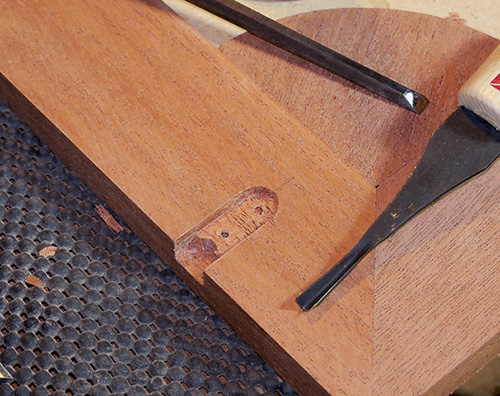
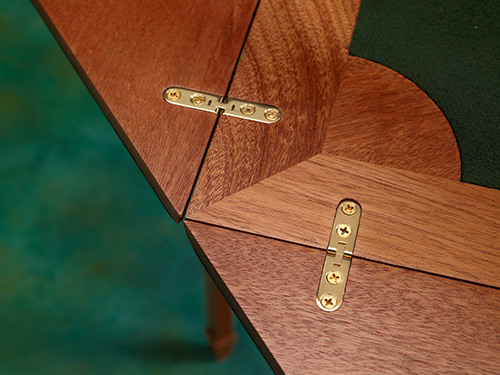
Mark out the hinge locations 3″ in from the corners as shown in the Drawings. Set the leaf 1/16″ off of the top frame and screw the hinge in place, but upside down. Now, carefully trace the mortise location with a sharp knife, then remove the hinge and, using those marks, clean out the mortise with a router or chisels as you prefer. Note that it is a stepped mortise, and a small clearance section is needed for the connecting bar of the hinge. Mortise all eight hinges in the leaves and frame, and then temporarily mount the hinges to the table. Fold the leaves in and ensure they meet in the center without binding. As you will notice, there is just a bit of play in these hinges. Check the fit and, if needed, this is the time to shave a little off an edge for a proper fit.
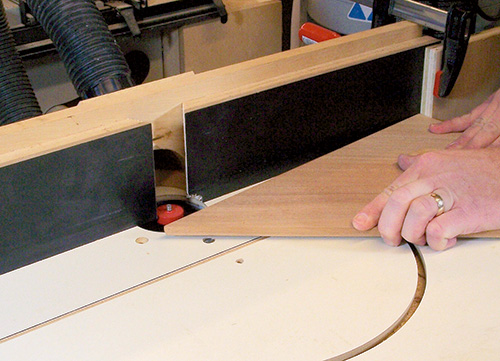
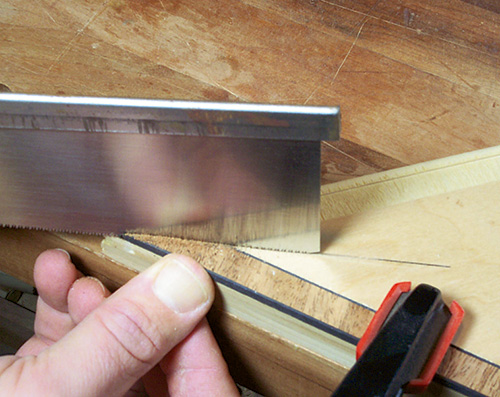
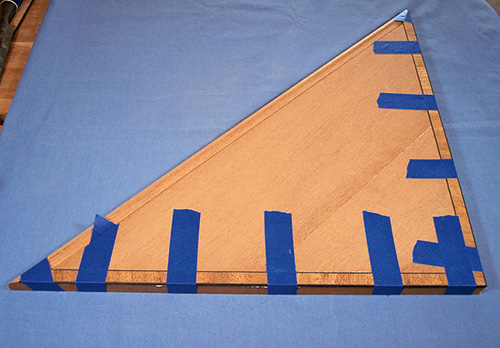
Once the hinges are fitted properly and the leaves adjusted, remove the hinges and begin milling the leaves to accept the inlay. A 3/8″-wide rabbet is milled around the edges of the top of the leaves to receive the cross grained inlay strip. Along the outer edge of the leaf, the rabbet starts at the edge of the roundover milled in earlier, but on the other two sides the rabbets are right out at the edges. The depth of the rabbet should be the same as the thickness of the inlay, or just a hair less so that you can sand it flush. Carefully cut the inlay strip to meet at the corners. A nice trick to help cut the corners easily is to use the leaf template: first as a setup piece for the rabbets (testing the cuts), then as a cutting guide for the strips. After you have properly fit the inlay strips, glue the trimmed inlay strips in place, being careful about the alignment of the corners. I used blue painter’s masking tape as “clamps” in this process.
Another detail to attend to is the brass pull. With the top folded, one of the leaves needs a pull for opening the table up. Many antique examples have some type of spring-loaded mechanism, but others have a visible pull. I couldn’t find any detail regarding how the spring mechanism worked, so I opted for a single brass pull. The pull requires drilling a shallow 1-1/4″ counterbore and a 1″ diameter hole 5/8″ deep for the body. This is located near the tip of the triangle, so don’t force the fit. Widen the hole if needed to avoid breaking the tip. (Please don’t ask how I know this!)
Drawer & Runners
No game table would be complete without a drawer for storing cards and chips. The drawer front, which you set aside earlier, can now be cut to final size. Measure the finished opening and allow space on all sides for a reveal. I chose to dovetail the front to the drawer sides.
The front and sides are grooved to accept a bottom, and the back fixed between the sides using simple groove and tongue joint. Poplar was my secondary wood for the drawers, but whatever is on hand in your shop will be fine.
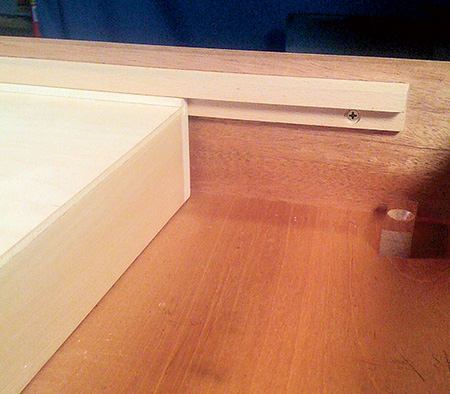
Runners that guide the drawer should be rabbeted to fit closely between the apron sides and the drawer, about 3/8″, depending on how much gap your drawer has. See the Drawings for all the drawer construction details. Drill and screw the runners to the apron sides. Maple or another close-grained hardwood is a good choice. Wax them well after finishing to ensure smooth drawer operation. Stop blocks (in this case made from mahogany scrap) are added to the underside of the sub-top as drawer stops.
Finishing and Assembly
With all the subassemblies completed, everything can be cleaned up, given a final sanding and the finish applied. For ease of application, durability in use and low-odor considerations, I chose waterborne polyurethane for this project. I applied three coats on all the subassemblies, with a light sanding between coats. When the finish completely cured, the sub-top and top were waxed to allow the top to smoothly pivot on the frame. A 1″ long carriage bolt was set into the hole in the center of the top, and down through the matching hole in the sub-top. A fender washer and nut attached the top to frame.
Next, reattach the leaves to the frame with the hinges and install the pull on the leaf. I mounted brass pulls to the drawer front — and the project was getting dangerously close to completion. All that remained was to mount the felt onto the playing field.
Applying the Felt Field
To make the playing surface, the felt is cut slightly oversized in comparison to the 1/4″ substrate you cut earlier. I used spray-on adhesive to bond the felt to the substrate, and then trimmed the felt, leaving a 1/4″ flap all around the substrate.
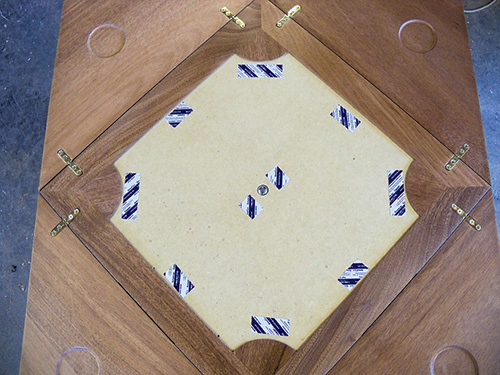
Grab the double-sided carpet tape you’ve used earlier and apply several pieces. I used thin spacers to center the felt-covered substrate as I mounted it.
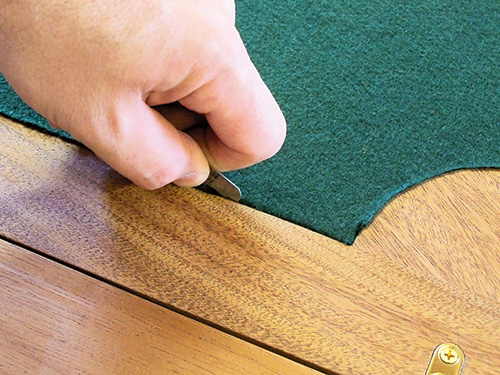
With the felt-covered substrate in place, I used a thin wedge to tuck the overhanging felt flap into the crack between the frame and the field.
Operation
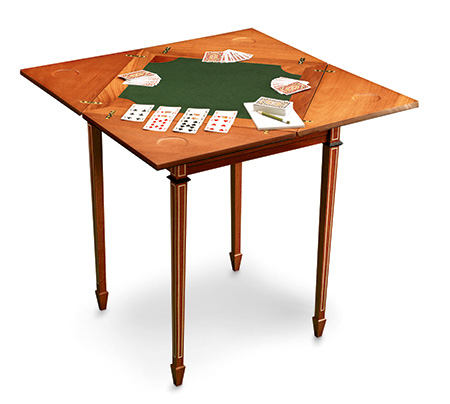
When not hosting a card game, the table is a mild-mannered end table, quietly gracing a den or family room. But when friends arrive, the top is rotated 45 degrees, exposing the corners of the frame. The leaves are unfolded, exposing a felt playing surface and the expanded table surface. When you’re done with the game, simply fold the leaves back in, and rotate the top until it is squared with the base of the table.
Here’s one thing to be aware of: the hinges are a two-knuckle design, with a short connector bar between the leaves. This means that the hinges can shift back and forth about 1/16th of an inch when closed. As the leaves are closed over the top, they can shift noticeably from corner to corner. A tap with the palm can align them properly.
Click Here to Download the Drawings and Materials List.
Hard-to-Find Hardware:
Narrow Sewing Machine Hinges (4) #30897
Folding Adirondack Chair Hardware (1) #24618
Provincial Edge Bit (1) #64033


