
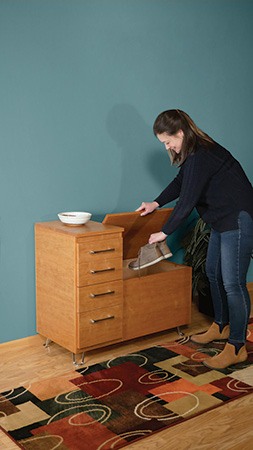
This attractive entry bench offers a helpful place to sit and change a pair of shoes. You’ll also appreciate its storage capabilities: four drawers can hold gloves, scarves and hats, and its deep chest can stow boots and other seasonal footwear.
Preparing the Plywood Panels
Follow the Cutting Diagram to cut a 4×8 sheet of 3/4″ plywood into slightly oversized panels for the bench and drawer cabinet. For the drawer cabinet, you’re cutting the back, sides, subtop and bottom.
For the bench, you need the front, back, sides and bottom. If you lay out the panels according to the diagram, the face grain will align around the perimeter of each box.
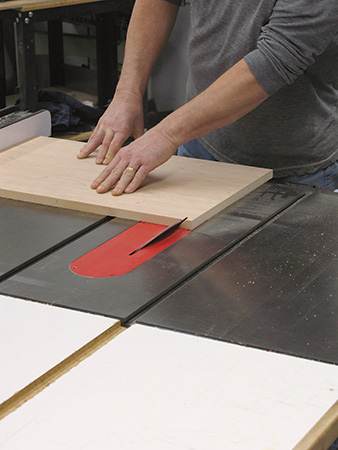
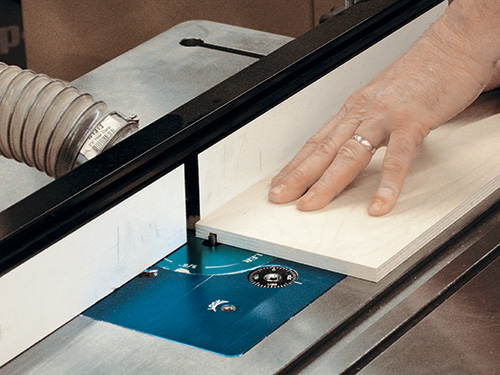
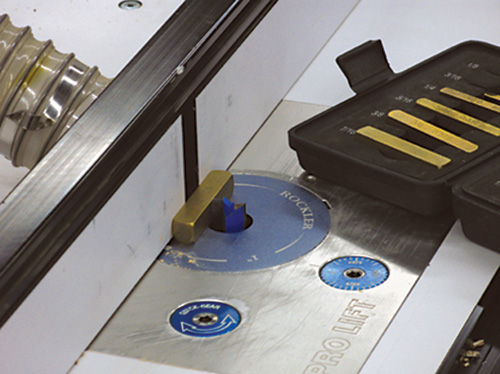
Now, trim the panels to final width, using a sharp blade in your table saw to cut the plywood’s face veneer cleanly.

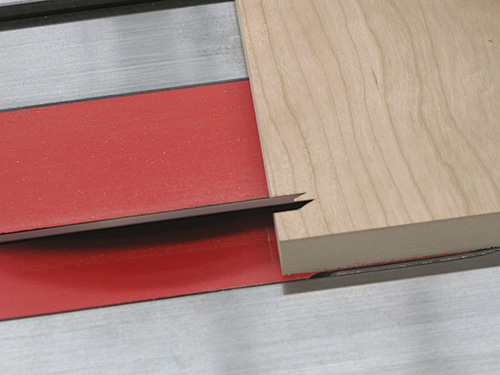
The front, back and side panels of the bench will be assembled with 45-degree bevels, then later modified with solid wood trim strips. Likewise, the drawer cabinet’s back panel connects to the side panels with the same bevel joints.
Tilt your saw blade carefully to 45 degrees, and trim the appropriate edges or ends of the panels. Test your saw setup first on scrap material to be sure the bevel joints will meet at 90 degrees. These bevel cuts should also bring the ends of the bench panels to final length.
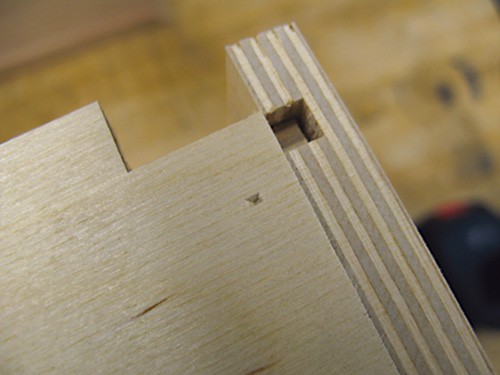
Next, mill 3/8″-deep, 3/4″-wide dadoes across the inside faces of the drawer cabinet panels to fit the subtop and bottom panels. Position these dadoes 3/8″ in from the panel ends. Likewise, plow a groove for the bottom panel in the bench’s front, back and side panels. Locate this groove 3/8″ up from the bottom edges of the panels.
Apply iron-on veneer edge tape to the front edges of the drawer cabinet’s side panels as well as the top and bottom edges of the bench’s front, back and side panels. Notice that tape will cover the ends of the dadoes on the drawer cabinet’s front edges. Carefully trim and file away the excess tape as needed.
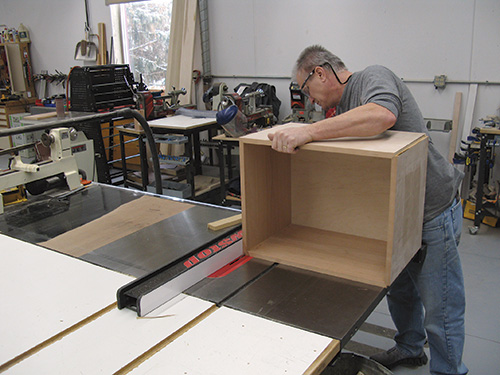
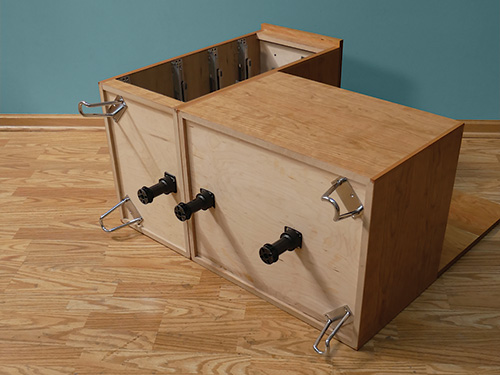
Dry assemble the front, back, side and bottom panels of the bench to make sure the bevel joints close properly. If they do, spread glue along the bevels and dadoes, and assemble the bench with strap clamps. Don’t assemble the drawer cabinet at this time.
Making Drawers
These drawers are made of 1/2″ plywood with 1/4″ plywood bottoms. Notice in the Drawings that the drawer boxes are assembled with butt joints to keep the construction process easy. Follow the Material List to rip and crosscut parts for the four drawer boxes to size. Don’t cut the 3/4″ drawer faces now — those will come later.
At the router table, plow 1/4″-deep grooves in the drawer fronts, backs and sides for the bottom panels. Since most plywood is slightly thinner than its stated thickness, use a router bit that matches your plywood thickness so the drawer bottoms will fit their grooves well. Position these grooves 1/2″ up from the bottom edges of the parts (that spacing is necessary to fit the drawer slide hardware). Rout the grooves the full length of the parts.
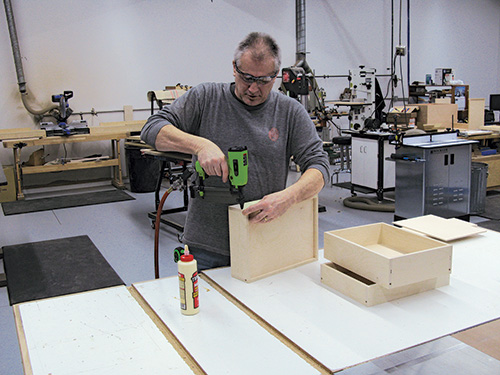
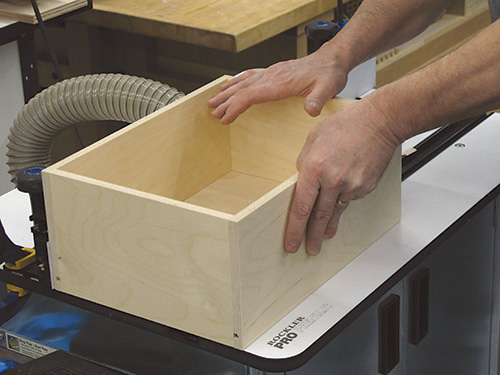
Dry assemble the four drawer boxes to check their fit; the sides overlap the ends of the fronts and backs. Then finish-sand the pieces with 150- or 180-grit sandpaper. Assemble the parts with glue, reinforcing the joints with 1-1/4″ brad nails. Make sure their corners are square; out-of-square drawer boxes are much more difficult to install.
Installing Tandem Edge Slides
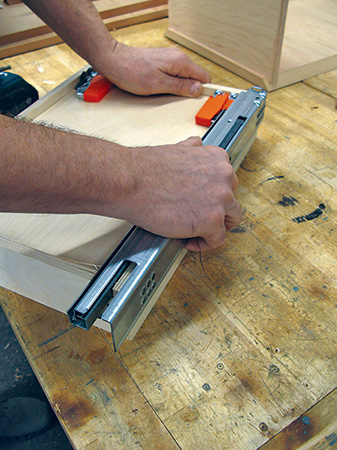
We’re hanging these drawers on Blum Tandem Edge 7/8 Extension Drawer Slides. Each consists of two components: a cabinet-side member that attaches to the cabinet walls and a plastic and metal locking drawer component that tucks underneath the drawer bottom behind the drawer front.
The two parts clip together and provide a soft-close action, while also making the drawers easy to remove from the cabinet when necessary. Rockler offers a helpful PDF installation document for these slides that can be downloaded to assist you, along with the following instructions.
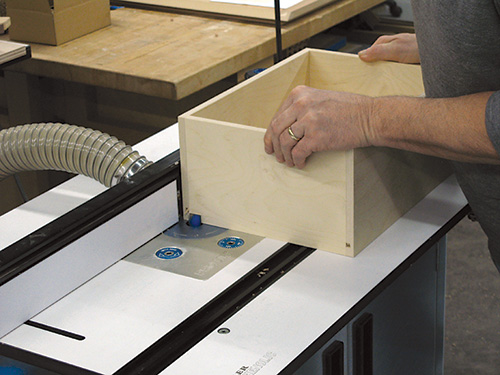
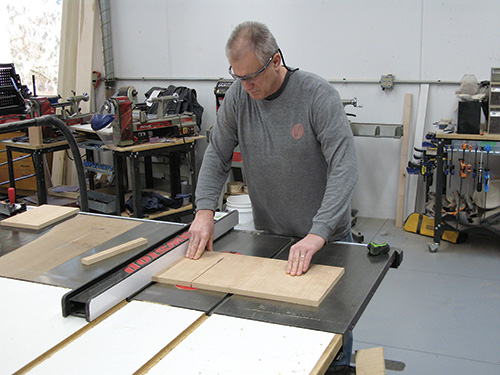
The cabinet-side slide components require that a 1/2″-deep, 3/4″-wide notch be cut through the back face of each drawer box, adjacent to the drawer sides. We cut these notches at the router table with a straight bit.
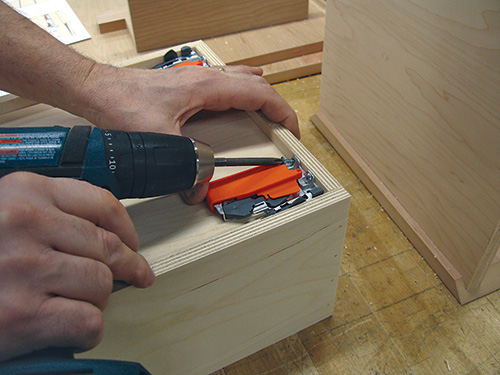
When the notches are done, flip the boxes over and fit a pair of drawer-side locking devices against the front bottom corners of each drawer box. Drive the included screws at an angle through holes in the hardware to attach them.
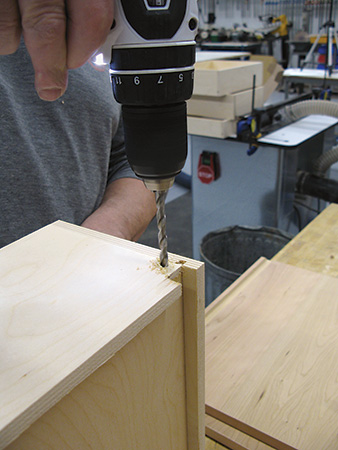
These slides have a pointed metal locator hook on their back ends that must fit into a 1/4″-dia. hole bored into the back face of the drawer box back, one hole per slide. Lay out and bore these holes 13/32″ deep; you can locate the holes by measuring, of course, but there’s another simple way to do it without measuring.
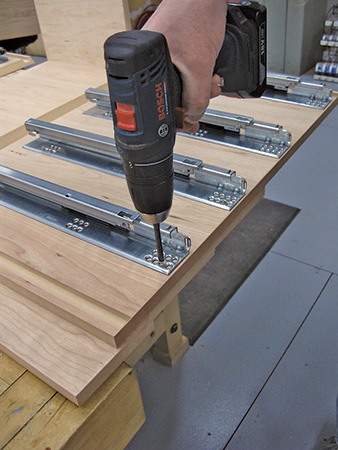
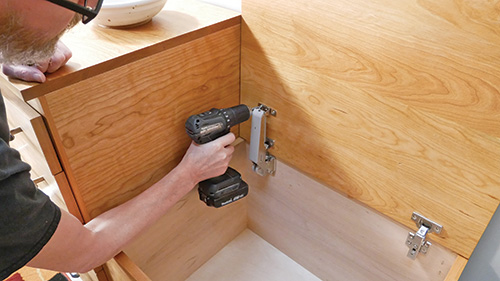
It’s much easier to align and attach the cabinet-side slide components to the side panels when you can still lay them flat on a bench, and that’s the reason why we haven’t assembled the drawer cabinet yet.
Carefully lay out the four slide locations, as shown in the Drawings. Make sure that your panel layouts match and that the slides will be square to the panel edges. Attach the slides to the side panels with their included screws.
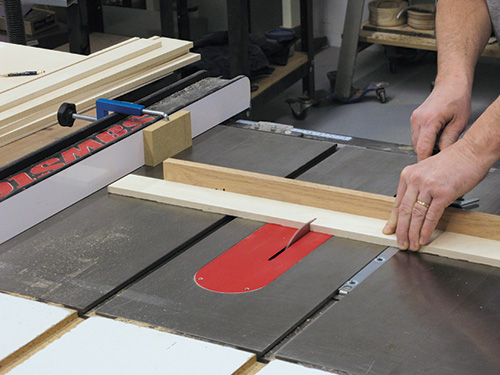
Next, rip and crosscut a pair of front rails for the drawer cabinet from solid wood. Plow a 3/8″-deep, 3/4″-wide groove along the inside face of each front rail, 3/8″ in from one edge. These grooves will fit around and capture the subtop and bottom panels.
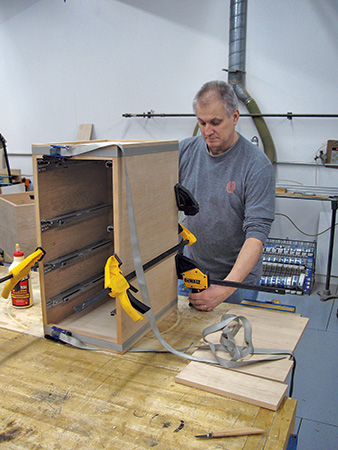
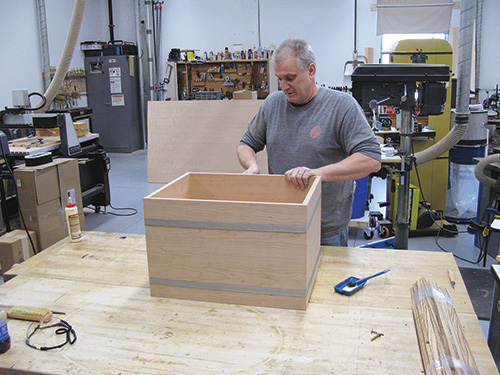
Dry fit all of the drawer cabinet workpieces together, making sure that the subtop and bottom panels seat in their dadoes or grooves and that the back bevel joints close properly. Make any necessary adjustments. Then give the parts a finish-sanding, and assemble the cabinet with glue and clamps.
Adding Wood Corners
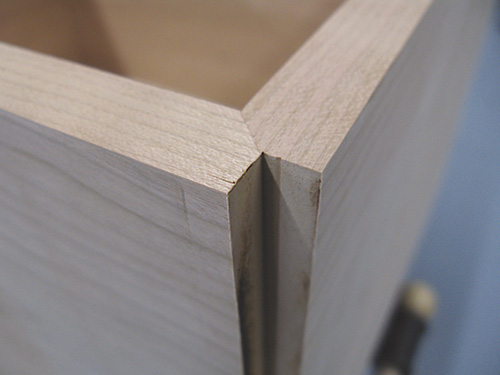
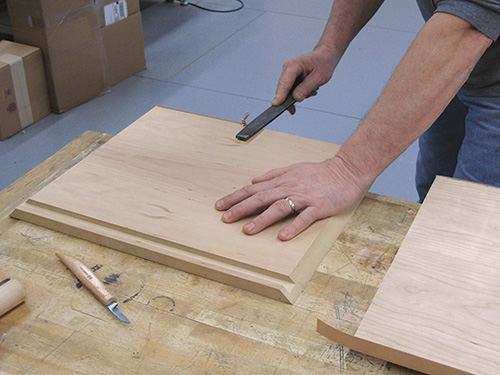
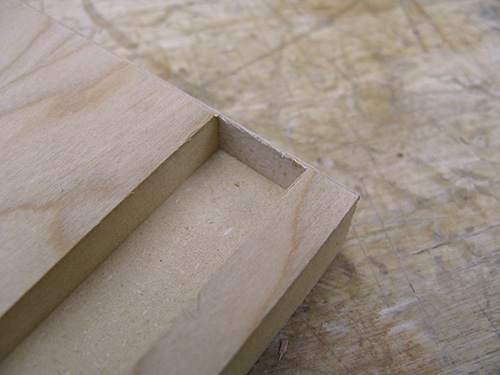
You’ll see in the Drawings that the four vertical edges of the drawer cabinet and bench are actually strips of 3/8″ x 3/8″ solid wood. There are two good reasons for adding this corner trim detail. First, if any of these long bevel joints come together less than perfectly after glue-up, replacing the plywood with a strip of solid wood allows one more chance for a better-looking corner. Second, the trim provides a tougher wear surface than thin plywood veneer for the scuffs and dings this project will certainly endure when used in a busy entryway.
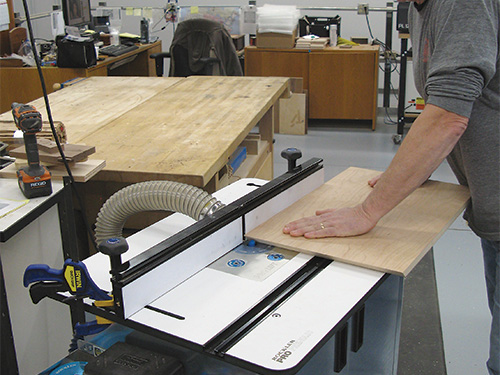
To trim off the beveled corners, install a very sharp blade in your table saw, and lock the rip fence 3/8″ away from the blade’s outside face. Raise it to exactly 3/8″. Make test cuts on scrap to be sure your blade and fence settings are accurate. Then, carefully feed the drawer cabinet and bench boxes over the saw to trim the corner material away.
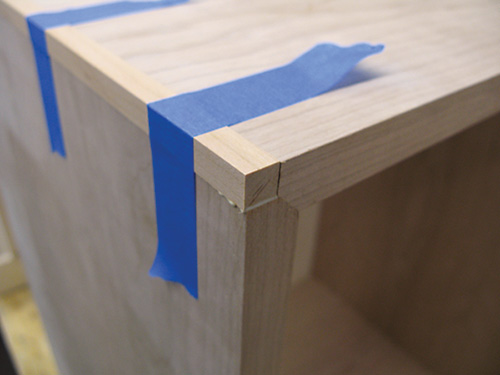
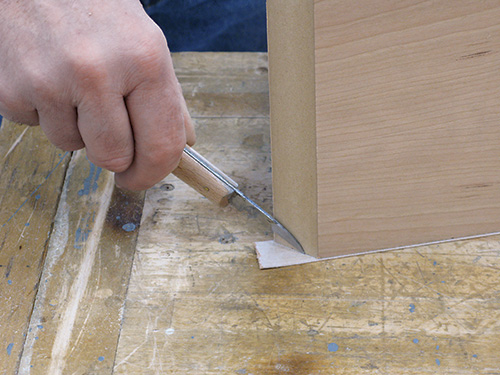
Once those notches are cut, rip eight 3/8″-wide strips from a piece of 3/8″-thick solid wood that are long enough to cover the notched corners. Trim them to length, and glue them into place on the drawer cabinet and bench. Hold the trim in place with tape.
Mounting Drawer Faces
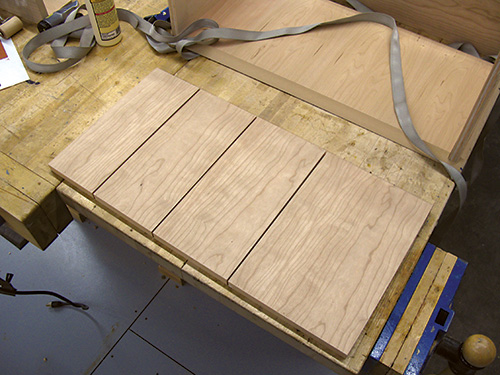
Find the remaining 3/4″ plywood panel you set aside initially for the drawer faces. Trim the panel to 12-1/4″ wide, then follow the Material List to crosscut it into the four sequential drawer faces. Mark each face to remind you of their original ordering. This way, their grain pattern will align down the bank of drawers.
Cover the ends and edges of the drawer faces with veneer edge banding, trimming and filing it neatly. While you’re at it, finish-sand the “show” sides of the drawer faces.
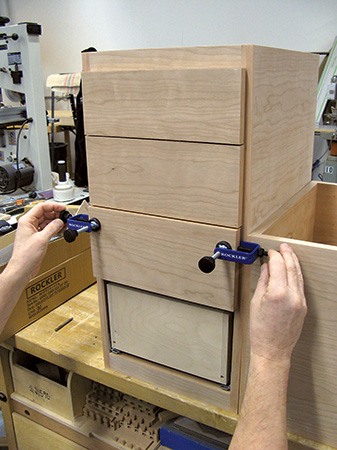
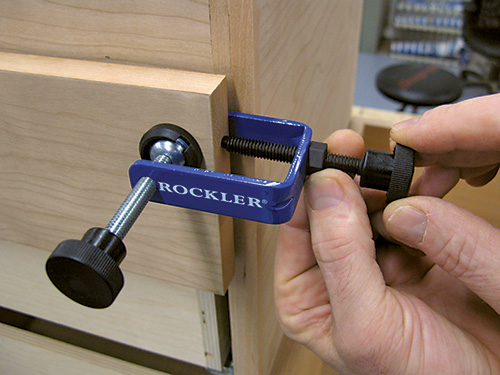
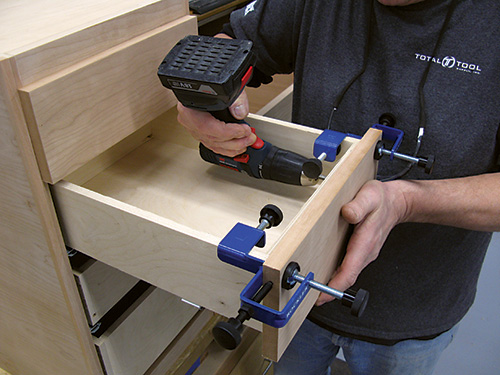
Now, clip the drawer slide components together to hang the four drawers in the cabinet, and test their action. If they open and close smoothly, you’re ready to mount the drawer faces. We installed ours using Rockler’s Drawer Front Installation Clamps. A pair of these clamps enable you to clamp a drawer face to the drawer box, then easily make final adjustments to it while still being able to close the drawer.
Install the faces beginning with the top drawer and working your way down, one drawer at a time. Drive several 1″ flathead screws through each drawer front and into its drawer face to secure the parts. Countersink their heads.
When the drawer faces are in place, go ahead and drill mounting holes for the four drawer pulls. We located all four pulls 2-1/4″ down from the top edges of the drawer faces and centered them, side to side. Carefully drill through holes for these screws, backing up the drilling area with a piece of scrap wood to prevent the drill bit from splintering the face veneer as it exits.
Bringing Cabinet, Chest Together
You still need to prepare a top panel for the drawer cabinet and a seat for the bench. Follow the Material Lists to glue those up from solid wood. When the panels come out of the clamps, trim them to final size and sand them up through the grits to 180.
Position the top panel on the drawer cabinet with its back edge flush to the cabinet back, in order to create a 3/4″ overhang on the front. The panel edges should be flush with the outside faces of the cabinet sides; this is particularly important on the side of the cabinet that will be adjacent to the bench — the bench lid will need to pivot past it when opened. Attach the top panel to the subtop with either brad nails or screws only — no glue. Since this panel is made of wood and not plywood, it must be allowed to expand and contract across the grain with changes in humidity. If you use screws to attach it, drive them through slotted holes in the subtop where necessary so it can move.
You’re now ready to attach the drawer cabinet to the bench with glue and screws. On a large flat worktop, set the cabinet (without drawers) and bench into position. Spread glue on their contact faces, and clamp them together. Make sure their front edges are perfectly flush. Drive eight to 10 countersunk #8 x 1-1/4″ flathead wood screws through the side of the drawer cabinet and into the adjacent side of the bench. This way, the screws won’t show once the drawers are in place.
We’re installing the seat on the chest using Sugatsune Aileron Hinges. They incorporate a soft-close lid stay that mounts over the top of one of the two included hinges. These hinges require that a 35 mm hole be bored 11″ deep into the seat to fit a hinge cup, similar to “Euro-style” cabinet door hinges. Mark and bore these two cup holes into the panel’s bottom face along the back edge. We positioned the hinge cups 3-1/4″ in from the ends of the seat panel.
Finishing Up
Smooth any areas of the bench that may still need a bit of touch-up sanding, then apply several coats of finish to the assembled bench, drawers and seat panel. When it cures, mount the cup side of the hinges to the seat and the hinge brackets to the back inside wall of the chest with screws. Snap the hinges together to mount the seat on the bench, then fine-tune the hinges with their adjustment screws so the seat overhangs the front and side of the chest evenly. Also make sure the lid can open and close without brushing against the drawer cabinet. Complete the lid’s installation by attaching the Aileron Lid Stay arm and bracket hardware over one of the hinges. Adjust the arm for the lid closing action you prefer. Then fasten the pulls to the drawers with screws.
The bottom corners of this entry bench are supported by Rockler’s 4″-tall Hairpin Legs/Feet, screwed to the chest and drawer cabinet. However, we also added three black leveler legs along the bottom center of the project. Two of these legs are installed beneath the chest and one is located under the cabinet. These legs allow the project to bear the load when the bench is used as a seat.
Now, ask a friend to help you move this project into place near your entry door. Then, get ready to enjoy its practical conveniences.
Click Here to Download the Drawings and Materials List.
Hard-to-Find Hardware:
128mm (5in C to C) Wisdom Stone Corba Pull – Chrome Finish (4) #73804
Modern Hairpin Legs/Feet, 4″H, 2-Pack (2) #61604
Adjustable Leveler Leg, 4-Pack (1) #32183
Sugatsune Aileron Lift-Assist Soft-Close Hinge Set and Lid Stay for Chests, Set (1) #67858
Blum 15” Tandem Edge 7/8 Extension Drawer Slides (4) #63111


