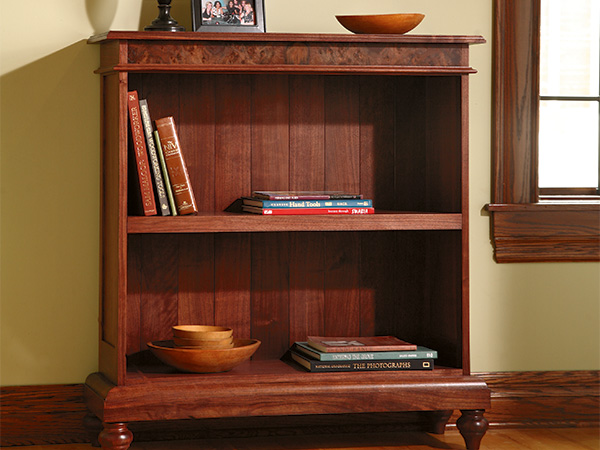
Casework projects are not exactly my bread and butter. Although I have been making my living as a woodworker for more than 30 years, my focus has always been more in the area of chairs and dining room tables. (I actually built a nice little bench for the Journal…well, it was Today’s Woodworker, before they bought the Journal) way back when publisher Larry Stoiaken was still serving as editor. But when current editor Rob Johnstone called me recently and asked if I was interested in building this little bookcase, I thought it would be a good change of pace. Art director Jeff Jacobson brought me the drawings and, after studying them carefully for a while, I was able to kick the project off.
A Series of Subassemblies
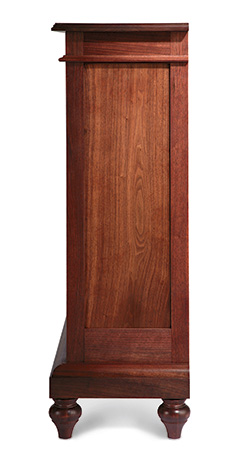
It would be really hard to think of a more classic project than a walnut bookcase, and this one is traditional — even down to its joinery. But, as you’ll see later, I do add a twist or two that makes the whole thing a bit easier to put together. All in all, though, there is nothing really tricky about this project.
As with most of my furniture pieces that are made entirely from solid lumber, my first tasks were determining which pieces of stock would go where on the finished bookcase, and then gluing up narrow boards to make the flat panels.
Fortunately, I had a long, nicely figured board in 1/2″ thickness that was wide enough to make the side panels without butt joints. (Again, I took considerable care selecting this stock, because the panels are a major visual component in the bookcase.) After I rough-cut the pieces to length, I machined them down to their proper size on my table saw. If you will have to glue up stock for the side panels, try to make sure that you match the grain pattern across the glue-up as well as you can to blend the glue seams.
When it came to the top, shelf and bottom, I did need to glue up stock sufficiently wide to create those pieces. So I took the time to prepare stock and glued up butt-joined panels for each of these “show” pieces. This entire bookcase is made from solid walnut lumber, with the exception of the bottom stringers (which I made from some thick oak stock I had set aside in my shop for just such a situation). You could substitute walnut-covered veneer sheetstock for any number of the parts if you’d like … but I prefer the look and feel of solid hardwood, and in a project of this size, you would not likely realize significant cost savings by using the sheetstock. You can find all the dimensions for the various parts in the Material List.
I set the side panels — along with the three clamped-up pieces I just mentioned — aside for now and moved on to making the stiles and rails, which I constructed from 3/4″-thick stock. After cutting them to width and length (remember to factor in the length of the rail’s stub tenons in this calculation), I needed to machine grooves and tenons. Once again at my table saw, I outfitted it with a dado head to plow grooves in the center of the appropriate stile and rail edges.
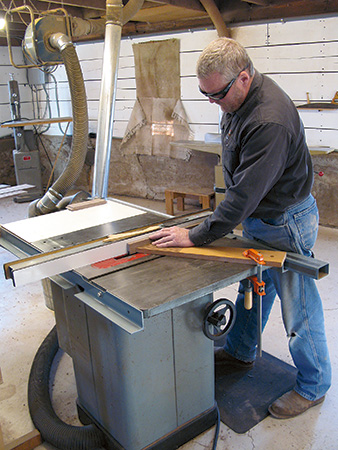
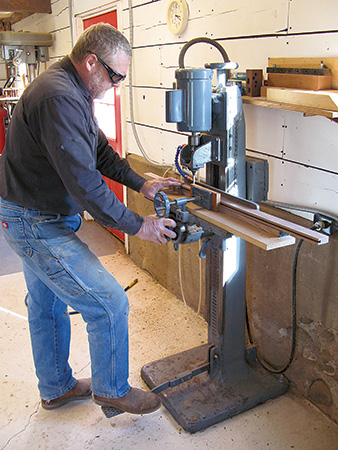
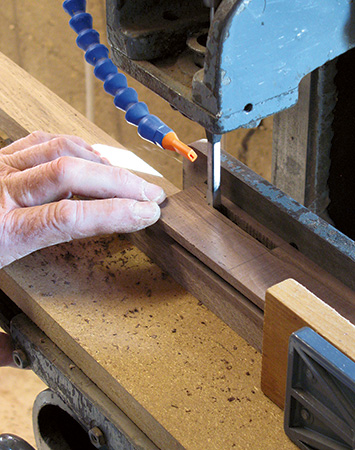
To help control the cut, I used a shop-made featherboard in this operation. Then I placed my big crosscut sled on the table saw (keeping the dado blade in the saw) and raised the tenons on the ends of the rails — taking care to fit them to the grooves I had just formed. Once the stiles and rails fit together properly, I needed to chop a couple of mortises into the stiles. I used my old mortising machine to chop the openings. When I make mortises like this with a machine, I always start the process in the middle of the mortise and move to either side. I believe I get better results as the cutter does not deflect during the cut this way. These mortises are open at the top of the rail so they will accept both the veneered front stretcher and the lower stretcher that sits just below it. They both slide down into the same long mortise. See the Drawings for more details.
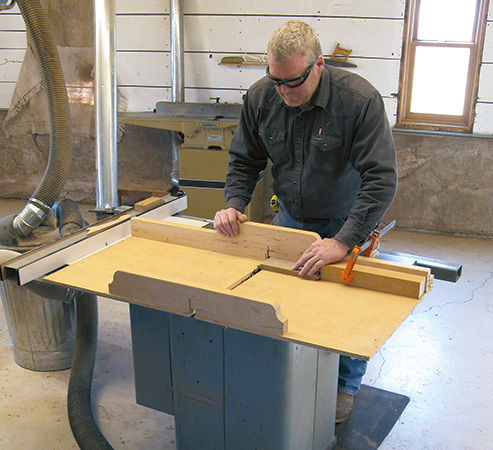
With that done, I grabbed the two side panels and got to work machining them to fit into their respective frames. Once again I used my trusty table saw, in this case to form a rabbet all around the edges of the side panels. The joints are formed such that the panels fit into the stiles and rails so their inside faces are flush. (Later, when mounting the shelf into the bookcase, it will make perfect sense why I did this.) Once again, you can check out the Drawings for details. One important note: because they are made from solid lumber, the panels must have room to expand and contract seasonally within the frame.
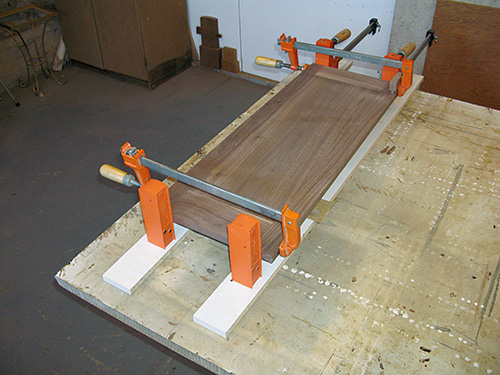
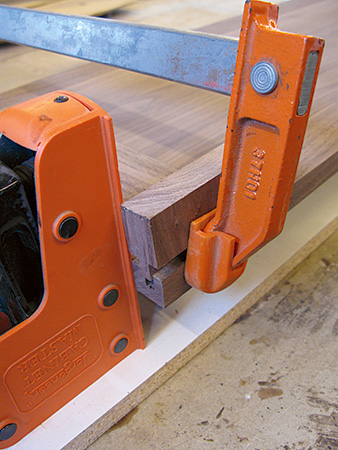
I test-fit the components of the side subassemblies, and once I was satisfied that everything was well and proper, I glued and clamped them together, allowing the panels to float within the frames. When the glue had cured, there were just a couple more pieces of machining to get through. I formed shallow rabbets on the back edges of each frame-and-panel side assembly into which the outermost back slats fit.
There is also a stopped rabbet right at the bottom of each side assembly. I cut this rabbet with a handheld router guided by a straightedge. I needed to square up the stopped end with a sharp chisel, but that was easily accomplished. With that hand work done, I set the machined sides aside.
Making the Bottom Assembly
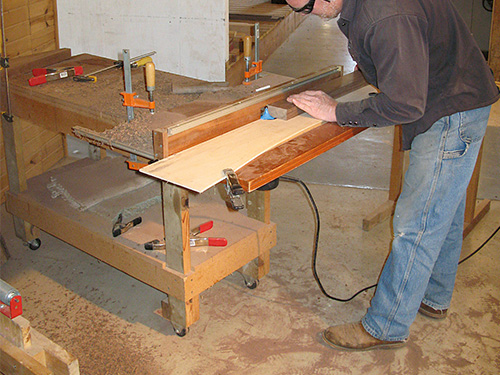
After taking the panels that I had glued up to make the top, bottom and shelf out of their clamps, I moved on to building the piece from the bottom up. Starting with the piece that would become the bottom, I cut it to size on the table saw. Important details on the bottom are the notches that correspond to the stopped grooves on the frame-and-panel sides and the rabbet for the back slats. I cut and fit the notches carefully, testing them in the side panels, rather than doing this later. Then I formed the rabbet along the back edge of the bottom. It’s important to note that the bottom is a key part of the lower subassembly, which also includes three thick moldings, two stringers and two stretchers — all of these pieces are structural.
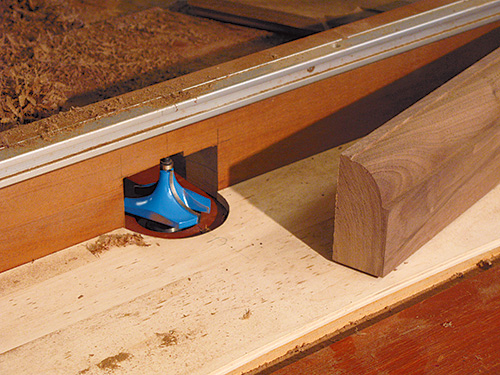
I got going by cutting the molding stock overly long (enough to make the side and front molding pieces) and to its proper width and thickness. Then I chucked a beaded roundover bit into the router table and took several passes to shape the stepped roundover on the top edge of the molding. I like to take a very scant final cut on molding like this … it reduces tearout and leaves a really smoothly cut surface. With that done, I machined the stringers and stretchers.
As you can see in the Elevation Drawings, I used pocket holes bored into the stretchers to join them to the stringers. The order of assembly was: first, attach the stretchers to the stringers, then attach the bottom to this subassembly (put a bead of glue on the top edge of the front stretcher).
Next, I used my miter saw to cut the base molding pieces to size. They wrap around three sides of the base with mitered corners. Using glue and screws, attach the base moldings to the stretchers and stringers and allow the glue to cure. I quickly wiped away glue squeeze-out with a wet cloth.
Now a word about the feet. These bun feet match the style of the bookcase very well and are easy to install. I ordered my walnut feet from Osborne Wood Products rather than trying to stain another species to match the rest of the stock in the bookcase. I think it’s worth the extra time and money.
Moving to the Top and Back
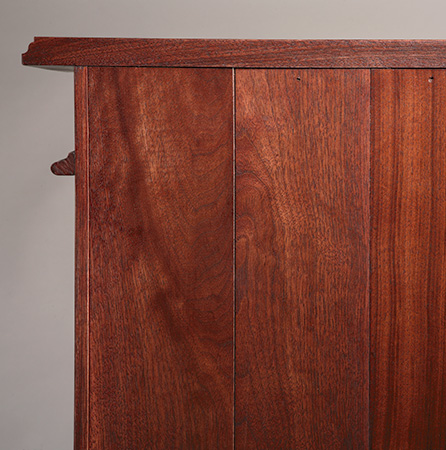
There is an internal frame at the top of the bookcase — unseen in the completed unit — that helps hold the top together and to which the back slats are mounted. Because it is hidden, I once again used screws to assemble the frame cleats.
The back slats are shiplapped so they can overlap one another as they go across the back of the bookcase. It is a very traditional way to build a solid wood back that takes into account its expansion and contraction. Note that the center slat has two rabbets on the same face, while the remainder have the rabbet on the opposite faces. These back slats are actually pretty visible from the front of the bookcase, so I took time to compose them in an attractive manner. With the back slats and the upper frame completed, it was almost time to do some more major assembly … almost. First there was some sanding to do. It is much easier and more efficient to sand these components before they are assembled. I took them right up to 180-grit.
After test-fitting all the parts, I glued and clamped the side subassemblies to the base, then glued the top frame in place. I also used screws to help secure the frame to the side subassemblies. It is important to square up the bookcase at this step.
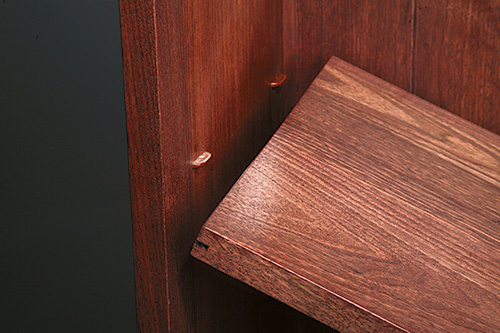
I measured the inside dimensions of the case and carefully cut the shelf to size, allowing for the thickness of the shelf front. I also sliced a narrow groove in each end of the shelf, to accommodate the hidden shelf support pins. (See the Drawing for more details.) When that was done, I cut the shelf stiffener to size and glued and clamped it to the shelf, setting the assembly aside until the glue cured.
A Veneered Accent Strip
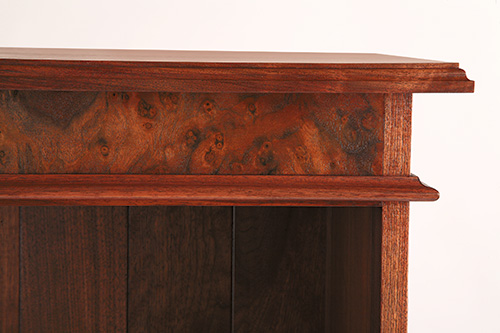
One detail that gives this bookcase a truly “classic” feel is the burl veneer glued to the upper stretcher that runs across the front of the piece. If you are thinking of building this piece but are uncomfortable with the practice of veneering, you could always skip this step and use a really attractive piece of solid walnut. But this sort of veneer work is not hard, and it might just help you to become more comfortable with this truly handy technique.
I cut the upper stretcher to size from a piece of solid walnut and milled it about 1/16″ under 1/2″ thick to accommodate the added thickness of the front and back veneer. A piece of 1/2″ plywood or MDF actually would have been better for this task, but frankly, I didn’t have any on hand and was not going to buy a whole sheet of plywood to make a 2-1/2″ x 35″ strip! Next, I selected my veneer from a flitch of 6 or 7 pieces. (A “flitch” is several sequentially sliced pieces of veneer. Because they are very thin slices, the grain is nearly identical on each of the pieces.)
Examining the veneer, I found a nice place to start my book-match, placed the stretcher piece on top of the veneer and carefully sliced around it about 1/4″ oversize with a utility knife. (I used a fresh blade!) It is important to note that this piece will cover only half of the stretcher. Taking the next piece of veneer from the flitch, I located the same grain pattern and cut it to rough size as well. I overlapped the veneer slightly at the center seam and used a small straightedge to slice a clean square cut where I would join the two pieces together to form the book-match.
With that done, I taped the veneer together, forming a long narrow strip that was just about a 1/2″ wider and longer than the upper stretcher. (What kind of tape should you use? Veneer tape is the proper product for this task … but again, I did not feel like buying a whole roll of it, so I used blue masking tape. It is not great for this task, but it worked for me.)
I put some newspaper on my workbench to catch the glue drips. Then I applied a coating of regular wood glue (white or yellow, it makes no difference) to one face of the stretcher and the non-taped face of the veneer. A thin, smooth coat of glue is required. If, as happened to me, the veneer fractures (burl is notoriously fragile), just carefully tape it back together and keep on going. The good thing about burl is that its exceedingly wild grain will hide a few little imperfections, and they probably will end up not being noticeable.
I allowed the glue to dry completely and, while that was happening, I dug out my clothes iron. The iron, set to its hottest temperature, is used to push the veneer down on the substrate. The heat from the iron activates the glue, and it sticks in place instantly. One important point: once that hot iron hits the veneer, you can’t move the veneer side to side or up and down on the substrate, so I make dead sure that I have it exactly where I want it when I start this process. Press the iron down along the whole length of the stretcher to secure the veneer. I again used the utility knife to trim off the excess veneer. Then I repeated the veneering process on the back of the stretcher. (If the stretcher had been made of plywood, I would not have felt the need to put veneer on the back of the stretcher. Because it was made from thin, solid wood, I chose to balance the layers to keep it from distorting.)
At this point, I raised the tenons on the ends of the upper stretcher, fitting it to the mortises I had chopped earlier. I also made the lower stretcher and machined its tenons at the same time. When they fit well, I glued and clamped them in place. (I did take the time to sand them before I attached them to the case.)
Adding the Top and Trim
The project was getting closer to completion with every step. I moved on to the top, which I had glued up earlier. Now I cut it to size and shaped the sides and forward edge with a Roman ogee bit installed in my router table. I tested its fit on the bookcase, and then set it aside. Following that, I made the trim molding. Because it is very narrow, I shaped the edge of a wider board first with an ogee bit in the router table and then followed that by shaping the bottom with a roundover bit. With that completed, I ripped the trim piece off of the board at my table saw. This method is far safer than working with thin stock on a router table. I cut the pieces to length, mitering them around the bookcase and then glued and clamped them in place. After the glue had cured, I mounted the top to the bookcase using screws driven up through the hidden internal frame.
After thoroughly sanding them, it was time to mount the back slats to the bookcase using one small brad nail through the center of each slat, top and bottom. I started with the center slat and worked outward. The last slats on each side required a bit of extra fitting. I glued the outside slats into the shallow rabbets on the back of each frame-and-panel side.
At this point I also attached the bun feet using small hanger bolts. They mount to the bottom stringers.
The last step in the construction process was to bore four holes for the shelf mounting system. (See the Drawings for the hole locations.) It was the first time I had used these little pins with the odd flat wings on them, but I have to admit, they worked pretty well.
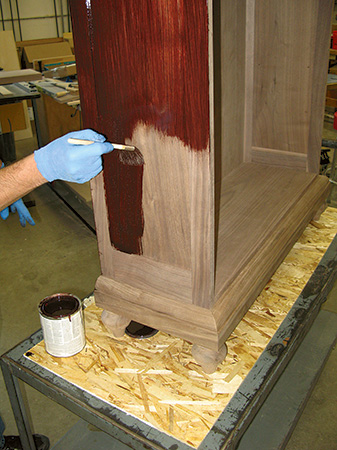
Finishing went smoothly on this piece. Because I had taken the time to sand the pieces before I assembled them, the final hand sanding to 220-grit did not take too long. Now, some folks might think this is odd, but I find some walnut gets a bit flat and gray looking with just a clear finish. So, to combat that, I used a red mahogany oil stain to add red highlights to the walnut. Then I followed with three coats of clear poly. It looked great.
While I’m not going to get into fulltime casework projects, this bookcase was an enjoyable change of pace for me. I hope that you enjoy building it and that it finds a fitting place in your home.


