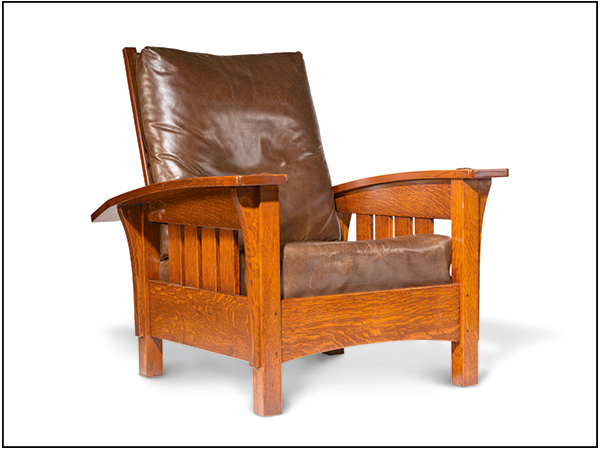
I’ve been making Arts and Crafts furniture for many years, and it’s a style that I never get tired of building. This Morris chair design has become a personal favorite and a hit with students in my classes. If you’re comfortable cutting mortise-and-tenon joinery, it’s well within the purview of an intermediate woodworker’s skill set, plus it affords you the chance to try your hand at steam bending the curved arms. Sure, there are easier ways to make the arms by laminating several thin pieces together, but I don’t like to see those glue lines, and I prefer a solid bow arm. The process is more costly, in terms of needing to create a steam box a bending jig or two, but the end result is well worth your time and expense. So, go with the steam-bent arms, and let’s get started!
Sorting Your Stock
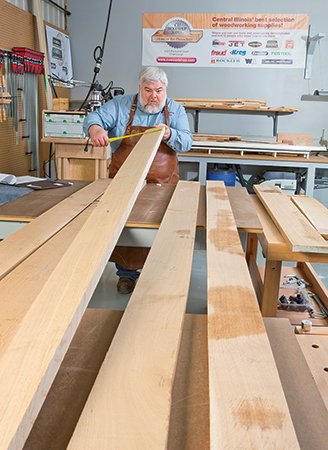
A proper Morris chair should be made from quartersawn white oak, and you’ll want to save your most highly figured wood for the prominent parts: the arms, front stretcher, wide side rails and slats. I identify the best figure by wiping my rough-planed stock down with denatured alcohol, mineral spirits or water so the figure comes alive, and then I measure those pieces, holding aside the wide boards for the widest chair parts.
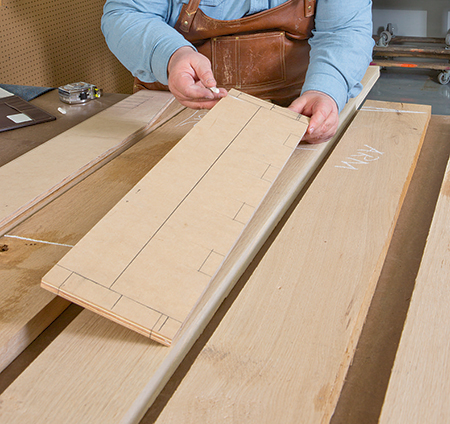
Once you’ve sorted your stack, go ahead and mark out the parts with a pencil and chalk. Cut the parts to rough size and plane them down to correct thickness. Be sure to label your workpieces clearly.
Forming the Laminated Legs
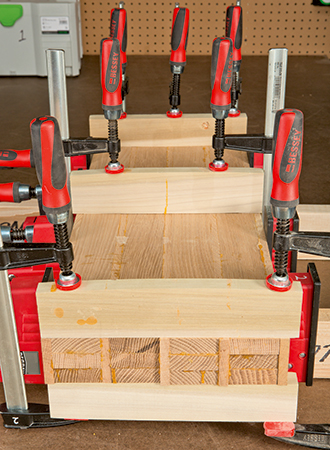
If white oak trees were perfect, we could harvest solid legs for a Morris chair that have quartersawn faces on all four sides. But, that’s just plain impossible, so we have to do the next best thing: laminate some thinner stock together and apply quartersawn veneer to hide the edge grain that would show on two of the leg faces. You’ll see how I address this glue-up process. First, I rip 12 strips of 26″-long stock to 2-1/16″ wide from 13/16″-thick material. Three of these will serve as the inner laminations of each leg when face-glued together, but that still doesn’t solve the problem of hiding those flat-grain edges and glue lines. So, once my glued-up “cores” are dry, I sandwich the four of them between five pieces of 1/2″-thick, 2-1/2″-wide quartersawn oak to create an even larger glued-up slab. Why? Because this way, the thinner material beside the cores will become veneer for those two faces of each leg when I rip the big glue-up into four leg blanks again.
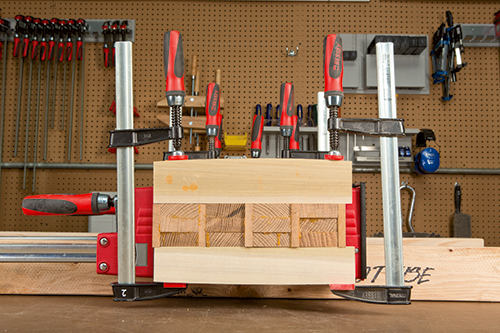
Now, maybe you are saying to yourself, “I don’t have a jointer as wide as Mike does for flattening the face of that big slab,” and that’s OK. At CU Woodshop School of Woodworking, we are very well equipped, so I can tackle this job on a 12″ jointer. But, you’ll get the same end result if you just make up two narrower sets of these leg slabs instead of one so you can flatten their faces on a 6″ or 8″ jointer. Note: you’ll need an extra piece of 1/2″ stock to hide the edges of one side on the second slab.
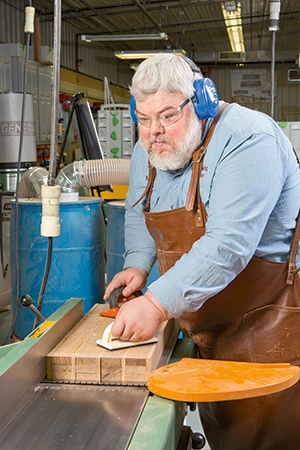
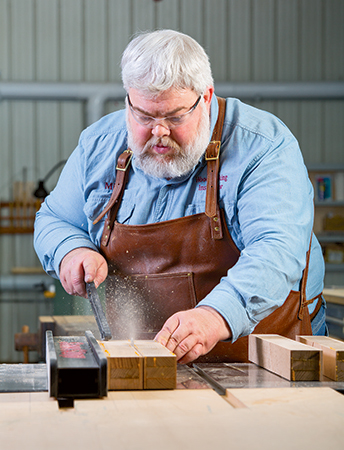
After I jointed one face of my big leg assembly smooth, I set up my table saw with a thin-kerf blade to rip through the centers of those thick veneer pieces. But, there’s still final sizing to do here. Your goal is to end up with 2-1/4″ x 2-1/4″ legs. So head to your planer and plan your strategy: you want to take the legs down in size so the pair of veneer faces on each leg are uniformly thick. And, since the core stock was just over 2″ wide to start with, the final thickness of that veneer will end up pretty thin — around 3/32″. You also need to plane down the two original quartersawn core faces to reach final thickness there. Work carefully!
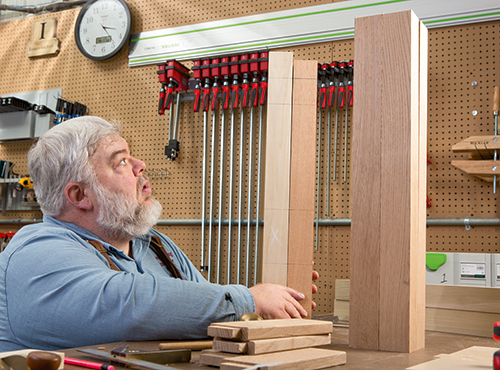
Next up, it’s time to lay out the various leg mortises. It’s easy to get confused when marking out a bunch of mortises on four legs, even if you’ve been building mortised furniture for as long as I have. So I recommend starting by marking your legs as front right, front left, rear right and rear left. Pick the two with the showiest ray flake patterns for your front legs, and choose their two best faces to point forward on your chair.
Now, study the Drawings to mark 1/2″-wide mortises for the front and rear stretchers as well as the upper and lower side rails. All of these mortises are centered on the thicknesses of the legs and face inward. Notice that, even though the mortises for the upper side rails on the rear legs will get shortened when you cut these legs to fit the curved arms, at this stage those mortises should start out at 2-1/2″ long — just like on the front legs. Double-check your layouts before chucking a 1/2″ hollow-chisel bit in your mortising machine and milling the 12 stretcher and rail mortises.
Steam Bending Basics

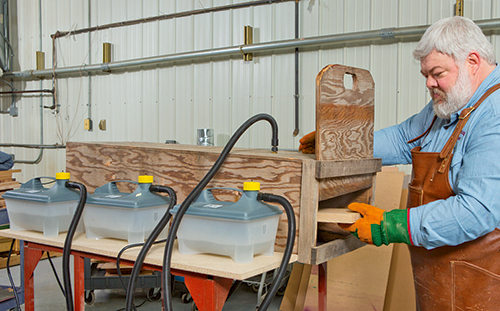
A steam box is really just a steam-tight chamber with a door on one end and a drain hole for condensed water on the other end. Mine is made from marine plywood, and it will hold four arm blanks at a time. If you work by yourself, I advise making yours smaller and steaming only one arm at a time so you can bend and clamp it before it dries and cools. Plans for these simple steam boxes are plentiful online. To heat mine, I use three Rockler steamers (item 42826), which heat up quickly and produce a high volume of steam. You could get by just as well with two steamers on a smaller box.
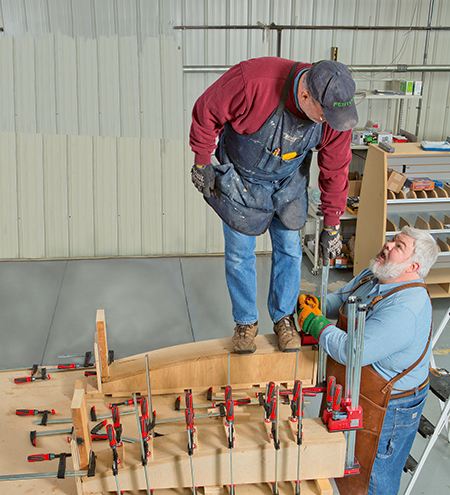
The two arm-bending jigs I use for this Morris chair are very straightforward: four pieces of 3/4″ sheet material cut to match the arm curvature and glued and nailed together with spacers in between to form a wide support. A base board with blocking underneath provided room for clamp heads.
You will need at least 15 clamps to secure the arm once it’s steamed through and pliable. At that point, you only have a few minutes to get the boards out of the steam box and clamped up in your bending jig before it cools and stiffens up. Have your clamps ready, plus short scrap-wood cauls to bridge across each pair of clamps. A helper can be invaluable, too, even if only to weigh down the board while you tighten up the clamps. Work smarter, not harder here!
Making Stretchers, Rails and Slats
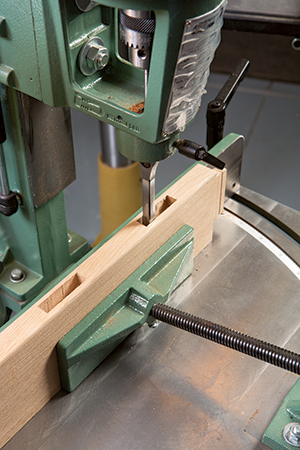
Round up your workpieces for the front and rear stretchers, side rails and slats. Pair up the upper and lower side rails with grain patterns that are most consistent, and mark them with eight mortises for the side slats. See the Drawings for these locations. Since your mortiser is all set, fire it up again and mill the 3/4″-deep slat mortises.
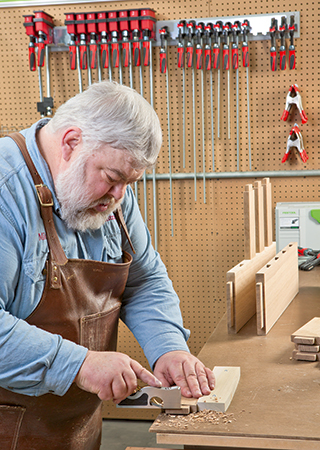
There aren’t too many more operations to complete before you can commence with some assembly, but all of those mortises you’ve just cut now need mating tenons. My method of choice for tenoning is a stacked dado blade, but you certainly could also use a tenoning jig and a standard blade on your table saw, a straight bit in a router table or even your band saw. All of these tenons are centered on the workpieces, but the shoulder sizes vary, depending on part thickness and width. I mill my tenons on the saw until they are just a hair too thick for their mortises, and I pare them down to a good friction fit from there with a rabbet plane set for thin shavings.
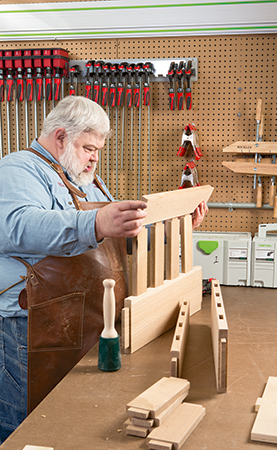
Hand-planing gives excellent control over fine-tuning, and it also cleans away the saw marks and creates smooth tenon faces for good glue adhesion. Lastly, use a narrow strip of hardboard or thin scrap as a batten to lay out the arch on the bottom edge of the front stretcher. The apex of this arch should be 1-1/4″. Cut the curve to shape at your band saw or with a jigsaw, and smooth it with a large-diameter sanding drum — it’s easier to fair an even curve with a larger drum than a smaller one.
Creating the Side Assemblies
Patience is always a virtue in woodworking, and while I know the urge to start gluing parts together is strong, patience will save you effort in the long run here. So, get out your sander and give the legs, stretchers, rails and slats a thorough sanding up through the grits to 180, then finish that work off with a round of hand sanding. It’s much easier to sand pieces flat on your bench now, and if you plan to stain this project, you want all of those fine scratches and blemishes taken care of at this stage so they don’t show up when the stain goes on. When that dust clears, glue and clamp the side slats between the upper and lower side rails. Try to orient the slats so their quartersawn patterns are harmonious — it makes for a better-looking end result. Now is a good time to bore a 5/8″-diameter hole in each back leg for the back pivot pins, later. Make these 1-3/8″ deep.
When the side rail glue-ups dry and come out of the clamps, spread glue onto their tenons and into the leg mortises, and clamp the front and back legs in place. Allow these glue joints to dry overnight so you can round up any and all clamps you’ll need for steam bending the first arm, which comes next.
By now, you’ve no doubt reviewed the section on steam bending basics and have your steam box, bending jig and steamers ready. Here are some pointers from my experience with these arms. In order to steam these 1″-thick arm blanks sufficiently to bend them, I kept each one cooking in my steam box for 70 minutes. Put several spacers under the arm blank inside the box so steam can penetrate the wood from all sides and so the arm blank doesn’t become saturated with the water that condenses on the box bottom. I filled my Rockler steamers to the water line, and even after an hour and 10 minutes, there was still plenty of water left in the reservoir.
Once you’ve reached that time mark, pull on thick gloves and retrieve the blank. Starting at one end, clamp the arm to your jig with a caul under each pair of clamps. When the clamps are all in place, leave the arm in the jig for a full 24 hours so it can cool and dry thoroughly. Even after a full day in the clamps, I don’t take my bent arms out of the jig until I’m ready to install them. It ensures that the curves are set.
At this point, unclamp the arm and set it against the legs and upper side rail so you can trace the bottom curvature onto the assembly. Register the arm on the front leg at 24-1/4″, and leave about an inch of tenon length in the rear leg for the upper side rail. Head to the band saw to cut this curve, and sand it smooth.
There are five 5/8″-diameter back support adjustment holes to drill on the inside edge of the arm near the back end for the support pins. Mark and bore them 2-1/4″ deep at your drill press. Then, use the Top View Drawing of the arms as a reference for laying out the arm’s tapered shape. Cut the taper, soften the corners, and ease all of the edges with a 1/8″ roundover bit in your router. Final-sand the edges and faces. At this point, I glue and clamp the arm to the top of the side assembly, overhanging its inside edge 1/8″ past the inside leg faces. The arm should overhang the front of the front leg by 2″.
Give the glue overnight to dry, then repeat the whole process to bend and install the other arm on the second side assembly. It’s best to tackle one arm/side assembly at a time, because each arm will probably produce a different amount of “springback” when you release it from the jig, and thus a different curvature.
Building the Back Support
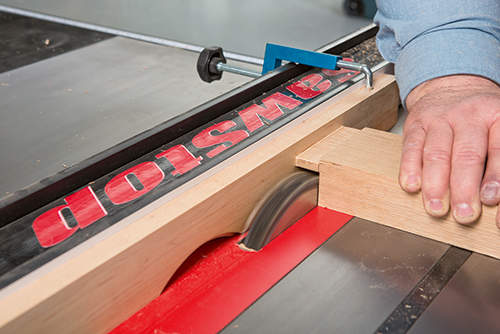
While the glue dried on my second side assembly, I went back to my project parts and retrieved the two back support sides, wide top slat and four narrower back slat blanks. Don’t surface the long back supports down to final dimensions just yet: I leave these a little wider than necessary so I can joint and fit the backrest snugly between the arms of the chair after it’s assembled. But, go ahead and cut the five back slat mortises into each of the side supports now. They all are 3/8″ wide. When those are done, mark and bore the 5/8″ through holes for the pivot pins.
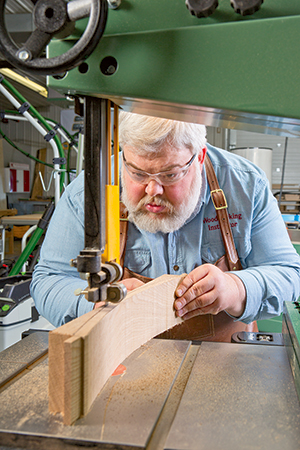
The back slats obviously have a curved profile to make the chair more comfortable, but before you can cut these curves, the tenons come first while the blanks are still flat and in full portion. Notice in the Top and Lower Back Slats Drawing that tenons are nearly flush with the faces of the workpiece blanks; their front shoulders are just 1/8″ wide. Lay out the shapes of these parts with a flexible batten, and mark the tenon sizes. Turn back to your table saw, band saw or router table to rough out the tenons. You’ll see in the photo that cutting these tenons required me to raise my dado blade pretty high to form the back cheeks and shoulders. At this point, you can also cut the top and bottom shoulders on the ends of the tenons even though, in the photo series above, I didn’t. (I cut these with a hand saw after shaping the curves; either approach works.)
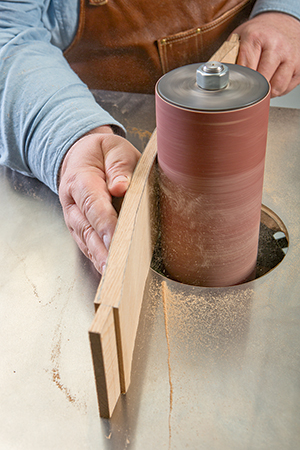
Now crank up the tension on your band saw blade, and cut the broad inside and outside curves of the slats, tracking those cuts so they are just outside your layout lines. Then step over to the drum sander and smooth away the saw marks and refine the curves down to the layout lines.
With this joinery work completed, give your supports and slats a final hand sanding, and glue the works together.
Assembling the Chair Frame
At this stage of the game, all of those subassemblies are really starting to have the makings of a nice chair, so let’s put a few of them together and really get excited! Spread glue on the tenons of the front and back stretchers as well as into their leg mortises, and clamp up the chair frame. Once the clamps are tight, you can see how your back support will fit between the arms. If it rubs their inside edges, take it over to your jointer and skim some material off the outside edges of both side supports until there’s a nice bit of clearance for the back support to pivot up or down.
And how is the pivoting process going to work? Well, I’m fortunate enough to have a metalworking buddy who milled me some beautiful pivot and support pins from solid brass. I thought they’d be a really nice and contemporary touch for the chair I built for this article. But, these pins are usually made of white oak on most classic Morris chairs. (You can see an example of what those can look like in the photos – I built it a number of years ago for a client.)
So, now you have a chance to spend a couple of hours at your lathe spindle-turning the pins from four sticks of scrap white oak. Make the small diameters of your pins just a tad shy of 5/8″ so they fit nicely into their holes in the chair frame, and turn the larger diameters to 1″. When you’re done at the lathe, round over the large ends of the pins on your disc sander.
This chair also has a decorative support under each arm, so make those next. Since you’ll need four supports, and their shapes match, I’d suggest creating a hardboard or MDF template so you can lay out the long curve just once. Grab your flexible batten, and use the Decorative Arm Support Drawing as a reference. Cut out the template and smooth it at your drum sander. Use it to trace the shape onto four 1-1/4″-thick blanks. Cut these out on your band saw, and leave about 1/16″ of waste all around. Then mount the template to a blank with double-sided tape, and chuck a piloted flush-trim bit in the router table to shave the support to an exact match. Repeat for the other three supports. Switch to a 1/8″ roundover bit and soften the long curves.
Adding Faux Arm Tenons
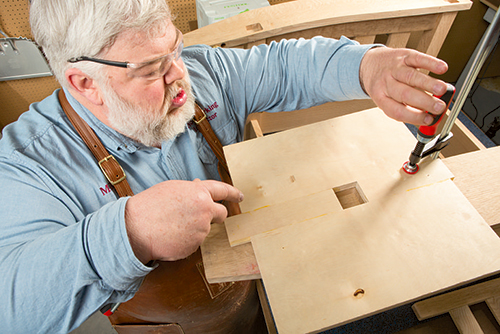
You just wouldn’t have a real Morris chair without some leg tenons poking up through the bowed arms. But, faux is just fine here. Their 1-1/2″ x 1-1/2″ mortises are easy to make with a template, a router and a rub collar guiding a 1/4″ straight or spiral bit. My template has two adjustable sections so I can use it for routing a variety of mortise sizes, but you can just make a square cutout for this “one-off” jig if you like. Lay out the mortise locations on the arms so they’re centered over the legs, and clamp the template in place. Rout each mortise in a series of deepening passes down to a depth of 3/4″. Chisel the corners square.
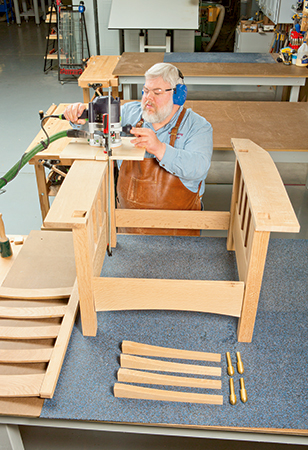
The tops of these faux tenons stand just proud of the tops of the arms. It’s a nice detail. To make them, start with a long 1-1/2″ x 1-1/2″ blank, and ease both ends at your disc sander to create a gentle curved profile. Or, if you prefer, you could just carry the roundover theme from other aspects of the chair and knock off the sharp edges and corners of these tenons at the router table.
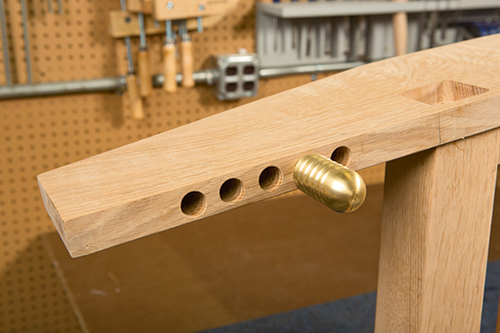
Slice a pair of tenons off the ends of your blank, and repeat the shaping process to make two more. When all four are done, hand sand them so the ends are smooth and scratch-free. Brush some glue into their mortises, and press the tenons down into place on the arms.
On to the Finish
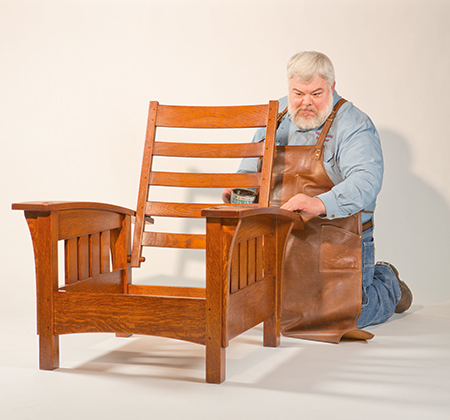
With the arm tenons now secured, it’s time to add the decorative supports. Depending on your arm curvatures, you’ll probably need to shape the top ends of the back leg supports so they snug up nicely under the arms. This is easy to do at a disc sander without a lot of fuss. Sand a little, check the fit and sand a little more until you reach a satisfactory intersection. Now cut the rear supports to their final length (all four supports should line up with the bottom of the lower side rails when installed). Then glue and clamp the supports beneath the arms so they’re centered on the widths of the legs.
Glue alone forms a strong mortise-and-tenon joint, but a dowel pin driven through the parts will lock them forever. So, I drilled and installed a pair of 5/16″ dowel pins into the joints of the front stretcher and upper back support slats, and a single pin for the rest of the back slats and the rear stretcher.
Wrap up construction by screwing a pair of cleats inside the stretchers to support a plywood seat board. You’ll need to determine the final position of these cleats based on the thickness of the seat cushion you use.
There are all sorts of recipes for “authentic” Arts & Crafts finishes, but choose a color you like. I applied a dye stain to pop the figure, followed by a dark pigment stain to accentuate the grain and then topcoated with lacquer. Now find some leather cushions, and your new Morris chair is ready for the den!


