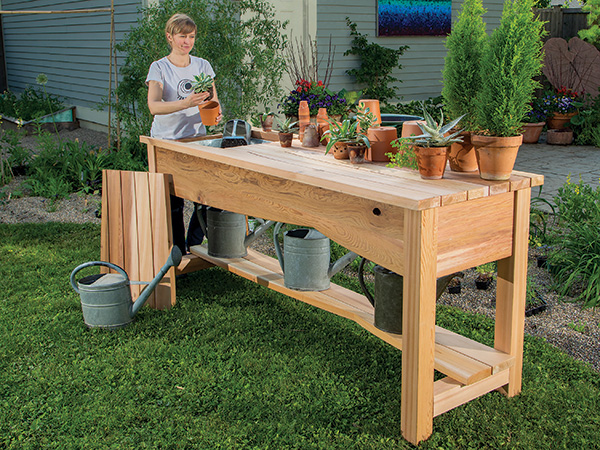
A few years ago, I designed and built this potting bench for Jonathan Wright, who is deputy director for Horticulture and Natural Resources at the Indianapolis Museum of Art and a professional gardener. He provided insight for what his ideal structure would be to support both gardening tasks and play. I say “play” here because the project’s galvanized steel soil bin can be washed out and used as an optional beverage cooler for entertaining. Jonathan has since used this bench as a bar for outdoor get-togethers.
You’ll notice in the opening photo that I’ve shaped the wide front apron and bottom shelf with a “wave” style edge to create a sense of visual movement. That same shape is repeated across the top of the bench’s slats by using a large template to cut and rout the slats from a glued-up blank. But all these curves aren’t necessary. Straightedged timber would also work for the front apron, top slats and shelf. That’s the version of the project shown in the Exploded View Drawing. How artsy you want your bench to be is up to you!
Getting Started with Stock Surfacing
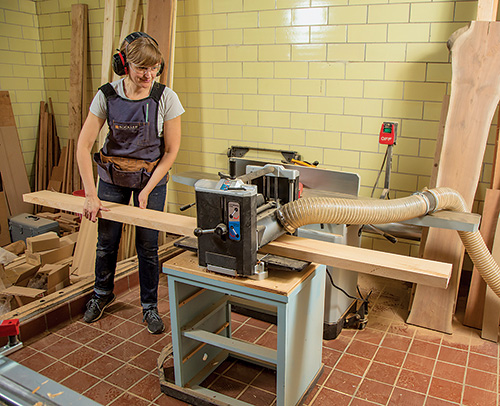
I use roughsawn western red cedar for almost all of my outdoor projects, because it stands up to the outdoors well and I love its color variations. But it needs some initial surfacing to make it suitable for this bench. So my first step was to run the stock for the 1-1⁄2″-thick parts across my jointer to flatten one face, then send it through my planer to smooth the other faces and reduce the boards to correct thickness. Do the same to your cedar if you’re also starting with thick, rough stock.
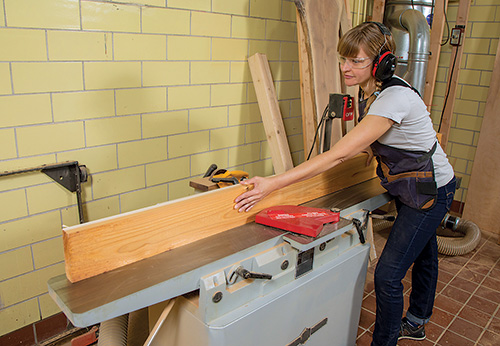
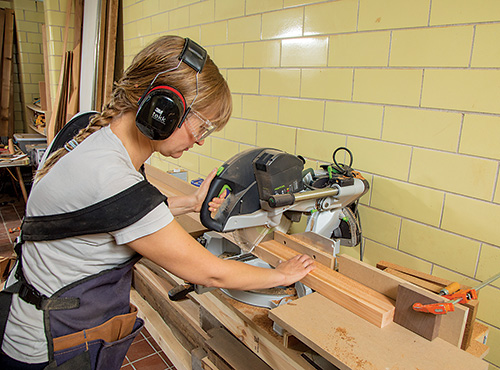
With that done, joint one edge of each board flat so you can use that reference edge to rip workpieces to width for the bench top slats, four aprons, lower shelf pieces, inner cross bracing and soil bin lid battens. See the Material List for these part sizes. Now go ahead and crosscut these parts to final length. I broke this stock down at my miter saw, using a stop block on my miter saw station’s fence to make sure the same-length parts would be cut accurately.
The 4x4s I purchased for the legs and bottom stretchers were already milled quite nicely, with flat, smooth faces and square edges. So I just cut the legs and stretchers to length without any further surfacing at the planer or jointer.
Making Joinery
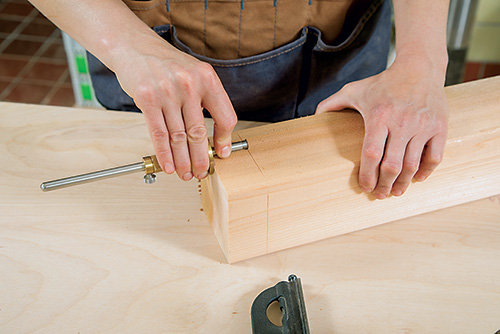
Now it’s time to mill some mortise-and-tenon joinery to attach the stretchers to the legs. Start by laying out the tenons on the ends of the stretcher blanks. Set a marking gauge to 1-1/2″ so you can scribe shoulder lines for the tenons all the way around the ends of the parts. Then install a wide dado blade in your table saw and raise it to 3/4″ high.
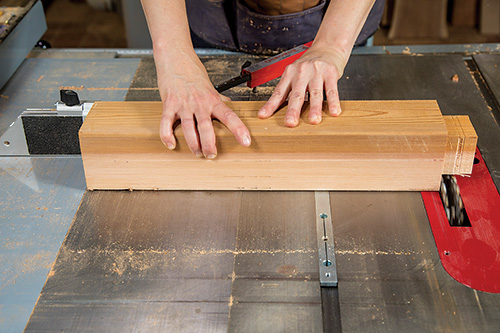
I set up a stop on my miter gauge’s long auxiliary fence so all of the shoulder cuts would line up around the workpieces. Make these shoulder cuts on both ends of each stretcher, then remove the stop on the miter gauge and saw away the rest of the material in the tenon areas with more side-by-side passes to complete them.
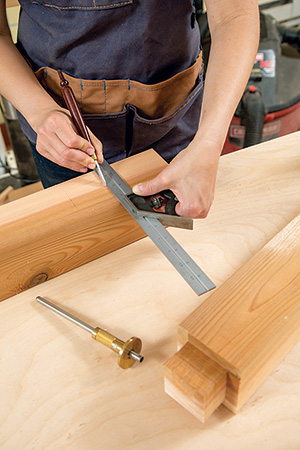
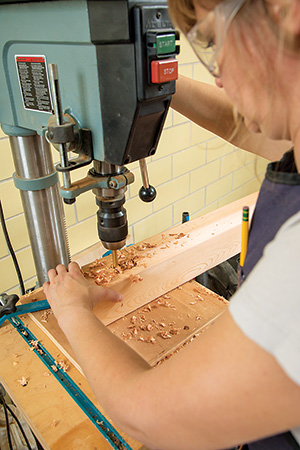
With the tenons done, use their 2″ x 2″ proportions to lay out a corresponding mortise on each of the legs. Locate these mortises 4-3/4″ up from the bottoms of the legs, centering the mortises on the leg thicknesses. Now step over to your drill press to drill out as much of these mortises as you can. I used a big Forstner bit for this job and set the drilling depth to just a tad deeper than 1-1/2″ so the stretcher tenons would fit fully into them. Drill out the waste in several overlapping plunges.
Tidy up the mortises with a sharp chisel and mallet so their walls are flat and smooth and the corners are square. Now try out the tenons in the leg mortises; they should fit together without needing to “persuade” them into place with a mallet.
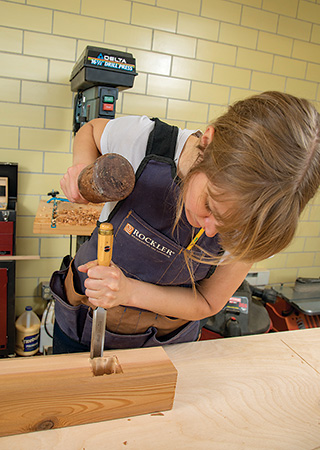
You’re nearly ready for some assembly, but first decide if you want to shape the bottom edges of the potting bench’s front apron like I did with a wave pattern. Or leave its bottom edge flat. I drew the swooping shape on a long piece of 3/4″-thick scrap to serve as a template so I would be able to trace the same curvature onto all of the bench’s sculpted parts.
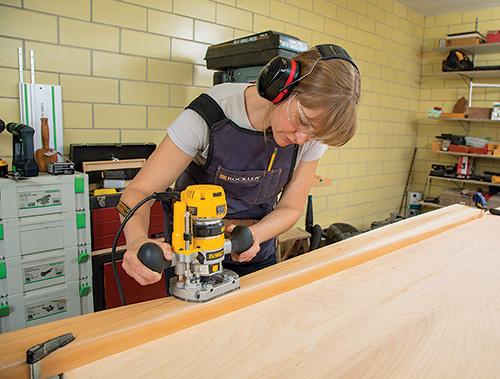
Cut out the template’s shaped edges and sand them smooth. Then trace its profile onto the front apron blank, rough-cut the wavy edge and template-rout it to final form. Ease any sharp edges that are left, and sand smooth all the workpieces you’ve made up to this point.
Assembling the Bench Frame
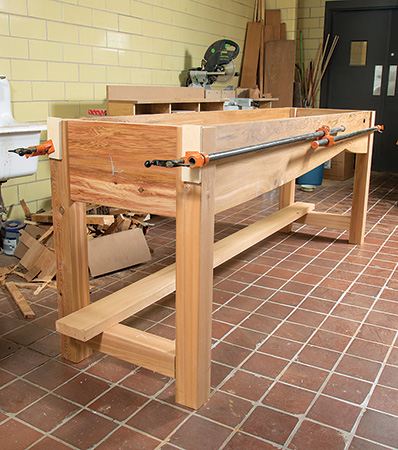
Tenons can be challenging to cut on really long workpieces. So for ease of assembly, I drilled the inside faces of the four aprons for pocket-screw joints instead. I created two subassemblies for the bench frame by gluing the bottom stretcher tenons into their leg mortises and driving 2-1/2″ exterior pocket screws to attach the short aprons to the upper ends of the legs. I inset the short aprons 1/2″ from the outside faces of the legs. After that came the long, unwieldy front and back aprons. To install those, I first clamped them in place between the subassemblies, setting them back 1/2″ from the faces of the legs as well, then drove their pocket screws home. Working alone as I do, long clamps sure made this step easier!
Next you can install two of the five inner cross braces between the aprons near one end of the bench. I positioned these to straddle the tapered sides of Jonathan’s galvanized steel soil bin (see the Inner Cross Brace Locations Drawing). The bin simply wedges between these cross braces and hangs from them. Position the braces so the rim of the bin will be even with the top edges of the aprons. This way, the bin’s rim will support the removable soil bin lid when that is set into place. Again, I turned to pocket screws to attach these two bin cross braces to the aprons.
Creating Wave-shaped Artisanal Top Slats
The key to recreating the author’s optional wave-shaped details on this potting bench’s top slats, front apron and bottom shelf boils down to basic template routing. A single long template with the sculpted profile on both edges is all you need to trace, cut and rout this shape over and over again. Here’s how it works.
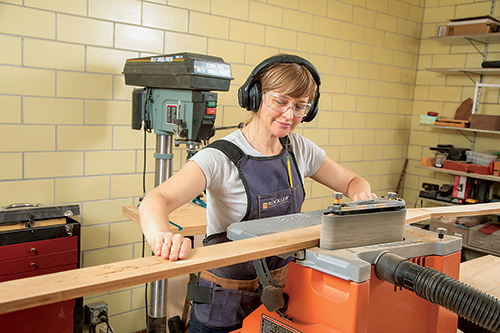
Draw the wave-shaped profile along both edges of an 8-ft. piece of scrap plywood, MDF or solid stock to serve as a template. Cut the template to shape and sand its curved edges smooth.
Trace the template onto the front apron, glued-up top panel (for top slats) and bottom shelf piece shown here. The same template is used for every shaped part.

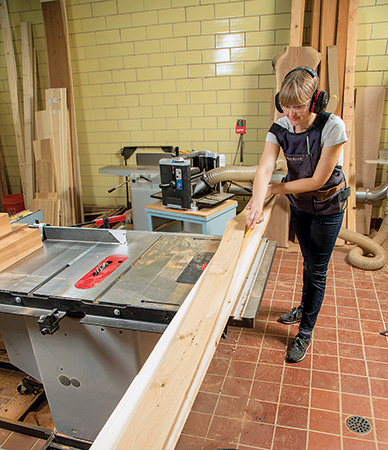
Use a jigsaw or band saw to cut the wavy profile into each workpiece. Cut about 1/16″ outside of your layout lines. Make sure to have outfeed support in place for band sawing long stock like this.
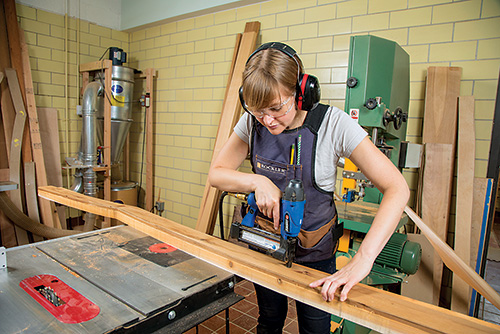
Pin nail the template to the workpiece so the rough-cut edges extend beyond the edges of the template. If you don’t have a pin nailer, double-sided carpet tape works well, too.
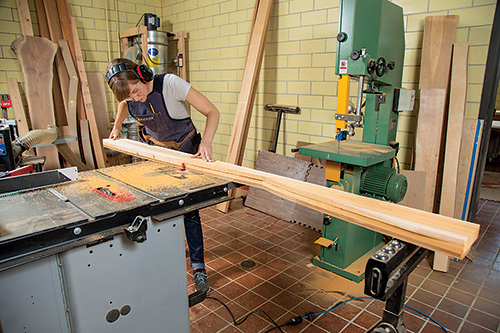
Install a long piloted flush-trim or pattern bit in your router or router table, and adjust the bit so its bearing can roll along the template. Rout away the waste edges.
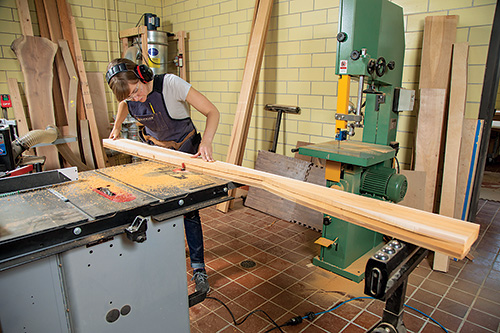
Once the author had cut and routed her bench’s curvy tabletop slats to shape, she nested them together in their final order to cut a lid for the soil bin. A track saw guided these straight cuts.
Choosing and Building the Benchtop
Now’s the time to choose either my wave-shaped “artisanal” top for your bench or go with straight slats instead. The “straight-slat” approach requires five 5-1/2″-wide boards cut to 92″ lengths. If you want to create a sculpted top, however, start by gluing up enough 1-1/2″-thick stock to create a 32″ x 92″ solid panel.
As shown above, the process for making each wave-shaped, sculpted top slat is pretty easy. Use the long template you made for shaping the front apron’s lower edge to trace a repeating pattern of slats across the panel. Space these layout lines about 1/4″ apart so you’ll have room to cut each of the slats free. You’ll see that the shape of my template enabled me to offset each slat in the layout so the wave pattern appears to “drift” diagonally across the bench’s top. It’s a nice effect!
Once the slat pattern is drawn on your panel, use a jigsaw or band saw (if you have adequate support around it) to saw the slats to rough shape. Cut just outside your layout lines. Then mount your template temporarily to each slat with pin nails or pieces of double-sided tape so you can rout the slat edges flush to the template. Use a long piloted pattern- or flush-trim bit for this task. Clean up all the top slats this way, then break their sharp edges with a 1/8″ roundover bit in a handheld router to keep splinters at bay.
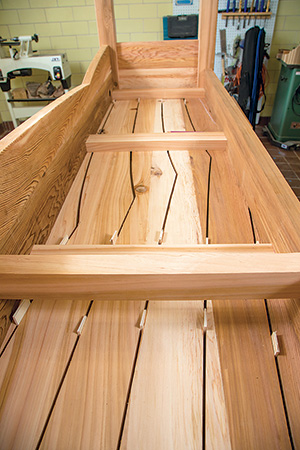
Whether you’ve decided to use straight or sculpted slats, their installation procedure is the same. Flip all the slats upside-down and set them together with their ends and edges aligned. Separate them with some 3/16″-thick scraps. Then get a buddy to help you flip the bench over as I did, and position it carefully on top of the slats, adjusting for an even overhang. My bench’s top overhang was about 1-1/2″ all around. Then set the remaining three cross braces you’ve made into place inside the bench frame aprons, spacing them evenly along its length. These will support the top slats and serve as attachment points for them in the area beyond the soil bin cross braces (refer again to the Inner Cross Brace Locations Drawing). Mark these three “loose” cross braces for pairs of screws at every benchtop slat location.
Installing the Benchtop Slats and Shelf
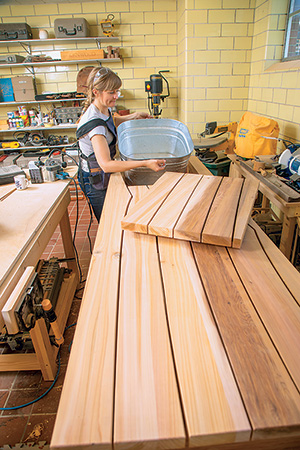
Once my three braces were laid out for screws, I marked and bored a pair of pocket-screw holes on each end into their top faces. We flipped the bench right-side-up again so I could install the three cross braces flush with the top edges of the aprons using 2-1/2″ pocket screws. And while the bench was off the top slats, I marked them so I could cut a 20-3/4″-wide x 31-1/4″-long lid for the soil bin. When those slat portions are cut free, space them 3/16″ apart and line up their cut edges. Position the two soil bin lid battens on the bottom face of the lid segments and spread them evenly apart. Drive countersunk 2-1/2″ exterior-rated screws through the battens and into the lid slats to fasten the parts together.
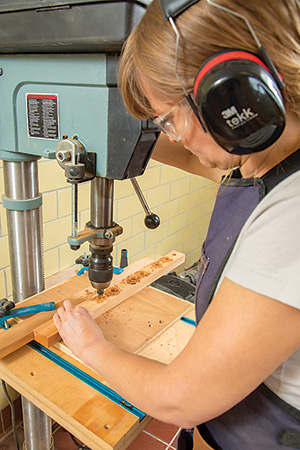
With the lid now done, carefully invert the bench frame and set it on the slats again, realigning the parts. Drive 2-1/2″ exterior- rated screws into the cross brace pilot holes you drilled earlier to fasten the top slats in place.
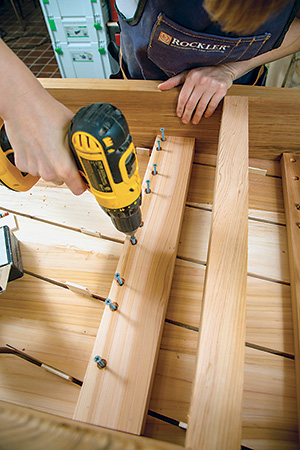
I shaped the edges of the two shelf boards with the wave template to continue that theme there. And since the bench was still upside-down at this point, I drilled countersunk pilot holes through the stretchers so I could fasten the two shelf boards to them from below with 4″ exterior-rated screws.
You can choose to stain and/or finish your bench if you like, but Jonathan and I both agreed that it would look nice with no finish at all. It’s now aged to a lovely silvery gray color.


