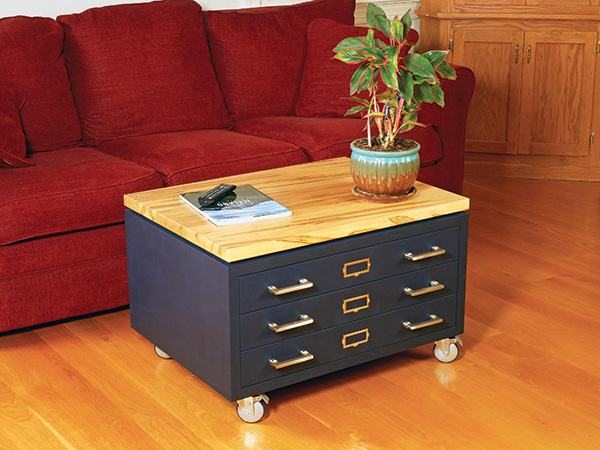
Our family enjoys traveling, but for obvious reasons 2020 hasn’t been the year to do it. So to help satisfy that wanderlust, I thought it would be fun to create a funky coffee table that hints at far-off destinations we’ll consider traveling to again one day. This “cartographer’s” coffee table won’t store maps laid flat, as the shallow but broad drawers of those actual cabinets once did. But its four drawers will hold the stuff you may want to have close at hand while spending some quality time on the couch: entertainment system remotes, drink coasters, a collection of favorite DVDs or perhaps the latest novels and magazines you’re reading.
Making the Tabletop in Multiple Glue-ups
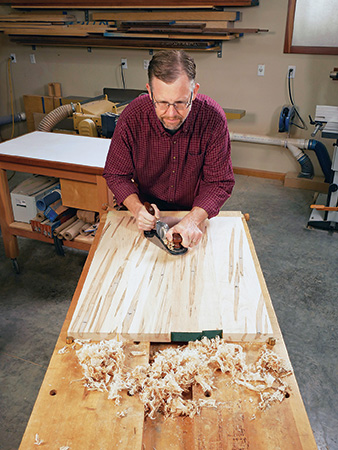
This project’s tabletop is a substantial 1-1⁄4″ thick. I made mine starting from a plank of heavily figured 8/4 ambrosia maple, but any hardwood species you prefer will work fine, too. Rip and crosscut enough stock to prepare the blank, and plane it down to 1-5⁄8″ thick. Joint and edge-glue the pieces to create two 12″ x 24″ blanks — this way they’re still narrow enough to fit through most lunchbox or larger planers. Plane them to final thickness, and glue the two halves together. When the clamps come off, scrape the center joint, trim the panel to final size and sand it smooth. Then set the tabletop panel aside.
Assembling the Cabinet Carcass
Following the Material List, cut a top and bottom panel for the cabinet carcass to final size from 3/4″-thick plywood. If you’re planning to paint the project as I have, choose a plywood with a face veneer that will accept a painted finish well. Baltic birch, regular birch or maple plywood are all good choices, as they have a closed-pore structure that won’t telegraph a grain pattern through the paint.
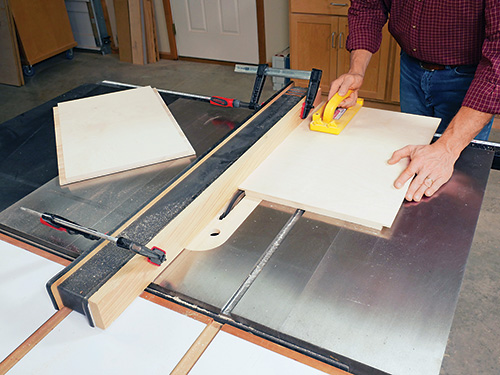
Notice in the Drawings that the carcass end panels are rabbeted along their top and bottom edges. These rabbets will hide the ends of the top and bottom panels from view, once they’re assembled. Install a wide dado blade in your table saw, and raise it to a cutting height of 1/2″. With the blade partially buried in a sacrificial fence clamped to the rip fence, set the blade’s exposure to a width that matches the exact thickness of the plywood you’re using — it might be 23/32″ thick or a full 3/4″, depending on the manufacturer. Mill a rabbet across the end of each end panel and into its same face. Be sure to make a trial rabbet cut on scrap first, to check your blade and fence settings.
Pocket-screw joints are an easy, concealed way to attach face frames to carcasses from the inside. So I decided to use that method here. I drilled a series of screw pockets along the short ends of the end panels and the long edges of the top and bottom panels on their inside faces.
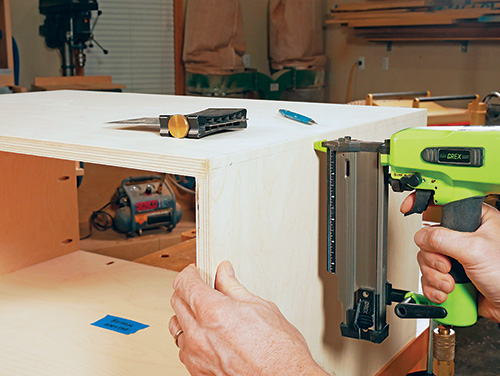
Once those pocket holes are drilled, spread glue along the rabbets, and clamp the carcass top, bottom and end panels together. Measure the diagonals of the assembly to ensure that the diagonal lengths match, which confirms that the corner joints are square. If the numbers are off by more than about 1/16″, adjust the clamping pressure or the clamp positions as needed to correct for squareness. Sometimes simply loosening the clamps a bit will correct the problem, too. When the glue dries, remove the clamps, and reinforce the rabbets with 1-1⁄4″-long 18-gauge brads, driving the brads through the rabbet tongues and into the top and bottom panels.
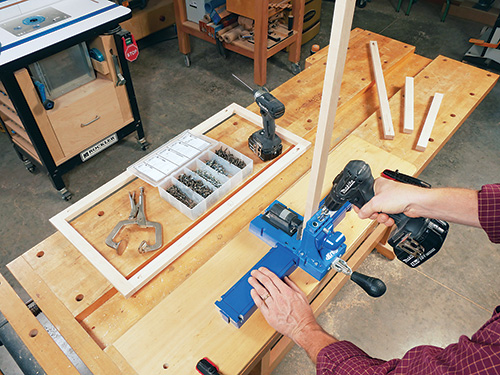
Next, rip and crosscut pairs of solid wood rails and stiles to create the two face frames that will surround the carcass openings and hide the plywood edges. Maple or poplar are good choices for these parts, because either accepts a painted finish well. Assemble the face frames with a centered pocket screw joint at each corner. Drill the screw pocket holes through the back faces of the rails, then clamp the rails and stiles together with the stiles overlapping the ends of the rails. Drive a 1-1⁄4″ pocket screw into each joint to secure the connections. Plane or sand any mismatched joints flush.
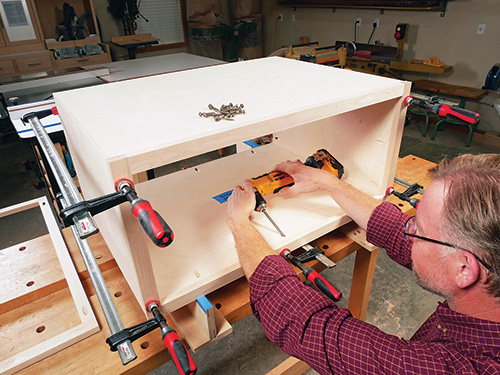
When those are ready, set each face frame into position on the carcass and clamp it in place. Drive 1-1⁄4″ pocket screws into the carcass pocket holes to attach the face frames. Sand or plane away any overhanging face frame areas so the frames are flush with the cabinet all around.
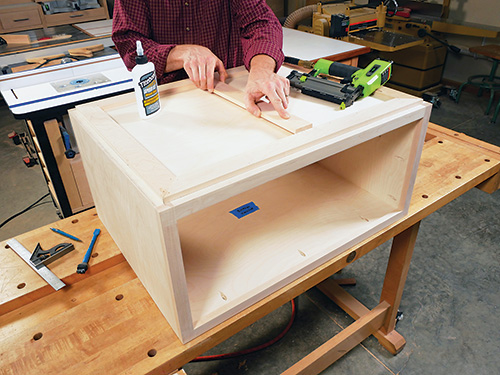
One of the neat features of this coffee table is that the top seems to levitate above the cabinet. A shadow line underneath the top is what creates this illusion, and it’s formed by a separate 1/2″-thick mitered subframe of solid wood that’s inset 3/4″ in from the top ends and edges of the cabinet. Create the long and short pieces of the mitered frame by preparing 2″-wide frame members from 1/2″-thick solid wood. Miter-cut their ends to 45 degrees.
Draw layout lines 3/4″ in from the ends and edges of the carcass to indicate where to position the subframe pieces. Then glue and install the four frame pieces onto the carcass, nailing the parts to the top panel with 1″-long 18-gauge brads. Make a crosspiece from more 1/2″ stock, and install it across the middle of the subframe to serve as an additional point of connection for the coffee table’s tabletop.
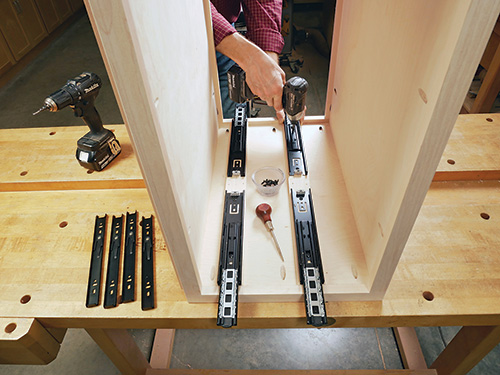
slide supports with short screws. Center the slides on the support widths.
The drawers for this project are mounted on full-extension drawer slides. The slides must clear the inside edges of the face frame stiles to operate correctly. To do that, we’ll install 1/2″-thick support strips inside the carcass for mounting the slide hardware flush to the face frame edges. Make up four of these supports, and glue and nail them to the carcass end panels. Locate the bottom edges of the strips 3-1⁄2″ and 9-9⁄16″ up from the inside bottom face of the carcass.
Unclip the “cabinet-side” member of each drawer slide from the “drawer-side” member. Attach the cabinet-side members to the drawer slide supports so the hardware is centered on the supports. The front edge of the slide should be flush with the back edge of the face frame. When hanging the slides with their included screws, choose the horizontal, slotted holes for placing the screws. That way, you’ll have some in-and-out drawer adjustability when the drawers are hung. Go ahead and clip the drawer-side members of the slide hardware back onto the cabinet-side members.
Building the Drawers
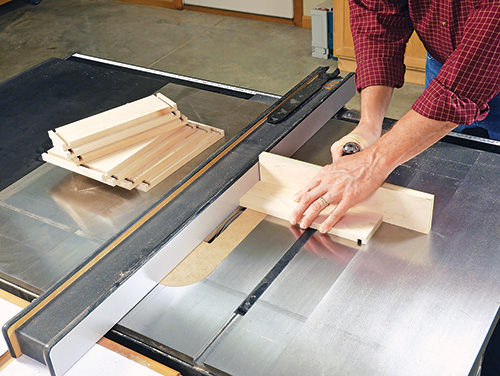
Measure the distance between the faces of the drawer-slide hardware to determine the final length of the four drawer boxes. Then prepare enough 5/8″-thick solid stock for the drawer fronts, backs and sides as well as a couple of test pieces. Cut the drawer parts to final width and length.
Rabbet-and-dado joints are simple and surprisingly sturdy for drawer construction, so I chose them for this project. To make them, install a 5/16″-wide dado blade in the table saw and raise it to 5/16″. Lock the rip fence 5/16″ away from the blade. Use this setting for cutting dadoes across the inside faces of the drawer box side workpieces.
Once the dadoes are cut, clamp an auxiliary fence to the rip fence and widen the dado set by a chipper. Bury the dado blade in the fence so just 5/16″ projects out from it. Make test cuts on the end of a scrap piece to see if this rabbet fits the drawer-side dadoes, and adjust the blade setup as needed. When your “test” rabbet fits the dado, cut the rabbets into the ends of the drawer box front and backs.
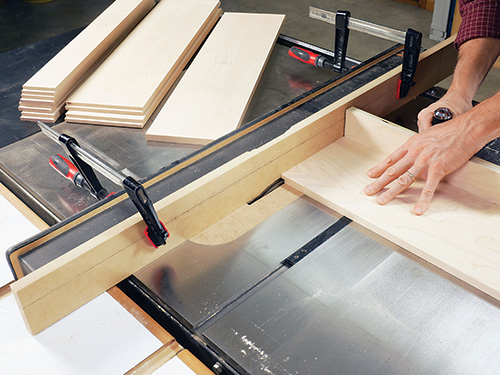
Now restack your dado blade to 1/4″ wide to cut a drawer bottom groove along the inside faces of all the drawer box workpieces. Position these grooves 1/4″ up from the bottom edges of the parts, and make the grooves 1/4″ deep.
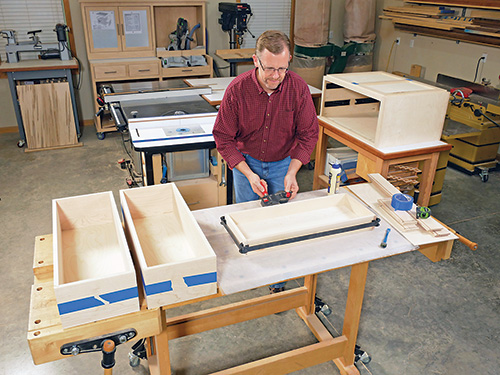
Dry assemble the drawer boxes to verify the final dimensions of the drawer bottom panels, then cut the four drawer bottoms to size from 1/4″ plywood. Sand all the drawer parts up to 180-grit, and glue and clamp the drawer boxes together. Be careful when tightening the clamps that the drawer boxes remain square. When the glue dries and the clamps come off, attach the drawer side components of the slide hardware to the drawer boxes with screws, centering the slides on the sides of the drawers. After those are in place, clip the slides together to hang the boxes in the cabinet.
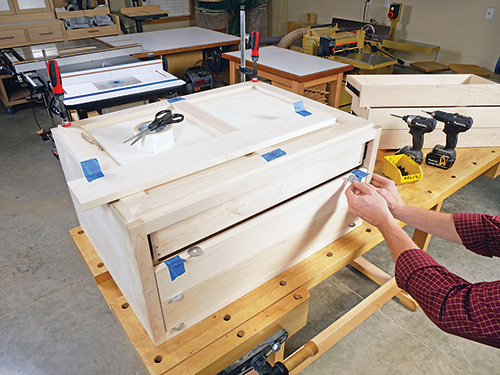
Now you can cut the six drawer faces to size from solid wood. Install them on the drawer boxes with strips of double-sided tape so you can position them evenly in their openings. I used fender washers as temporary spacers to hold the drawer faces about 1/16″ apart when positioning and sticking them in place. Install a couple of clamps to hold each drawer face more securely before driving several 1-1⁄8″-long countersunk screws from inside the drawer boxes into the drawer face to secure it. Then unscrew the drawer faces from the drawer boxes, and remove the drawer slide hardware to prepare for final finishing. Ease all the edges and sharp corners of the drawer faces with a sanding block.
General Finishes Milk Paint: Flat-out Easy Topcoat Option
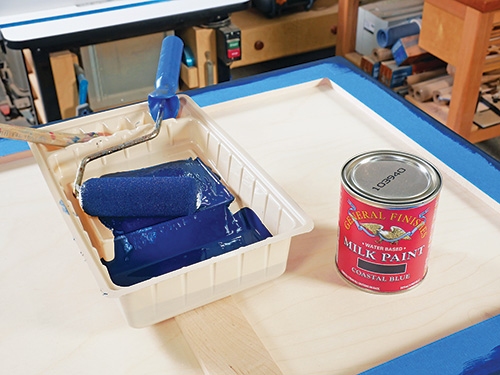
True milk paint is often powdered, requiring that it be mixed into solution with water. It dries to a flat sheen. Achieving even coloration with thin milk paint can take several coats. General Finishes has formulated their mineral-based milk paint line to simulate the flat sheen and color palette of traditional milk paint, but with easier application and better durability. This premixed and ready-to-use indoor/outdoor paint can be brushed, rolled or sprayed. I had excellent results using a 3″ foam paint roller. GF Milk Paint has almost no odor. It flattens out well, dries quickly and offers soap-and-water cleanup. Sold in pints or quarts, one pint was sufficient for me to complete this project. If you skip a primer coat and apply the milk paint directly to bare wood, you may need to use more paint for even coverage.
Applying a Painted Finish
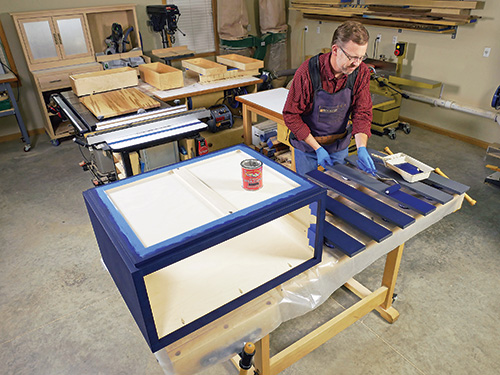
I’ve been wanting to try milk paint for a long while, and this project’s plywood cabinet provided an ideal opportunity to do that. Milk paint is formulated to dry to a flat sheen, and it comes in a variety of interesting earth tone and primary tints that are unlike ordinary latex or enamel color options. While I hadn’t anticipated it, milk paint on this project also helps to create the illusion that the cabinet might actually be made of metal and not wood. I think it’s a rather neat effect!
The first step in the painting process was to fill the brad nail holes in the rabbet joints with wood putty, as well as other minor seams and evidence of tearout in the plywood. Once it dries, sand away the excess putty and smooth the application areas. Since the deep midnight blue color I planned to use was going to be applied over blonde plywood and maple, I started with a base coat of gray primer, applied to the cabinet’s exterior and drawer faces with a foam paint roller and brush. Mask off the interior areas where needed first, for neater application and final appearance.
While the primer was drying, it afforded a good opportunity to give the tabletop and drawer boxes a final sanding so I could finish them with three coats of water-based polyurethane. I used General Finishes Enduro Var in a satin sheen; its ambering effect and fast drying time has made it one of my favorite finishes for many years.
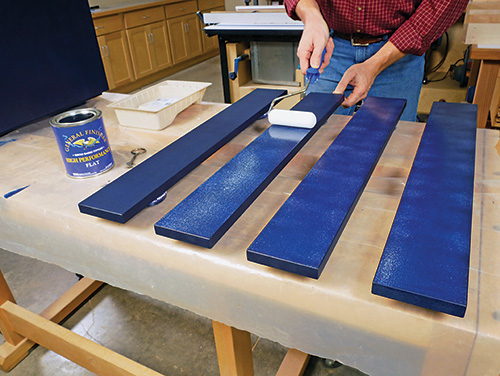
Once the primer dries, sand it lightly with 220-grit paper to smooth any rough areas caused by dust nibs or minor grain-raising. Then you’re clear to roll on one or two coats of milk paint as needed to create even coverage. I gave the painted finish 24 hours to dry and then followed with a coat of General Finishes water-based High Performance Flat Top Coat, which adds a layer of protection over the paint without altering its flat sheen.
Installing the Tabletop and Hardware
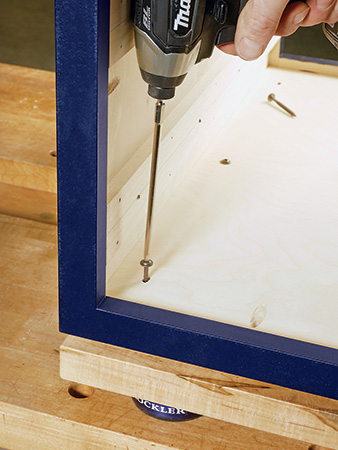
With the varnished and painted finishes now complete, go ahead and install the tabletop on the cabinet. Keep in mind
that since it’s made of solid wood, the top needs to be able to expand and contract across its width as humidity levels change. I fastened the cabinet to the tabletop with nine 2″ panhead wood screws. To account for wood movement, I drove three screws through round pilot holes, centered on the width of the cabinet and the subframe parts. For the other six screws, I created 1/2″-long slotted holes, orienting them in the direction the tabletop panel would need to move. I centered the screws in these slotted holes before sinking them into place.
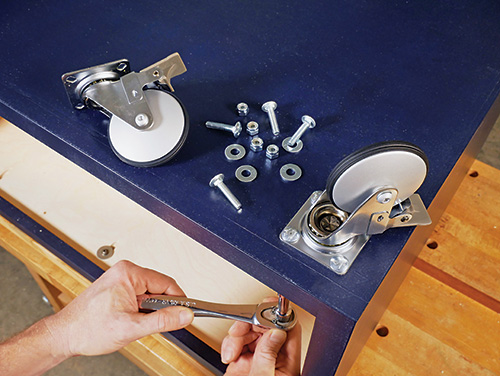
Installing the top requires inverting the coffee table to drive the screws. With its bottom face still up, now is also a good time to install the casters. I positioned their mounting plates 1″ in from the ends and edges of the cabinet and secured them with 1-1⁄4″ carriage bolts, washers and locknuts. I faced the threaded ends of the bolts toward the cabinet’s interior.
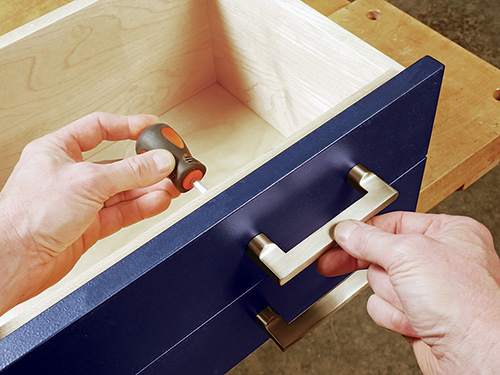
Set the coffee table on its casters so you can reinstall the drawer slides. Hang the drawer boxes inside the cabinet and screw the drawer faces back onto them again. When that’s done, you can lay out the positions of a pair of drawer pulls on each of the six drawer faces, drill pilot holes for their installation screws and install them. I inset the pulls 3-3⁄4″ in from the outer edges of the face frames (equivalent to one pull length), and I centered them on the drawer face widths.
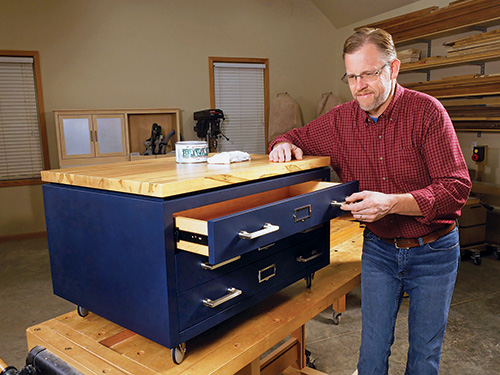
Finish up construction by installing a metal card holder on each drawer to further simulate the look of a vintage cartography cabinet. I centered these between the pulls and attached them with tiny Phillips screws that come with the card holders. Check the drawer action and alignment, and install more screws in the drawer slide hardware as needed to fix them permanently. Here’s to happy(er) trails again soon!
Click Here to Download the Drawings and Materials List.
Hard-to-Find Hardware:
3″ Aluminum Swivel Caster with Polyethylene Tread and Brake (4) #60876
10″ Series 757 100-lb. Over-Travel Centerline® Lifetime Slides, Black (4) #47057
Flat Card Holder, Nickel (6) #47608
Ashley Norton Apollo Cabinet Pull (12) #GRP41100
General Finishes Coastal Blue Milk Paint, Pint (3) #39130
General Finishes High Performance Water-based Top Coat Flat, Quart (1) #53869


