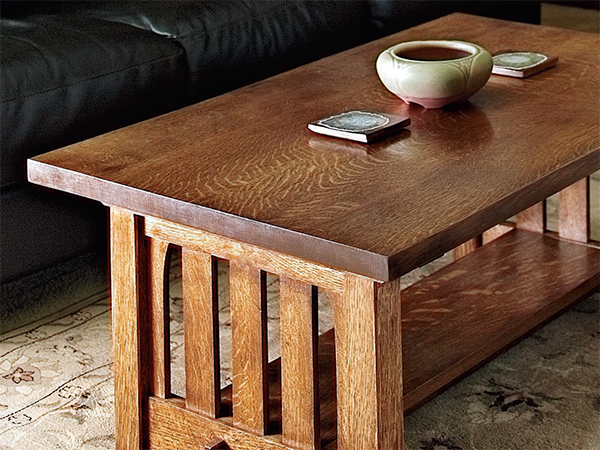
My wife has practical ideas about what makes a piece of furniture useful…”I have to be able to put my feet up on it.”
When a new couch and loveseat for our living room dictated a new coffee table to fit the L-shaped arrangement, she knew what was important. She often watches TV from that vantage point and wanted to be able to rest her legs on the table, in lieu of a vetoed recliner.
We have an eclectic mix of furniture styles in our home — mostly pieces that I’ve built. The common theme is simplicity and clean lines. Modern, Shaker, Scandinavian, Arts and Crafts designs — all with a minimum of ornamentation — share our space and aesthetic.
Clearly a light-looking turned-leg Shaker table or an airy Danish Modern design was not going to cut it. This piece had to be physically and visually substantial — it needed to support at least
two pairs of feet and not move under the load — as well as not look so delicate as to discourage informal kick-back comfort.
An Arts and Crafts design seemed to fit all our requirements. The top could be thick enough to be substantive and the substructure could be constructed to suggest rock-solidity. We decided on a trestle design to maximize the visual weight of the support structure. Legs, rails, slats, beveled support beams … all were part of the A&C vocabulary I could use.
To keep the trestles from looking monolithic, I decided to use setbacks and shadow lines to break up the visual mass and give the eye something to play with. This, in turn, dictated making it from stock of varying thickness. For ease of measurement and construction as well as convenience in setting up all the mortise, tenon and groove locations, I decided to use multiples of 1/4″ for the setbacks and 1/2″ for the stock. So, 2″ legs, 1″ rails and 1/2″ slats would result in 1/2″ setbacks between legs and rails and 1/4″ between rails and slats. The beveled support beams for the top would be 1-1/2″ thick and continue the 1/4″ relationship to the top rails. The top would be 1-1/4″ thick, plenty massive for doubling as a footstool, but perfectly proportionate to the rest of the piece.
Now, designing with these thicknesses is easy enough; sourcing the stock is another matter, especially with the added consideration of using quarter-sawn white oak with its distinctive ray flake figure. The legs, for instance, needed to be 2″ thick and show quartersawn faces on all four sides; however, a quarter-sawn piece of oak will only show ray flake on two sides. Since a thick slab of plainsawn oak will show ray flake on its thickness, I didn’t need to find thick quarter-sawn oak — a thick plain-sawn piece would provide quarter-sawn surfaces along its edges. And since I wanted to veneer the plain-sawn faces, 2″ stock would have wound up too thick. Luckily, a better solution presented itself: I found some nice surfaced, 1-3/4″-thick plainsawn lumber. Resawing 1/8″-thick veneers from quartersawn stock and applying them to the flatsawn faces would result in 2″-square legs with quarter-sawn faces all around.
Likewise, I wanted 1″ quarter-sawn stock for the rails, and this is not a common finished size either. I could have milled 5/4 stock to 1″ finished thickness, but this seemed wasteful, especially since 1/2″ quartersawn stock is easy to find. I opted to build the 1″ pieces up from laminated 1/2″ stock and buy enough to make the 1/2″ slats as well.
For the top, I definitely needed quarter-sawn stock, and it needed to be 1-1/4″ thick. Building up this stock would have resulted in very visible seams on the edges, so I decided to put all my milling time and energy into surfacing 6/4 rough stock down to 1-1/4″ for the top. My favorite lumberyard had a pallet full of 6/4 quarter sawn boards; picking through them yielded two with good figure and enough width and length to make four 6″ x 40″ pieces to glue up into the 24″ x 40″ finished-size top.
Start Machining with the Legs
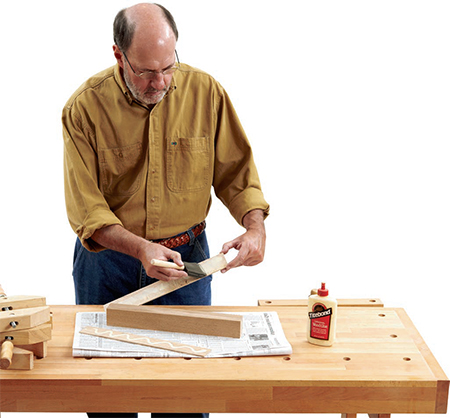
I began with the legs. I sawed four pieces from my 1-3⁄4″-thick lumber, 15″ long and 2-1/16″ wide, allowing extra length to square up the ends and a little extra width to clean up the glue lines on the jointer after laminating the veneers onto the plainsawn faces. While I was at it, I sawed a couple of extra “test legs” exactly 2″ wide to use for setting up the mortises and the grooves for the slats. (Since I was only interested in the 2″ width and I was not veneering or jointing these test pieces, I didn’t need any extra width.)
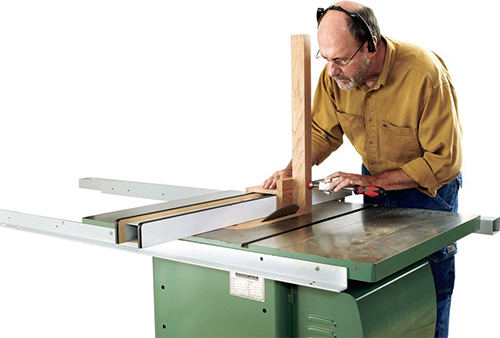
Next were the veneers for the flat-sawn faces. I resawed 1/2″-thick quarter-sawn stock into roughly 3/16″ veneers on my table saw, and then cleaned them up, bringing them down to 1/8″ thickness with my planer. As I planed them, I tested them on the legs until the finished thickness was exactly 2″. I then cut them to the same 15″ x 2-1/16″ size as the legs, and I glued them to the legs. I used all the clamps I own to ensure that the seams were tight all along their length. Later, when I was ready to assemble, I would bevel their edges to hide the veneers. I wanted square edges to reference the mortises and grooves I was about to machine.
After jointing and cutting the legs to finished size and sanding them to 100- grit, I moved to the mortising machine to cut the mortises for the bottom rails. Since these were through mortises and I didn’t want to cut them from both sides, I clamped a 1/2″ sacrificial board to the mortiser’s table and adjusted the bit to plunge about 1/8″ into it; this also helped ensure that the bottoms of the mortises wouldn’t chip out. Even so, I always put the “show” surfaces up as I cut. My experience is that the top surface ends up with the cleanest cuts.
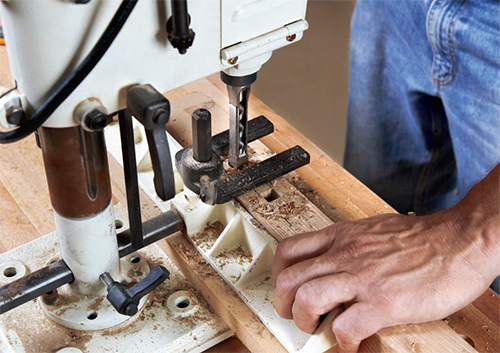
To achieve absolute uniformity from leg to leg, I marked the mortise location carefully on one test leg, set the machine up for the first plunge cut and clamped a stop to the fence. I then made a test cut and, when everything was accurate, I made the first cut in all the legs, butting them against the stop before repositioning the marked leg for the second cut and resetting the stop. Two tips for accurate mortises with a mortiser: first, make the two end cuts first and then make the intermediate cuts in between them (to avoid drift that might move the final end cut out of position) and second, clamp the workpiece solidly to the fence for every cut with a C-clamp (the hold-down on the machine does not always hold securely, making the bit difficult to withdraw and possibly causing slop). I cut the mortises in my other test leg at this time, too.
At this point, I cut and laminated the top and bottom rails from my 1/2″ stock (allowing a little extra length and width for cleanup), jointed them and cut them to length. As before with the legs, I made up a couple of extra test pieces.
The next step is plowing the grooves that hold the slats in the inner faces of the legs and the rails. I used a dado blade in the table saw for this (be sure to use a throat plate with an opening of appropriate size for the dado blade), configuring the blade for a 1/2″-wide cut to match the mortises in the legs. Here is where the consistent thickness of stock really began to pay off. It was easy to set the fence exactly 3/4″ from the blade to keep the grooves exactly centered in the legs. I set the depth of cut to 1/4″ and plowed a test groove in one of my test legs to see if everything was accurate. I didn’t need to set up any stops for this cut, since the legs were already mortised. Because the groove is full length until it joins the through mortise, I could simply start the cut at the upper end and look down into the mortise as the blade entered it, stopping the cut once the groove fully intersected the mortise. I reset the fence to 1/4″ from the blade, tested it on my test rails, and plowed the centered groove full-length in the rails.
Making the Rails and Slats
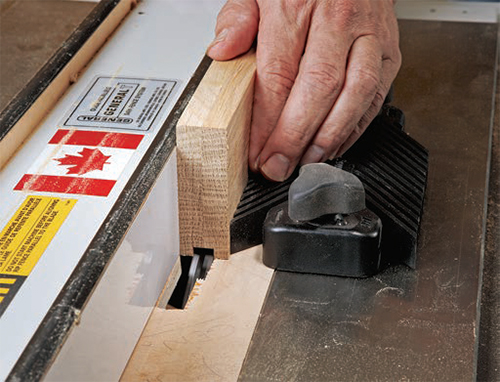
While the dado blade was on the saw, I used it to cut the exposed tenons on the lower rails and the stub tenons on the upper rails in multiple passes. Again, the consistency of stock thickness and reveals paid off, as the same 1/4″ depth served for the shoulders of all the tenons. I made test cuts in my test pieces and the real cuts in the rails when the fit was accurate.
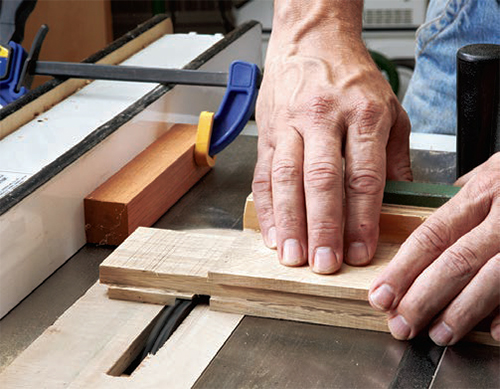
Now for the slats in the trestles. These would be inset into the groove I made in the legs and rails. I had to tweak things a little — as the board’s 1/2″ was a trifle fatter than the dado blade’s 1/2″ dimension. A quick pass through the planer fixed that in a snap. With the planer set for the right thickness to fit the grooves, I also planed a 24″-long scrap piece of 1/2″ stock from which to make the spacer pieces that would go between the slats. Since the slats were less than 10″ long and 2″ wide, I had plenty of area within my stock from which to select the best grain figure. I chose a piece for the four curved outer slats that had a slope to the figure that complemented the curve. With the selection process done, I cut these and the stiles to 2″ wide. Then I carefully measured the space between the top and bottom rails (8-5/8″) and added 1/2″ for the top and bottom grooves (9-1/8″ total) and cut them to just a tiny bit shorter than this measurement — I have tried to bang home rails that were just a hair too long for the available space, and I do not want to try that again!
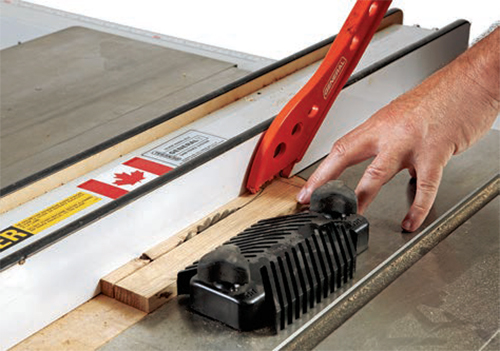
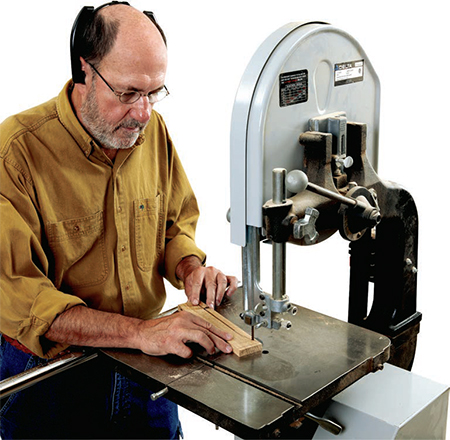
I cut the curves on the outer stiles in two operations, first ripping the bottom to 1-3⁄8″ about 2/3 of the way up on the table saw and then cutting the curve to the full 2″ at the top on the band saw, using the first one as a pattern for the rest. I stopped the curve 1/4″ from the top, leaving the part that would go into the groove straight. This way the visible top of the slat would be full-width and the filler pieces there would not have to be cut to an angle.
When I orignally considered the slats, I thought about the spacing between them and how it impacted the layout of the mortises for the stretchers, which are centered on the two spaces adjacent to the center slat. The 1-1/4″ spacing resulted in a pleasing space between the mortises so I cut two spacer pieces to that length, centered the middle slat in the space, fit the filler pieces on either side and made reference marks from the center of each spacer for laying out the stretchers’ mortises. The outer spaces between the slats would need to be wider, because 1/4″ of the outer slats is inset into the leg grooves — an arrangement that I thought would look good.
Making the Beams
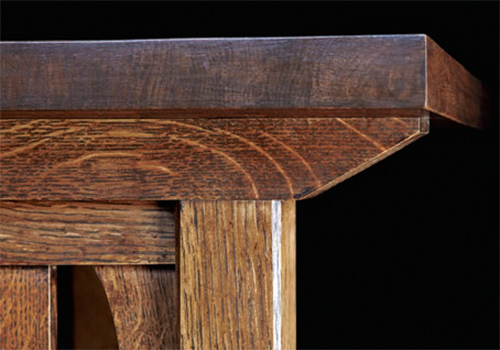
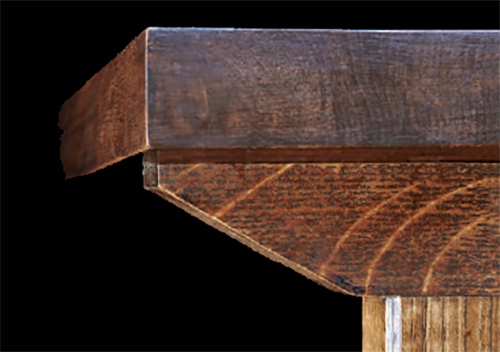
I turned my attention to the beams that would support the top. I had enough 1-3/4″ stock remaining to make them (again with the quartersawn faces on the thickness), and I milled them down to 1-1/2″ thick. I cut the beams 2″ wide to match the legs and to a final length of 23″. The bevels on the beams start 2″ from the ends and taper down to 1/4″. I cut them vertically on the table saw, clamping them to a purpose-built jig that rides on the fence. At this point, I began to think about how to attach the top and decided that pocket-hole screws were my best option. So, before going any further, I clamped a couple of long scrap pieces to the drill press table to hold the beams securely at an angle relative to the drill bit, tweaked them a bit to center them and leave a sufficient thickness of wood for the screws to bear on, and bored five pocket holes in the inside face of each beam with a 3/8″ Forstner bit. I then went back and drilled oversize holes for the screws centered in the pockets — it allows for seasonal movement in the top.
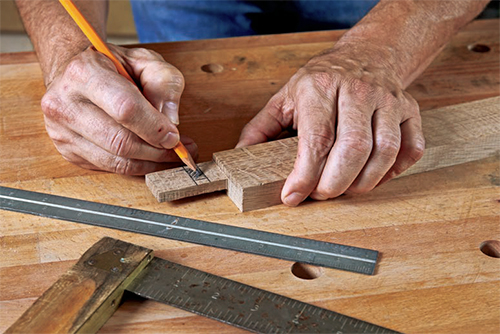
With the dry-fitting done, I disassembled the trestles and laid out the mortises for the stretchers. I centered them on the reference marks I had taken from the spacer pieces, starting them 7/8″ from the top of the bottom rails to leave a little step-down when the 3/4″ shelf was installed. These details are shown in the Drawings. I made the stretchers from 3/4″ stock, since their thickness isn’t visible. I cut the tenons with my dado blade, then laid out and cut the 3/8″-wide by 3/4″-long mortises for the wedges that lock the stretchers in place. As is standard practice, mortises extend just a hair inside the thickness of the lower rails, so the wedges pull the stretchers tight.
Final Assembly
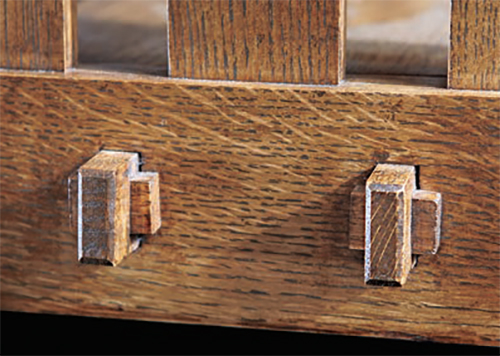
In the last steps before final assembly, I sanded everything to 220-grit and routed the bevels on the edges and bottoms of the legs and on the ends of the exposed tenons on the bottom rails and stretchers.
I started by gluing the lower rails into the legs, carefully brushing glue on only the 2″ of the tenons that would be buried in the legs’ mortises. I then glued the outer edges of the outer slats (but not the tops and bottoms) into the grooves on the legs. I centered the middle slat in the groove but did not glue it, but I did glue my 1-1/4″-long spacers into the grooves on either side — making sure they were centered over the mortises below. I added the next two slats, again without glue, and finally I could measure and cut the remaining spacer lengths exactly. These spacers are approximately 1-1/2″, but this distance may vary slightly.
Then I added the top rail and did the same process over again on top (the outer filler pieces on the top are, of course, narrower than those on the bottom) and clamped the whole thing up. When the trestle assemblies were dry, I decided which sides looked best and would face out…and I glued the top support beams to the top rails. They are flush with the legs and present an even overhang on both sides (pocket holes to the inside). I clamped them tight, drilled countersunk screw holes centered on each leg and screwed the beams down to the legs. To keep the three middle slats from rattling if they ever shrank, I shot a brad into the top and bottom of each from the back side of the top and bottom rails. Finally, I glued the stretchers into the mortises on the bottom rails and clamped the assembly overnight. I left room next to the clamps to fit and glue in the wedges in the stretchers’ mortises.
The shelf came next. I chose some nicely figured 3/4″ boards and edge-glued them up into the 8-3/8″-wide shelf. When they were dry and finish-sanded to 220-grit, I cut the shelf to final length, placed it on top of the stretchers, centered it so it hit just inside the outer edges of the 2nd and 4th slats in the trestles and clamped it in place. I then flipped the assembly over, cut two shelf blocks to the width of the space between the stretchers (with the grain running the same direction as the shelf), spread glue on one end of each (keeping the glue in the center so it wouldn’t squeeze out and stick the blocks to the stretchers or the bottom rails) and dropped them into the space, tight against the inside faces of the bottom rails. Once the glue set, I took the shelf off and drilled countersunk holes to screw the blocking to the shelf on from the bottom. The shelf simply drops into
place — gravity keeps it there nicely.
Making the Top
Making the top was a straightforward job of planing, jointing, ripping, gluing and crosscutting. It is worth reflecting on milling roughsawn lumber, however. It is something of a Forrest Gump process, in that “you’re never sure what you’re going to get.” It’s easy to find quartersawn 6/4 stock at a decent lumberyard, and the figure is often dimly visible through the rough surface, but the final look will only be revealed in the milling process. Also possibly revealed will be knots, voids, cracks, splits, whorls and other impediments to clear lengths and widths that go into a top that will be the star attraction of a piece like this. So it’s important to get stock as wide as possible, consistent with the final dimensions of the top (I needed four 6″-wide by 40″-long boards) to allow for piecing the top together. By that I mean matching the grain harmoniously from board to board and working around defects. If one plank winds up narrower than ideal, it’s good to have another that’s wider to compensate. In this case, to make the grain match, I settled on two 6-1/2″ inner planks and two 5-1/2″ outers, and even so, there was only one way the boards went together into a pleasing composition.
I like to glue a big, thick piece like this into as close to final dimension as possible, since trimming it can be awkward…and wrestling a thick, 50-lb. plank over a table saw can be dangerous. It turned out that I glued it up to exact width and only about 1/4″ over length for squaring up. In my opinion, that is a job best done with a straight bit in a router run along a clamped straightedge.
Here’s a tip for screwing the top in place. The trestles are linked together only at the bottom by the stretchers and will likely move a bit at the top when driving the pocket-hole screws home because they go in at an angle, no matter how firmly you clamp the top to the stretchers. Use a couple of 36″ bar clamps bridging the top rails to keep them in alignment while driving the screws.
Finishing
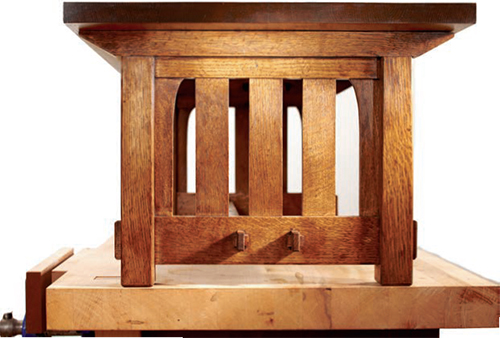
To finish the piece, I took a page from a previous Woodworker’s Journal and mimicked the traditional fumed Arts and Crafts finish with General Finishes wipe-on gel stain in Antique Walnut, followed by a satin polyurethane topcoat. The self-leveling wipe-on topcoat is especially convenient on a piece with this many surface planes, reveals and exposed tenons and wedges. I finished it off with dark Briwax and buffed it for a nice antique-looking sheen.
The piece has been in service for about a month now, and my wife reports that not only is it a beautiful looking coffee table, but a solid footrest as well.
Click Here to Download the Materials List and Drawings.
Mike Stevesand is a woodworking hobbyist.


