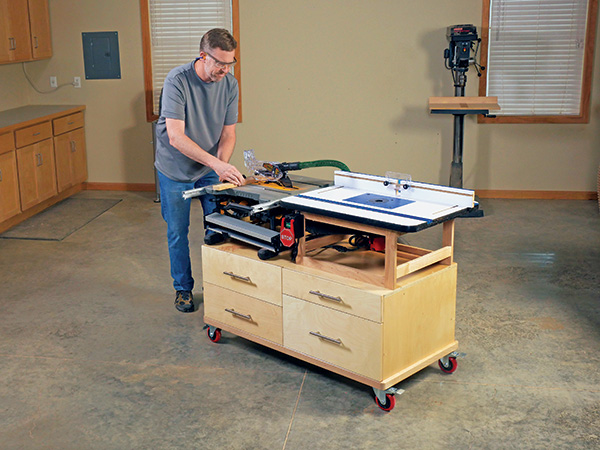
There are few upsides to this pandemic, but it has prompted a lot of folks to start woodworking. If you’re one of them, welcome to the club! To support your new hobby, maybe you’ve bought a jobsite table saw like the DeWALT saw shown above. But you’ve probably discovered it’s lightweight, it offers very little support behind the saw table when you’re cutting really long workpieces and it could use a more stable, sure-footed stand.
Building the Carcass
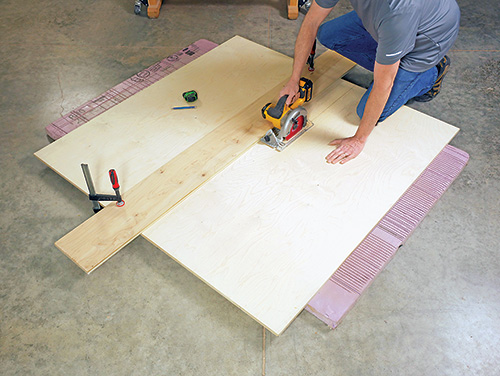
We’ll start by building the carcass that houses the drawers. Measure, mark and cut the top and bottom panels to size, according the Material List. Cut the carcass’s two sides to final size. Their length should match the width of the top and bottom panels. Now cut the divider to size. Note that it is shorter than the side panels by one thickness of the plywood you are using. The divider is shorter because the back panel will overlap its back edge when the parts are assembled.
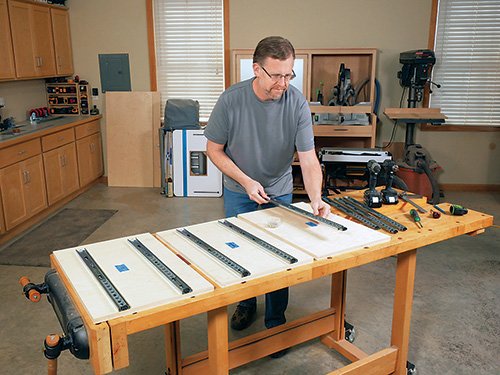
Drawer slides are often installed after a cabinet carcass is assembled, but waiting until then can actually make the slides harder to hang inside a deep but short carcass like this. So we’ll install the slides on the sides and divider now, while these parts are still loose and easy to work with. Mark the inside faces of the side panels so you’ll know which one is left and right on the project. Mark the left side panel with two layout lines that extend from the panel’s front to back edges. Position these lines 31-3/16″ and 12-1/16″ up from the bottom edge. These are center lines for locating the two drawer slides that will support the workstation’s pair of medium, same-sized drawers (under the table saw).
Mark one face of the divider panel with these same layout lines. On the other side of the divider and the rightside panel will hang the drawer slides that support the shallower drawer on top and a deeper drawer below. Mark centerlines for these drawer slides 5-3/16″ and 13-9/16″ up from the bottom edges of the divider and right-side panel.
Unclip the drawer slides’ two components — a wider “cabinet” side component and a narrower “drawer” side component. Mount the “cabinet” components to the carcass side and divider panels. Center each of these eight drawer slide parts over your layout lines and so their front edges are flush with the front edges of the carcass parts. Drive three screws per slide through the hardware’s slotted holes, centering the screws on the slots so you can adjust the slides slightly if needed later.
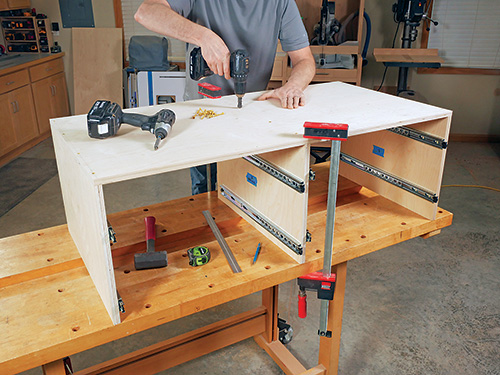
Now we can begin to assemble the carcass. Set the side panels so their outside faces are flush with the ends of the carcass bottom panel. Drill countersunk pilot holes up through the bottom panel and into the sides so you can drive #8 x 2″ flathead wood screws to fasten the parts.
Mark layout lines across the bottom and top panels that will center the divider panel on them. Set and clamp the divider in place so its front edge is flush with the front edge of the bottom panel. Drill pilot holes up through the bottom panel into the divider, and fasten the parts with more 2″ screws.
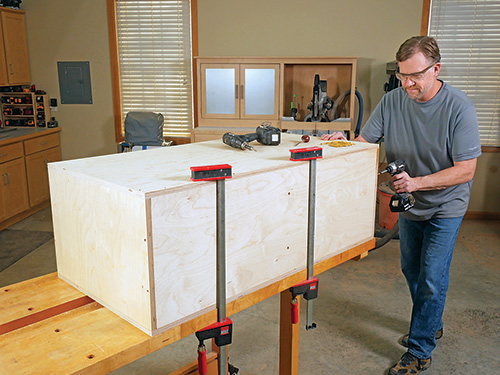
Set the top panel into place on the carcass. Make sure the front edges of top, sides and divider are flush and that the divider is adjusted to its layout line. This time, drill counterbored (deeper) pilot holes for the attachment screws so you can hide the screwheads with wood plugs. Attach the top panel to the sides and divider with 2″ screws.
The last big panel we need to install on the carcass is the back. Measure its opening to verify how those dimensions compare with the Material List. Cut the back panel to fit the opening. Set it into place on the carcass, and install it by driving counterbored screws through the side and top panels into the back panel. Drive counterbored screws through the back panel into the divider, and finish with countersunk screws driven up into it through the bottom panel.
Adding Cleats, Casters and Trim
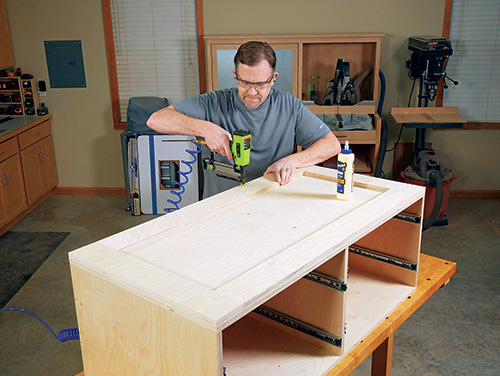
Notice in the Drawings that the bottom of the workstation has pairs of short and long cleats attached to it. They stiffen the bottom panel and provide extra thickness for installing lag screws to attach the casters. Rip and crosscut these four cleats to size.
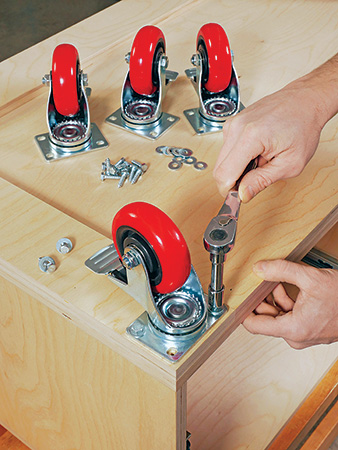
Invert the carcass, and attach the cleats to the bottom with glue and either 18-gauge brad nails or #8 x 1-1/4″ flathead wood screws. Locate these fasteners so they won’t get in the way of the four mounting holes for each caster plate. Then go ahead and install the casters with 1/4″ x 1″ lag screws and washers.
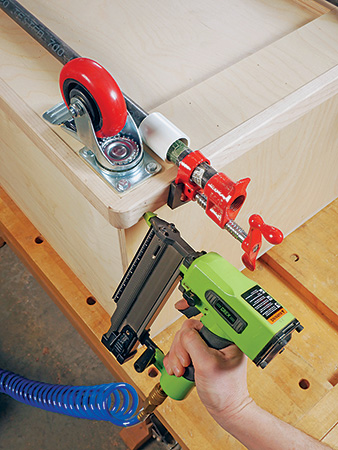
We’ll hide the edges of the bottom panel and cleats with 3/4″ x 1-1/2″ solid wood skirt boards. Rip long strips for this trim work from a piece of solid wood, and crosscut these parts to final length. The short skirt boards on the ends of the carcass overlap the ends of the long skirt boards on the project’s front and back edges. I rounded the outside corners of the short skirt boards with 3/4″ radii on a disc sander to give them a neater look and to make them hold up better to wear and tear. Glue and nail the trim pieces into place.
Building Stone-simple Drawers
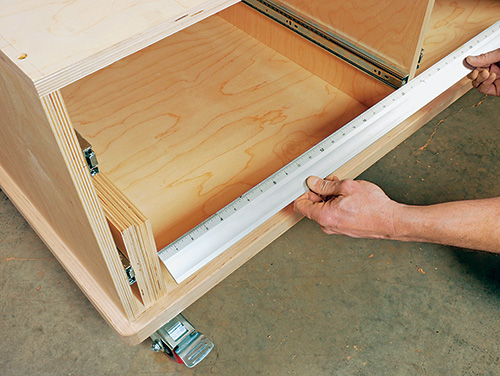
A shop project like this really doesn’t need hard-to-build drawers. Butt joints, screws and glue can create incredibly strong corner joints without special tools or skills. So that’s the drawer-building approach we’ll take here.
Start by cutting two sides for the two medium drawers, the shallow drawer and the deeper drawer from plywood. Be very careful that these parts have square corners and that opposing parts match so the drawers will be square when they’re assembled.
Now measure for the drawer fronts and backs. Their lengths are particularly important: making them too long can create drawers that bind against the slides and won’t open and close smoothly. If the parts are too short, the slides might not clip together properly or even disconnect during use. So to verify the correct length for the drawer fronts and backs, measure the distance across the opening between each pair of slides, subtract twice the thickness of the plywood you’re using (the drawer fronts and backs fit between the drawer sides). Cut the fronts and backs to length.
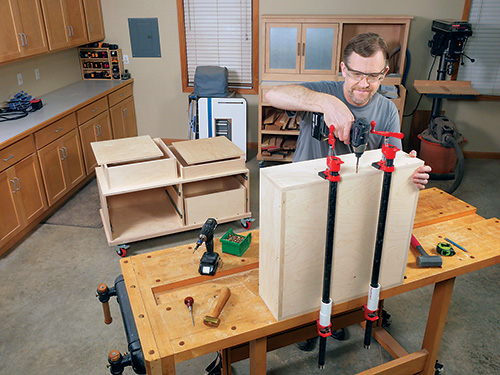
Sand the faces and edges of the drawer parts up to 180-grit. Then assemble each box with glue and counterbored #8 x 2″ screws, arranging the pieces so the drawer sides overlap the ends of the drawer fronts and backs.
Next, measure and cut the drawer bottoms to size. Install the bottoms in the two medium and one deep drawers with counterbored 1-1/2″ screws.
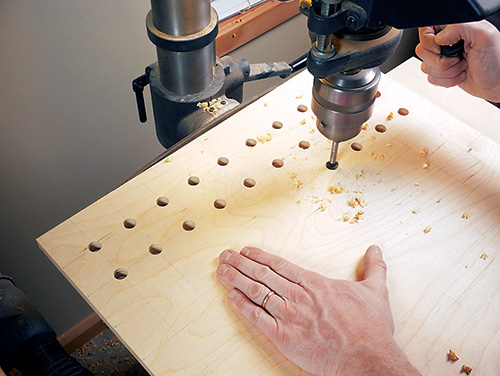
I decided to dedicate the shallow drawer to storing router bits; it holds up to 90 of them if you space the holes about 2″ apart. I’ll suggest you consider using Rockler’s nylon router bit inserts, which will hold either a 1/4″- or 1/2″-shank bit. These inserts require a 5/8″-diameter installation hole. Lay out and drill holes for these inserts in the drawer bottom before installing it in the shallow drawer box with counterbored screws.
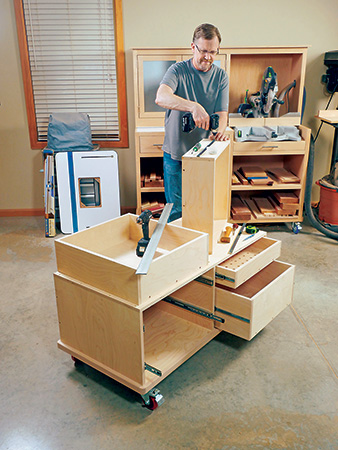
You’re ready to hang the drawers in the carcass. To do this, install a “drawer” side component on each side of the drawers, centering it, top to bottom. Attach this hardware with three screws per slide. Choose the slotted holes in the hardware for these screws so you can do some minor adjustments to drawer fitment, if needed. Engage the slide components with one another to hang the drawers.
Finish the drawer construction by cutting four drawer faces. Size these parts to leave about 1/16″ of space between each drawer and its neighbor as well as above the front bottom trim piece. Sand the drawer faces and ease their edges.
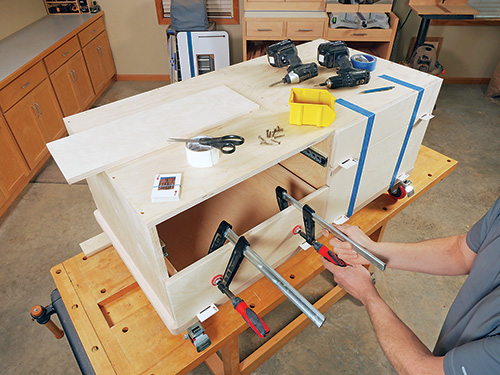
Set the drawer faces into place on the project, and use playing cards as spacers to separate the faces from one another. Then use short pieces of double-sided carpet tape to stick each drawer face to its drawer front. Carefully open each drawer, clamp its face in place and drive four countersunk #8 x 1-1⁄4″ wood screws through the drawer front into the drawer face. Wrap up by installing the drawer pulls.
Turning to the Router Table Base
This benchtop tool cart makes use of Rockler’s standard 1-1/4″ x 24″ x 32″ laminated router tabletop, but you’ll need to build a base framework for it. Since jobsite table saw heights can vary, set your saw on the workstation and measure its exact height. This dimension, minus the thickness of the router tabletop, determines the length of the legs you’ll need to make for the router table base.
Rip and crosscut four legs to size from either more 3/4″-thick plywood or some solid wood. Then cut four long and four short rails for the base to size, following the Material List dimensions.
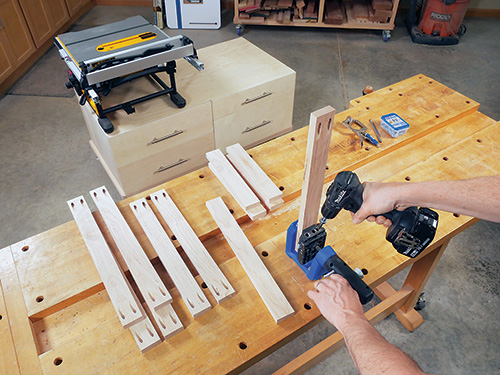
Continuing our goal of keeping this workstation easy to make, we’ll assemble the base with pocket screws.
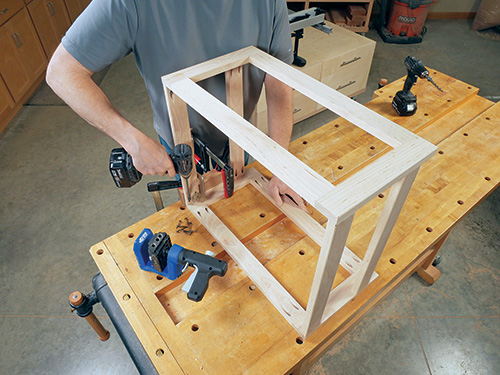
Mark the inside faces of all eight rails for a pair of pocket holes on each end. Set up your pocket-hole jig, and bore these holes. Arrange pairs of long rails between two legs to form two rectangular frames. The ends of the rails should butt against the inside edges of the legs. Drive 1-1/4″ pocket screws into the holes. Mark the inside face of each frame to locate the four short rails. Position the top short rails so their top edges will be flush with the top edges of the frames and their outside faces will be flush with the outer edges of the legs. Set the bottom short rails 2″ up from the bottoms of the frames. Clamp these four rails between the two frames, and drive pocket screws to secure the joints.
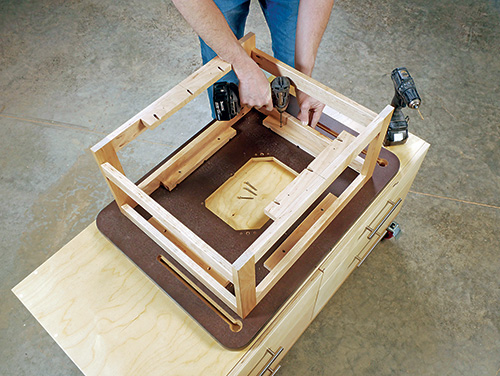
Now cut six 1-1/2″-wide x 12″-long cleats from scraps. Install four of these cleats around the inside top of the router table base. Center the cleats on the rail lengths and position their top faces flush with the top edges of the rails. Fasten the rails to the cleats with glue and pocket screws. Attach the remaining two cleats in the same way to the base’s bottom long rails.
A durable finish will keep this project looking great. I applied water-based varnish to the workstation, router table base and drawers at this point.
Mounting the Machines
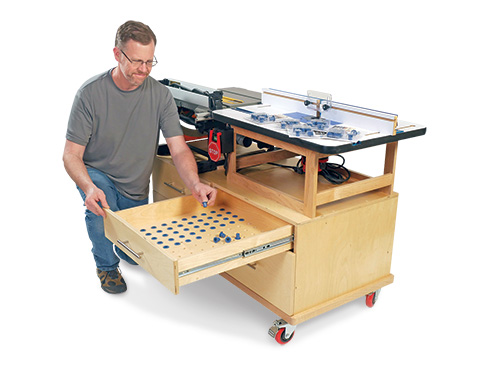
When the finish dries, set your jobsite table saw and router table components on the workstation, and adjust them evenly from front to back and end to end. I aligned one of the table saw’s miter slots with the router table miter slot, but this isn’t crucial for operating either tool. When everything is situated, mark the underside of the router table where the base should be installed.
Turn the router table and base upside-down, and locate the base on it. Drill a pair of countersunk pilot holes through each of the four cleats, and drive 1-1/2″ screws through the cleats to attach the base framework to the tabletop.
You’re now ready to mount the base of the table saw and the router table to the workstation with screws driven into the top. You may need to add some additional blocking underneath the saw, depending on the machine you own. Be careful that the attachment screws don’t go all the way through the workstation’s top, or they could interfere with the travel of the top drawers.
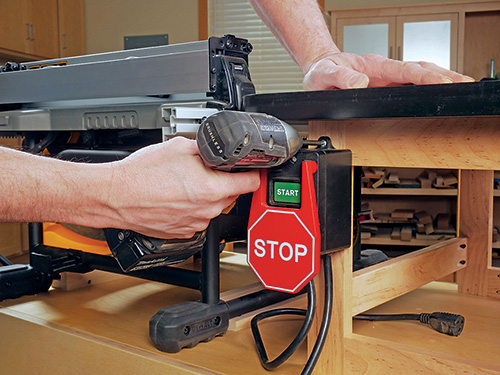
Install the fence on the router table and set the router plate in place with the router installed on it. I added an On/Off safety switch to the router table, which plugs into both the router and a power source. It makes the router easer to turn on or off without reaching under the table to do so.
Press a router bit insert into each of the holes in the router bit drawer, if you’ve purchased them, and load the drawer up with bits. Then roll this handy workstation into place in your shop. It’s now ready to go to work on your next project!
Hard-to-Find Hardware:
22″ Series 3612 75-lb. Full-Extension Centerline Lifetime Slides (4) #47467
4″ 300-lb. Polyurethane Caster, Swivel w/Total Lock Brake (4) #84718
Rockler High Pressure Laminate Router Table Top (1) #46924
Rockler Router Table Fence (1) #58215
Safety Power Tool Switch (1) #20915
Rockler Router Bit Storage Inserts, 10-Pack (9) #57223


