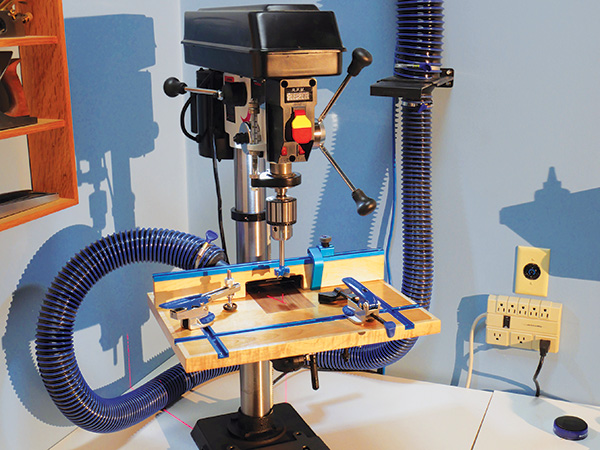
Every so often it’s fun to spoil yourself with a new tool, and buying that tool usually means making a couple of new jigs and fixtures for it. For example, I came up with this pretty fancy table for my new benchtop drill press.
You could opt for a plain-Jane version. But I decided that I was going to dig out a couple of special scrap pieces, add some of my favorite Rockler T-track accessories and build the drill press table of my dreams.
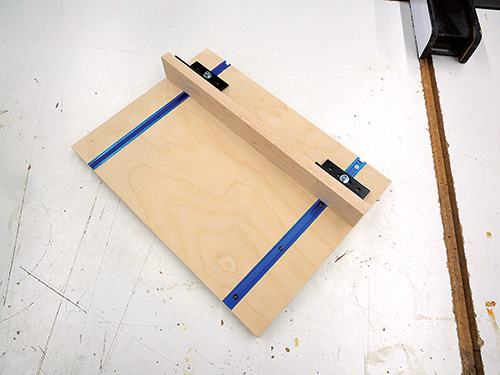
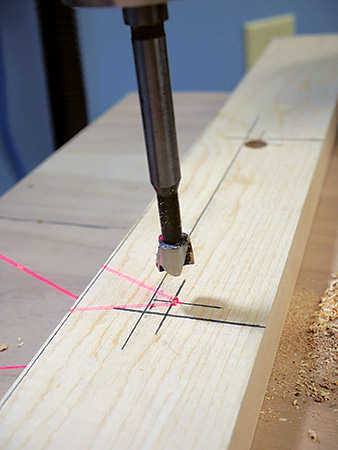
Start this project by cutting all the needed materials to size according to the Material List. In terms of material selection, I used some cherry plywood for the table, a piece of maple for the banding and fence and a small scrap of thin walnut for some sacrificial inserts. Which materials you use is entirely up to you.
Once everything was cut to size, I installed the maple banding around the table, attaching it with glue and mitered corners. Setting that off to the side to dry, I turned my attention to the fence. I wanted it to be multi-functional, so I placed sections of Rockler’s aluminum T-track on top of the fence for mounting a stop block as well as across the table to lock the fence in place.
Using a T-slot cutting bit on a router table, I milled a slot in the back of the fence (see the Drawings for details) that will be used to attach the fence brackets and the dust collection port.
I switched to a 3/4″-dia. straight bit to rout grooves for the T-tracks in the table. Laying out your grooves according to the Drawing will make sure you only need to cut the T-track a couple of times. It’s easy to do if you clamp it securely and cut it with a hacksaw.
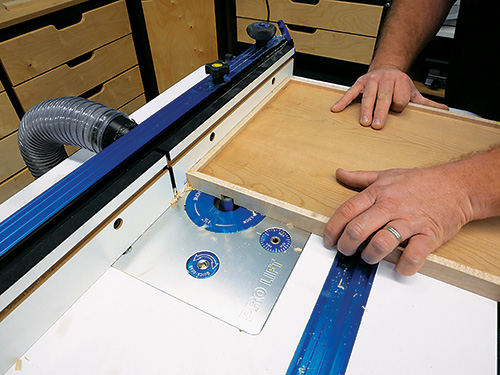
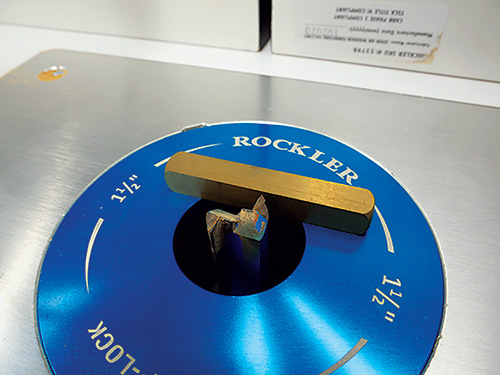
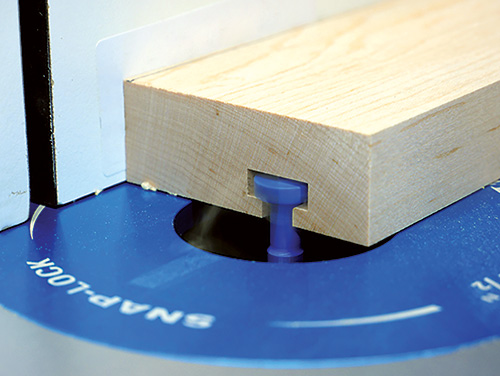
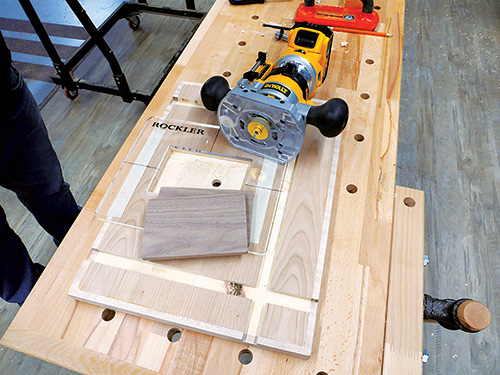
The tabletop will benefit from a sacrificial insert that can be replaced when needed. With the Rockler Bow Tie Inlay System I was able to make several inserts quickly and accurately. I used the system’s acrylic frame to rout a mortise in the table and then the same frame to rout out the walnut inserts.
To make these inserts easier to remove, I drilled a 5/8″ hole through the mortise area in the table so I would be able to pop them out easily with a finger.
Before final installation of the T-track and other accessories, I applied a couple of coats of finish to make the surface more durable and easier to clean. I think the table also just looks better with finish on it!
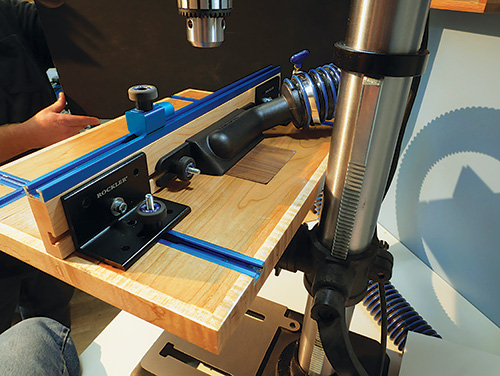
Before final assembly, I decided to add a 1/4″ piece of plywood to the underside of the table. It adds more holding power for the T-track screws. I then installed the T-track, making sure that the pieces were flush with the table surface and the intersecting corners were nice and tight. Driving short screws through its pre-machined holes makes installation simple.
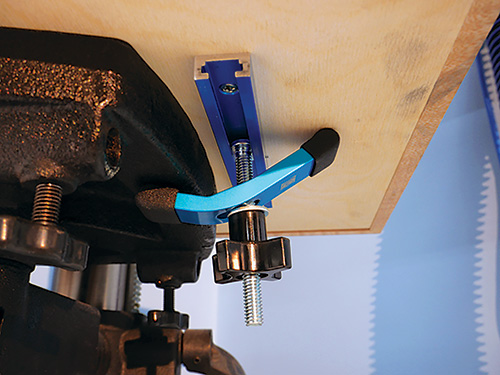
I attached a couple more lengths of T-track to the bottom of the table so I can use hold-down clamps to secure the project to the cast-iron table of my drill press.
Click Here to Download the Drawings and Materials List.
Hard-to-Find Hardware:
3 Ft. Universal T-Track (2) #26420
T-Track Intersection Kit (2) #22209
2″ x 2″ Multi Track Brackets (1) #35961
Dust Port for Drill Press Fence (1) #56312
Mini Hold-Down Clamp (2) #45692
Easy-to-Grip 1″ Round Knob 1/4″-20 (4) #58088
T-Slot Bolts 1/4″ – 20 Thread (1) #31969
1/4″ Shank Keyhole Slot Bit (1) #92035


