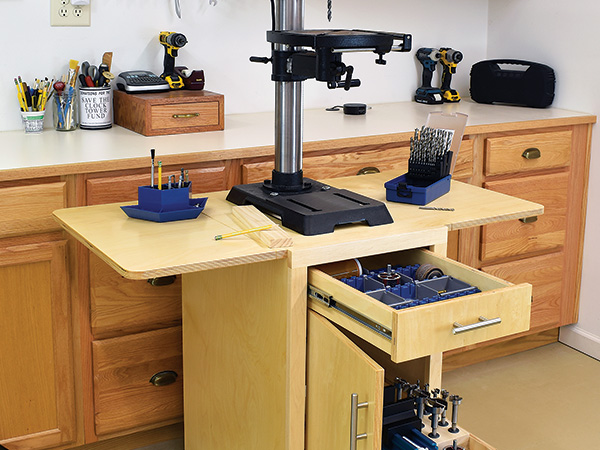
Benchtop drill presses are great … until you run out of benchtops. Instead, how about a custom-built cabinet that not only supports the machine but also makes it mobile for use anywhere in the shop and adds plenty of storage in the bargain!
Made almost entirely of 3/4″ Baltic birch plywood, this cabinet has some definite heft, ensuring a stable base for a tall machine. Built with rock-solid rabbet-and-dado joinery, it’s easy to make and can be tweaked to fit specific drill presses and storage needs.
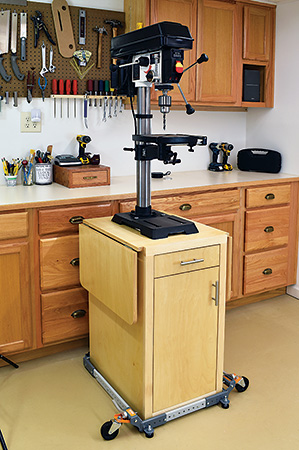
Since woodworkers (and benchtop drill presses) come in all sizes, it’s a good idea to first measure your ideal working height. You don’t want to reach higher than is comfortable or have to bend over. Stand as you normally would using a drill press with your hand held where it would rest most comfortably on the feed handle, and measure the floor-to-hand height.
Now measure your drill press and use both measurements to determine how tall the cabinet must be, including the height of your wheeled base. I’m 5′ 11″, so a cabinet about 31″ high works perfectly for me.
Plywood Playbook: Tips for Taming Baltic Birch
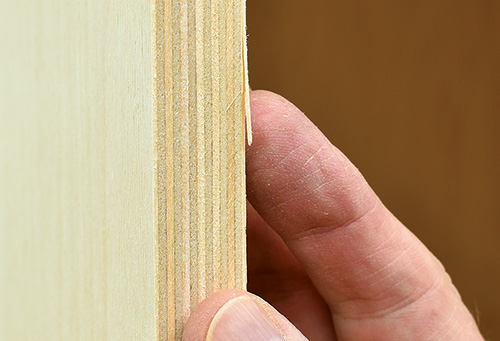
Baltic birch plywood is a reliable building material, but the thin outer plys easily splinter on the corners when they’re freshly cut. Take care when handling it, not only for personal safety (I can’t tell you how many splinters I got during this project), but also to avoid damaging the plywood. These edge splinters, while seemingly tiny where they stick out, can continue separating from the stock for several inches if snagged, potentially ruining a clean edge.
Lightly sand all fresh edges and corners to remove protruding splinters while a project is in progress, then give them a more thorough sanding afterward to slightly round over these areas. Once sanded, a few coats of finish such as polyurethane can help prevent further splintering of the delicate edge plies.
Should a completed plywood project get “dings” on the edges during use, sand these over to prevent another running splinter from forming.
Cutting Parts, Milling Joinery
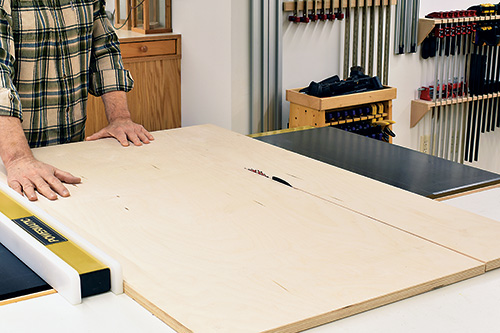
Begin by cutting workpieces for the main carcass. A table saw is perfect for breaking down your plywood sheets, but you can also use a track saw or a clamp-on guide for a circular saw. Keep in mind that plywood is prone to splintering, so use a sharp, clean blade and orient the stock so the blade cuts down into the face side of the material. This way, any tearout will be on the unseen side.
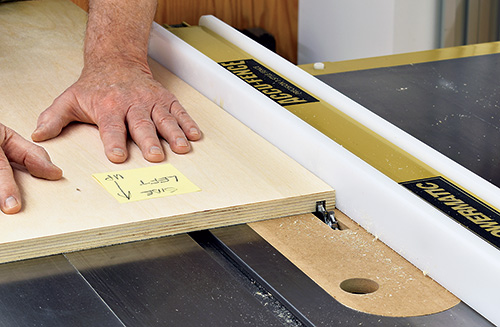
This is a solid cabinet, thanks to a simple but strong combination of rabbets and dadoes (and technically, grooves when the dado is in-line with the grain). A dado blade on your table saw, or a straight (or rabbeting) bit in a router table tackles all the joinery you’ll need to make quite nicely.
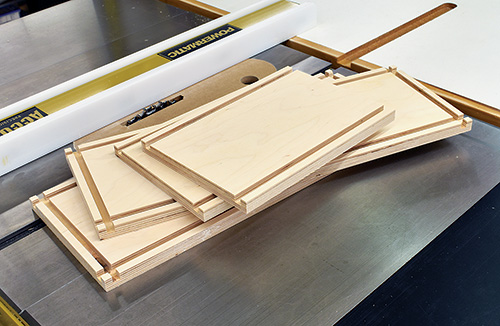
Cut the drawer and shelf sides, and the sub-top workpieces, to length only. This provides a longer working edge to make cutting these joints safer and more efficient — fewer passes needed over the blade or bit. Once your joints are milled, just rip the parts to final width.
Finally, cut the door and drawer front slightly larger than their Material List dimensions. Since those must fit perfectly inset into the face frame, we’ll tweak the fit a bit later.
Marking and Fitting the Top, Sub-top
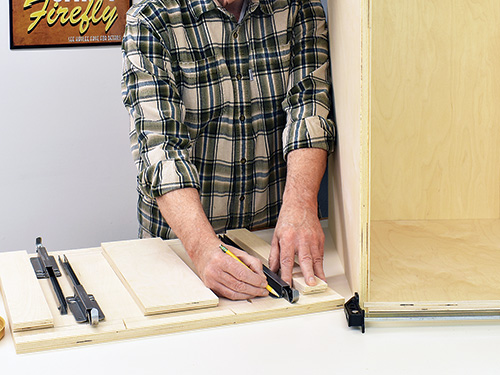
Speaking of fitting, before reaching for a glue bottle, there are a few preliminary things to do, beginning with a dry assembly.
Visually, the main top is just a flat surface, but there’s a lot happening underneath it. With the dry assembly clamped up, mark the underside of the main top to show where the three sub-top pieces are located by tracing them from underneath.
Disassemble the top and sub-tops, and arrange them on your marks to lay out the leaf supports. The separate sub-tops create gaps for attaching the supports on the underside of the main top. You’ll need to stagger the supports for internal clearance, but this won’t affect their holding ability. Their exact location depends on the supports you use, so a bit of tinkering will show the best arrangement. Trace around the mounting plates and mark screw holes, and also carefully mark where the supports will exit the sides of the cabinet.
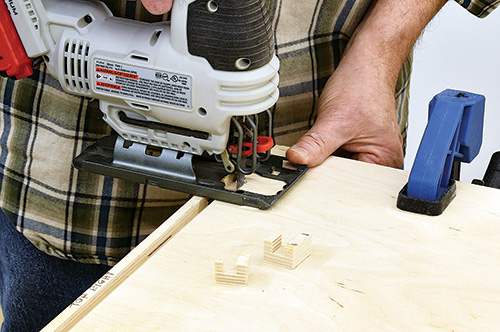
Transfer your exit hole marks to the top edges of the cabinet sides, enlarging them a bit for wiggle room. (Mine are 1″ high by 1-1/4″ long.) Cut the holes for these openings with a jigsaw. To minimize splintering, use a fresh fine-cut blade for wood or even a metal-cutting blade, and turn the saw’s orbital action as low as it goes. Clean up the exit holes with a light sanding.
Assembling the Cabinet Carcass
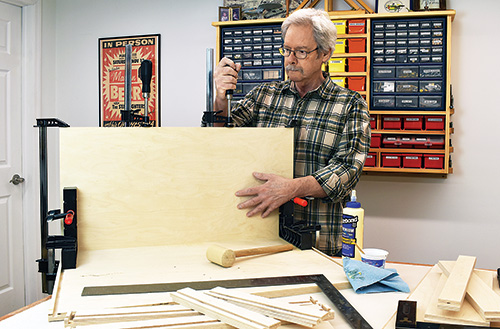
Assembling and gluing a cabinet this large and heavy while keeping everything square is difficult, so I like to start with a single corner and let it dry before going further. I’ve glued and clamped the cabinet back to one of the sides, using Rockler’s Clamp-It Assembly Squares to ensure a 90-degree joint. Once dry, this secure corner joint helps register the rest of the assembly as you add the remaining side, structural bottom and the three sub-tops.
A separate inner bottom piece adds weight for even more stability. Just brush some glue onto the structural bottom, slide the workpiece in, and anchor it with a few screws driven up from underneath the cabinet where they won’t show.
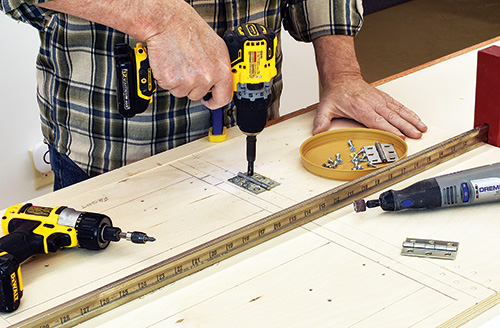
The last piece of the cabinet is the main top. Because it’d be more difficult to do later, lay out and mark the hinges for the folding wings now. This is also the time to drill pilot holes and drive in all the screws for the hinges and leaf supports; having those pilot holes already threaded will make things easier later. As with the supports, you may need to stagger the hinges.
Remove the hardware, then place and attach the main top to the cabinet with screws driven up through the sub-tops.
Putting on a Good Face
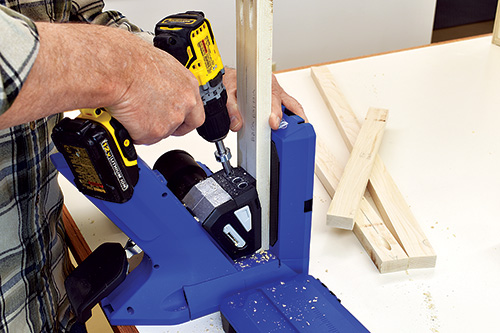
Cut the face frame rail and stile workpieces to size. I’ve opted to assemble the face frame with fast-and-easy pocket-hole joints. I doubled up the screws on the wider bottom rail and used single screws on the ends of the narrower top rail.
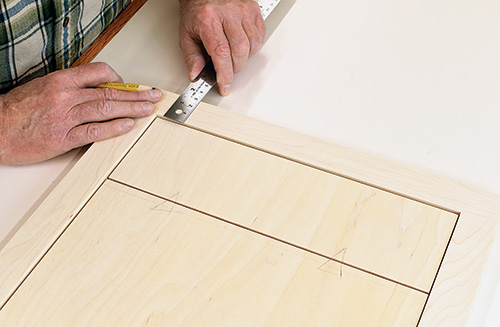
Before attaching the assembled frame, measure the opening and trim the door and drawer front to allow a uniform gap all around. Do a test-fit on your worksurface. A reveal of 1/8″ is ideal; it’ll look great and allow the door to swing freely. When the gap is just right, give these workpiece edges a careful sanding to remove their sharp corners.
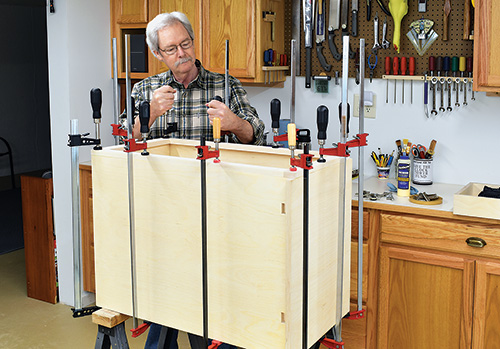
Attaching face frames can be done in a variety of ways: brads and glue, pocket screws from inside or with biscuit joints. But this cabinet’s double-thick top and bottom offer a lot of gluing surface (nearly the full width of the face frame top rail, and more than half of its bottom rail), so I opted to just glue and clamp the face frame in place. Glue joints will be plenty strong here.
Inside Work Comes Next
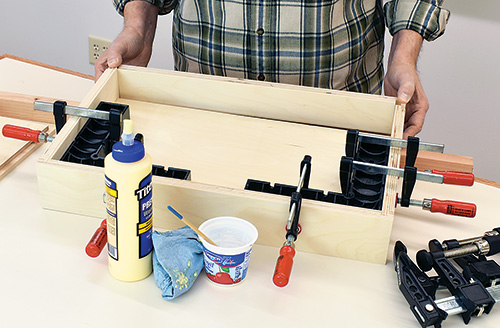
While the face frame glue joints dry, build the drawer and pullout shelf. Assembling them is pretty much the same process as the cabinet, but because they’re smaller it’s easier to assemble everything at once. Just make sure the drawer and shelf remain square when the clamps are tightened.
Next, prepare the inside of the cabinet for drawer slides. Slide hardware varies widely, so follow the specific instructions that are included with your slides. However, for a framed cabinet like this, all slides need something to attach to.
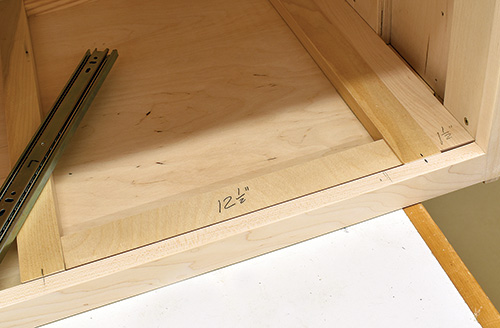
To support the slides used here even with the face frame, I’ve cut four 1-1/2″-wide spacers from 3/4″ stock that run front to back in the cabinet. The slides attach to the middle of the drawer/shelf sides, so the drawer spacers should be located 1-1/2″ down from the top. To center the shelf midway in the remaining opening, position their spacers 12-1/2″ below the drawer spacers.
Locating these is straightforward for the first side, but getting an exact match on the opposite side can be tricky by measuring only. So I made a variation of story sticks using scraps cut to the exact measurements to serve as layout guides.
Starting with the right side, place the drawer guide at the top, then the drawer slide spacer, the shelf guide and the shelf slide spacer. Three screws in each spacer anchored them. Then, just repeat for the other side for perfect alignment.
While the drawer slides are the same on both sides, the shelf slide on the left is offset to allow the door and hinges to function without blocking the narrower pullout shelf. Normally, slides are even with the face frame, which they are on the right side, but for the slides and hinges used here, I needed to offset the shelf slide on the left by 1-7/8″. To do this, I tacked a second “thick” and third “thin” spacer to the first spacer (see Exploded View Drawing).
Attach the cabinet-side components of the slides to the spacers in the cabinet so the drawer box and shelf will be flush with the back edge of the face frame. Then, attach the mating components of the slides to the sides of the drawer and shelf, and do a test fit. Choose the slotted holes in the slide hardware when installing them so they can be adjusted if needed.
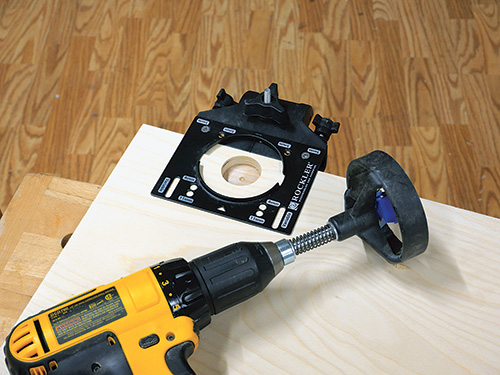
Euro-style hinges for hanging the door use an attachment “cup” that fits into a stopped hole into the back of the door bored with a 35 mm Forstner bit. This can be done freehand or with a drill press, locating the cup per the manufacturer’s instructions. There are a number of jigs made specifically for this task that make the process fast and easy by dialing in the required offset for drilling.
Attach the hinges to the door, then use the door hinges to mark the left frame for the hinge mounting plates and attach them on your marks. Mounting the door is as simple as snapping the hinges onto their mounts. Check the door action and fit. If it’s not centered or too far in or out, Euro hinges are adjustable up-and-down, side-to-side, and in-and-out with screws. Just tweak these screws until the door is perfectly set.
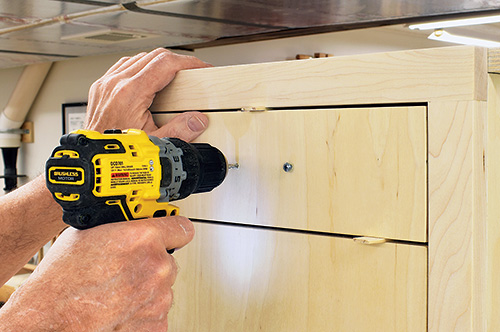
To locate and attach the drawer face, first drill holes for your drawer pull. Then, using 1/8″ shims around the edges, snug the drawer face in place in its opening and drill through your pull holes and into the front of the drawer box behind it. Slip the pull’s screws into the holes to hold the drawer face in place, remove the drawer, and secure the drawer face with screws driven through the drawer front from inside.
The cabinet is now ready for attaching the internal hardware and hinges as well as hanging the folding wings. This is easiest to accomplish by turning the cabinet upside down on a large worksurface. Remove the drawers and unsnap the door hinges first, and get some assistance for upending the cabinet as it’s pretty heavy at this point.
Your pilot holes are already drilled and threaded, so it should only take a couple of minutes to screw the hinges and leaf supports into place. If you plan to use this project mainly in a corner, consider angling the back edges of the wings at this point so they can be lifted while the drill press is in place. Then remove the hardware so you can apply a couple of coats of your favorite protective finish (I used polyurethane).
With assistance, set the cabinet upright onto your rolling base. Center the drill press on top of the cabinet and drill down through the mounting holes in the drill press’s base plate. Slip a pair of bolts through the baseplate, and secure the machine with washers and nuts from underneath.
Now, customize your rolling benchtop stand any way you like to accommodate the accessories you plan to store in it. If this project will be one you’ll be moving around a lot (perhaps because a car needs to park in your shop space, too), it’s worth adding a rear handle. Doing that early on in the construction process will make the cabinet easier to muscle around and very handy thereafter.
Hard-to-Find Hardware:
20″ Series Centerline Slides (2) #47758
Salice Soft-Close Hinges, Inset (1) #52024
Metal Drop Leaf Supports (2) #30006
Bora Portamate Mobile Base (1) #39379
Butt Hinges, 21 ⁄2″ L x 11⁄2″ W, Nickel (2) #54646
Stainless Steel Metropolitan Pull, 51 ⁄4″ (2) #24418


