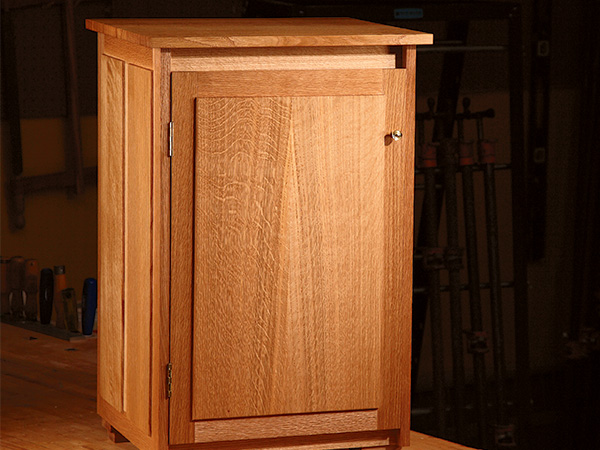
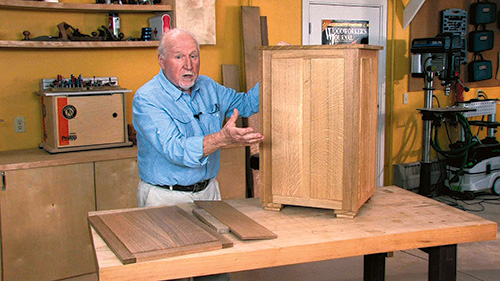
Frame and panel construction has been called the building block of solid wood furniture, and for good reason. That is because the development of this method widened the ability of woodworkers to make durable and practical case goods beyond anything that had come before it. If you are going to make furniture out of solid wood, you need to have a grasp on the process and methods involved in frame and panel construction — which is why, when we developed the collection of projects in our Way to Woodwork DVD series, we included two different frame and panel projects. Of course, all frame and panel pieces have considerable similarities. The white oak bookcase that we featured in the DVD series and in the February magazine issue, and this bedside table, are no exceptions. But while the bookcase utilized raised and fielded panels, the bedside cabinet has a different sort of panel altogether (more on that shortly). The other main difference between the two is that by hanging a door onto a casework project, you create a cabinet. Making the door is just another variation on the frame and panel, but fitting and hanging a door is another set of skills and techniques to add to your repertoire.
Overlay or Plant-on Panels
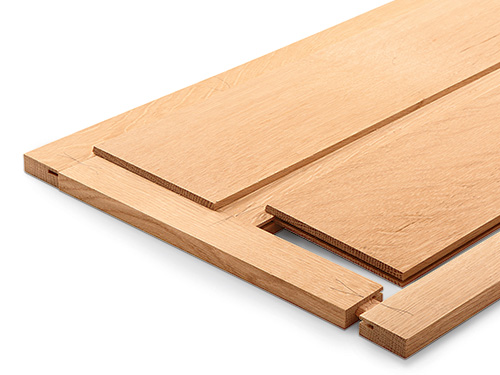
As mentioned, frame and panels are used to make the sides, the back and the door of this bedside cabinet. This particular construction is known as overlay panels. A glance at the photographs and the diagrams explains that these frames and panels are grooved in such a way that the panel sits atop the frame — or “overlays” it. This version of the frame and panel contrasts in many ways to its relative that uses a raised and fielded panel, so I am going to take the opportunity to expand on their differences.
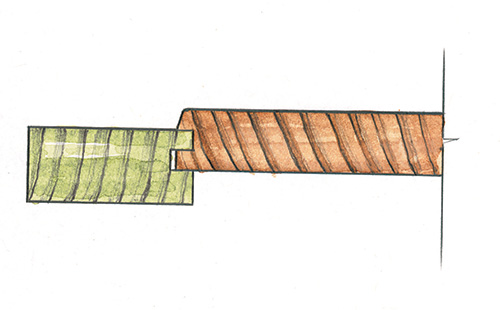
Technically and visually, the overlay panel is simpler than the raised and fielded one. Technically, because to get the panel to fit into the frame, you need only one machine setting to cut the same size groove into both the parts. The groove can be made on a table saw using a 1/8″ kerf blade. Alternatively, it can be made on a router table using a slot cutter. In both cases, the frame is set so that the wall of the slot is a hair less in width than the width of the cutter or groove. That will allow for an easy-sliding push fit when the two parts are brought together.
One step that is important in this sort of frame and panel construction is that you should make the corner joints of the frame and panel before you cut the panel groove. Once made, clamp the frame together and plane flush any misalignments of the joint line on the face of the frame. You are now two steps ahead. First, this will ensure that when you cut the grooves in the frame pieces they will be properly aligned. Second, it is hardly possible to plane any joint line misalignment once the assembly is glued, because the panel is in the way — which is not the case with the frame on a raised and fielded panel assembly.
Visually, the overlay panel is simpler than the raised and fielded panel because it’s a flat panel with no highlights and shadows which come from raised and fielded moldings. This simplicity is an opportunity to use wood that has a strong grain or color character. It might be any extraordinary colorful piece of cocobolo or a wild tiger-striped pattern on a piece of maple or a quartersawn oak board with perfectly dappled silver grain.
But simplicity is always a two-edged sword. In the case of the plant-on frame and panel, there are two things you must attend to. One is major and one is minor. The major one is getting the two components — the frame and the panel — to be in proportional harmony individually and in the overall. The proportion of a raised and fielded panel can be manipulated within the stiles and rails because the molding around the panel can be made narrower or wider. As well, the molding can be made a different shape, and it can run across the end grain on the top and bottom, or not. Those are variations you can’t make with a plant-on panel. My solution to getting plant-on panel proportions right is generally to make them narrower. You can see what I mean on the sides and back of this bedside cabinet. The door, on the other hand, has a wide panel without vertical division. If the door’s book-matched pieces had not been available, I would have probably chosen three narrow panels to make the door.
The minor problem with the panel is what to do about the square edges that stand proud of the frame. They are only 3/16″ to 1/4″, but that square shape looks very uncomfortable. The answer is to shape the edges at an angle of about 15°. You can do it with a plane or on the table saw. Once you’ve angled the edges, break their corners with fine sandpaper.
The joinery used to make this piece of furniture can be done using machines commonly found in a home workshop, but the finished surfaces are best prepared with a hand plane. This combination of machine and hand tool makes for an exquisite result. I make no bones about the fact that planing the surfaces inside and out was quick and easy because every part was selected from straight-grained quartersawn white oak. Regardless of your skill level, don’t think of this “best quality material” as an extravagance. Realize instead that it makes the most economic use of your time because the wood works easier. Its cost, compared to the cost of your workshop setup, is marginal, and the quality shows through in the finished piece.
Prepare the Parts
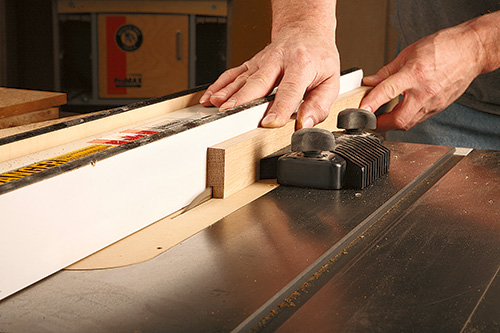
Begin by preparing the parts for the sides, the back, and the door. The frames pieces are all 5/8″ thick, with the panels 7/16″ thick. Rip the frame material to width and then cut the stiles and rails to length. At this stage mark each piece with a face side and a face edge mark. Choose the best-looking face to go outside and make the other side the face side. This is the vital step in machining the joints and the grooves in the right place to get the best-looking side on the outside.
Now that you have prepared the stock and cut the components to size, you are ready to move on to making the joints. There are three pieces that need to be butt joined: the top, bottom and shelf. This is an appropriate point in time to glue and clamp those pieces together so they’ll be prepared when you need them later on. If you choose to use a large panel for the door as I did, make that butt joint as well.
Cut the Joints
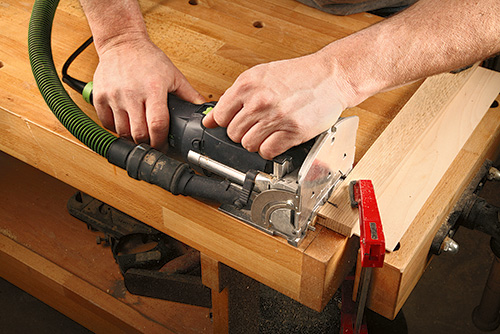
Joining the frames is the first step in this construction. I used a Festool Domino machine to make the frame joints.
The tool makes what amounts to a mortise-and-tenon joint but, in this case, the tenon is what we call a “loose tenon.” The machine makes a mortise hole in both pieces of wood.
The tenon is a piece of European beech hardwood made to fit the combined mortise holes in width and thickness and length. The loose tenon joint has been used in industry for many years; there’s nothing new about it.
The industrial machine used to make the holes is called a slot mortiser; unfortunately it’s a 3- phase machine that costs a few thousand dollars. The Domino machine is fast and efficient; it makes short work of the frames.
You’ll find the locations for the mortises, as well as many other construction details, in the Drawings. Once the joints are cut, clamp the frames together and be sure that the parts are flush at the joint lines. If not, correct them by planing.
Size the Panels
Once you’ve made the frames, cut the panels to size. This includes the panel that will go into the door. The Drawings should help you work out the dimensions. The panels on the sides and the back are formed from single pieces of solid wood, but as I’ve explained in previous articles and in the DVD series, there is more to making these panels than simply cutting them to size randomly from thicknessed lumber. There is an aesthetic component to this step in that you are choosing to cut the panel from the board where the grain pattern and color is shown to the best advantage. If that means some waste because the best-looking panel is in the middle of the board, so be it. Additionally, spend some time figuring out which of those panels will look the best paired with another in the sides and back that you will be making. This process of selecting the parts and composing them as a whole is a vital part of a handmade product.
Cut the Grooves
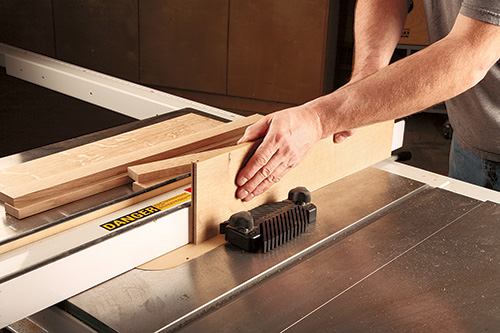
Cut the grooves on your table saw or with a slot cutter on a router. Positioning the fence is critical and best done with the help of some test pieces. The gap between fence and cutting should be a hair less than the width of the cut. In this way, the tongues will go into the groove as an easy push fit. Once again, you will find details for these grooves in the Drawings. It’s now, when you are cutting all the grooves, that the face side and edge marks will orient the faces in the direction you want. Paying attention to the marks will put the correct face to the fence and bed, which gets the cut where it should be.
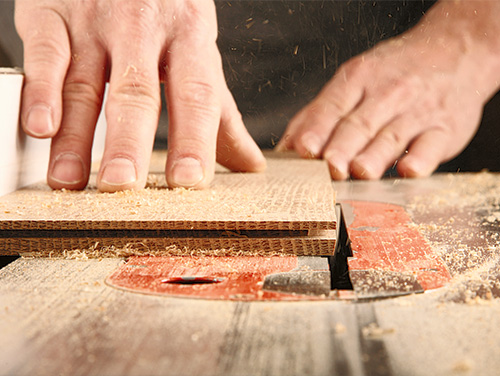
When you are done plowing the grooves into the sides of the panel, it is time to put the 15° angle onto the panels. You can do this with a plane, or using the table saw.
Clean Up: Polish and Glue
Once the mortise-and-tenon joints and the grooves are made, the machined surfaces can be planed smooth. In this instance, planing was made easy because the material had been carefully selected — in addition to its attractive figure, it planes beautifully. As stated earlier, I used straight-grained quartersawn white oak: a classic Arts & Crafts species. Before any subassemblies are glued and clamped together, I apply a polish (a “finish” in “States” terms) to the areas that would be difficult to reach after assembly. Salad Bowl oil by General was the finish I chose for the cabinet. It is a durable finish that is easy to apply and builds up quickly. Gluing up the frame subassemblies is made easy because the frames are flat — even so, check for square and that the frames are out of winding.
Joining the Subassemblies
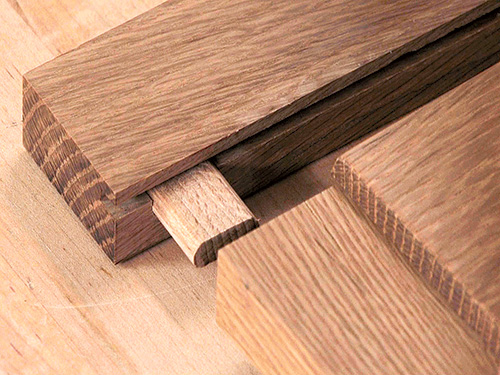
Before I could assemble the case, mortises for the upper and lower rails at the front of the cabinet needed to be cut, as did the matching mortises on the rails themselves. Once again, the Domino loose tenon system was used here. That done, the next step is to join the subassemblies together. I butt joined the sides to the back, but to help align the joint during glue-up, I used biscuits as shown in the Drawings.
The biscuits were glued into the back panel and allowed to cure, to simplify the final glue-up. Now it’s time for a dry clamping runthrough. Gluing and clamping, especially a large assembly like this one, is best done as a two-person effort. In this case, LiLi Jackson, who was my co-host in the DVD series, lent a hand. After the dry clamping, we glued and clamped the cabinet case together — as always, testing for square by checking the diagonals and making adjustments as needed.
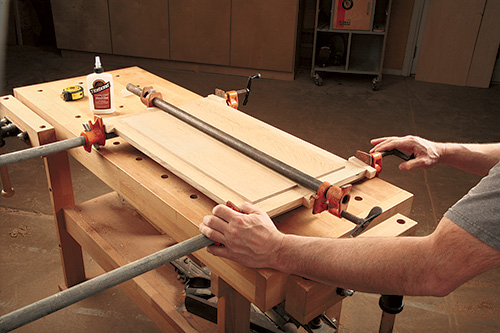
With that step completed, mount the ledgers to the top and bottom of the cabinet. It’s best to predrill holes in the ledgers, which are for the screws that will later secure the top and the bottom in place. The butt joined piece that you prepared earlier for the bottom can now be fitted. Plane off the machine marks and apply the polish. Do the same with the top. When the finish has cured, attach the top and bottom using screws driven up through the ledgers. Make the feet next, and glue them in place. Your cabinet will suddenly start to look like a piece of furniture.
Making and Fitting the Door
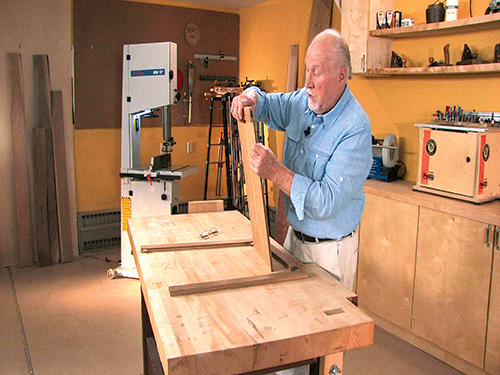
The book-matched paneled door is made to fit into the space between the sides of the cabinet. The top and bottom edges of the door nest on the top and bottom front rails, which act as doorstops. These rails are set back so they hold the door standing proud of the edges of the cabinet about the same amount as the panel stands proud of the frame.
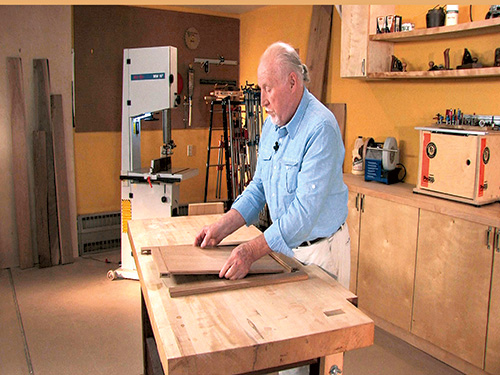
A more traditional case construction would dovetail the top and bottom rails in place so they present an edge at the front as do the sides. In the traditional construction, you’d be required to fit all four edges of the door to the opening; in this construction, you need fit only one edge of the door.
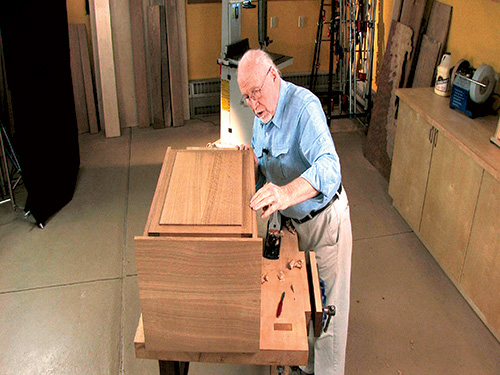
The rails are turned through 90° (see the Drawings for details) so they could be attached to the sides using a Domino. The length of the door is the same length as the side panels. The alignment of these parts, and the shadow caused by the door standing proud, make for a comfortable detail.
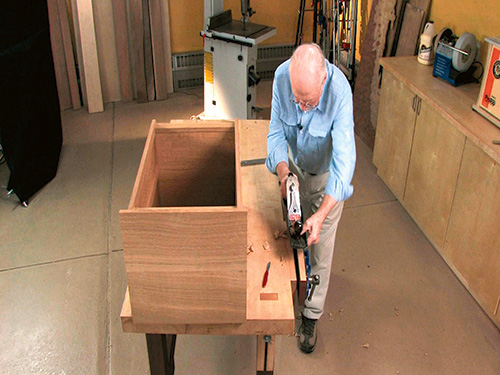
The first step in hanging the door is fitting the door to the opening. Here, I planed the edge of the door to fit the width of the case opening. There should be about 1/32″ gap between the edges of the door and the sides of the cabinet before you move on to mounting the hinges.
Making a Hinge Gain
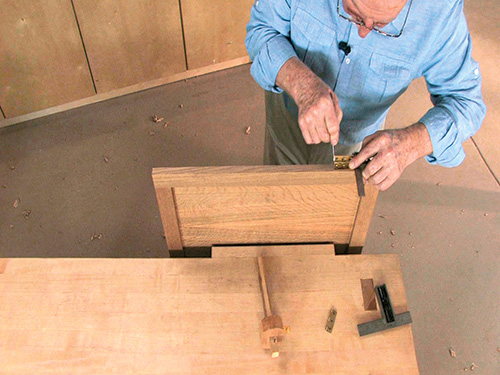
There is no formula as to where to position hinges, but they should end up equidistant from the top and bottom of the door. You mount them into the door first, holding the hinge in place and marking its length with a knife mark at each end.
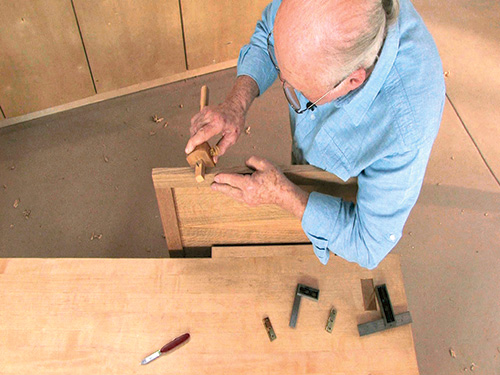
Square that mark across the wood with a try square. Now turn to your marking gauge. To mark the width, set the gauge with its fence on the flap and the spur to the center of the barrel, and scribe a line.
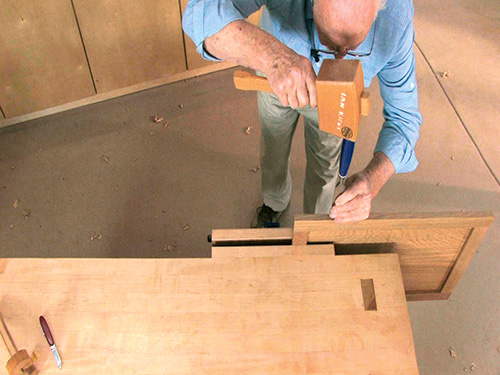
Next, set the gauge to the depth. With the face of the hinge on the fence of the gauge, adjust the spur to the center of the hinge barrel and mark the wood. The waste can be removed with a 1″ chisel. Start by cutting the end grain about 1/8″ in from the knife line, then rough out the gain, staying 1/8″ inside the lines.
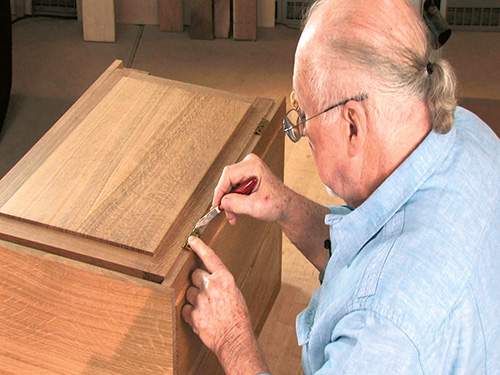
Complete the gain by chopping back until your last cut is in the knife lines. Drill pilot holes for the screws and put a steel screw in first, and then replace it with the brass screw. When you have completed these steps on the door, repeat them on the cabinet.
Fitting the Hinges
The door is hung using a pair of butt hinges. The preferred hinges are solid drawn brass. A less expensive alternative is pressed brass (get the solid ones: your work deserves it).
The area that is cut away to accept the hinge is known as the “hinge gain.” Properly done, the hinge should fit into the gain tightly so that the weight of the door and any other pressure is transferred to the end grain wood of the gain, not the screws. It is not a task that can be done in a hurry, but a properly fitted door is a pleasure to use and one of the benefits of furniture that you make yourself.
The Last Details
With the door hung and swinging freely, there are a few more details to complete. Although the rails on the front of the cabinet act like a doorstop, the door still needs a door catch. I used a solid brass catch that securely holds the door in place and both closes and opens with a substantive click. The pull on the cabinet door is likewise solid brass … it matches the hinges and the door catch.
Earlier, you butt glued together a panel to become the shelf. It is time to fit the shelf into the cabinet opening. When it fits, plane it smooth and apply the finish. There are many ways to mount a shelf in the cabinet, but for the sake of simplicity and to continue the elegant look of this piece, I simply drilled shelf-pin holes into the stiles and did not make the placement of the shelf adjustable. I chose to locate it in one position, but the choice is certainly open to you. The last thing to do is break the edges of the top with worn sandpaper. Then apply final coats of finish
until you are satisfied.
This little bedside cabinet is an excellent example of frame and panel construction and provides a good exercise in hanging a cabinet door. But more than that, it is a useful and beautiful piece of furniture that will provide years of service.


