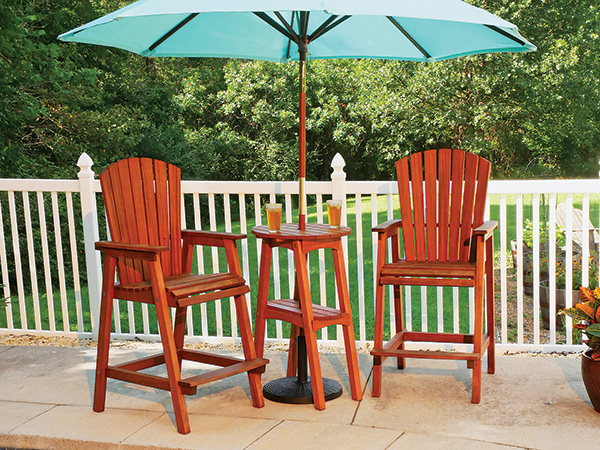
If you’ve built a set of the tall Adirondack chairs that appeared in our April issue two years ago, here’s a freestanding table to complement them and make your outdoor time in these tall chairs even more enjoyable. While the table mimics the slatted styling and angled legs of those chairs, it also includes through holes in the top and shelf so you can use it with a patio umbrella on those sunny, really hot days to come.
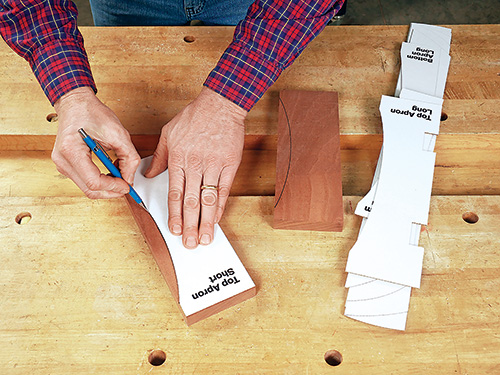
Rockler offers a 10-piece set of corrugated cardboard templates for this table that will help you trace its top oval and all of the other curved parts. If you only plan to build one table, you could simply trace the templates onto your stock and cut the pieces with your jigsaw or band saw, taking care to stay a little outside those layout lines so you can sand the pieces to final shape.
Another method I’ll recommended, especially if you plan to build multiple tables, is to trace the corrugated shapes onto 1/4″-thick plywood, MDF or hardboard and then cut out and sand them to make a more durable template set that will be ideal for template routing. Template routing is a quicker way to make multiple identical pieces, which adds efficiency to the overall construction process.
Building the Tabletop Assembly
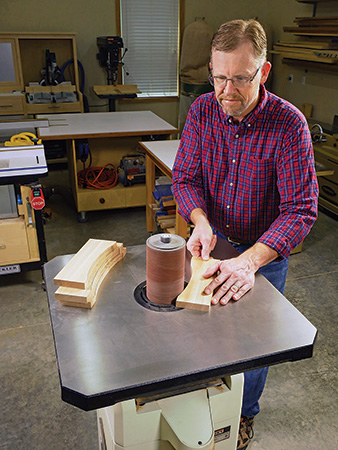
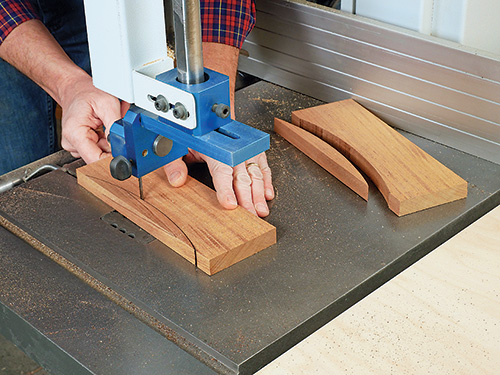
Start your table project by ripping and crosscutting seven blanks for the top slats to rough length, according to the Material List. Use the four top slat templates to trace their curves onto these workpieces. Cut the curves to shape with a band saw or jigsaw, cutting just outside the layout lines. Sand the curves smooth and up to the layout lines.
Now cut blanks for the short and long top aprons to size. Use the kit’s pair of templates to trace the bottom curves onto these blanks. Cut the curves to shape, and sand them smooth. Then, ease just the curved areas of the aprons (not the adjacent flat edges) with a handheld router and 1/8″ roundover bit, a file or a sanding block. Sand the apron faces smooth.
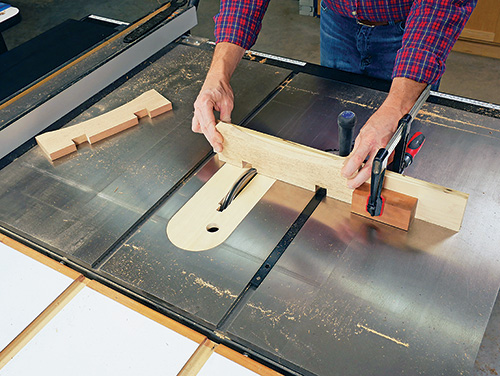
Notice in the Drawings that the top slats are secured to the long top aprons with two cleats that pass through a pair of notches in each apron. Mark these 3/4″-deep, 1-3/8″-long notches along the top edges of the long aprons. Position the notches 2-3/8″ in from the part ends. Then install a wide dado blade in your table saw, and cut the notches in a series of side-by-side passes, backing up the workpieces with a miter gauge equipped with a sacrificial scrap fence to reduce tearout.
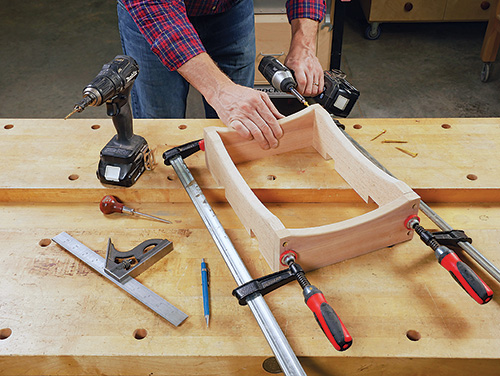
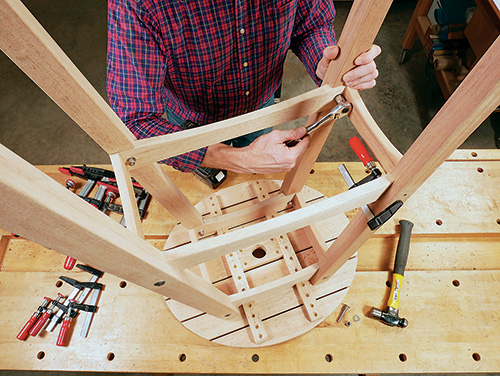
With that done, you’re ready to assemble the short and long top aprons into a subassembly using a pair of 2″ counterbored screws at each joint. Arrange the parts so the short aprons overlap the ends of the long aprons.
Rip and crosscut the two cleats to size that will fit into the top apron notches. Ease the sharp ends on one face of each cleat with a handheld router and chamfering bit, a file or on the disc sander. Aim for a 1/4″ x 1/4″ chamfer on these parts.

Go ahead and install the cleats in the notches of the long aprons with a single countersunk 2″ screw at each joint. Orient the cleats so their chamfered faces are down (toward the bottom curved edges of the aprons). The cleats should overhang the outside faces of the aprons by 4-1/4″.
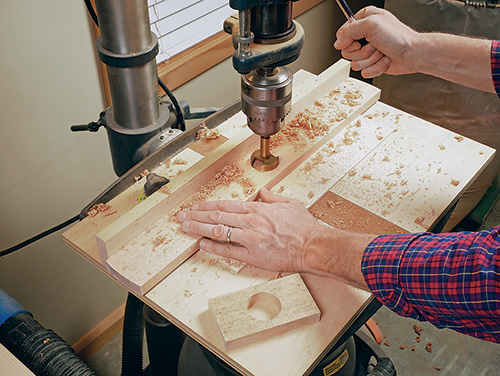
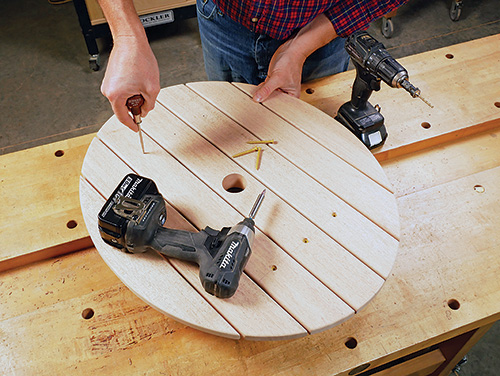
If you’d like to use this table with a patio umbrella, the center top slat requires a 1-3/4″-diameter through hole to fit a typical 1-1/2″-diameter umbrella pole. Mark the centerpoint for this hole on the slat. Then rip and crosscut two blocking pieces to size — one of these will reinforce the top slat from beneath in the hole area, so it also requires a centered hole for the umbrella pole. Install a 1-3/4″ Forstner bit or hole saw in your drill press, and bore a hole through the slat and blocking piece. Back the workpieces up against a clamped fence.
Next, ease the sharp edges and ends of the top slats with a handheld router and 1/8″ roundover bit, a file or a sanding block to reduce splinters. Sand the slats smooth.
Check to make sure the blocking piece fits between the tabletop cleats in the aprons. Then glue the blocking to the bottom face of the center top slat with the umbrella pole holes and part edges carefully aligned. When the glue dries, reinforce this connection with four 1-1/4″ screws driven through the blocking and into the slat. Recess these screws into counterbored pilot holes to maximize the screw penetration.
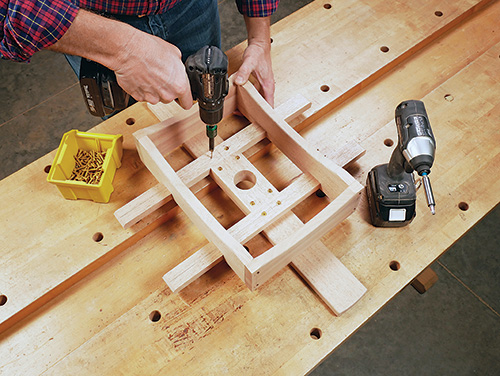
Install this center top slat on the apron subassembly with the blocking fitting between the cleats. First, invert the apron subassembly so the curves face up, and adjust the top slat so it’s centered on the lengths of the cleats. Then, drill a pair of counterbored pilot holes through each cleat at the slat location, and fasten the cleats to the slat with four 1-1/4″ screws. Again, the counterbores help to ensure maximum thread penetration of these short screws into the slat.
With the center slat attached, you can install the other six top slats on either side of the center slat to form the table’s oval top shape. Align the ends of the slats carefully with one another to create smooth curves, and separate the slats with 1/8″-thick spacers. (Here’s a tip: 2d common nails make good spacers for this purpose.) Attach the cleats to the six slats using four counterbored 1-1/4″ screws per slat, spacing the screws evenly along the cleats.
Now flip the tabletop over so the slats face up, and draw a layout line across the middle three slats, centered over the short aprons. Mark each of these slats on the layout line for a single centered screw that will attach the slats to the short aprons. Drill counterbored pilot holes, and fasten the slats to the aprons with 2″ screws.
Making the Laminated Legs
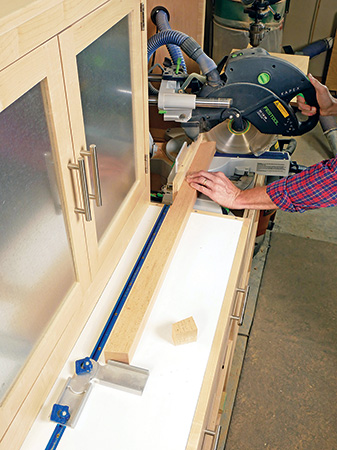
I made the table’s 1-1/2″-thick legs from two 3/4″ laminations for added stiffness and to take advantage of common lumber thickness (but you could certainly use 8/4 lumber planed to 1-1/2″ thick, if that’s available to you). Start by face-gluing and clamping two 4-1/2″-wide, 37″-long boards together to form a blank that’s wide enough to produce two legs. Prepare two of these blanks. When the glue cures, rip each blank into two 2″-wide legs. Then, swivel your table saw’s miter gauge or your miter saw to 79 degrees (or 11 degrees, depending on the tool) and cut the four legs to length. Their long edges measure 36-1/8″; make sure the angles on the ends of the legs are parallel to each other.
The Drawings will show you that each leg requires a 3/4″-deep x 3-1/2″-wide rabbet at the top to house the table’s top apron assembly. Each leg also receives a 3/4″ x 2-1/2″ notch for the lower apron assembly that supports the shelf. Note that the rabbet shoulder and the notch are parallel with the angled ends of the legs. Lay out these rabbet and lower notch cuts with a bevel gauge, following the Leg Details drawing. It’s also a good idea to mark the legs so you can keep their position and orientation clear.
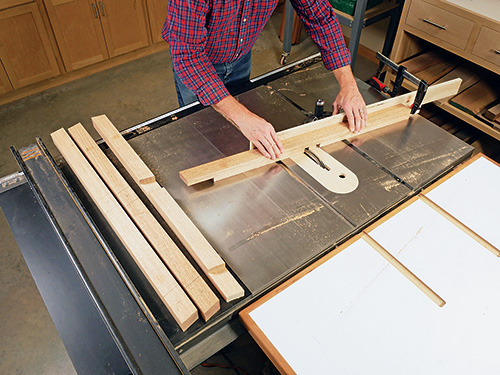
You’re ready to head to the table saw to cut those joinery details in the legs. Install a wide dado blade, and mill the rabbets and notches in the legs using a series of side-by-side passes. Support the legs from behind with your saw’s miter gauge swiveled 11 degrees off of square and equipped with a long scrap fence. Clamp a stop block to the scrap fence to register the rabbet shoulders and notch locations accurately. Work carefully when making these cuts to be sure your miter gauge is angled correctly, depending upon which leg you’re cutting: it will be swiveled left for two legs and right for the other two; they are mirror opposites.
the tabletop slats and its outer edge is even with the bottom (curved) edge
of the short aprons, as shown here.
Check to make sure the top and bottom aprons fit the rabbets and notches you’ve just cut before moving on from the table saw. If they do, shape the bottom sharp corners of the legs into 1/4″ curves to make them less likely to splinter when the table is dragged over rough surfaces. Then ease the legs’ long edges with a handheld router and 1/8″ roundover bit, a file or a sanding block. Sand the legs smooth.
Assembling the Lower Framework
Building the shelf’s apron assembly follows the same process as the one for the tabletop: rip and crosscut blanks for the short and long lower aprons, draw their curved profiles using the corrugated templates and cut them to shape. Ease their curved edges and assemble the apron framework with pairs of counterbored 2″ screws at each overlapping corner joint.
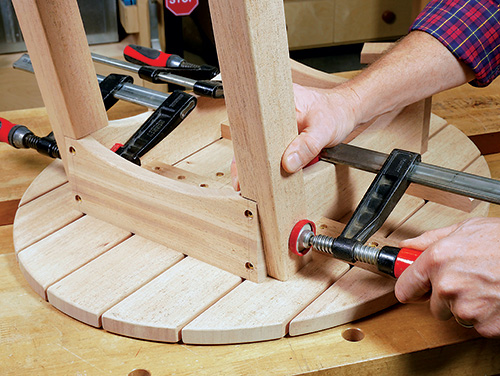
Invert the tabletop assembly on your workbench in order to clamp the legs in position against the long aprons. Align the outer edge of each leg so it intersects the bottom outside corner (curved edge) of the short aprons. Doing this will cause the opposite edge of the short aprons (directly beneath the tabletop slats) to project beyond the legs by 3/4″.

Now set the shelf apron subassembly into place in the leg notches. Adjust the legs so they intersect the bottom outside corners of the short shelf aprons in the same fashion as the top aprons do. Clamp the legs to the long shelf aprons to hold them in place.
Grab your pencil so you can mark the legs for a single centered carriage bolt at each joint that will secure the rabbet tongues and notched areas of the legs to the upper and lower apron subassemblies. Bore a 5/16″-diameter through hole at these eight layout marks. Fasten the leg/apron joints together with stainless or galvanized 5/16″ x 2″ carriage bolts, washers and locknuts.
It’s now time to cut three slats for the shelf and mark their curved ends with the corrugated templates. Cut the slat ends to shape, ease their sharp edges and sand the slats smooth. When that’s done, mark centerpoints on both the longest shelf slat and the second blocking piece you cut initially for the umbrella pole holes. Bore these holes through the workpieces at the drill press. Glue and screw the blocking to the bottom face of the center slat with the umbrella pole holes carefully aligned.
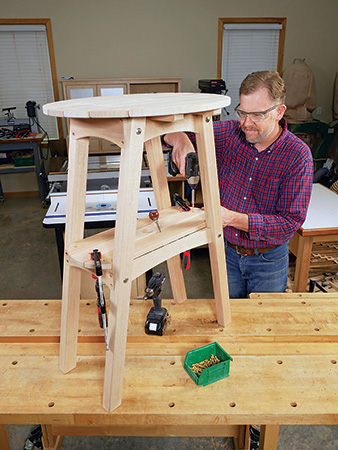
Stand the table right-side up, and set the shelf slats in place on the lower apron assembly. Align the curves of the outer two shelf slats with the inside edges of the legs. Adjust the middle slat evenly between the outer slats to form 1/8″ gaps between them and so the end curves line up well. Clamp the slats to the aprons, and fasten them with a single counterbored 2″ screw driven into the aprons at each joint location.
Wrapping Up with Wood Plugs and Finish
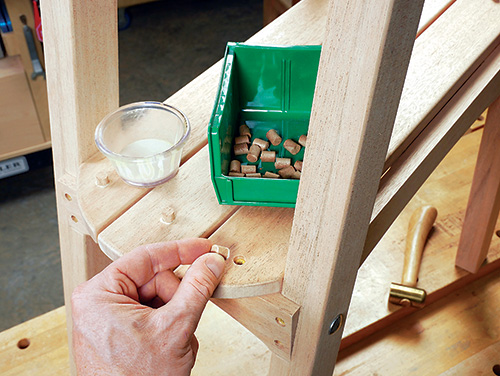
I cut and installed tapered wood plugs to hide the screwheads at the corner apron joints and where the screwheads are visible on the top and shelf slats from above. (It’s not necessary to fill the counterbores in the tabletop cleats, which aren’t visible when the table is standing upright.) Apply your choice of exterior stain, paint or other wood finish to complete the table. When it dries, it’s time to find that patio umbrella!
Click Here to Download the Drawings and Materials List.
Hard-to-Find Hardware:
Table
Bar Height Patio Table Templates (1) #61795
Bar Height Table Hardware Pack (1) #63918
Chairs
Bar Height Adirondack Chair Plan, Templates (1) #56771
Bar Height Adirondack Chair Hardware Pack (1 chair) #57269


