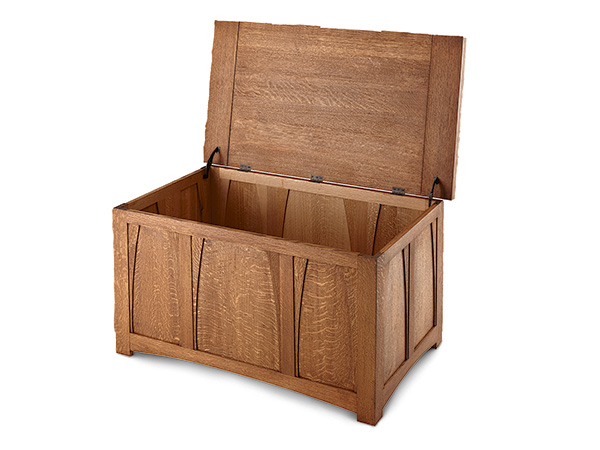
Solomon, who was acclaimed as the wisest man to ever live, is famous for saying that “There is nothing new under the sun.” Who knew that the ancient king was a woodworker? (He may have even been a fan of the Art & Crafts style — it seems like it has been around for at least that long.) So I was really intrigued when editor in chief Rob Johnstone asked me if I wanted to help his staff at the Journal work out a design for an Arts & Crafts blanket chest that would include a couple of twists. After all, the style is well-established…what sort of twists could he have in mind?
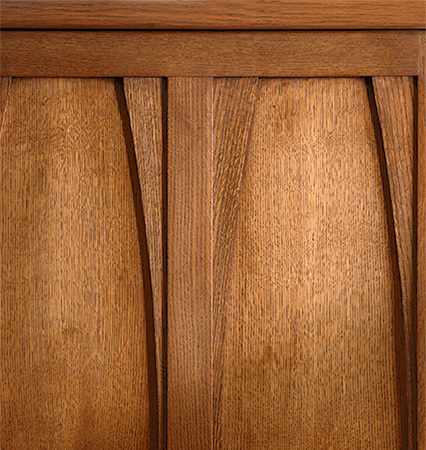
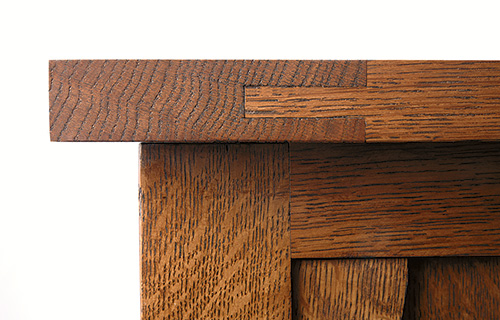
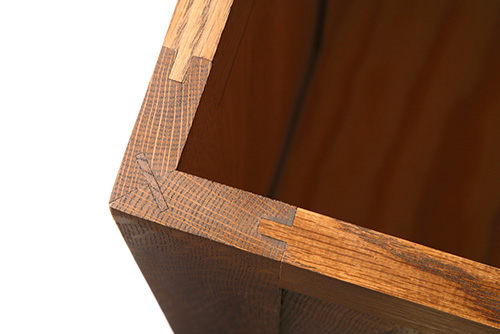
Some aspects of the project were not at all a departure from the Arts & Crafts genre: its quartersawn white oak lumber is strictly Stickley in its origin. We also worked out a stain and finish that closely mimicked existing Stickley finishes. The exposed breadboard end joints are a step away from traditional Stickley construction — although the concept of exposed joinery is right in the Arts & Crafts sweet spot. The “corner posts” are one area where we took our own path. In an early 1900s piece, these posts would have been full thickness chunks of wood — we chose to miter 3/4″ stock to create the look of a solid leg. You might think that the arched cathedral panels were a bit of extracurricular design, but you would be wrong. That look is pure Stickley — but how we went about constructing those panels with their adjacent curved stiles is a 21st century take on the look. As a result of our design process and decisions, I think this blanket chest not only turned out to be a solid representation of the Arts & Crafts style, but a really fun project to build.
It Starts with the Wood
While you might just possibly be able to get away with cherry lumber for this project, the choice of quartersawn white oak lumber is absolutely the way to go. And be certain to select your stock so that its figure is shown off to its best advantage. All quartersawn stock does not display equally. Some has regular straight grain without many medullary rays — but other boards show off the classic quartersawn flake (the rays mentioned earlier) with serious flair. Work out in advance where you want each type of grain to be most prevalent. I wanted the dramatic flake to be most visible on the book-matched flat panels and in the aforementioned corner posts. One of the big advantages of building up the posts is that I was able to show quartersawn figure on both exposed faces of the posts.
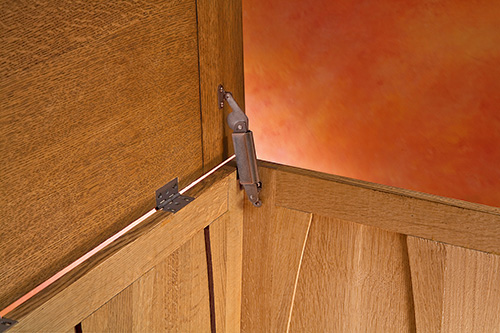
The whole of the chest is made, or resawn from, 3/4″ stock. The significant exception to this is the lid, which is formed from 1-1/4″ stock. There are a couple of lid supports that hold the top in an open position, and I chose solid brass butt hinges to attach the top to the chest, although other options would have been fine. One important note: As this chest is configured here, this is not a toy box. The lid is heavy, and the hinges and lid supports do little to hold back the momentum of the top when closing. Little children and this chest should not mix.
Frame and Panel and Then Some
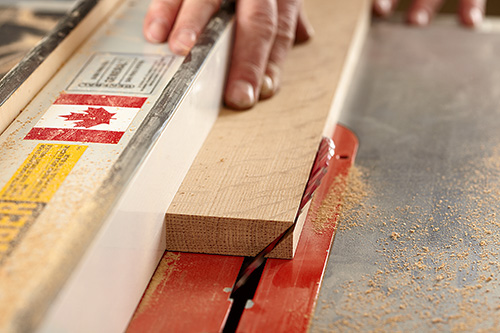
This chest is constructed using frame and panel joinery and, in that regard, it is pretty much bread-and-butter woodworking. Where it starts to get a bit tricky is that some of the rails are curved, and that means the panels must match that shape. But before you have to worry about that, you need to start with the posts and rails. Start by cutting the post parts to width and length from prepared stock (pieces 1).
When you use solid hardwood like this, it is a good idea to get it into your shop a week or so before you start to work it. That lets it settle into the environment and stabilize. Now that you’ve started selecting and cutting out the frame pieces, go ahead and machine all the rectilinear rails and stiles to length and width (pieces 2 though 6). Although it is easy to get into a routine when cutting these pieces, take time to select the appropriate figured wood for each of these parts and to mark them to indicate their position on the blanket chest. In an additional bit of machining, all of the bottom rails have a gentle curve scribed and cut on their lower edge. I used a thin flexible piece of wood, which I flexed using a long pipe clamp. I traced the curve onto one of the front and back bottom rails and a complementary curve form in the same basic manner onto one of the bottom side rails. Then I stepped up to the band saw and sliced the curve onto the rails. After I had trued up the shapes using a sander, plane and a bunch of elbow grease, I transferred that shape onto the remaining two rails and repeated the procedure.
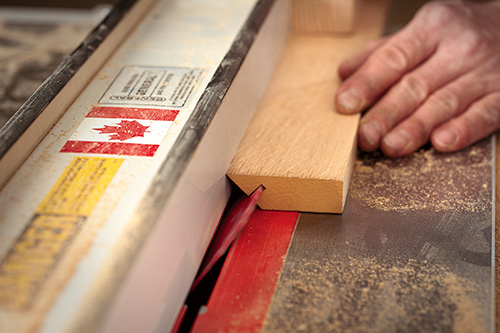
The post parts also need a bit of machining. In addition to the groove on one long edge, they are mitered along the other edge (see the Drawings for construction details) and then have a spline groove cut into the mating edges. (The splines will help a great deal when you align the post parts during glue-up.) All of this is done on the table saw. Once you have the spline grooves cut, go ahead and cut the splines (pieces 7) and fit them to the spline grooves. The post parts also have stopped grooves plowed, top and bottom — see the Drawings for details — that are 1/4″ wide and 3/8″ deep. I formed these on my router table with a 1/4″ straight bit.
Mortise and Tenons
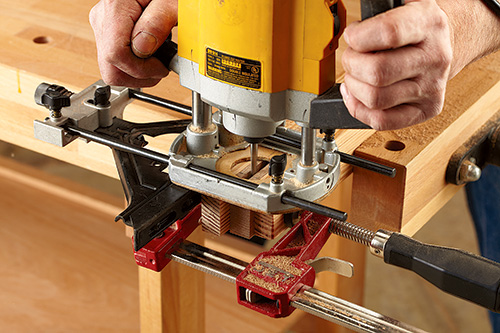
The next step to consider is machining the various mortises and tenons on the stiles and rails and post parts. It is my habit to form the mortises first, so that I can fit the tenons to match them. First, I carefully marked where each mortise was to be cut. My technique is to clamp the stock that I will be machining between two pieces of wood in my bench vise. In this case, I used a plunge router with a 1/4″ straight bit chucked into the collet.
After setting the cutting depth on the router (I like the depth to be slightly greater than the length of the tenons), I use an edge guide attachment to locate the placement of the mortise. I highly recommend testing your setup on scrap material. When you are pleased with your setup, go ahead and form the mortises. I square up my mortises with a sharp bench chisel.
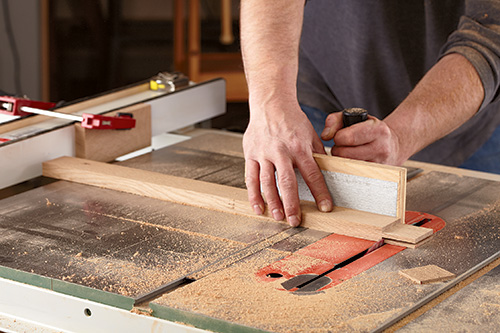
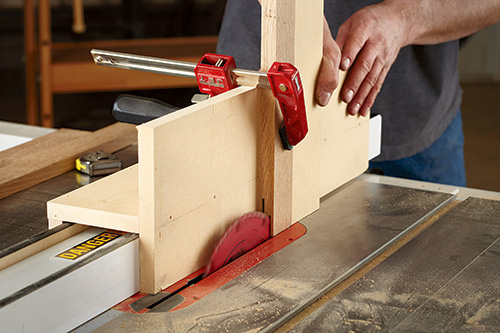
To help form the tenons on the ends of the straight stiles, I made a simple little jig that slides over the fence on my table saw. It is made from MDF and is sort of H-shaped. The upright stop on the long side holds the stiles square to the table saw blade. Clamp the stile in place and you can start the tenons with just one cut per side. (If you own a factory-made tenoning jig for your table saw, it will do nicely as well.) Set up and test your cuts with properly sized scrap lumber. When you have the cuts dialed in, cut all the cheeks and then move on to the shoulders. The shoulders are formed using the miter gauge on the table saw. Be sure to use a hold-off block to be safe. Cut the shoulders and set them aside.
Curved Stiles
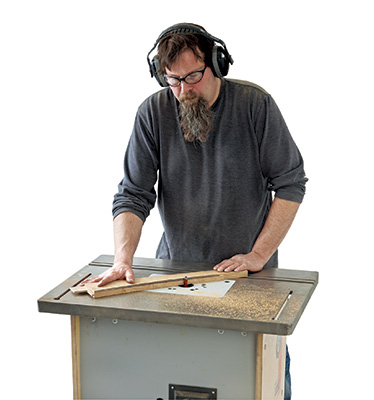
The most striking visual aspects of this chest are the arched stiles and panels. The most complicated joinery on the project is fitting those two components to each other. If you’ve read any of my previous articles, you probably already know that pattern routing is going to be the key to solving this conundrum.
Begin this process by cutting the curved stile blanks to size (pieces 8). I selected stock that had a similar grain pattern for all these parts, and I recommend that you do the same. Next use the gridded pattern found in the scaled Drawing to form a template for the curved edge on the stile from 1/4″ hardboard or MDF. Take care to keep this curve fair and true, because you will be routing that shape onto all the curved stiles. Before you start cutting the shape onto them, you will need to glue the curved stile blanks into their common straight stiles (it is a simple butt joint…see the Drawings for details). Once those subassemblies are done, trace the curved line onto the curved stiles using the template you made earlier. When you’ve got all the parts properly marked, go back to your band saw and rough out the shape. Stay just outside of the pencil line as you make your cut. The less material you need to trim while pattern routing, the easier that task will be.
I used a pattern routing bit (bearing at the end of the bit) in my router table to machine the curved stiles to their final shape. Attach the template to the workpieces with double sided carpet tape. In cases like this, where you are removing just a small amount of material and where any tearout will be a disaster, I use a climb cut to do the deed. It can be a little bit hairy, but in this case it is the way to go. Take your time and machine all the curved stile subassemblies, then set them aside for now.
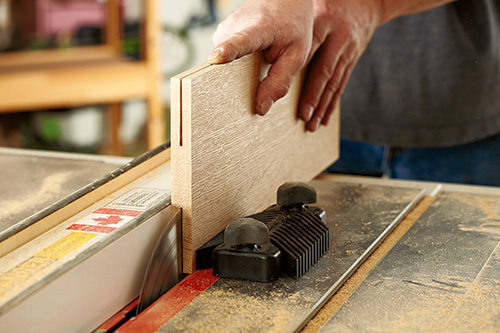
In order to make the book-matched flat panels (pieces 9 – 11) at the center of each of the frame sections, you will need to resaw 3/4″ stock and machine it down to a final thickness of 1/4″. I resaw wide panels in a two-step process that I think adds some control. First, I cut kerfs into the edges of the board on my table saw. Then I step to the band saw and complete the cut. The saw kerfs make it much easier to keep the band saw blade perfectly on track. It works really slick. When the pieces are all resawn, I mark them so that I don’t mismatch them later on, and then take them to the planer to remove the saw marks, surfacing them to just a bit thicker than their finished dimension. With great care, edge glue these pieces together with their mates.
While the glue cures, grab some 1/4″ MDF or hardboard. Lay out and make full-size templates of all three flat panels. Once again, the curves must be fair and true. That curve is the reciprocal shape that you made on the curved stile template. Use that template to make the lines on your panel templates. Go ahead and cut the template to the rough shape and then use a combination of a sander and a file to get the shape just right. (You could just make one template and use it to make all the curved pattern cuts, but I found it easier to have one for each of the panels.)
Take the glued-up panels out of their clamps and clean up the glue line. Surface the panels to their final thickness — I used a hand plane for this task. When all the panels are ready, mark the curved lines onto them using your templates as a guide. Now, step back to the band saw and do some careful cutting as you rough out the shapes on the panels. This is exacting work — cut close to the line, but not into it. With that task behind you, take your pile of pieces over to the router table and pattern rout the final edges onto the panels. Once again, I used carpet tape to adhere the templates to the workpieces, and used a climb cut to avoid tearout. When you are done shaping the panels, go ahead and give them a final sanding — I went up to 180-grit.
Now that the panels are basically done, you can cut grooves into the edges of the curved stiles. I used a bearing-guided slot-cutting bit on my router table to plow those grooves. I needed to make two cuts per groove, so I was able to control the fit just as I wanted it (see the Drawings for the groove details).
Frame and Panel Subassemblies
I won’t sugarcoat this: the dry fitting stage of this project might be a bit trying. There are a lot of parts, and some of them are curved. But at the end of the day, you just need to fit and adjust the pieces like any other frame and panel project.
Dry fit the front and back as well as the side components. When they fit properly, glue them up in subassemblies of a front and back, and side panels. Once these are ready, take them out of the clamps and set up a dado cut that will capture the bottom (piece 12) on all four subassemblies. Plow the dado, cut out the bottom and, once again, do a test fit of all these components. These are big pieces, so an extra set of hands may be of help here. I took the time at this point to pre-finish the flat panels. They are going to float in their housings, so I wanted no stain line to show if and when they shrank a bit. When everything is ready, assemble the pieces using the splines in the corners to help align the miters. Check for square, and allow the glue to cure.
Hinges in the Mix
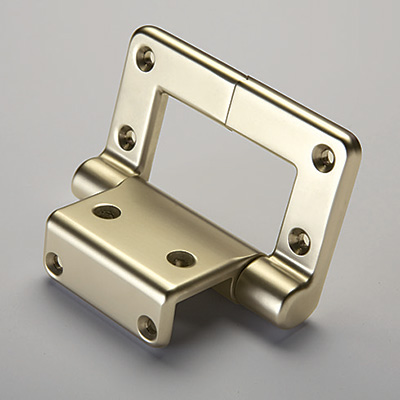
Choosing hardware for a project is often an arm-wrestle between style and function. In the case of this chest, Rob and I debated about using Rockler’s Lid-Stay Torsion Hinges, because they allow nearly any size lid to open smoothly and stay open without additional support hardware.
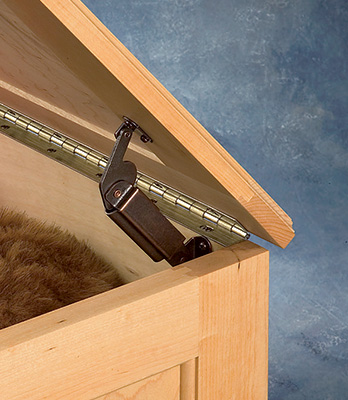
If we had gone that route, the Rustic Bronze color could have worked. Instead, we decided to go with more classic hardware styling for this period piece, to keep it closer to its Arts & Crafts roots: three antique brass butt hinges and a pair of matching lid supports. You could also use a piano hinge or even no-mortise hinges to keep things really simple.
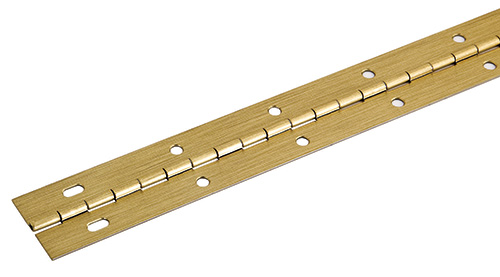
Whatever style of hinges suits your fancy, keep in mind that, at 1-1/4″ thick, this is a very heavy lid. You’ll need some sturdy means of stopping the lid when it’s fully opened or to help slow it down during closing. Rockler sells a variety of lid support options. Buy a pair that are rated for around 125-inch/lbs. of support each to play it safe. Pinched skin and fingers is nobody’s idea of a good time!
Topping it Off
With the case in clamps, you can move on to building the lid. Made from 1-1/4″ thick lumber, it is a fitting crown for a substantial piece of furniture. I glued up the top panel (piece 13) and once again chose to flatten the piece using my bench plane. I cut it to overall dimensions and then formed the tongues using a router and a straightedge. Next, I machined up the two breadboard ends (pieces 14) from the same thickness of stock. I plowed the deep grooves to accept the tongues using just a full kerf table saw blade and multiple cuts. I nibbled away at the opening and kept it centered by flipping the piece end for end with each operation…making two cuts per effort. When I was satisfied with the fit, I glued the breadboard ends onto the top panel. Look to the Drawings for the machining details for these joints.
With the components of the blanket chest completed, I started in on my final sanding and applying the finish. A case this large and with as many different levels (or planes) to deal with means that you really must be methodical in your sanding procedure. I worked from the “highest” to lowest plane as I sanded the piece. I also worked around the perimeter in a set pattern — all this just to help me be sure that I got every piece and aspect smoothed exactly the same. For more discussion of the finish we chose and how it is applied to this project.
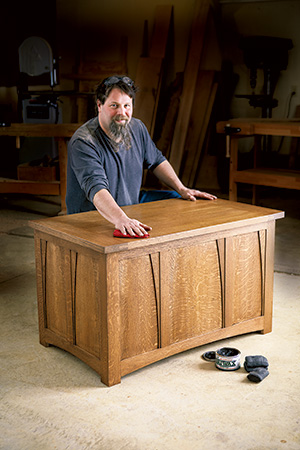
After the finish had cured, I mounted the lid to the case with three solid brass butt hinges. Because the lid is so heavy, I felt it was important to add some good quality lid supports to the mix.
I hope that you take the opportunity to build this blanket chest. It is a sweet little project that nicely evokes the heart of Arts & Crafts style. While there are a couple of challenging details, nothing here is so complex as to move beyond just plain woodworking. Which, in itself, is what makes the Arts & Crafts style so appealing.


