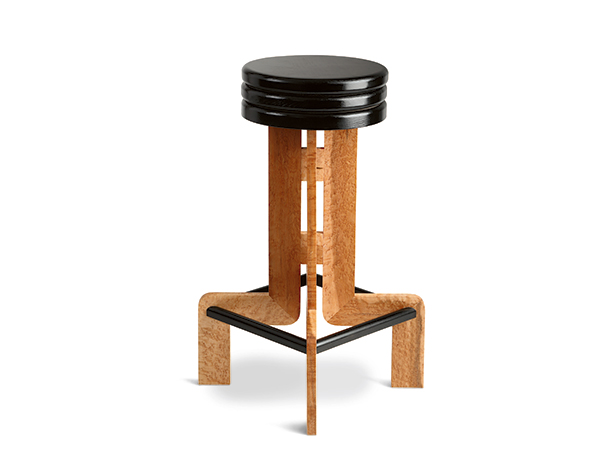
Curiously, I don’t actually have a bar in my house, but I am planning to add one to my kitchen soon. So when a really nice stash of bird’s-eye maple caught my eye, I knew that I needed to buy it and use it to make my stools. In addition to the maple, I used clear pine for the seat sections and foot rails, lacquering them black for a dramatic look. A long weekend in the shop produced two stools and a situation reminiscent of one described by the Beatles. (“I’ve got no car and it’s breaking my heart, but I’ve found a driver and that’s a start!”) I guess it’s time to get going on a new kitchen counter.
Loose Tenon Options
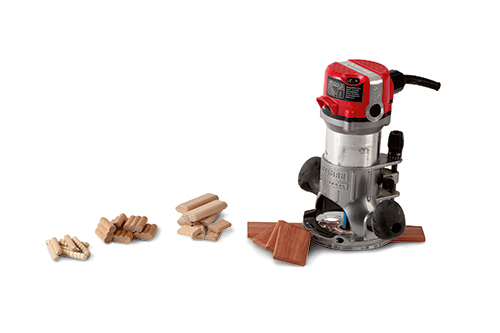
Tremendously useful and structurally sound when done well, the technique of using a loose tenon is not a new one. But in recent years, making the loose tenon joints has gotten even easier, albeit in some cases more expensive. This project is made using the Domino XL loose tenon system. It is on the expensive end of the spectrum, but it is also super easy to use. Other less expensive systems include beadLOCK, dowels or shop made loose tenons.
Kicking it Off
Because I was designing the barstools essentially from scratch, my first work in the shop was building a full-sized mock-up from my rough sketches. When I was satisfied with the mock-up, my next step was to pick through my pile of bird’s-eye to find lumber with the best figure and color. Bird’s-eye figure presents a bit of a challenge, as it easily tears out as you plane it and run it over the jointer, which is the task that follows lumber selection. So I honed my jointer knives and crossed my fingers…with the results being a minimal amount of tearout. When the maple boards were flat, straight and out of twist and with one edge jointed to 90-degrees, I stepped to the table saw to rip stock for the legs to width.
It would be hard to overemphasize how important it is to properly prepare the leg stock. When you start to cut the miters that create the shape of the legs, if your stock is at all wonky, it will make the rest of your work much harder. And speaking of the miter cuts — they, too, have to be dead-on.
Building the Leg Assemblies
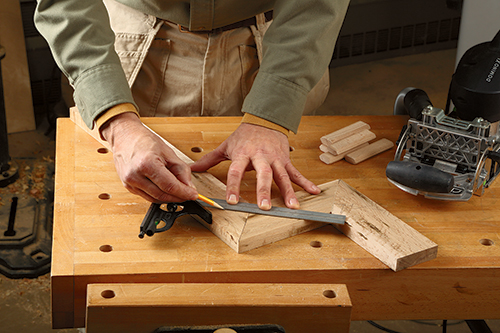
With the stock properly prepared, I stepped over to my chop saw to cut the leg sections
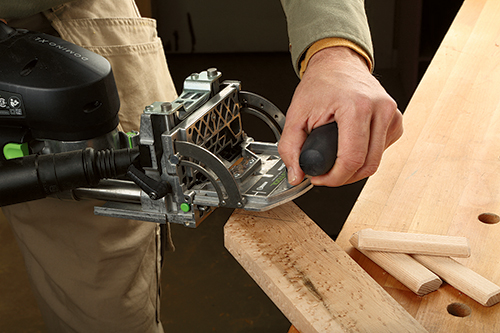
to length. Because I had taken the time to make a full-size mock-up, I was able to set up the saw from those measurements — you can look to the Material List for those details. Cut and miter pieces 1 through 3 to length. Next, mark the locations of the loose tenons at the mitered joints between the lower and center leg components. Form the mortises and test the fit. (If you are making your own loose tenons, there are a couple of extra steps to take here.) If the joints fit properly, glue and clamp them together. Wet both surfaces of the miter joint with a thin coat of glue, and be sure to get glue in the mortises. I found I only needed one clamp to close the joint securely. Allow the glue to cure.
While the glue cures, go ahead and make the crossover (pieces 4) pieces. These short lengths of wood not only join each separate leg subassembly together, but form the joint that secures them both into a single unit; see the Drawings for details. When you’ve cut the crossover pieces to length using a chop saw, mark a center line and cut the through mortise as shown in the Drawings. Then drill a 1/4″ diameter hole for a dowel, centered, on one edge of each piece.
You can now go back and take the lower leg subassemblies out of their clamps and mark and cut the joints that will allow you to glue the upper leg pieces to the glue-ups. When that is done, glue the upper leg sections in place and set them aside until the glue is dry.
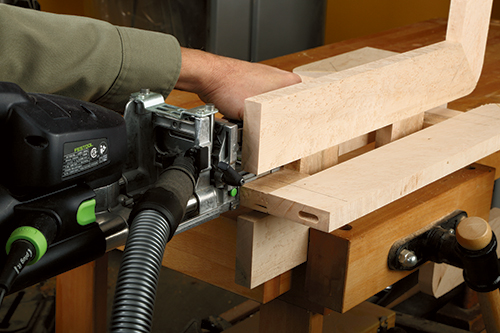
When those components are ready, take them out of their clamps and mark the radii on the mitered corners as shown in the Drawings. Cut the curved shapes — I used a handheld jigsaw, but a band saw would work well — and then sand the saw marks smooth. The pieces are now ready for the next step in the assembly process.
As I’ve already mentioned, the crossover pieces are key to joining the leg subassemblies — and this leads to a moderately complicated glue-up process on this stool project. Start out by locating the crossover pieces between two of the glued-up leg subassemblies that you just completed, as shown in the Elevation Drawings. Mark the mortise locations for the loose tenons in the legs off of the center lines on the crossover pieces and cut the mortises. When that is done and you’ve tested the fit of the joinery, glue and clamp the pieces together. (Take note of the dowel hole orientation!) For our purposes, we’ll call this the primary leg assembly glue-up. When the glue has cured on that effort, take it from the clamps and grab the remaining set of leg components.
Lay the loose leg pieces flat on a work surface in their correct orientation with the crossover blocks between the upper leg segments (these pieces will become the secondary leg assembly). Square up the top ends of the legs to each other and then grab the primary leg assembly and place it right on top of the parts on the work surface. Now, here is the important part: slide the crossover pieces of the secondary leg assembly so that their edges (the ones with the dowel holes) align perfectly to the crossover pieces on the primary leg assembly. Carefully remove the primary leg assembly and mark the locations of the crossover pieces of the secondary assembly using the center lines you scribed on them earlier. At this point, it’s time to cut the mortises and dry-fit the secondary leg assembly to be sure that it fits together properly.
Putting the Legs Together
One small oddity of this project is that the completed leg assembly needs to be put together with the parts standing upright. Gather the remaining parts together for a test fit and practice assembling and clamping the pieces together without glue. The order of assembly is this: put the dowels into their holes in the primary assembly. Push the crossover blocks of the secondary assembly onto those dowels.
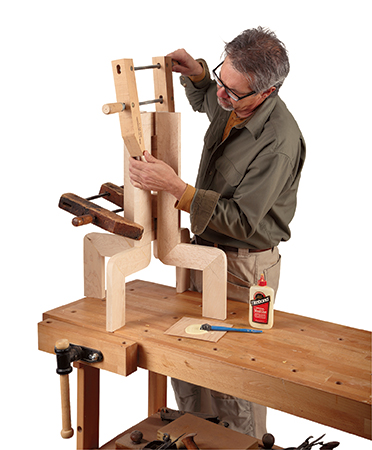
Slide the loose tenons into one of the secondary leg assembly leg segments and then through their crossover blocks. Push the remaining leg segments onto the loose tenons, and clamp them together. Once you’ve done this a time or two without glue, do it for real, making sure the primary and secondary assemblies are at 90-degrees to one another as they cure completely. When that is done, sand the assembly, break the edges with sandpaper and cut the mortises at the ends of the legs. Now you are ready to make the seat.
Sitting Pretty
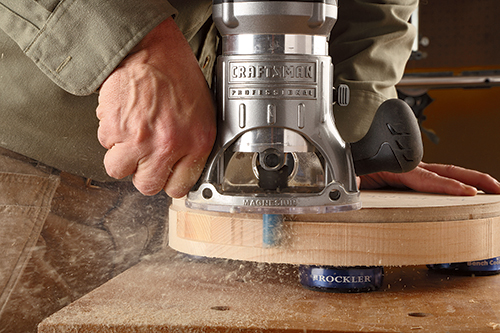
I made the seat components (pieces 8) out of clear pine lumber because it is relatively lightweight, easy to work and paint…and because I had it on hand. Any paintable lumber would work as long as it’s properly dried and not too heavy. To make three identical pieces for each stool, I used a template and a pattern-routing bit as shown in the photo above. Next, the appropriate edges were rounded over, and then the parts were glued and screwed together. I primed the seats with B-I-N® from a spray can and then used black lacquer for the final finish. When it was dry, I transfered the mortise location from the leg assembly, and I cut the matching mortises. Then I glued the seat in place and applied a few coats of Watco® Danish Oil, Natural, to the legs.
The last step was to make a long length of the footrest stock (pieces 7), priming and lacquering it black like the seats. Then I mitered each footrest to fit and nailed it in place. A little black lacquer over the nail holes, and they disappeared.
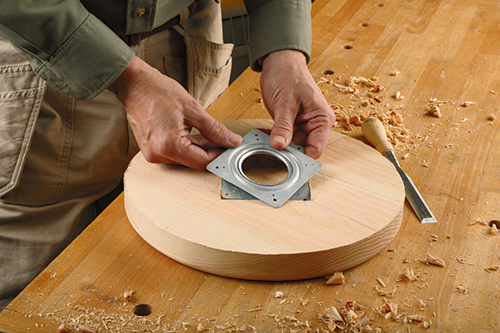
When I brought my first stool to the office to show my staff, they all agreed that I should have made the seat so that it would spin like the stools at a lunch counter. So I made the second one with a lazy Susan between the uppermost seat layers. I have to admit it worked pretty well…but my rear end prefers the solid seat concept. That is an option for you to decide for yourself. Either way, I think you’ll find it a fun project to build. (Now, on to the kitchen bar!)


