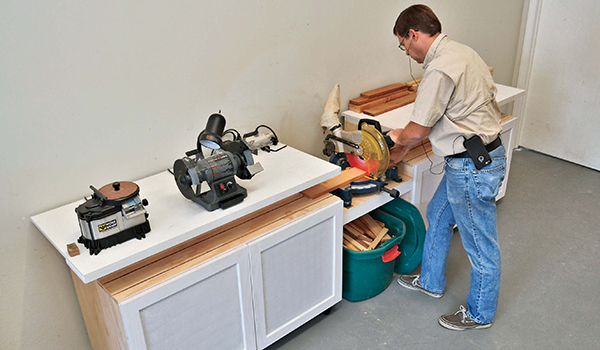
During a recent move, it looked like I might have to locate my shop for some time in a two car garage. I found a more spacious solution, but this forced me to take a hard look at how I could reduce my workspace without losing functionality. I have always thought that my miter saw took up a lot of space for the use it gets, so I spent some time considering how the support tables on either side could serve the saw without sacrificing bench space.
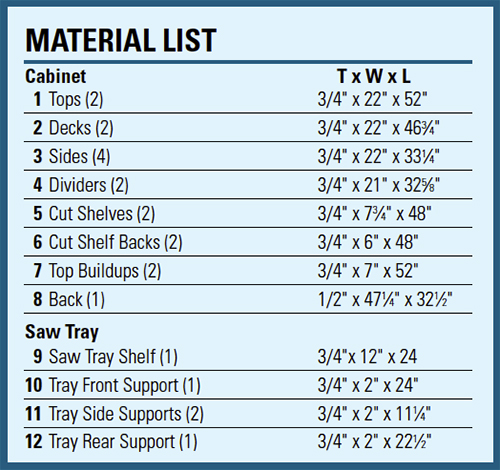
What I came up with was this miter saw station. It is essentially two standard cabinets with the saw mounted between them. Instead of drawers below the counter, a built-in shelf supports the lumber being cut. A 10″ saw can really only cut about 7-1/2″ wide, so 7″ of width is plenty to support the cut. Tucking it under the counter lets me have my miter station AND lots of bench space that does not need to be cleared off every time I want to make a cut. So let’s begin, maximizing your shop space.
Getting Started
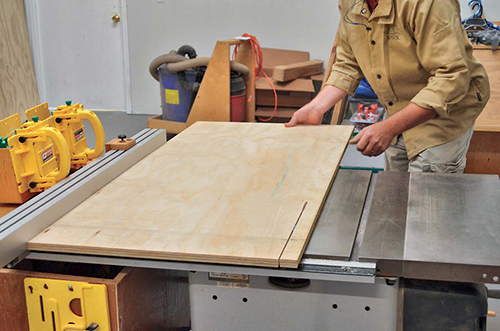
Even in a well-equipped shop, cutting a full sheet of plywood when working alone is difficult and dangerous, so I reduce sheets into more manageable pieces using a circular saw and straightedge. A sheet of rigid foam insulation on top of the sawhorses (or even on the floor) allows you to make the cut without damaging your blade or horses, while supporting the whole sheet during the cut. Just set the circular saw blade to cut through the plywood but not through the foam. The cutting diagrams show you how the three plywood sheets can best be sectioned by hand. Rip about 1/4″ to 3/8″ off one long side to provide a clean edge and crosscut as shown. The smaller sheets are then ripped into the components using the table saw, and then crosscut to length.
Cut Shelf
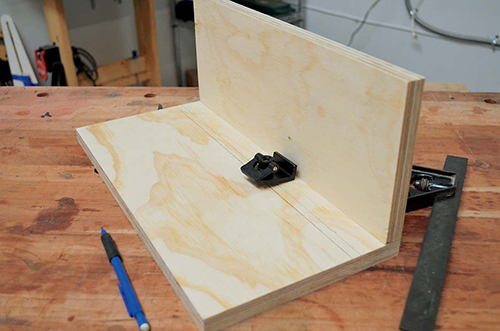
The cut shelf needs to end up very flat and straight to work properly, so it gets built first and the cabinets fabricated to fit the shelf. Save the waste when you crosscut the two shelf parts and the shelf back; they will be useful as setup parts for the next step.
Unlike a portable saw stand, this Miter Station provides two continuous surfaces extending out from each side of the blade, perfect for adding a stop system.
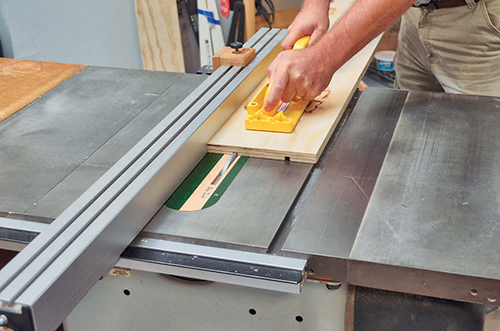
Before assembling the shelves, cut two T slots in them for stops. Plow 3/8″ grooves down the length of the shelves (see the Drawing).
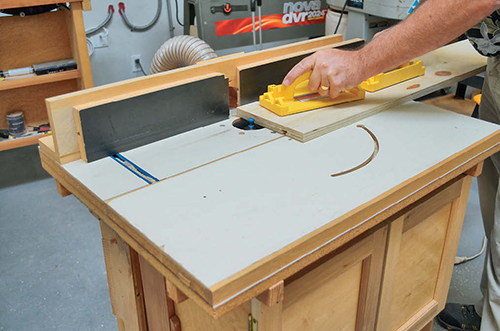
Follow up with a T-slot cutter on the router table. This makes adding stops easy (I used Rockler’s Inline stops).
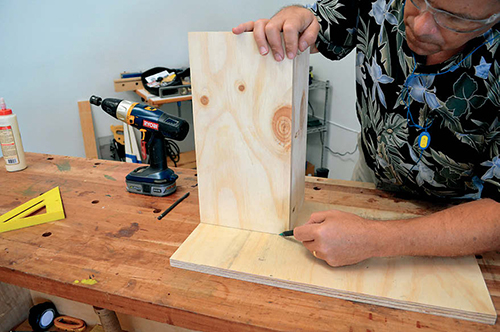
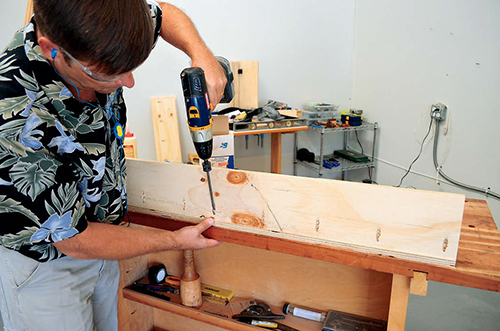
With the cut shelves milled, the backs can be attached. Nothing fancy here: they get glued and pocket screwed along the back edge of the cut shelves.
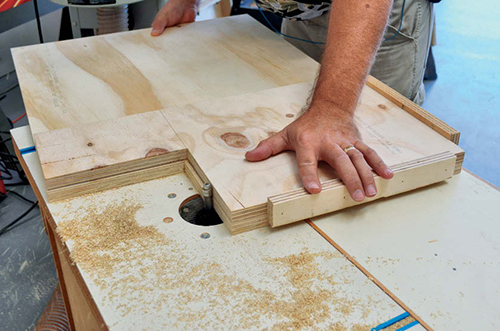
Start at one end and screw them on, working across, keeping them exactly flush with the back edge of the cut shelves. I assembled the cutoffs, too, so I have a sample part that will come in handy during some setup later.
Sides/Dividers
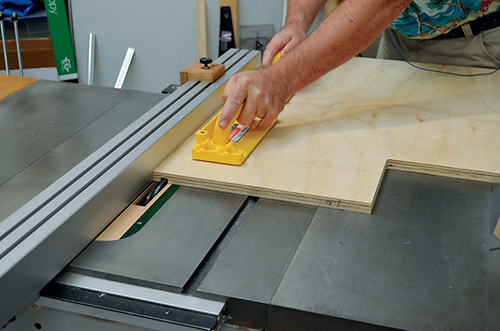
The sides and dividers all need a large notch in the top front corner to accept the cut shelf. There are six to cut exactly the same, so a template is required. I used the cut shelf sample from earlier to mark out a template, then carefully cut and sanded the notch.
Cleats added to the top and front edges of the template ensure alignment. I marked and rough-cut all six parts on the band saw, then flush-trimmed them to match the template.
The bottom inside edges of the sides get a 1/8″-deep rabbet for the deck, and a 1/2″-wide by 3/8″ deep dado to accept the back. This is where the sides become lefts and rights. It is just a shop cabinet, but there is no point in not having the best faces showing.
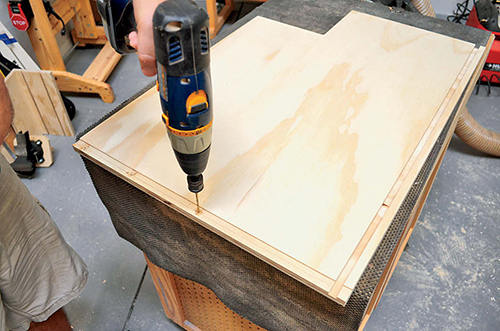
The final step in making the sides is to drill a line of 1/16″ pilot holes along the centerline of the rabbet. You’ll thank me for this tip as you assemble. The dividers need nothing other than the notch.
Deck
The two decks only require a 1/8″-deep, 3/4″-wide dado milled front-to-back along the centerline to locate the divider. Again, drill a series of 1/16″ pilot holes along the dado centerline. Now you can assemble the basic cabinets.
Carcass Assembly
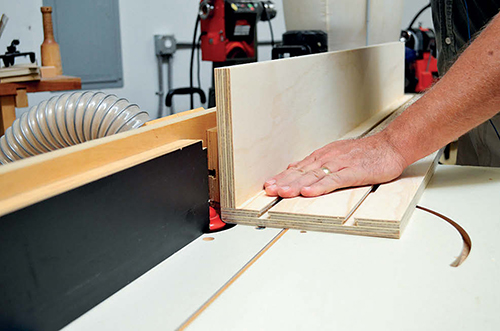
Attach one side to the end of the deck with glue and screws. Then attach the other side in the same way and screw through the deck into the divider.
The routed notches in the cabinets have a rounded inside corner. It is easier to round over the back of the cut shelves to match rather than squaring all the notches.
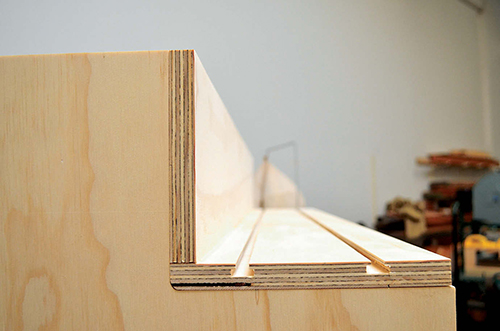
Now the cut shelf can be added to each carcass. The ends mount flush with the sides, but I marked the center of the shelf to help get the divider in the right place. I glued and nailed everything to hold it as I drilled pilot holes and screwed through the shelf into the notches.
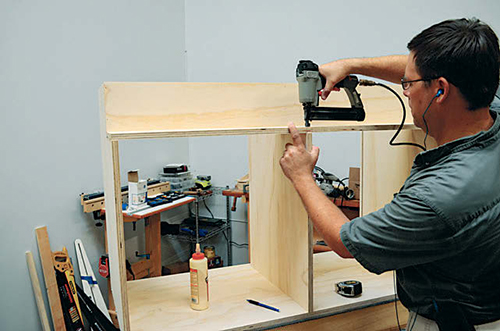
You may have noted the lack of a toe kick. Because the cut shelves need to be aligned very accurately across the station, I chose to use adjustable leveling legs to support the cabinets. This is the easiest way to precisely level and straighten the whole setup, and they are easy to use.
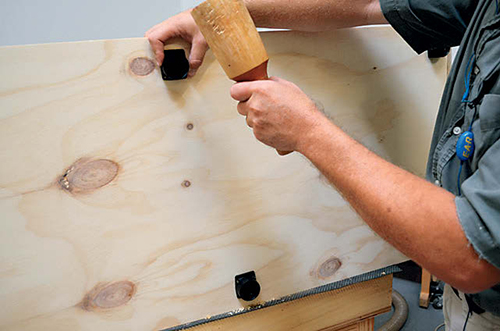
I drilled 5/8″ locating holes in the four corners of each deck and near the centerline. I spaced them about 2″ in from the ends and 3″ in from the front/back. The leveler bracket has an expanding boss that fits into this hole. Driving the pin in from the outside spreads the boss, holding the bracket in place as you secure it with the included screws. The leveler legs then snap into the brackets. Turning the feet adjusts the height up or down.
Set the cabinet on its legs and slide the 1/2″ plywood back into the back rabbet. It rests on the deck and stiffens the cabinet. A couple of brads through the sides will keep the unit from racking.
Saw Tray
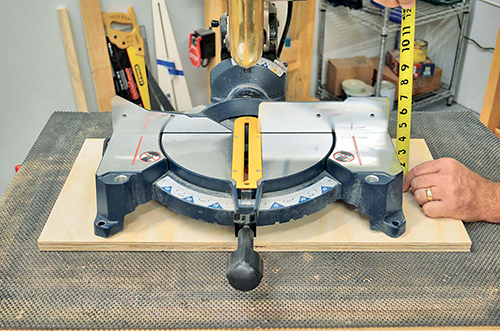
Now the miter saw needs a place to sit. I have included the dimensions used for my saw, but you may need to adjust them for your particular saw.
I cut the shelf parts from the remainder of the plywood. Measuring my miter saw, it was clear that I would need 24″ of space to swing the saw, and at least 12″ to bolt all four feet to the shelf. To stiffen the shelf, I added 2″-wide drop edges around the shelf bottom. I then carefully checked the height of the saw cutting surface. You’ll need this dimension when you mount the shelf.
Setting the Cabinets
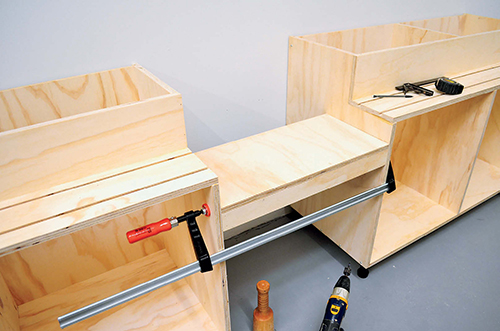
I set these without the tops or doors in place. The weight is manageable and the interiors are open for easy access. Set the two cabinets generally level and spaced apart by the width of your saw shelf. To mark the saw shelf position, measure down from the top of the cut shelf the same distance as the height of the miter saw measured previously. Mine was 3-1⁄4″.
Clamp the saw shelf between the cabinets close to the lines. Set the clamps just tight enough to hold it in place. Use a mallet to tap it into final position, and firmly clamp it in place, but do not screw it in yet. Set the saw on the shelf and check to see that you have the positioning right.
The saw deck should be perfectly level with the cut shelf, and the fence of the saw flush with the cut shelf back. This shelf worked out to be flush with the front of the cabinets. Others may not. No worries: adjust the shelf position until the saw lines up properly.
When positioned, screw the shelf into place. Two or three 1-1⁄4″ screws in each side will hold any miter saw that you can lift. Do not yet secure the saw.
Level and Straight
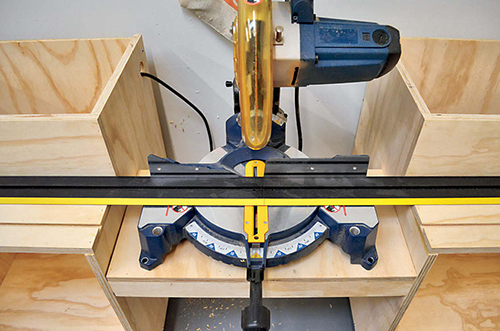
This bit can be tedious, but it is crucial for accurate cutting. To adjust the cut shelf even with the saw fence, set a long straightedge centered on the saw fence, and align the cabinets until everything is touching the straightedge.
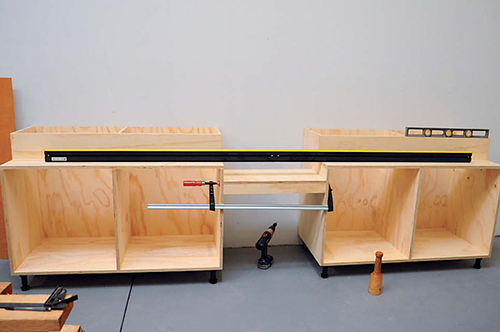
The cabinets are held together by the saw shelf, so you may need to shim between the saw shelf and cabinets front or back to achieve this. Loosen but do not remove the screws, add wedges until things are where you want them, and re-tighten the screws.
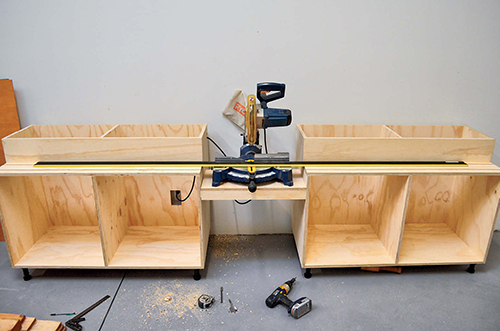
Next, stand the straightedge vertical and adjust the cabinet height until the straightedge is in contact with the miter saw table and cut shelf all the way across. The leveling legs will make this a lot easier. The levelers allow for adjusting all four corners of the cabinets largely independently. Remember that level would be nice, but STRAIGHT is what is important.
I did not fasten these cabinets to the wall. I left room behind so the cords of my bench tools could be kept out of the work area. If you want to secure yours, no problem, but be careful not to misalign the cut shelves as you do so.
Tops
You can use premade laminated countertops from the home center. The tops on my unit are simple plywood panels. The top is supported by the sides, divider, cut shelf and back, so it should remain flat over time. The 7″ overhang on the front worried me a bit so I doubled it up, gluing and nailing on a 7″-wide strip to the underside to resist sagging. My tops are cut to 54″ for a bit more bench space. The inside edge is flush on the saw side, and the overhang is on the outside.
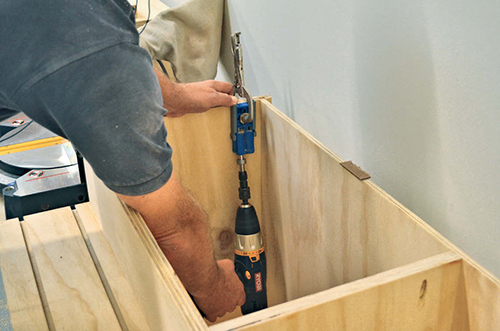
I drilled pocket screw holes in both sides and the divider. The top is set in place with the buildup tight to the cut shelf back, then screwed in place.
Doors and Shelves
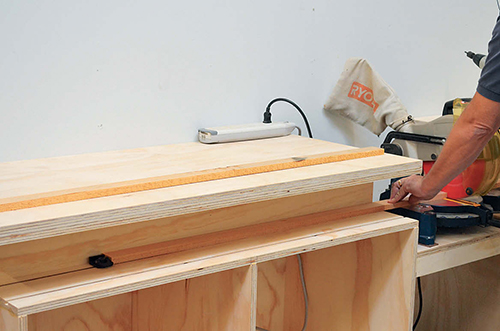
This article is about the cut shelf, so I won’t go into details on door construction. Simple slab doors cut from another sheet of 3/4″ ply or whatever would work just as well. I happened to be making stile-and-rail doors for another project, so it was easy to make these at the same time.
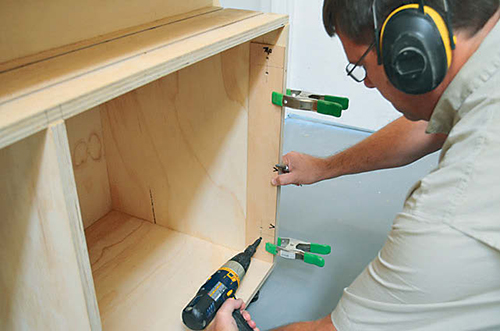
The doors are hung with cup hinges, which make them easy to adjust after hanging them. I made up a template for drilling pilot holes for the hinge plates. This saves a lot of time and frustration. Just remember that the template will rest on top of the deck, but your door should align 1/8″ up from the bottom edge of the deck.
Fixed shelves or even adjustable shelves could be used, but I hate having to kneel down to find things in the back, so I made pullouts. These are cut from the same 1/2″ ply as the backs and are simple, open boxes 3″ tall. I plan to store cased tools (routers, dado sets, nail guns and the like) on the deck and hardware in the pullouts. This way I’ll be able to access everything easily.
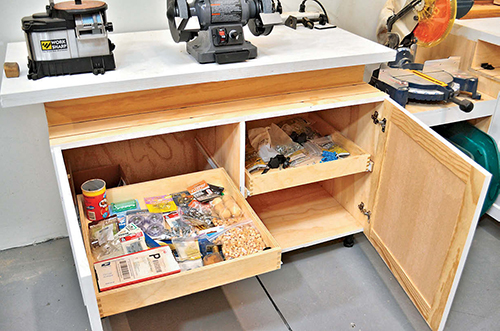
The only thing to keep in mind with pullouts is that, unlike fixed shelves or even normal cabinet drawers, pullouts need to clear the door. This means that the pullout width needs to be 1″ smaller than the opening for the slides, and an extra inch is needed to clear the door. I built mine 3″ narrower than the space, and added a 1″-thick cleat to each side. Technically, you only need to cleat on the door side, but I like having an even gap on both sides.
And there you have it. An 8′ miter station with adjustable stops, over 17 square feet of usable bench space, and nearly 30 cubic feet of storage all contained within 21 square feet of floor space. Perfect for small shops, and very convenient for larger ones, too.
Click Here to download a PDF of the related drawings.
Hard to Find Hardware
T-Slot Cutter (1) #26099
Inline Stop (1) #50603
Adjustable Leveler Leg (1) #32183


