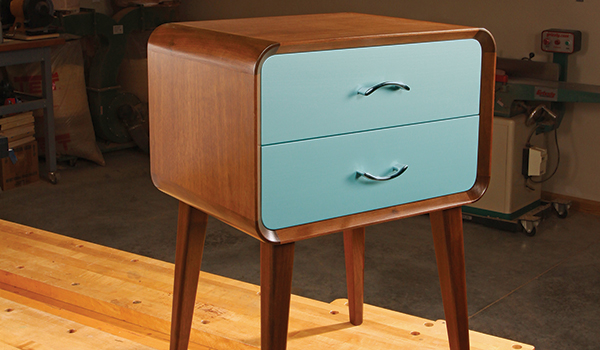
While the 1950s are forever in our rearview mirror, Mid-century Modern furniture is very much back in vogue. And this little nightstand project can add a bit of retro flair to your bedroom, living room or home office — wherever you can use a couple of drawers and a place to set a book, alarm clock, a few mementos or a lamp. Its rounded corners, slender, tapered legs and sleek styling give a nod to Mid-century Modern’s European design origins. I built this nightstand from black walnut and walnut veneer plywood with a dark brown dye finish, but you could use any wood species and stain color you prefer. My drawer boxes are made of maple, and the faces are just poplar with a spray-painted metallic finish (poplar takes paint beautifully). Of course, the drawer faces could be made of the primary project wood and stained instead, for an all-wood look. This nightstand will be a tall order to build in two days, but with some hustle, you’ll have it fit for Ward Cleaver’s den in about two weekends.
Tapering the Legs
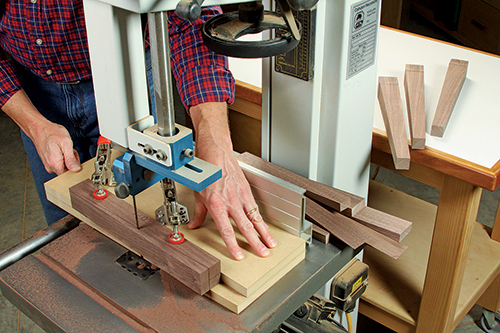
Let’s get started by preparing four 1-3⁄4″ x 1-3⁄4″ leg blanks. Cut them to length, according to the Material List. Using a tapering jig at the band saw, rip two tapers from top to bottom to form the legs’ inner faces and 1″-square feet. You also need to miter-cut the tops and bottoms of the legs to form their splaying stance.
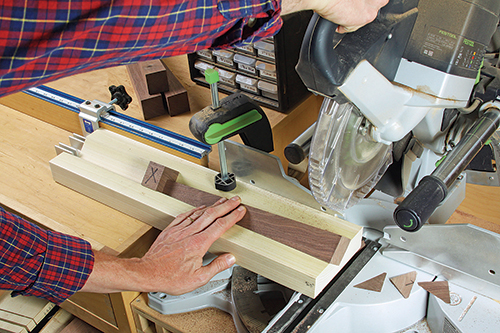
I used a scrap V groove jig to hold the untapered (back) edge of each leg securely and correctly while I made these two cuts on each leg. Tilt your miter saw off of vertical to a 5.5° angle, and trim the top and bottom ends to this angle. Be careful that both cuts face the same direction. Then set the legs aside for now.
Edging Plywood
Covering plywood edges with solid wood is a common method to hide the core material. If you do this carefully, you almost can’t tell it’s still plywood.
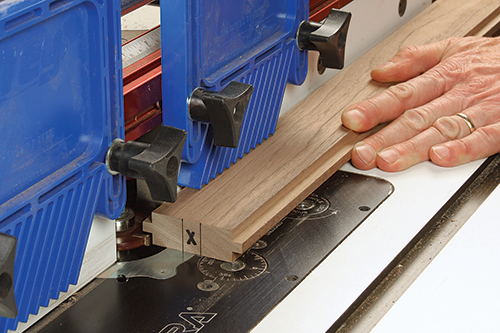
On this project, the edging also provides extra wood for milling deep chamfers around the nightstand’s front face.
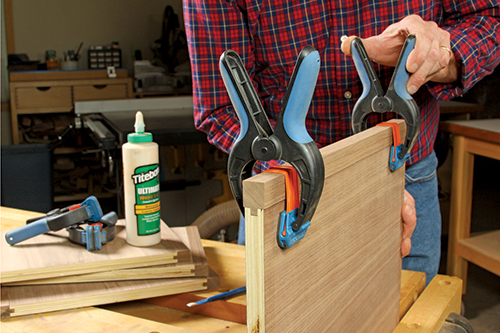
A short tongue on the edging fits into a centered groove in the plywood to join the parts. By forming the edging on wider blanks, the narrow strips are safer to make at the router table and table saw. Then just glue and clamp them in place. Simple!
Adding Wood Edging
Rip and crosscut a top, bottom and two side panels for the carcass from veneered plywood. Use a sharp blade to cut the plywood’s face veneer cleanly, because on this project, those cut edges will show. To help minimize splintering as much as possible, trim the plywood “best face” up.
Now, mill a centered, 1/4″ x 1/4″ groove along the edges of the carcass panels that will face front and back. I used a 1/4″-wide slot-cutting router bit. This will give the solid wood edging, to come next, a locking connection to the plywood as well as a glue bond.
Prepare enough blanks of 3/4″-thick, 2-1⁄2″-wide solid wood to form pairs of edging strips for all four carcass panels. Try to choose your edging stock from wood with a grain pattern and color that’s consistent with the plywood veneer so it will blend in nicely. Mill the 1/4″ x 1/4″ tongues along both edges of each piece at the table saw with a dado blade buried partially in a sacrificial fence. Or, go with the same slot cutter you used to make the grooves.
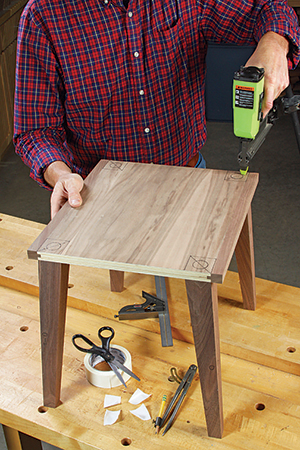
It’s a good idea to refine your tongue-cutting setup on a test piece first so you can dial in a perfect fit in the panel grooves – you want a good, snug connection. Once the tongues are milled, rip the edging strips to width, cut them to length and glue them to their panels. Plane, scrape or sand the edging flush to the plywood faces, if needed. The nightstand’s legs will attach to the carcass with dowel tenons, so we’ll drill holes for those next. Carefully lay out the leg positions on the carcass bottom panel: they’re located at the corners of the plywood, flush with the edging. Center and mark a 1″-diameter tenon hole within each of the four leg areas.
While the tenon holes run straight through the bottom panel, the legs are splayed, so these holes penetrate the legs at an angle. And, you’ll want the legs to align with the bottom panel holes precisely. Easy solution? Stick the legs to the bottom panel with carpet tape to position them, then secure them for drilling, temporarily, with two 1-1⁄4″ brads.
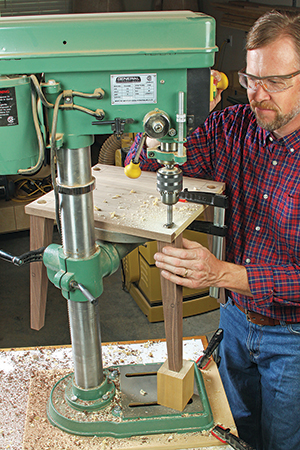
You’re now ready to drill those dowel holes, but first study how I set this up in the photo. With the bottom panel resting on your drill press table, drill the tenon holes through the bottom panel and 1″ into the legs. Brace underneath the leg with a scrap block when drilling its dowel hole. Once the four tenon holes are done, pry the legs free from the panel, pull out the brads and peel off the tape.
Making Corner Blocks
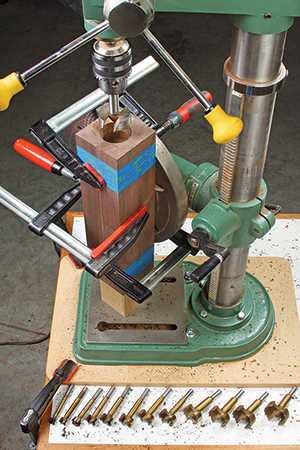
Shaping the nightstand’s large, rounded outside corners would be impossible on plywood, so we’ll use wood blocking here instead. Prepare four 1-3⁄4″-square blanks for the corner blocks, and crosscut them to match the width of the carcass panels.
You’ll notice that the inside corners of the carcass are also rounded, so let’s start with those curves first. We’ll form them in the corner blocks simultaneously with a 2″-dia. Forstner bit. Start by taping the four corner blocks together in a bundle. Arrange the blanks so their best-looking ends are together. These will face front on the nightstand.
Unlock and tilt your drill press table to vertical, and clamp the bundle securely to the table so it’s centered exactly under the chuck. If you’ve got a powerful drill press, bore a 1-3⁄8″-deep hole down into the centerpoint of the bundle with the 2″ Forstner bit. Then flip the bundle over and reclamp. Bore a 3/4″-deep hole into this end for the carcass’s back panel. To manage drilling into this tough end grain with my modest-sized drill press, however, I had to use a range of Forstner bit sizes, working up to a 2″ diameter, to keep the drill press from stalling. It was time-consuming but doable. Just be patient with the slow drilling process.
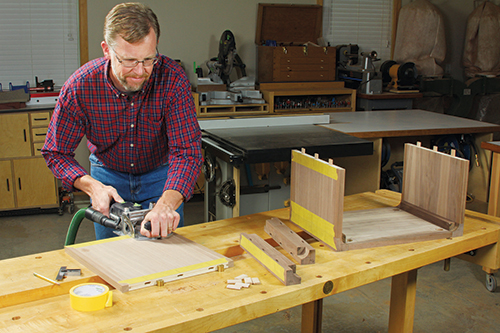
With these inner curves completed, you’re ready to assemble the carcass. I used a Festool Domino machine to reinforce the corner joints with three floating tenons, but biscuits or dowels would also work fine. Dry-assemble the carcass pieces to check their fit, and mark them to keep the part order clear.
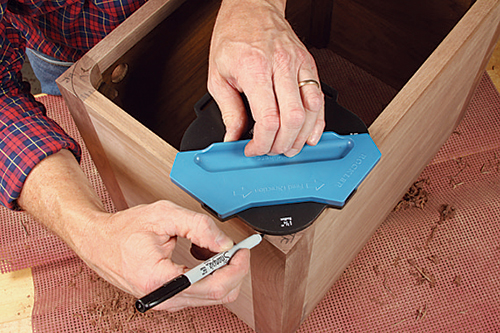
Now sand the inside faces of the carcass parts up to 180-grit, and apply stain and finish. Then go ahead and glue and clamp the carcass together.
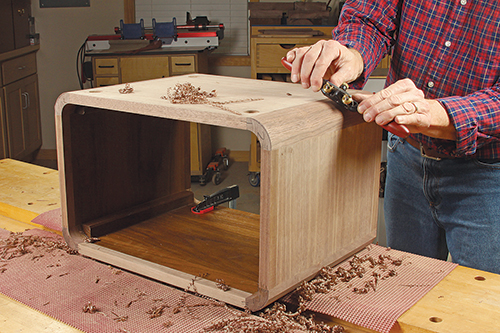
When the clamps come off, round the outside corners of the carcass to 1-3⁄4″-radii. I did this by first trimming off the sharp corners at the table saw with the blade tipped to 45°, then removed the rest of the waste with a spokeshave. It’s a great way to gain some experience with a classic hand tool, and the process is remarkably quick and enjoyable if your spokeshave is good and sharp. Sand these curves smooth and so they meet the carcass panels flush.
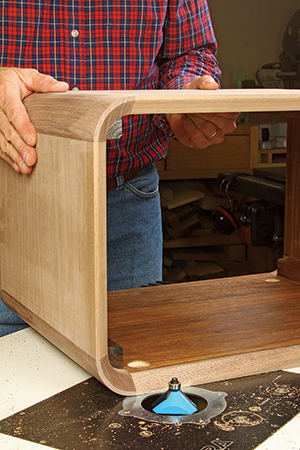
The inside front edge of the carcass receives a deep chamfer all around. You can mill it with a large piloted chamfering bit at the router table. Feed the carcass clockwise against the bit, removing material in several deepening passes. Make the final chamfer 5/8″ deep and so about 3/16″ of material is left around the outer edge of the carcass face.
Final-sand and finish the outside surfaces of the carcass to complete it.
Detailing the Legs, Adding Tenons
Grab the four legs again so you can soften their long, sharp edges. I eased the outer three edges to 3/8″ radii with a router and roundover bit, then switched to a 1/8″-radius bit for the fourth edge that will face inside the legset. Sand the legs smooth, then stain and finish them.
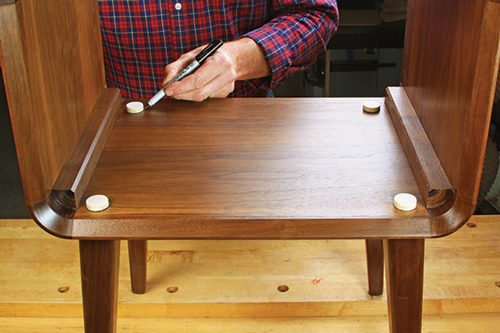
Glue 2″ lengths of 1″-dia. dowel into the four holes in the legs. When the glue dries, test-fit the legs on the carcass without glue, and mark the top protruding ends of the tenons for a flush fit. Remove the legs so you can trim the tenons to final length. Do this back at your miter saw with the blade tipped again to 5.5° off of vertical. Face the outside edge of the legs down in the V-groove jig as you did before. This will create the proper cutting angle to trim the tenons neatly to your layout lines.
Building the Drawers
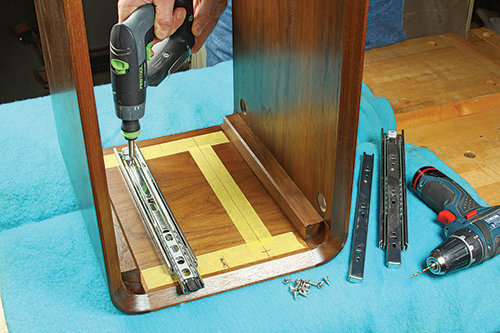
Before you build the two drawers, go ahead and install the drawer slides inside the carcass so you’ll know if you need to adjust the Material List dimensions of the drawer parts to suit your nightstand’s actual inside dimensions. Better to be safe than sorry! Locate the centerlines of the slides 2-1⁄8″ up or down from the corner blocks.
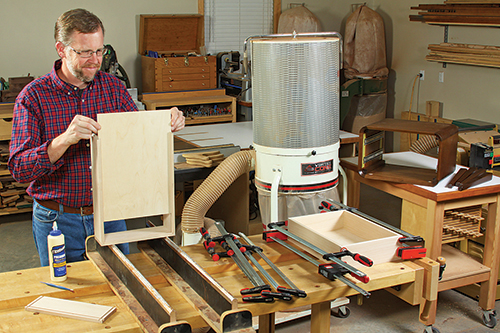
Now prepare enough 1/2″ stock for the drawer fronts, backs and sides, then rip and crosscut these parts to final size. I assembled the drawer boxes with simple 1/4″ x 1/4″ rabbet-and-dado corner joints. They’re easy to mill at the table saw with a 1/4″-wide dado set. Plow 1/4″-deep dadoes across the inside faces of the drawer sides, front and back, 1/4″ from the part ends. Then cut rabbets on the ends of the drawer fronts and backs to fit the drawer-side dadoes. Dial in your saw settings on test pieces first, so your final joints will be spot on.
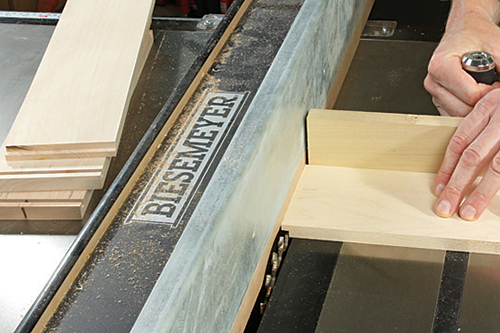
Next, leave the dado blade in your table saw to cut 1/4″-wide, 1/4″-deep drawer bottom grooves around the inside faces of the drawer parts. Dry-fit the drawer boxes together, and measure the span between those grooves before cutting your two drawer bottoms to size.
You’re ready to sand the drawer parts up to 180-grit, and assemble them with glue and clamps. When the clamps come off, give the drawers a couple coats of clear finish to protect them. After it dries throughly, install the metal slide components on the drawer boxes so you can hang them in the nightstand.
Routing Corners with a Jig
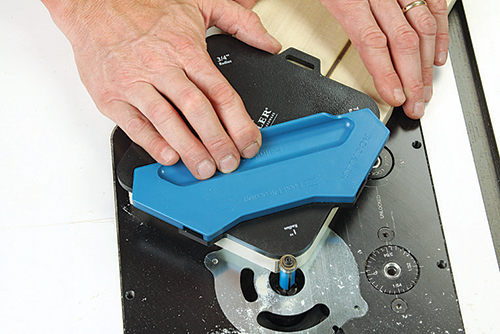
These ABS-plastic templates, with four different radii per template, register with the corners of a workpiece blank automatically, thanks to pins and tabs that protrude down through the clip-on blue handle. For these drawer faces, you’d use the 1” radius template corner.

Trace the template curves, then trim off most of the waste with a band saw or jigsaw. Bring the curves to final shape by guiding a top-bearing flush-trim bit in your router table along the template edge.
Finishing Up
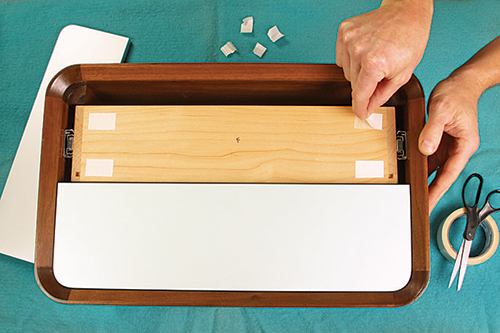
The drawer faces are the only parts left to make. Measure the inside opening of the carcass carefully, then cut two drawer face blanks to width and length. Mark 1″ radii on their outside corners. Trim off most of the waste, and rout or sand the curves to shape.
I sanded my drawer faces super smooth and eased their edges with a tiny chamfer, then spray-painted them with six light coats of metallic lacquer. Let them dry thoroughly.
Mount the drawer faces on the drawer boxes temporarily with carpet tape to help position them. Now locate and drill pilot holes through the drawer faces and boxes for the screws that secure the metal pulls. Install that hardware.
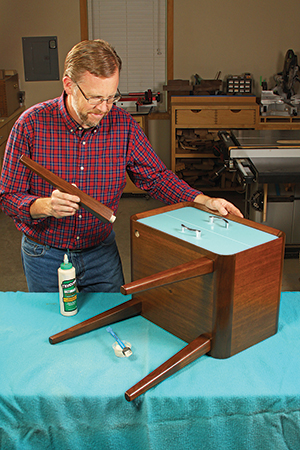
One more piece of round-cornered plywood will form a back for your nightstand. And once that’s fixed in its opening, glue and install the legs to wrap up this snazzy little retro project.
Click Here to download a PDF of the related drawings and Materials List.
Hard to Find Supplies
Rockler Corner Radius Routing Templates #32611
Amerock Allison Value Hardware Pull BP3415-26 #1007662
12” Series 3612 75-lb. Full-Extension Centerline® Slides #45859
2” Forstner Bit, 3/8” Shank #21242
17⁄8” D x 1” H x 1/2” Shank Rockler Chamfer Bit #27080


