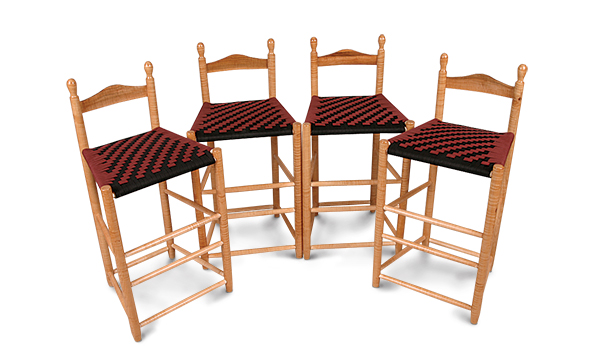
Many people are daunted by chairmaking because of all the mortises that have to be drilled at precise angles, but a simple fixture and a drill press iron out that problem. The turning is very simple spindle work: essentially, you only have to turn large diameter dowels for the legs. At 35-5/8″ even the back legs can be turned without a steady-rest. The same for the seat rails, but the stretchers are improved by tapering them to the tenons. In short, Shaker work chairs are perfect to impart understanding of chairmaking in general.
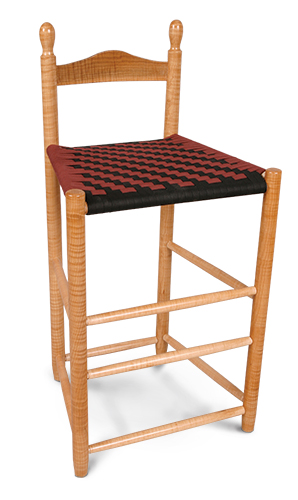
Ample use of stretchers makes it immune from racking, and the tape seat is like having a myriad of band clamps to reinforce the glue.
Shaping the Legs
I turn the legs almost entirely with a spindle roughing-out gouge. While I will plane straight-grained wood with a very sharp skew chisel, curly wood is best sanded smooth. I finish the legs and stretchers, but not the seat rails, before glue-up.
Finish Options
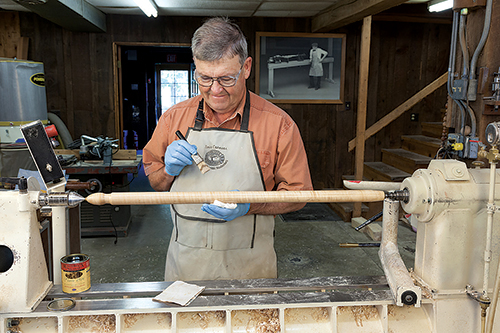
The original Shaker chair in the museum is maple with a wash of red paint, but I have made these chairs in curly maple with a clear finish to stunning effect. If you want to use the original Shaker finish, then leave the wood bare and remove all traces of excess glue. Mix a thin solution of milk paint and brush on an even coat. Once thoroughly dry, apply a coat of oil finish such as Waterlox®.
On the other hand, if you have picked striking wood, a clear finish is easy to apply. A couple of coats in the lathe make sanding much less tiresome.
Marking and Drilling the Legs
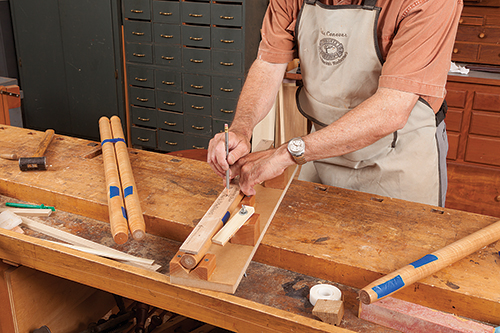
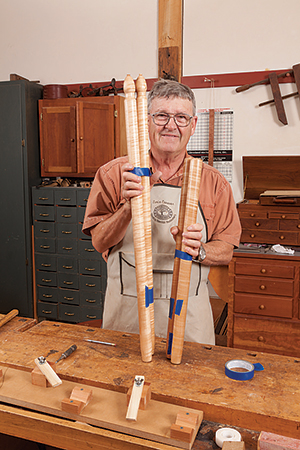
I like to bundle the leg posts together as they will be in the assembled chair and put masking tape or a pencil line (the distance up from the bottom of each leg) where the mortises will be drilled, as seen in the photos. This keeps me organized and saves me from turning a post in the wrong direction when drilling the second line of holes.
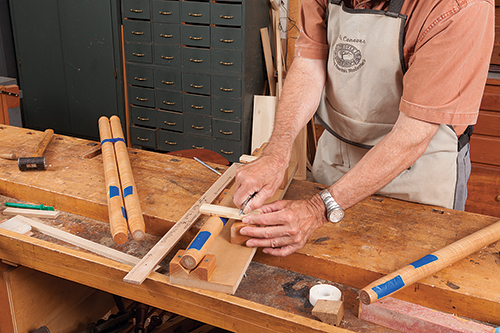
To drill the holes in the legs, I created a marking and drilling jig that you can see in the photos and Drawing on the next page. With this jig, I also use a 10˚ alignment ramp and an alignment stick. The alignment stick is a 1″-square billet with a 5/8″-dia. by 7/8″-long tenon turned on one end. The tenon should be a tight slide fit with the hole drilled by the auger bit that will be used to drill the mortises in the leg posts for the rails and stretchers.
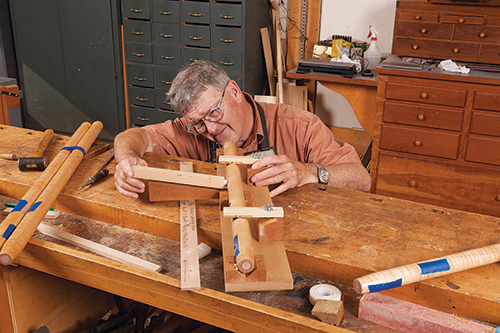
Clamp each rear post in the Drilling Fixture and drill the mortises for the back rails/stretchers first. The 5/8″-dia. holes should be drilled 7/8″ deep to fully bottom the 3/4″ tenons. Making a story stick like I am using in the top photo at right helps to get things right, even if you are only making one chair. The story stick should be 1-7/16″ wide (slightly smaller than the 1-1/2″ diameter of your leg posts); it helps greatly in centering the holes as you mark them. Be sure to center punch the location before drilling.
After drilling the back rails/stretcher holes in the back posts, insert the alignment stick in the bottom hole and rotate the leg so that it is parallel to the alignment ramp with the big end toward the jig. A note about the alignment stick and the alignment ramp: They are used as a reference — sometimes the surface of the stick lies directly on the alignment ramp, but sometimes you eyeball the relationship. See it in use in the photos. You should see the second pencil mark, meaning you turned in the correct direction, and you will have an angle of 100˚ between the holes. The other post in the pair will turn in the opposite direction, and the wedge has to be placed on the other side.
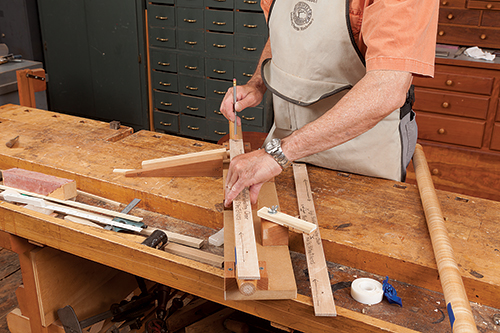
In the Drawing, you see the big end of the wedge as it would be used for the back posts. Making the alignment stick parallel to the wedge makes the angle between the rows of the holes 100˚— what you want for the back posts. Use the small end for the front posts.
Making Rails and Stretchers
The seat rails are essentially dowels with a 5/8″-dia. by 3/4″-long tenon on each end. I turn them with a spindle roughing-out gouge and leave a spiral pattern, which helps prevent the tape from which the seat is woven from slipping to the back. (For the same reason, you won’t want to finish the seat rails!)
To quickly size the tenon, I use a beading and parting tool and a 5/8″ open end wrench as a gauge. The eight stretchers can also be a dowel with a 5/8″-dia. by 3/4″-long tenon on each end, but they look much more elegant if they are tapered from the center to about a 1/16″ shoulder at each tenon.
When you’re placing the rails and stretchers into your chair assembly, you’ll need to note that all the side seat rails and bottom stretchers are slightly higher than the front and back rails/stretchers. The distance is 5/8″, or just a bit more, so that the holes do not interfere with each other. Other stretchers are placed to reduce racking. You can see the placement distances for these in the Drawing; all distances are for the center of the hole location.
Seat Back: Boiling to Bend
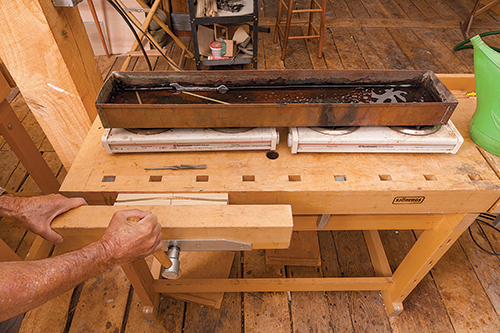
To create the curve in the seat back, I employed the process of poaching in a hot water bath. I built a bending form, as seen in the Drawing, to accomplish this. The form was easy to build: simply saw the shape down the center of a 2″-thick by 3″-wide by 11-1/4″-long piece of wood. I use maple, but any wood will do. The shape may be laid out by bending a thin strip of wood between nails pounded into the top at about 3/4″ from each end. You will need to sand each half smooth; otherwise, rough saw marks will imprint in the wood that you’re bending.
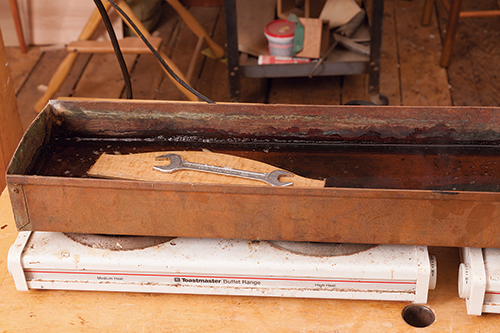
To bend, wood needs to be 180° or hotter and have 20% moisture content. You can easily accomplish both needs by poaching your back piece in simmering water or steaming for 15 to 20 minutes. A cake pan and a hot plate or camp stove will work. I find it useful to put some round bars in the pan so the piece is slightly off the bottom, and to place a weight like the wrench you can see in the photos above to hold it down on these bars.
Once you’ve removed your piece from the simmering water, it’s very important to have it fully clamped into your bending form within one minute. Waiting longer than a minute will most likely result in the piece dropping below 180˚: breakage, rather than bending, will be the result. Wearing leather gloves during this process is a good idea. I simply put the form in a bench vise, align the hot part between the two halves, and close the vise. Your piece should stay in the bending form for a minimum of 12 hours.
Once you’ve removed your back piece from the bending form, it will spring back a bit, leaving about 3/8″ of deflection.
Cutting the mortise for the back support is best accomplished with a hollow chisel mortiser. I put the alignment stick in one of the holes and vertically align it in the mortiser. If you don’t have a mortising machine, hand mortising works well, as does a router with a 1/4″ spiral bit and a suitable jig.
Final Assembly
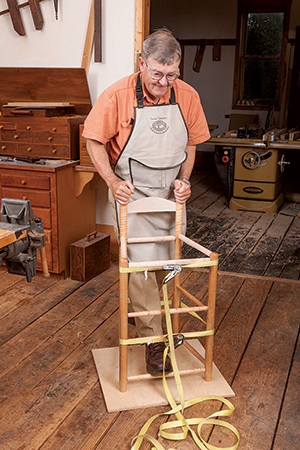
Once you have all of your wooden pieces ready, it’s time to glue up and assemble your chair. Glue with a long open time is best; I like Titebond® III or 90-minute epoxy. Two strap clamps will pull all of the tenons to full depth and usually bring the chair square.
Just after clamping, if the chair is out of alignment, I become a chair chiropractor. I simply grab the tops of the back posts, place a foot on one of the bottom stretchers and muscle the parts around until the chair sits level and looks square. This is why long open time glue is very, very good!
Weaving the Seat
My wife, Susan, weaves the seats for our chairs with cotton tape, which is available in several colors as “Shaker Tape” from Royalwood Ltd. (www.royalwoodltd.com; 800-526-1630). She shows the simple weaving process in a video found below:


