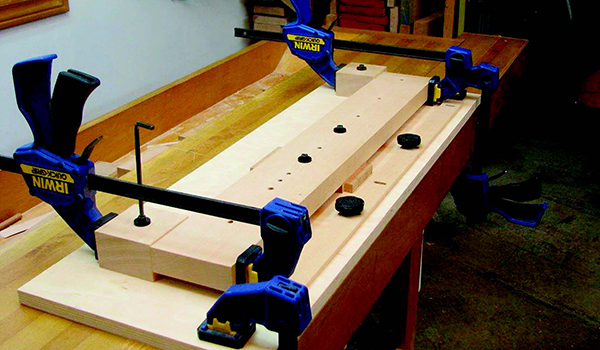
For years, I clamped a guide block to the shoulder lines of my tail and pin boards to accurately guide the back of a chisel, but clamping a guide block exactly in the right place was a bit of a challenge. Even harder was ensuring the guide block would end up the same distance from the end of the workpiece after flipping it over to chisel from the second side. So I started searching for a more reliable solution to the problem. The result was this dovetail chiseling jig, which I designed and built many years ago. I now use it regularly when cutting both through and half-blind dovetails for my own projects and when teaching dovetailing courses to others.
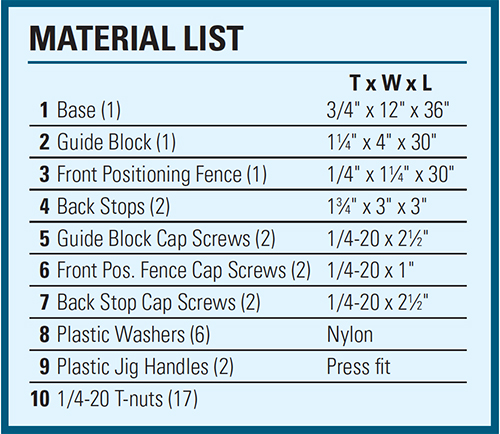
When you study the Drawing, you’ll see how simple this jig is to build from plywood and scrap. It’s just a base with a long guide block on top that pins workpieces down and provides a square backup fence for chisel. An adjustable fence in front and two backstops further immobilize workpieces during chiseling. All of the parts secure to the base with T-nuts and either cap screws or threaded knobs.
Suggestions for Building the Jig
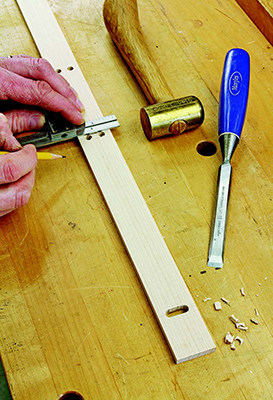
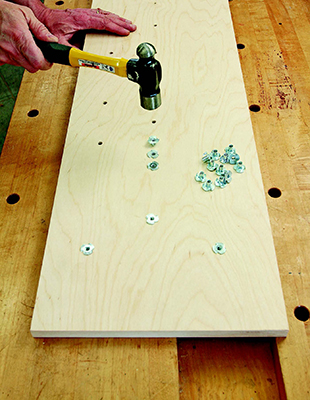
Here are some general suggestions for building yours. The jig can accommodate thin parts or thick. For really thick parts, I use longer cap screws to hold the main guide block down. Also, the jig works with narrow parts, such as for small drawers, or with panels up to 24″ wide. So chopping dovetails on the panels of a blanket chest is no problem at all. I have drilled many holes for the cap screws with various spacings for a wide range of possibilities. Just choose two holes a little bit farther apart than the width of your workpiece. If they are too far apart, the guide block will bend and dig into your workpiece at the outer corners.
Tighten the guide block exactly on the shoulder line, placing a square behind the block and against one edge of the workpiece. Then secure the slotted front positioning fence tightly against the end of the panel. That way, when you flip the workpiece over, you can reposition it exactly in the same plane again. Your chisel cuts will line up beautifully from both sides.
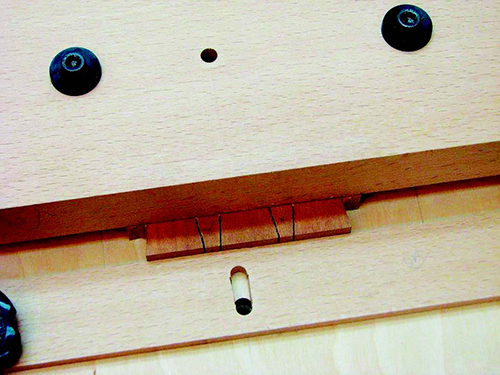
When drilling the holes for the guide block’s cap screws, size them just barely large enough for the screws to fit through without slop. If there is slop, then when you loosen them to flip the workpiece and retighten, the guide block might randomly move forward or back, or even at some slight angle. I decided to add two back stops behind the guide block to further prevent this.
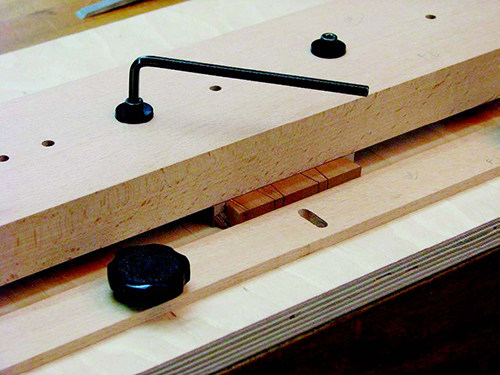
After positioning the guide block on the first side of the workpiece, clamp the back stops to the guide block and then tighten their cap screws. When you flip the workpiece to work on the second side, clamp the guide block to the back stops again before tightening the cap screws. It’ll end up in the same plane every time. Since the back stops never have to move forward or backward any appreciable distance, I didn’t elongate the cap screw clearance holes. I just drilled the holes a little oversized.
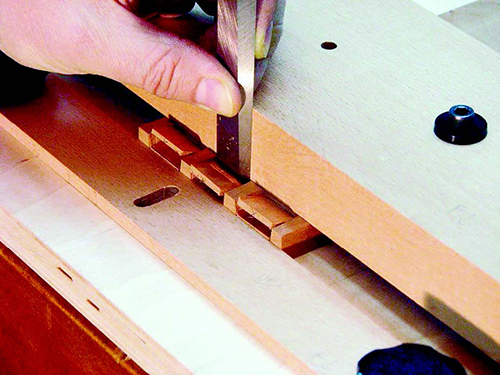
When chopping tails or pins on the second side of the workpiece, you can move the positioning fence away or even remove it completely. This is especially helpful when cutting the bottom portion of a half-blind pin board. But be sure to secure the fence back where it started before removing the workpiece if you have other identical parts to chop. There’s no point in resetting the guide block manually every time.
Hardware Option

You can use jig handles instead of cap screws if you like, but I decided that using a hex key is a small price to pay for rigidity. You’d be surprised how much force is needed to keep the guide block from moving. When you pound on a chisel, the guide block wants to move backwards from the wedging action. The back stops help prevent this.
I can’t emphasize enough how useful this jig is for cutting dovetails by hand. While I still need to saw the pin and tail boards manually (I use Japanese Dozuki saws), the jig helps enormously with the chisel work. And when it comes to making
Click Here to download a PDF of the related drawings.