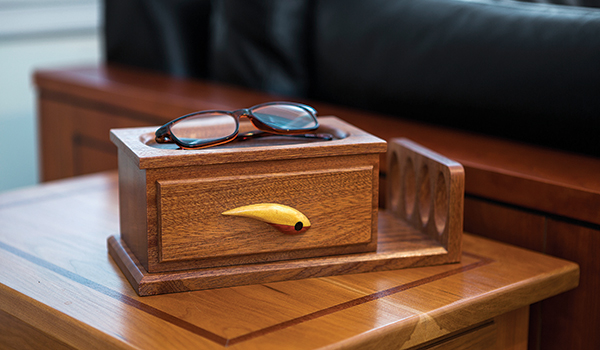
If you’ve ever wished for a convenient way to store reading glasses, pencils, and other small necessities, this chairside caddy may be just what you need. Its heart is a single-drawer, band saw type box, but a few additions — an overlay drawer front, oversized base and leather-lined top recess — increase its utility and appeal immensely.
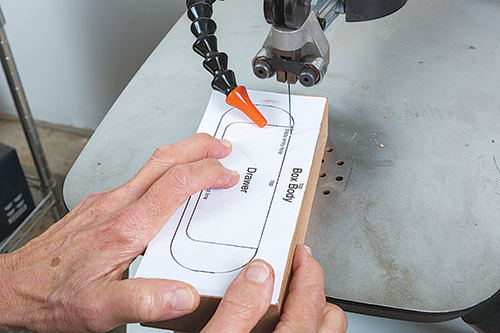
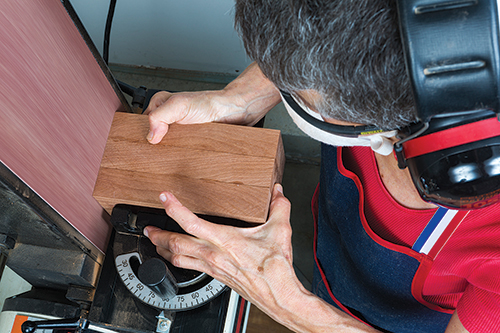
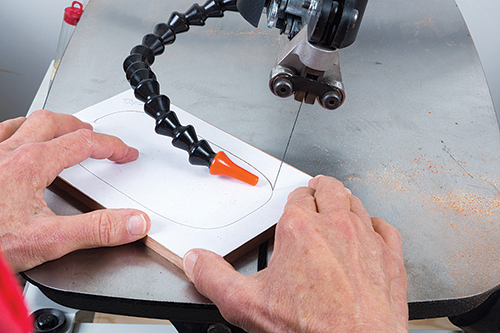
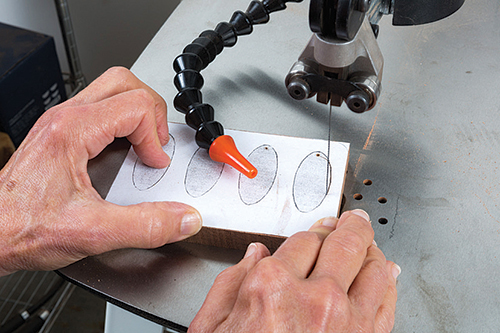
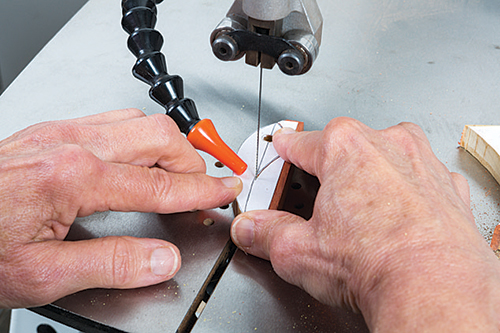
Scroll saws easily handle internal cuts and tight curves, but not thick hardwood. To get the total thickness I needed for the box, I used three pieces of 1-1⁄4″-thick sapele for the box body/drawer unit, each cut individually, then glued together. Attach a pattern to the front of each workpiece with repositionable adhesive. Label the box and drawer sections of each pattern “Front,” “Middle,” or “Rear.”
Transfer these markings to the wood when you remove the pattern. Now drill a blade entry hole where indicated, with a 1/16″ or smaller drill bit. Insert a #5 or #7 blade and carefully cut along the cutting line of the drawer. Leave the drawer patterns attached.

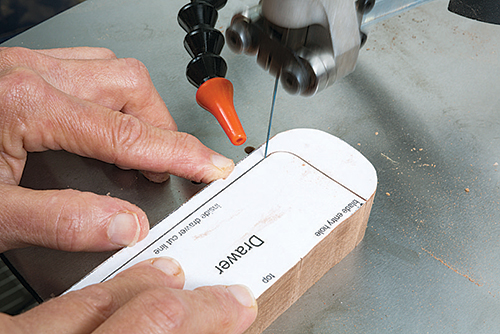
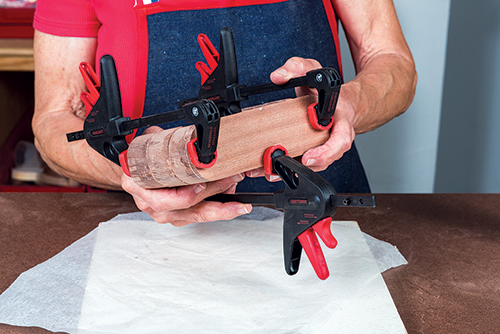
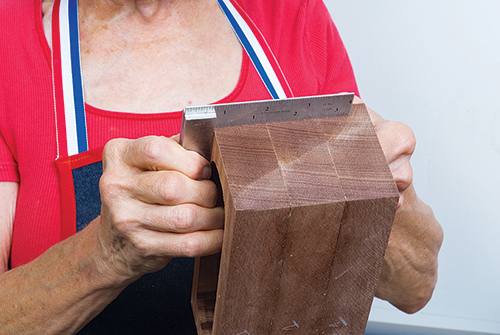
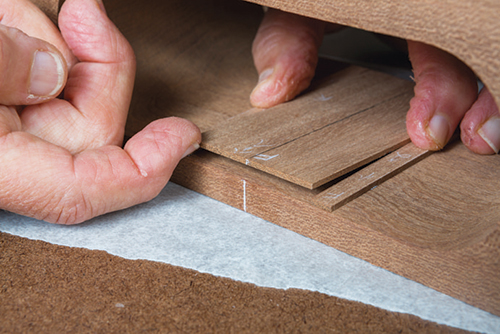
Next, mark and cut a 1/4″-thick slice from the back of the rear drawer piece to create the drawer back. You can also cut this piece with a band saw. Sand the cut surface of the slice smooth. Then cut along the inside line of the three drawer pieces to create the drawer opening, and glue and clamp the outer pieces together, keeping them in order.
When gluing the drawer pieces, I apply glue evenly to one face of the first piece, rub the adjacent face of the second piece against it until it drags, then line the two pieces up. Glue on the third piece the same way. This helps prevent slippage when clamping. When the drawer pieces dried, I used spindle and detail sanders to smooth the inside.
I sanded the rear face of the drawer by rubbing it lightly against a piece of 150-grit sandpaper that was attached to a granite tile. Glue and clamp the back into place, and clean up any squeeze-out.
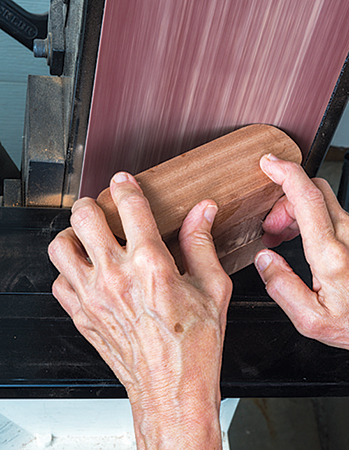
After the glue dries, sand the outside of the drawer just until smooth with a belt sander — too much sanding will create a sloppy fit in the caddy.
Assembling the Caddy’s Body
Next, glue and stack the three box body pieces together in order, matching the outer edges precisely.
Use clamps or a press for a good bond, and correct any slippage before the glue sets.
Once it’s unclamped, sand as needed so that the top, bottom and sides are flush and the box is square.
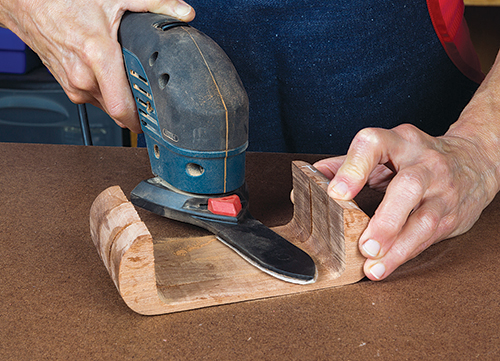
Sand the interior drawer opening smooth with a spindle sander.
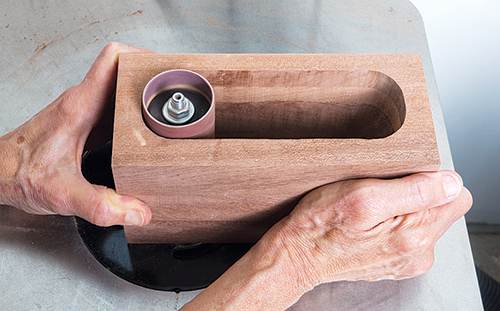
Keep the bottom of the cutout parallel with the bottom of the box.
Adding Drawer Guides and Back

To eliminate the side-to-side play typical of band saw box drawers, I fabricated a simple three-piece guide system of 1/16″-thick scrap, with two narrow strips and one wider piece on which I drew a line down the center.
To install them, measure the width of the box and draw a line on the front and back faces at the center point, directly below the drawer opening. Place the wider guide piece on the bottom of the drawer opening, aligned with the center points, and tape it into place, front and back. Check to be sure it’s square to the front and back faces. I used a quick-grab PVA glue to adhere the two 1/4″ strips into place on each side of the wide drawer guide, and pressed the strips down firmly for a good bond.
Once yours are installed, remove the center guide carefully. Measure the width of the drawer and mark the center point on its underside. Use a loop of masking tape, sticky side out, to center the wide drawer guide on the underside of the drawer, square to the front and back faces.
Now slide the drawer into place and check to be sure it moves freely. Then remove the drawer and mark both edges of the wide guide on the drawer’s underside. Remove the guide and tape loop.
Attach the guide with dots of quick-grab PVA glue, clamping the front and rear corners to prevent the thin wood from cupping, due to contact with the wet glue.

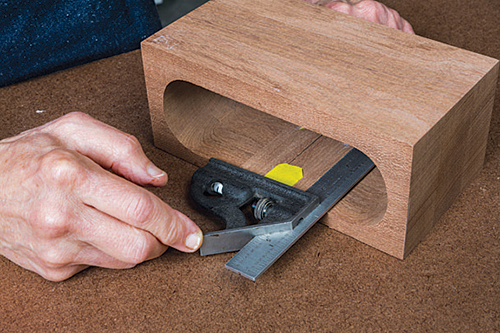
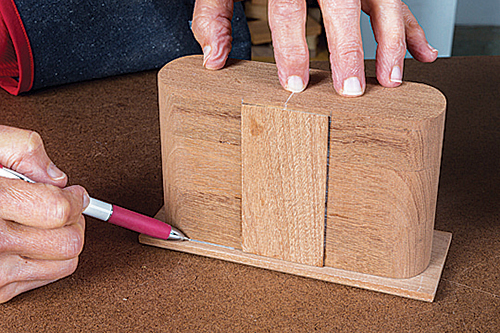
With the drawer hung, you can glue on the back of the box. Its edges should protrude slightly on all sides. When the glue dries, sand the back flush with the box, soften the edge of the drawer opening, and sand the box to 220-grit.
Installing the Drawer Face
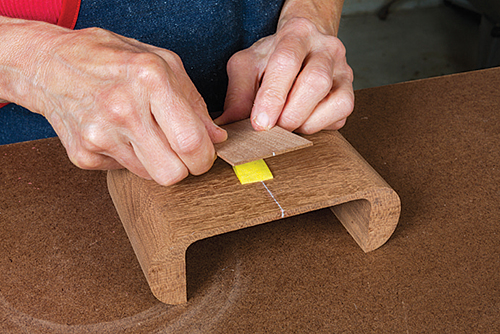
Start by cutting a drawer face to width and length. Sand a small 45˚ bevel around its front edges, then soften all edges. With the box on its back, center the drawer face on the box and mark its position. Remove the face and insert the drawer fully into its opening.
If it’s recessed, slip a temporary spacer behind the drawer to make it flush with the front of the box. I used loops of masking tape to adhere the drawer face onto the front of the box and pressed it into place. Be sure the face lines up with the registration marks you’ve made on the box front. Now remove the drawer, with the face still attached, and place it facedown.
Make positioning marks on the back of the drawer face, then remove the face and tape loops. Glue the face into position on the drawer. If you are using regular wood glue, clamp the pieces carefully.
I used quick-grab PVA glue instead; just press down on the drawer immediately after applying glue and hold the face in place. As soon as the glue begins to set, insert the drawer into the box and make any final adjustments. Remove the drawer, clean up any squeeze-out, and let the glue dry with the drawer face down.
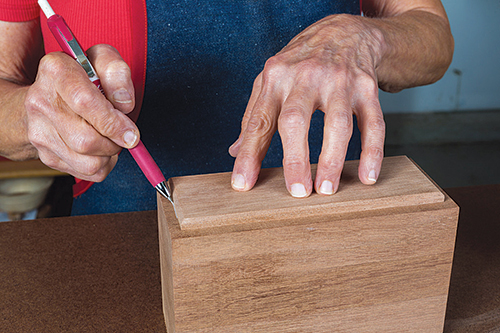
Detailing the Box Top
Prepare a blank for your box’s top, and attach a copy of the cutout pattern to it. Drill a blade entry hole, where indicated, at 15˚, using a shop made angle guide. If your scroll saw has a tilting arm, tilt it 15˚ to the right.
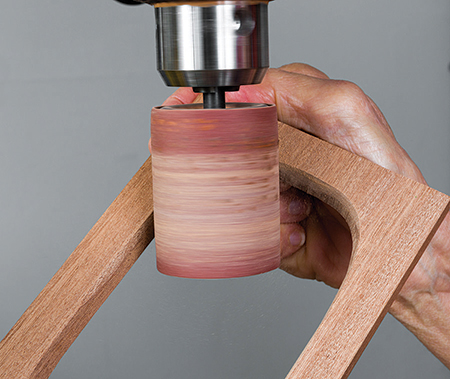
If it has a tilting table, tilt it 15˚, left side down. Insert a #3 blade through the starter hole and cut clockwise around the center opening. Then with a small pneumatic drum, smooth the cutout area, contour the upper edge and soften the outer edges. Finish up by sanding the whole piece to 220-grit.
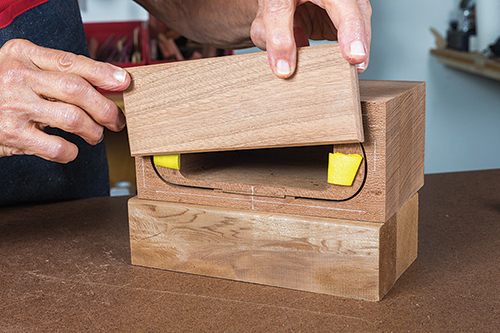
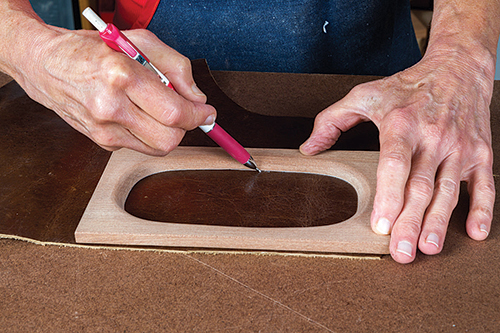
The leather insert that will fit inside this opening in the top lends a touch of class, while hiding the glue joints. With the box top still unattached, place it on a piece of leather, trace the opening, and mark its orientation. I’d also make a backup pattern of the opening on paper in case you need to re-cut the leather later.
Now you can install the top on the box permanently. Invert the top on a flat surface and apply quick-setting PVA glue to the underside, avoiding areas that will overhang the box. Invert the box body on the top piece. Press the parts together until the glue sets, and clean off any squeeze-out.
Adding a Base and End Piece

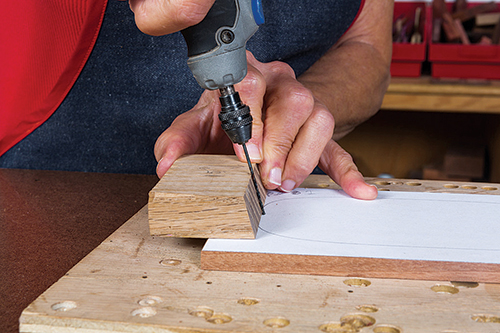
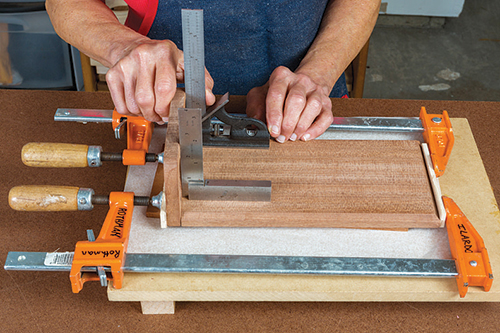
Cut blanks for your box base and end piece. I used 1/4″ dowels to strengthen the glue joint between these parts. Use a drill press and supports, keeping the base square to the table when you drill into its end. Bore two evenly spaced holes, 1/2″ deep. I used a 6.5 mm drill bit instead of 1/4″, because the .15 mm difference in diameter between the two bits makes dowel insertion easier, without excessive play.
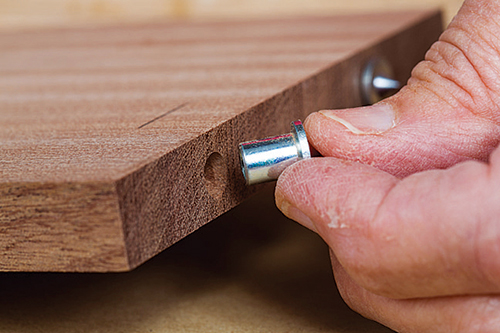
Now place 1/4″ dowel centers into the holes, position the end piece carefully, and press down firmly to transfer the drilling marks. Drill holes in the end piece to a depth of 3/8″ at your dowel point marks.
With the dowel joint now in good stead, mark the top face of the base. Then, cut or rout a 1/8″ bevel at 45˚ around its top edge, leaving the end with the dowel holes square. Smooth the cut edge with a belt sander or sanding block, keeping the bevel’s measure to 3/16″ or less.
The end piece still needs some top curves and four decorative cutouts. Attach a copy of its pattern to your workpiece, and cut the end piece to shape with a #3 blade. Smooth the inside of the ovals with a spindle sander and the outer edges with a belt sander. I also used a 180-grit spindle-mounted Mac Mop to soften all edges.
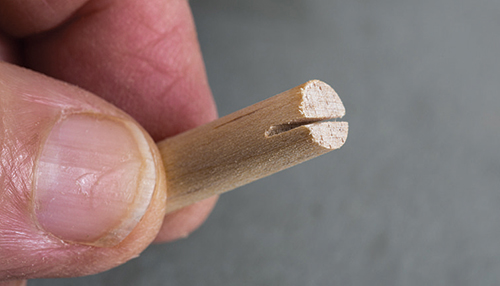
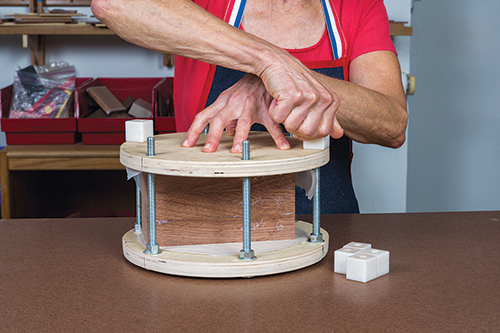
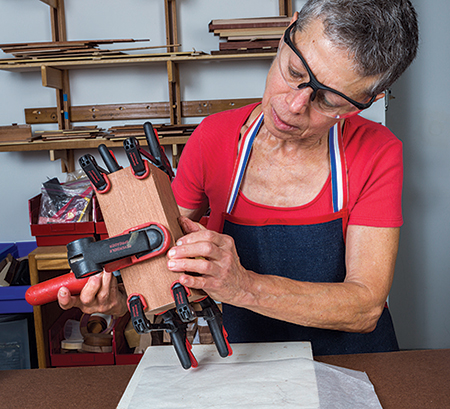
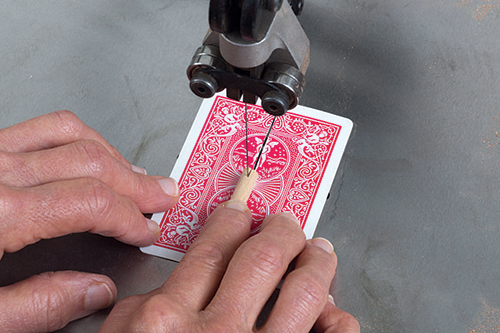
Then final-sand the base and end piece to 220-grit. Now go ahead and glue the base and end piece together with dowels — I cut short slits into the ends of my dowels at the scroll saw to make them easier to insert in their holes. Check for square as you tighten the clamps on this glue-up.
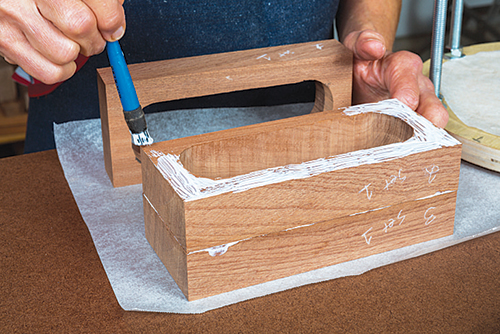
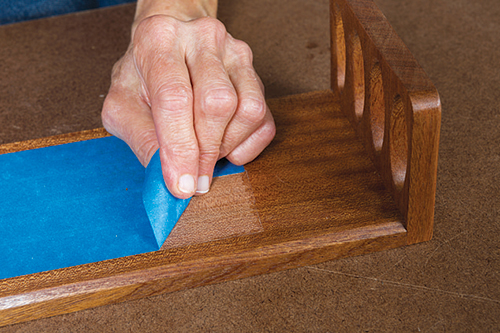
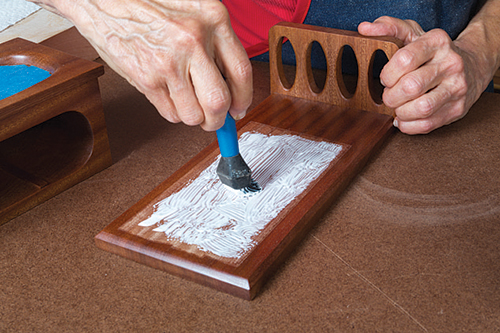
Now that all parts but the pull are completed, it’s time for the sealer coat. First, locate the gluing areas on the drawer front and base and mask them with blue painter’s tape. I applied dewaxed shellac to all surfaces of the box, drawer and base, except for the box bottom. Then remove the tape from the drawer front. Smooth all surfaces with 320-grit sandpaper. Mask the top oval, and leave the tape on the gluing area of the base.
Shaping the Drawer Pull
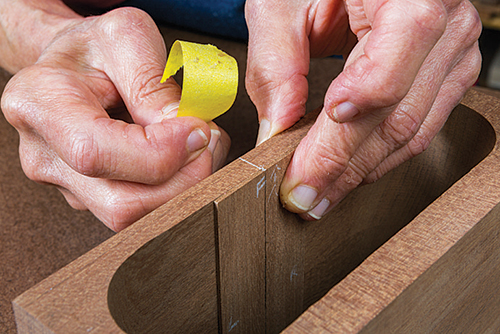
For an offbeat drawer pull, I used colorful wood to simulate a fishing lure (without hooks, of course!). To make it, I glued together pieces of yellowheart and padauk and attached the pattern so that the glue joint ran through the eye and mid-section. I drilled a 6.5 mm hole about 3/16″ deep for the eye, where indicated, then cut the outline with a #3 blade.
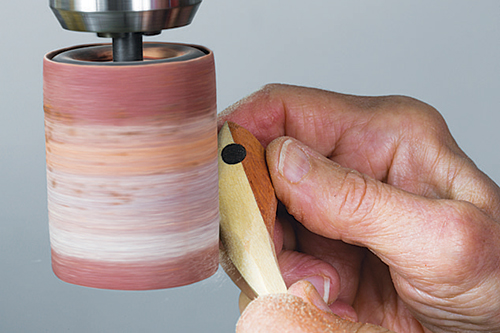
I glued a 1/4″ ebony plug into the hole, but a slice of 1/4″ walnut dowel would also work nicely. Then, contour the front of the pull with a pneumatic drum until it’s shaped to your liking.
To make the pull easier to grip, contour the rear edge as well, but be sure to leave sufficient gluing area. When your pull is ready, use quick-grab PVA glue and firm hand pressure to attach it to the drawer face, centering it carefully.
Final Finishing
I applied several light coats of spray lacquer to the drawer front, base unit and outside surfaces of the box body, buffing between coats as needed with 0000 steel wool.
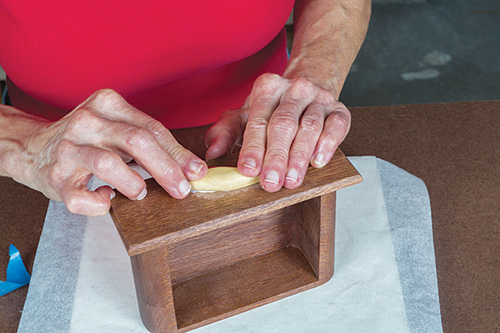
When the lacquer was thoroughly dry, I removed the tape from the base and glued the box into place, keeping the reveal even on the front, back and left side. I secured the bond with a heavy weight, checking for slippage and removing any squeeze-out.
Installing the Leather Insert
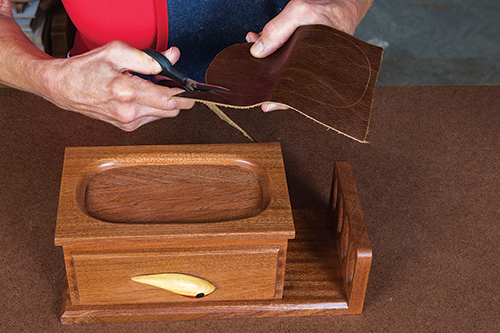
All that’s left to do on this project is to use a sharp scissors and cut out the leather insert for the box top. Check its fit in the opening and trim as needed.
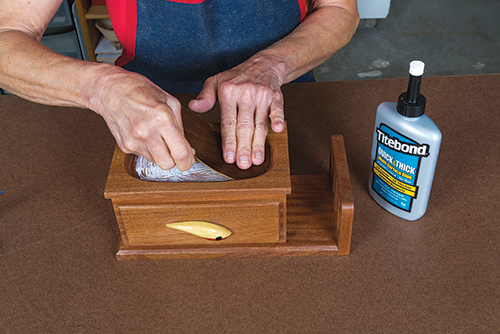
Glue the leather into the center, using firm hand pressure or a small roller to press it down evenly all around. With the leather installed, your caddy is ready to place beside a favorite chair. You’ll wonder how you ever managed without it!
Click Here to download a PDF of the related drawings and Materials List.


