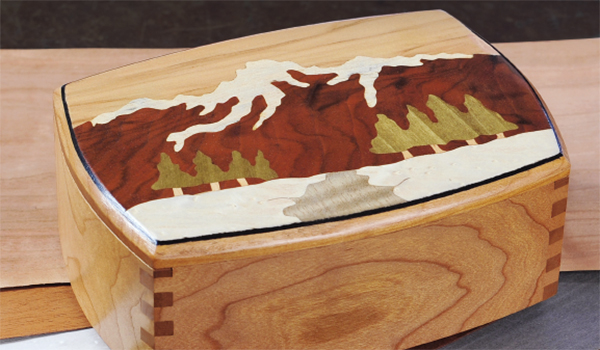
This project is an introduction to Double Bevel Marquetry, where two pieces of veneer are temporarily fastened together as they are cut. The incoming veneer is placed underneath the background veneer, and the design is cut out with the blade at an angle to the veneer. The top layer of the incoming section is then discarded, the bottom piece is pushed up into the background, and the cutting continues. The tilt angle depends on the thickness of the two veneer pieces plus the width of the blade. Depending on whether your scroll saw table tilts down on the left or on the right, the cutting proceeds clockwise (left-tilt saw) or counterclockwise (right-tilt) around the pattern. It is easy to be confounded by the problem of which direction to cut (how the bevel should be oriented). To help make it clear, picture cutting a tapered plug (the incoming piece) to be inserted into a conical hole in the background. Remember that the plug will be inserted from the bottom, and that only one direction of cut will give the required tapered plug and hole.
Making the Box
While this article is about learning to do marquetry, you’ll need to make the box first, and this is a really nice one. The sides are joined with slender box joints made on the table saw. Any accurate box joint jig (shop-made or manufactured) will do the job here — but if you don’t own one, you’ll find the plan drawings for mine here.
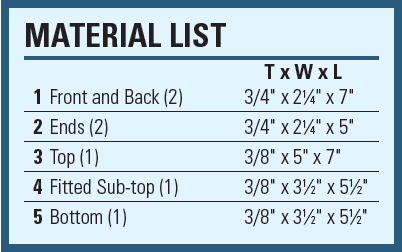
The box lid (the marquetry location) is two pieces: a larger sub-top that rests on the box sides and a smaller sub-top attached with glue that fits inside. Find the sizes and dimensions of the pieces in the Material List and the construction details in the Drawings. You’ll see there that the box is shaped with gentle curves that add a pleasing look. I formed the curves using a band saw and finished with a stationary belt sander. With the box ready to go, gather your materials for the marquetry phase of the construction.
Tools + Materials
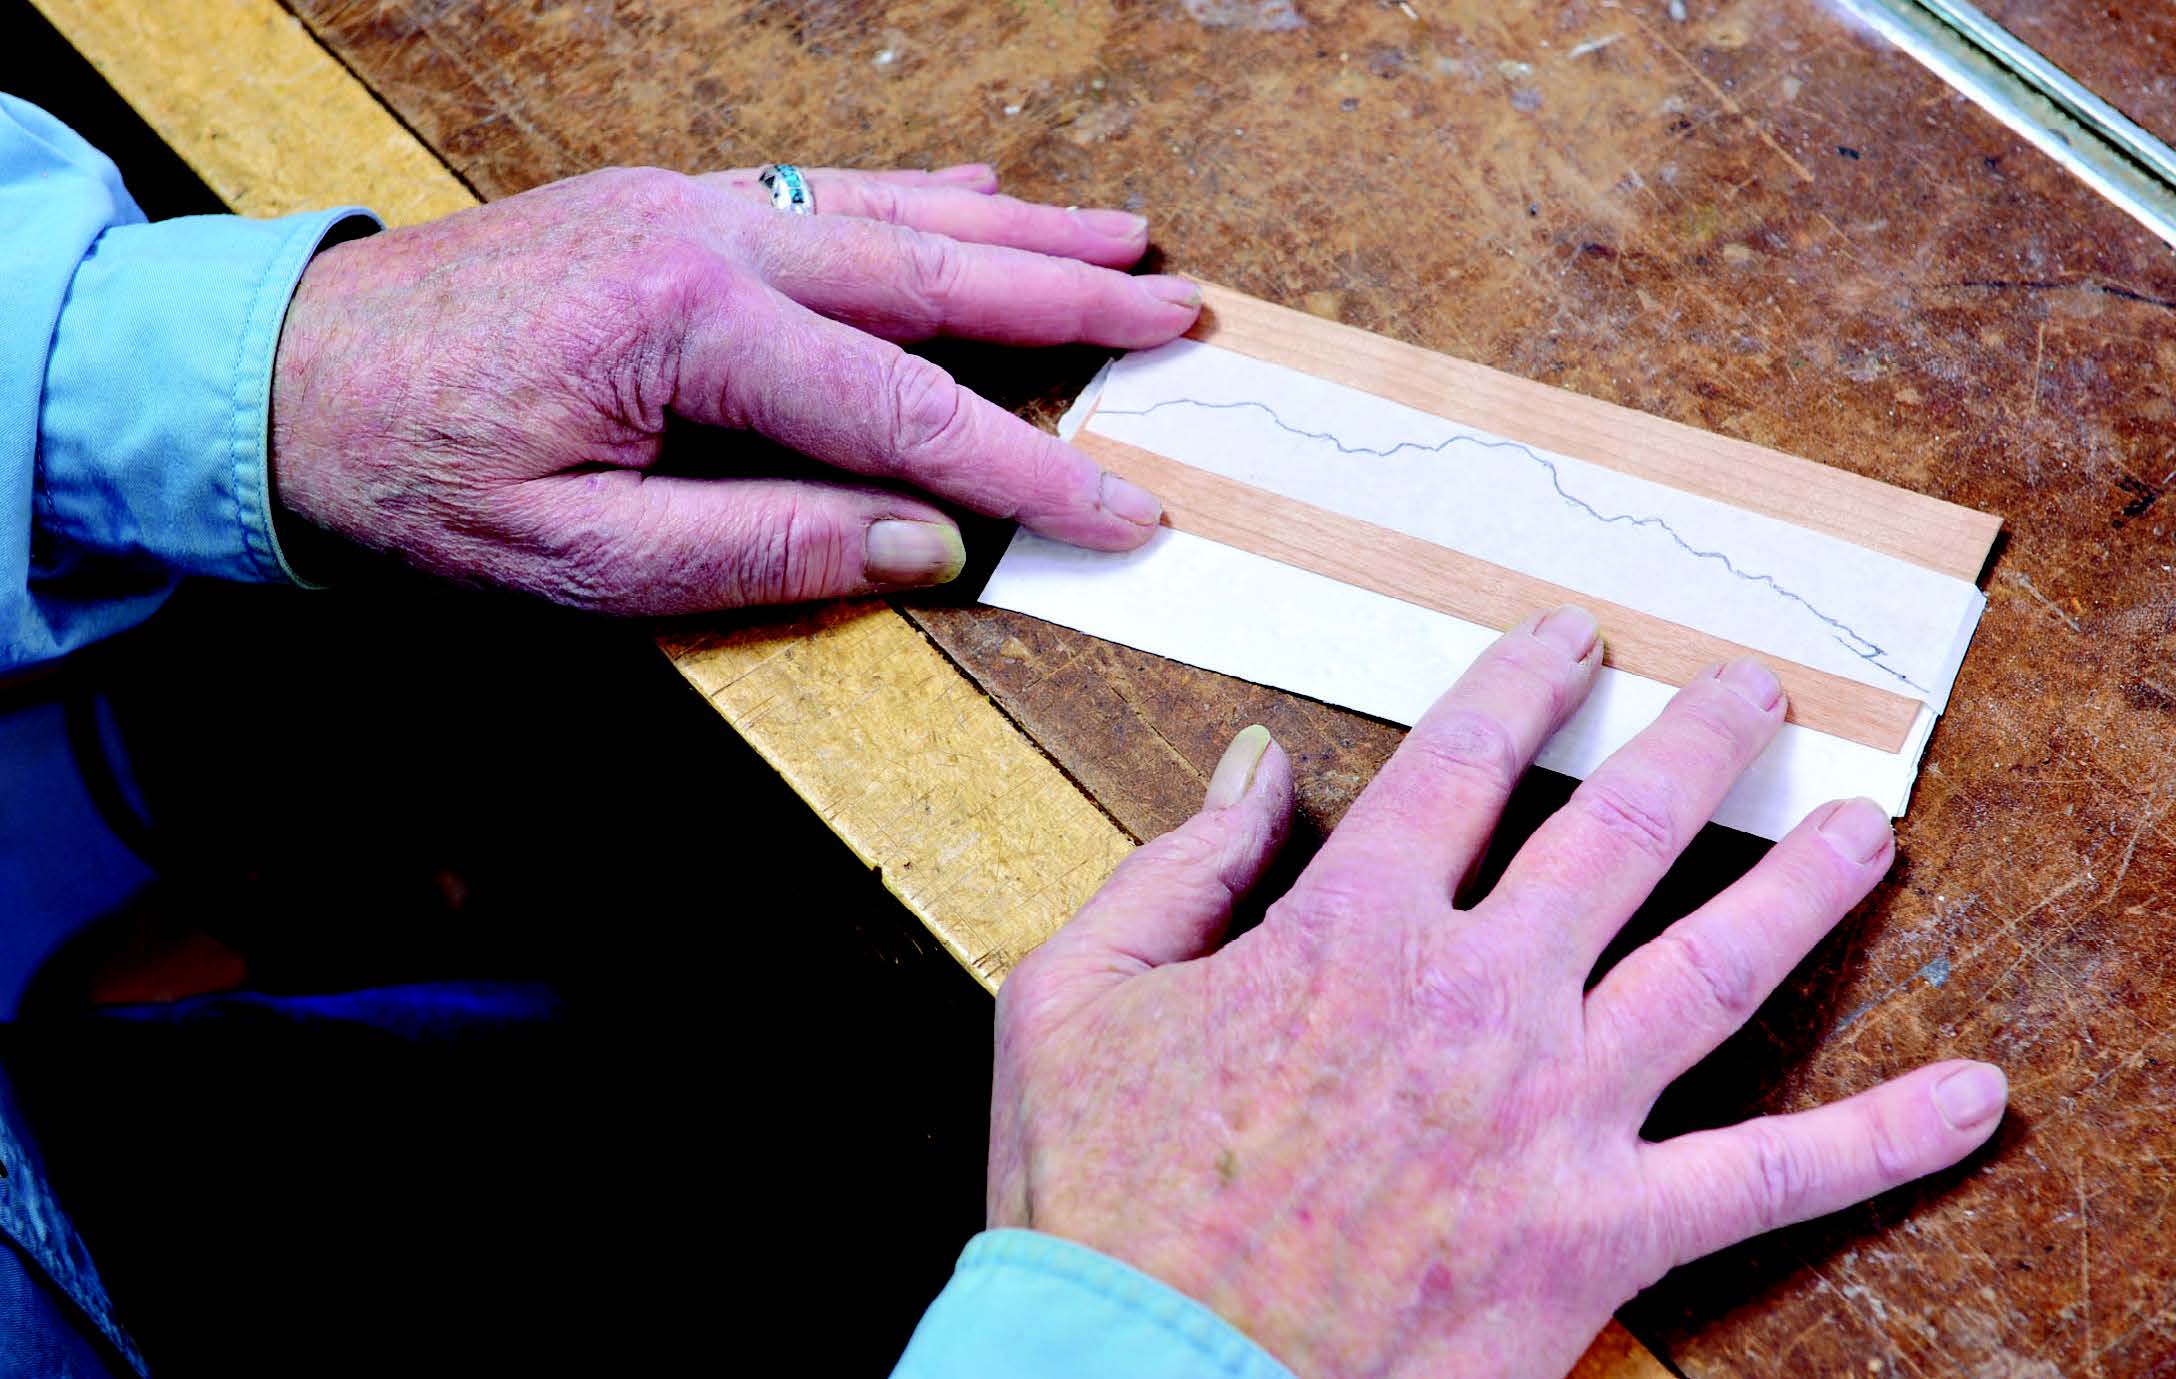
The marquetry scene I’ve chosen needs six different veneers; each will be cut into the background before the next veneer is added. For the process I’m teaching, you’ll need a scroll saw with a table that tilts at least 11° left or right, 2/0 non-pinned scroll saw blades, six pieces of veneer, application tape, blue tape, PVA yellow glue, tracing paper, transfer paper, clamps, hand scraper, sandpaper and a router.
Double Bevel and Pad Cutting
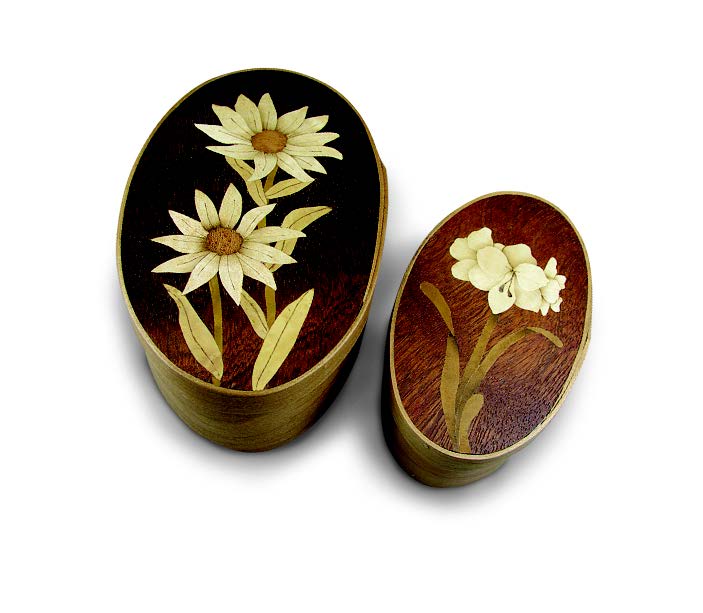
In marquetry, there are two main cutting procedures: Double Bevel Cutting and Pad Cutting. In Double Bevel, the blade is set at an angle and only two veneers are cut at one time. Bevel cutting has very tight joints, but only one piece of the final picture is cut and added to the picture at a time. Perfect fit, but slow. In Pad Marquetry, all of the veneers needed for the picture are placed into a pad, the blade is set at 90º, and all of the pieces are cut at one time. Individual pieces are then chosen and assembled for the final picture. The disadvantage? The fit is not as tight. The advantage? It is fast.
Gathering the Veneer
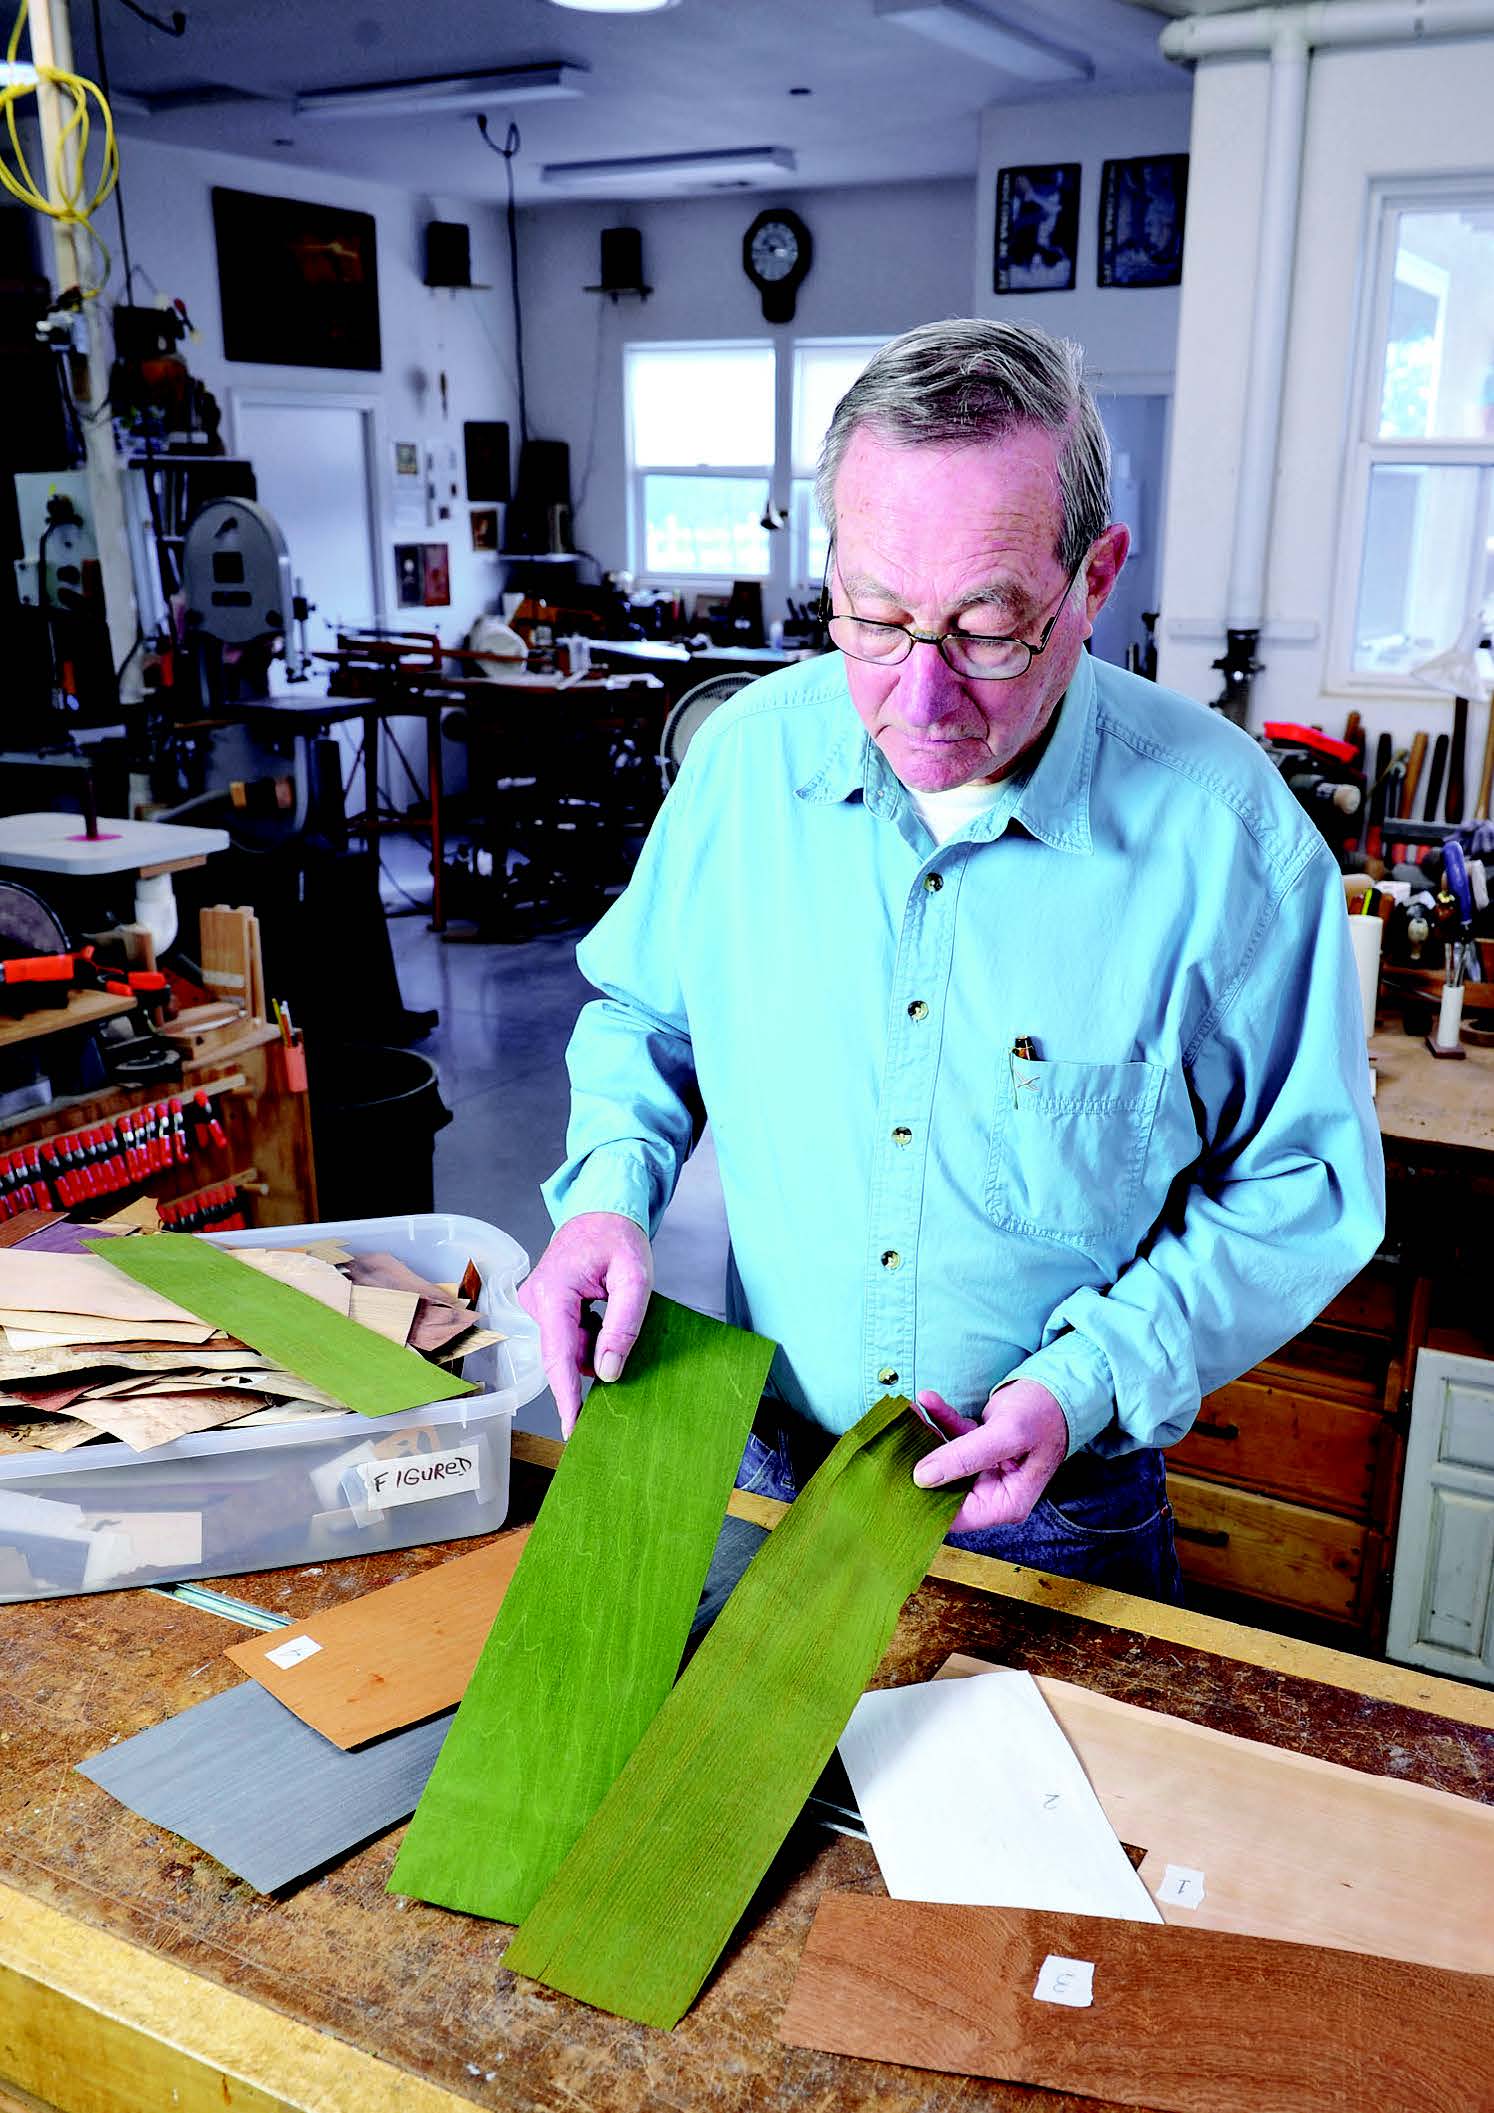
Select all six veneers before you begin cutting. Their grain patterns and color are the key to making your marquetry image pop off of the box lid.
The photo shows some possible colors, and the pattern indicates grain directions. Select a Sky-1 veneer with a visible grain pattern that is darker than Snow-2 but lighter than Mountain-3. Set the Sky veneer aside, put a piece of tape on it, and mark it number “1.”
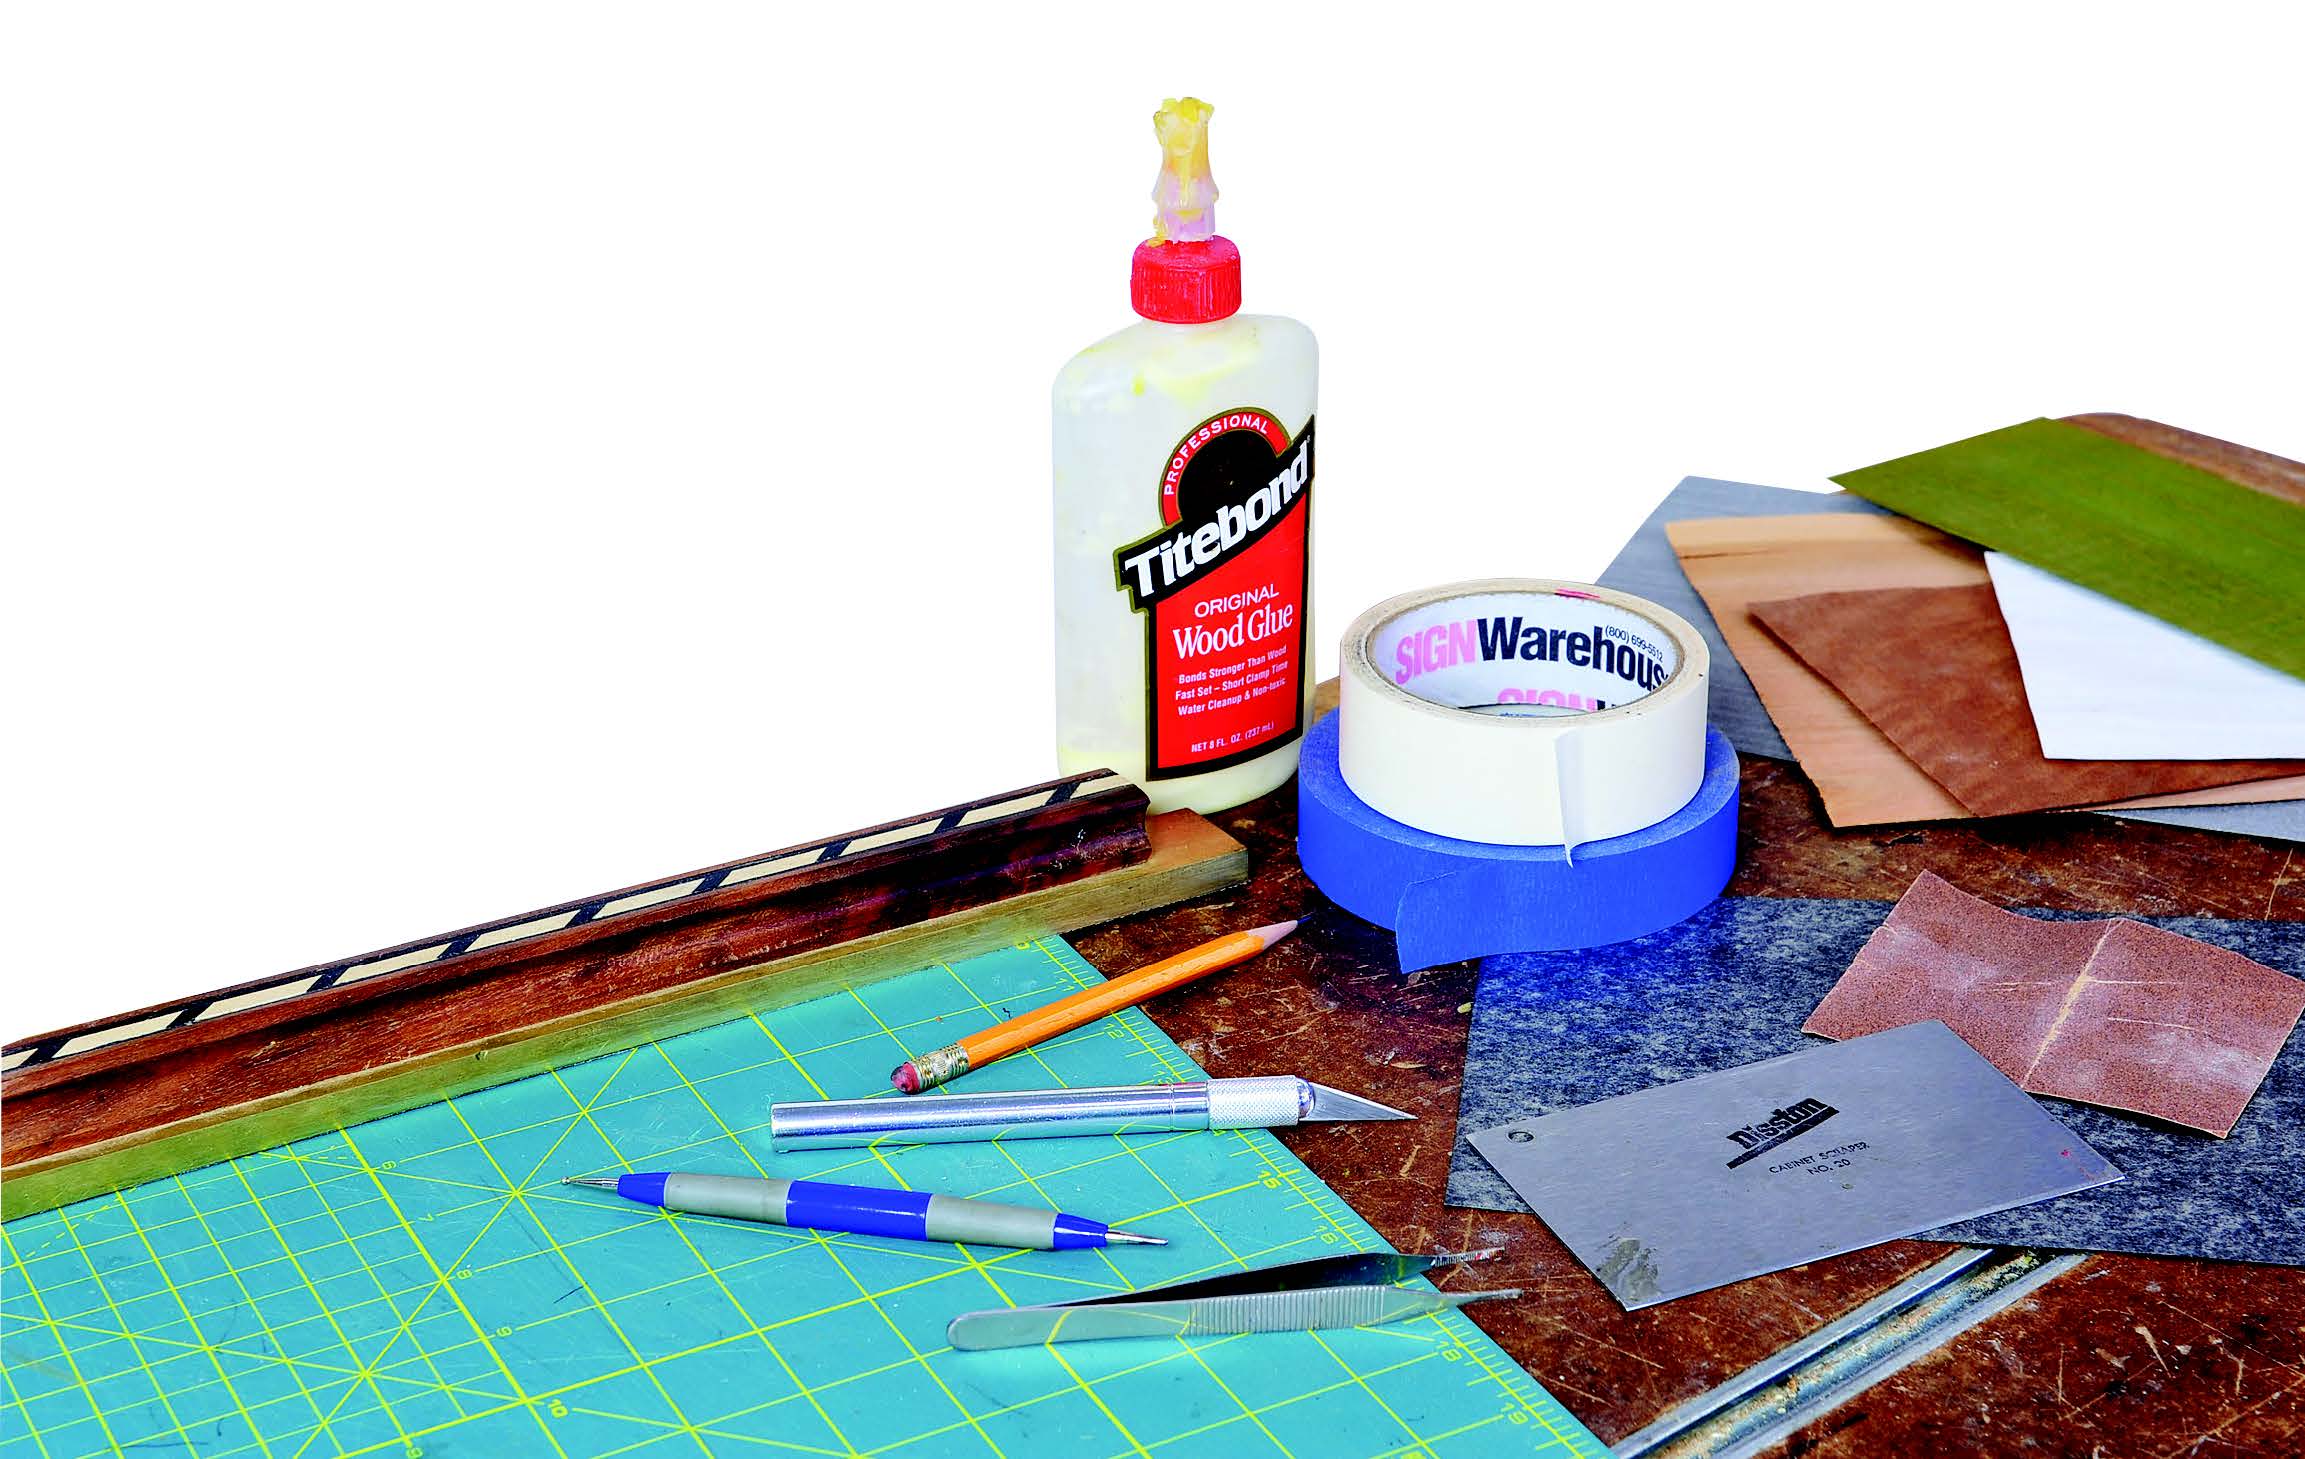
– Antilope brand jeweler’s saw blades, size 2/0; item 149.506D; $2.88 per dozen at www.ottofrei.com
– EnduraMASK™ Application Tape, 3.25” x 100 yds. item AP-ES-4076325; $8.45 per roll at signwarehouse.com
– Saral® Wax-Free Transfer Paper (rolls or sheets; amazon.com, dickblick.com)
-Veneer: 20 square foot sample pack available from sveneers.com; pricing varies
Next, choose Snow-2 veneer and mark it with a “2.” Choose the other five veneers and mark numbers on them “3” through “7.” Lay the veneers together and make sure that they are compatible. Confirm that Sky-1, for example, looks good with Mountain-3 etc. Note that Snow-2 and Foreground-6 will be the same near-white veneer.
Making the Pattern
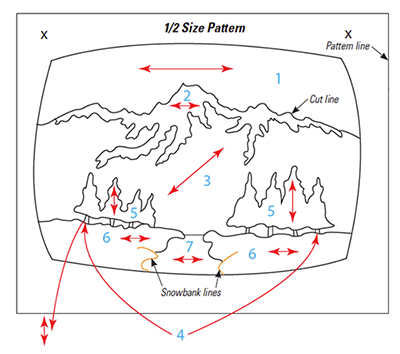
Marquetry is created by following a pattern that provides the shapes that will become the image. There is a full-size printable PDF version of the pattern (Figure 1) (print it at 7″ wide x 5″ high) free to download at our More on the Web section online.
Print or draw the pattern on white paper with heavy black pencil and number all the parts 1 to 6. Also draw arrows to indicate grain directions. Next, lay a piece of transparent tracing paper over the pattern and transfer all the lines from the pattern onto the tracing paper. Make “X” marks on the upper left and upper right corners of the tracing paper to use as registration marks.
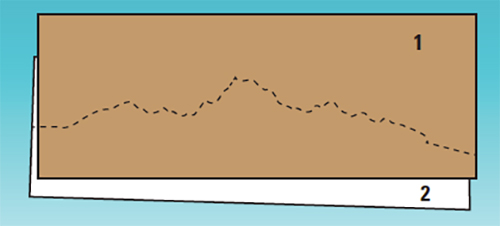
First Cut, add Snow-2 to Sky-1. Set the scroll saw table to the correct angle (usually about 11° for U.S. veneers and a 2/0 blade), and figure out the direction of cut. Make sure the Snow- 2 veneer is big enough and is placed correctly under Sky-1.
Cut Sky-1 to size (7-1/2″ wide x 3″ high). Keep the grain horizontal and cover both the front and back with application tape. Now lay the pattern on top of Sky-1 and transfer the “X” marks. Register the pattern (line up the “X”s) and transfer the top of the Snow-2 lines onto the application tape using transfer paper.
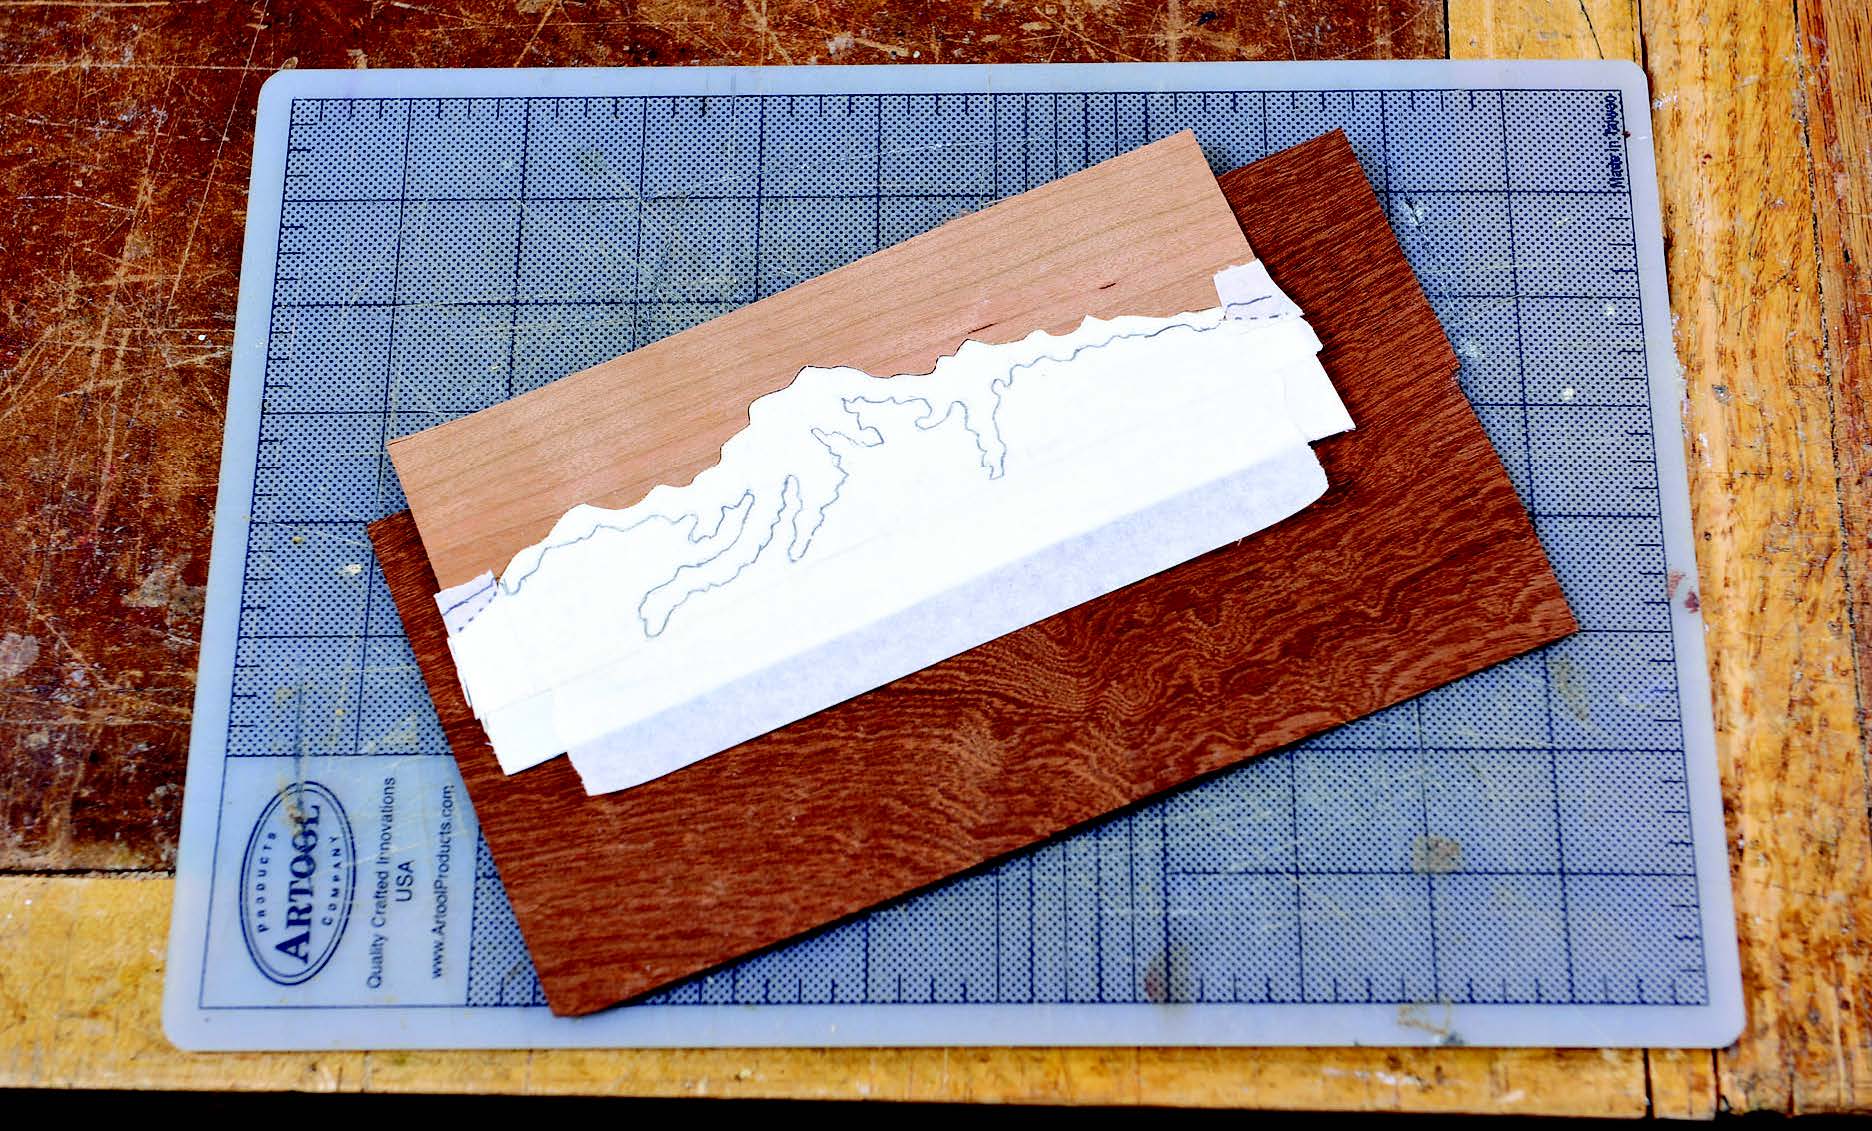
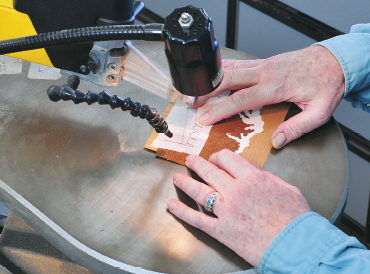
Put application tape on the front and the back of Snow-2 veneer and place it behind Sky-1 veneer. To line up an incoming veneer on the back of the workpiece, first turn the piece over and lay it flat on your bench. Reverse the pattern and line up the “X” registration marks. Now place the incoming veneer in position and blue-tape it into place. Use blue tape on the edges to secure it tightly. Tilt the table to 11°. Work from the front and cut across on the dotted line.
Take the two pieces apart and secure Snow-2 to Sky-1 with application tape on both top and bottom sides.
Second Cut, add Mountain-3 to Snow-2. Notice the difference between the “cut-line” and the “pattern line” on the left and right edges of the pattern. Application tape is still in place on top of Snow-2.
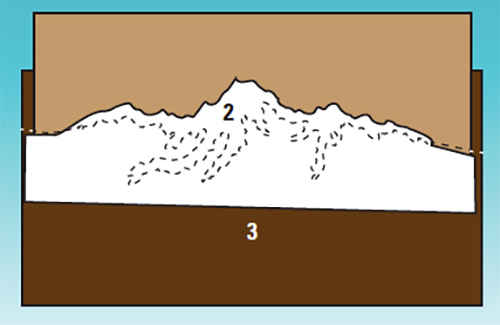
Turn the picture face-up and put the pattern in place by lining up the “X”s. Transfer the cut-line for Mountain-3 onto the application taped background. Put application tape on the back and front of Mountain-3 veneer and blue-tape it in place under the background. Cut along the dotted line.
Lay the piece face up on your bench and carefully pull up the waste section of Snow-2 veneer. Now turn the piece upside down and lay it flat on your bench. Carefully push the incoming veneer into place. Pull off the discard veneer from the back and application tape the new Mountain-3 section into the background.
Third Cut, add Tree Trunks-4 to Mountain-3. Notice that the cut now is from the bottom: begin on the left or on the right depending on which way your saw table tilts.
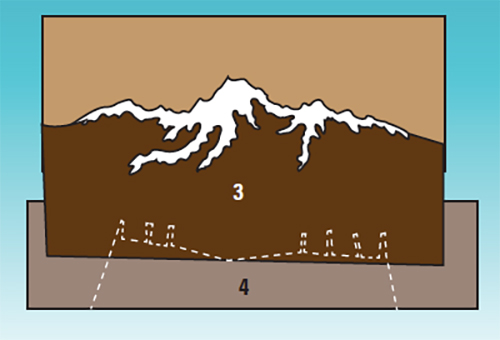
Register the pattern and trace the new cut-line onto application tape at the bottom of Mountain-3. Blue tape the Tree Trunk-4 veneer under the background and cut from the bottom along the dots as in Figure 4. Now go ahead and application tape Tree Trunks-4 into the background as in Figure 5.
Fourth Cut, add Trees-5. This cut will require small holes in the background to admit the pin-less scroll saw blade. The pin hole on the left will be covered with the next veneer piece; the hole on the right side will be filled later.
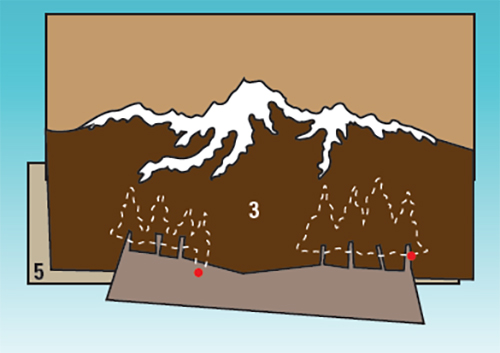
Register the pattern, line up the “X”s and draw the cut-lines on top of the background. I use a pushpin to make small holes to admit the blade. Cut in Trees-5 as in Figure 5. Use application tape to place the new Tree pieces into the background.
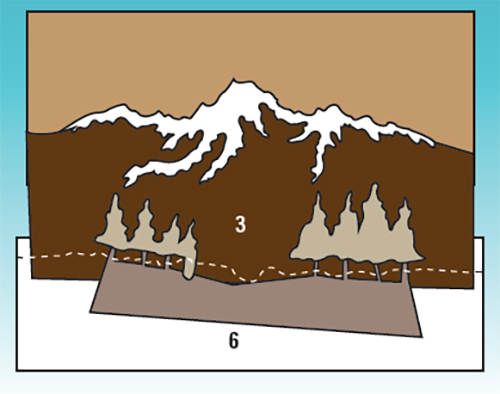
Fifth Cut, add Foreground-6. Note: This veneer is the same as Snow-2 veneer. Now you are likely getting the process down. Cut in Foreground-6 as in Figure 6. Note that this cut defines the bottoms of the Tree Trunks.
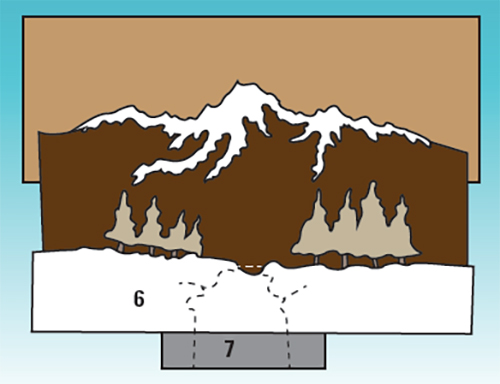
Sixth Cut, add the River-7. Note the “Snowbank” cuts on each side of the River in Figure 7. Put River-7 veneer under the background and fasten in place with application tape on both sides as in Figure 7. Cut from the bottom and remove the River-7 piece. Now cut the Snowbank lines; this is done by cutting into the Foreground-6 piece (they are the orange lines on the pattern above) and then carefully backing the blade completely out — all while the saw is running.
You’ve now completed the picture in veneer! It is not attached to the box’s top and not trimmed to size — but you are nearly there. Go ahead and cut it to its outside shape, exactly to the size of the top.
Repairing and Filling
Now that all the pieces have been cut and assembled, the next step is to fix any small veneer defects and to use a filler to plug small gaps.
All of the application tape pieces on the front and back of the marquetry need to be removed. To do this, carefully remove all tape from the front and replace with one or two large pieces of application tape. Press the tape firmly in place.
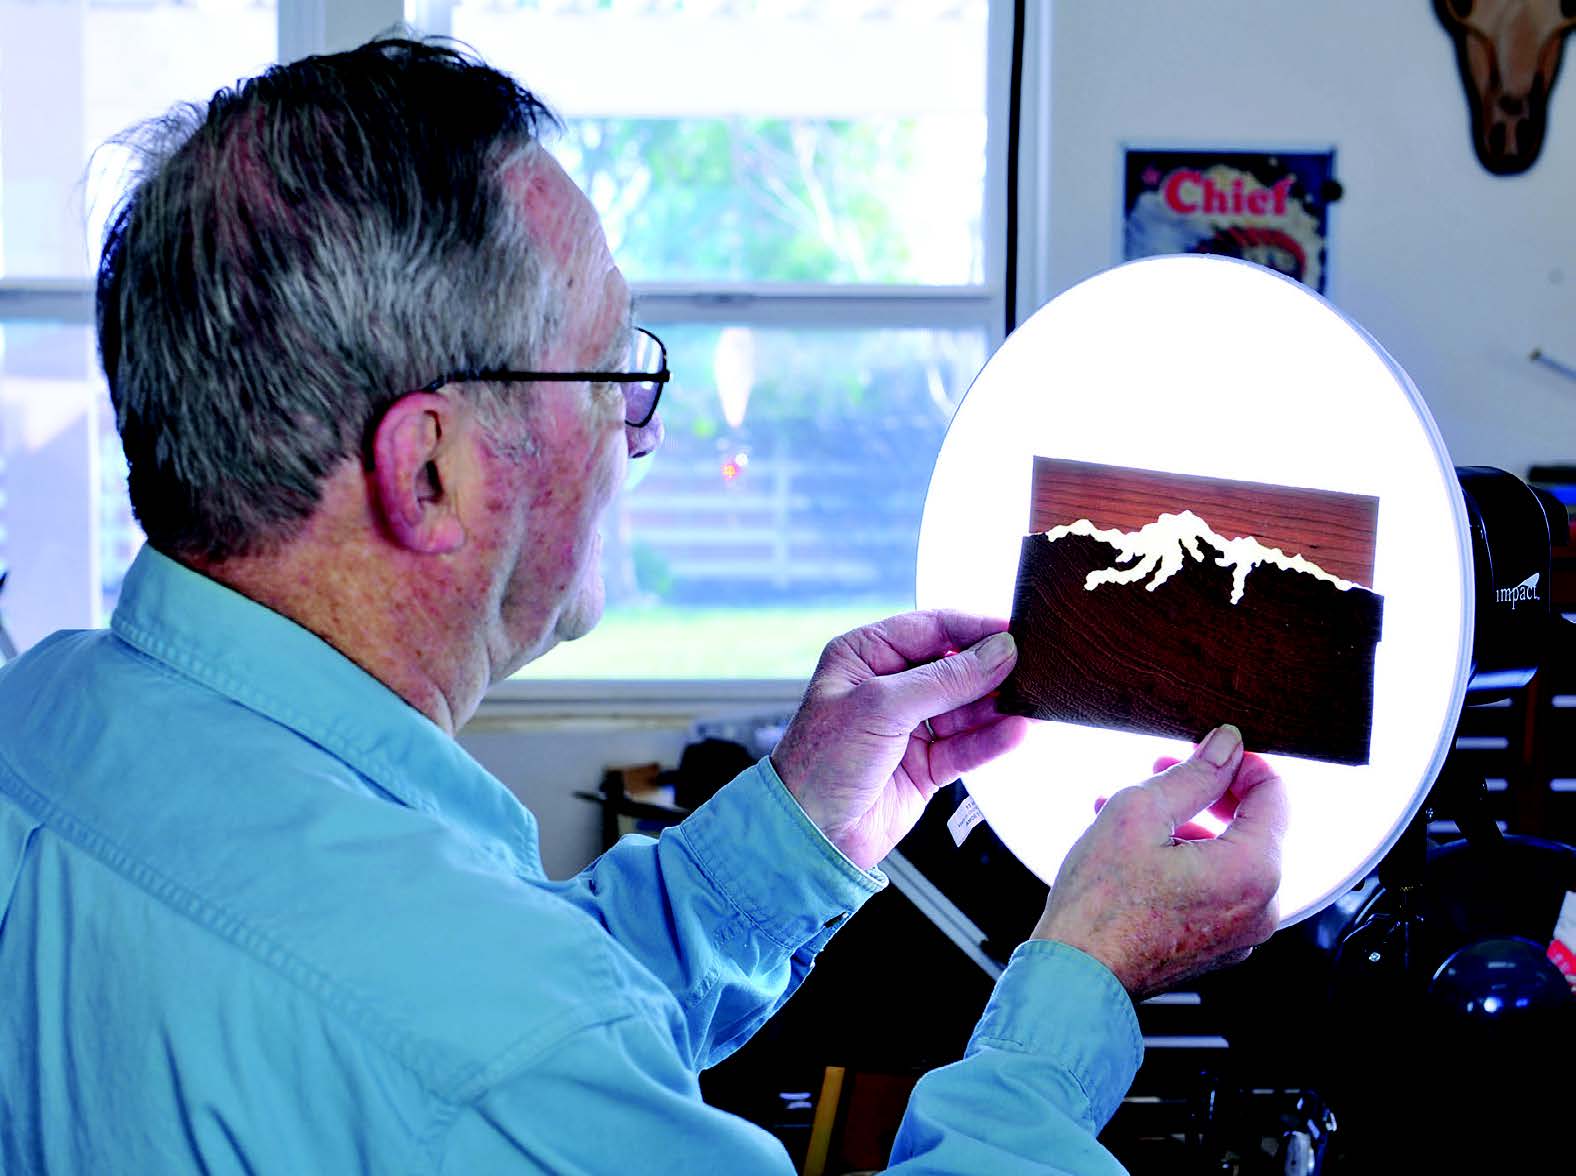
Next, turn the piece over and remove all the tape pieces from the back side. Now hold the piece up to the light and note any missing pieces or large spaces. Use small fragments of veneer and patch any holes or spaces from the back side.
Now make a colored filler using sawdust and glue to fill in any gaps. Once the filler is dry, sand the back smooth.
Glue the Marquetry to the Box Top
As you can see in the lead photo, the marquetry picture has a black spacer veneer between it and the cherry box lid. To get a more visible line, I use a thicker veneer here.
Cut the black veneer to size and glue it to the box lid using yellow PVA glue. After this has dried (usually one hour in a warm shop is plenty of time), trim the veneer to fit the lid.
Now place the marquetry piece facedown on your bench. Spread yellow glue on the black veneer which is attached to the box lid, and carefully lay it onto the marquetry piece. Use blue tape on four sides to affix the two pieces together and clamp.
After an hour, remove the clamps and peel off the blue tape and the application tape that is still on top of the marquetry. Carefully scrape and wipe off any excess glue and reclamp, using a paper towel as a pad. After another hour, the marquetry is ready to be taken from the clamps.
Once a marquetry piece has been cut and glued to the box lid, it needs to be made flat and smooth. Before proceeding, seal the surface with dewaxed shellac. It helps keep wood particulate from discoloring the various veneer pieces as you are flattening the surface.
Use a sharp blade scraper to even out the surface. Pull the scraper across the surface carefully at an angle but still in the direction of the wood grain. Apply more shellac and continue the procedure until the surface feels even — your fingers will tell you more than your eyes will during this process.
Once the surface is even, use sandpaper to smooth it. Start with 220-grit held on a firm, flat block. Stop often to inspect and to add more shellac as needed. Be extra careful if you decide to go ahead and use an electric sander: keep the sanding pad flat to the surface and use the vacuum accessory to whisk away the dust.
Completing the Lid
Next we have to round over the edges of the lid using a 3/8″ cove bit on your router table. Work to achieve the rounded-over look as in the lead photo. Then seal the top with shellac again and final sand, working from 220-grit to 320-grit. Use a wipe-on polyurethane for the final finish. Usually four to five coats will do just fine.
Click Here to download a PDF of the related drawings.


