Pasta Pair
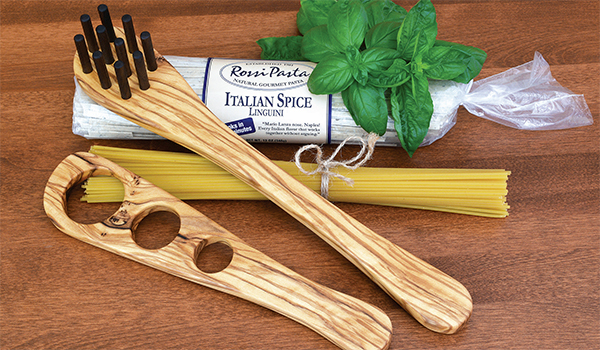
I enjoy making kitchen projects for my own use as well as for gifting to family and friends, and there’s nothing I like better than creating wooden versions of classic utensils. I’ve made several pasta servers like the one presented here, but this time around I thought two complementary pasta utensils would make for a fantastic matched set.
Although they are different sizes and have different uses, these utensils share the same basic pattern: The shape of the handle ends as well as the curve of the front ends are identical on both pieces. The only difference is that the server is long and narrow, while the measure is shorter, with an extended wider portion on the business end.
Any hardwood is fine for this project, but avoid open grains like oak and ash, especially for the server, as soft pasta could lodge in the grain. Closed-grain woods like cherry and maple are good choices, but for some beautiful figure consider giving olivewood a try.
Olivewood can be on the expensive side in larger sizes, so your best bet is to find a turning blank. With some careful resawing, the 2″ x 2″ blank I used here will easily provide two matched pairs of workpieces.
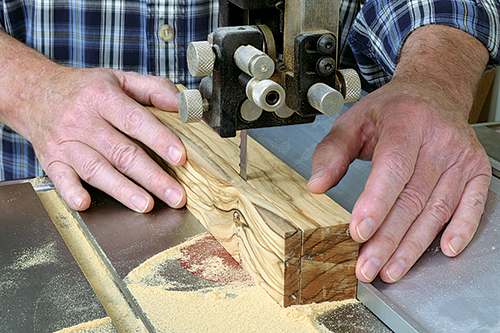
Start by cutting a 3/8″-thick slice for the pasta measure, and then a 1/2″ piece for the server. When it comes to resawing, the band saw can’t be beat. After cutting, give the faces of the two workpieces a good sanding to 150-grit to remove all saw marks.
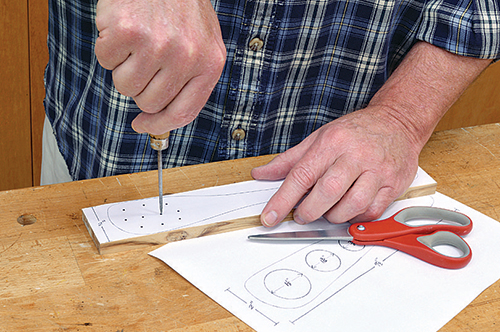
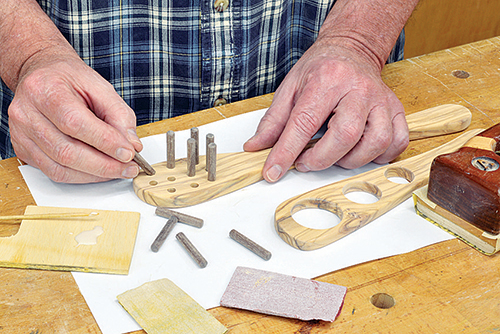
Transfer the patterns to each workpiece, and then cut both pieces out on the band saw. For the pasta server, I located each of the drilling points for the tine holes by poking the tip of an awl right through the pattern. With brad point bits, the marks from the awl make it easy to place the sharp tip of the bradpoint bit in the exact spot. A drill press is ideal for drilling these 1/4″-deep holes to ensure that the dowel tines are perfectly vertical to the face of the server.
The pasta measure has much larger holes that gauge the amount of spaghetti. The smallest hole is 7/8″ for a single serving, the next is 1-3⁄16″ for two, and the largest hole is 1-1⁄2″ for three servings. For more servings, it’s easy to use a combination of any of these three holes.
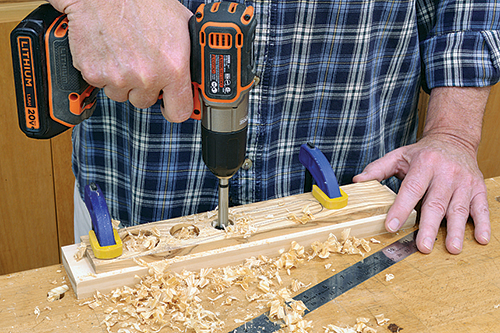
Clamp the measure to your bench or work surface with a sacrificial piece underneath, and then use Forstner bits to drill out the holes.
With all holes drilled, ease all the corners and edges of the two workpieces with a sanding block. Sanding up to 150-grit would be fine for items receiving a film finish like polyurethane, but these will get a rubbed oil finish, so sand up to 220-grit for a really smooth surface.
Cut a 1/4″ dowel into 10 sections, each 1-1/2″ long, for the server tines. Again, any closed-grain hardwood is fine, but I wanted a nice contrast with the olivewood, so I opted for walnut. With the tines cut, slightly round off the exposed tips with sanding — I alternated between a sanding block and twisting small pieces around the tips for a smooth end.
Apply waterproof glue into the server holes and slip the tines into place, taking care to orient the rounded tips outward. Be sure to wipe off any squeeze-out with a damp cloth.
I gave both pieces several coats of boiled linseed oil. Apply the oil liberally and allow it to soak in for about a half hour, then wipe off any excess and allow the utensils to dry for a day or so. When the first oiling has dried, I like to go over utensils like these with some 400-grit sandpaper for a glass-smooth surface, and then apply a second and third coat just as the first. When the final coat has dried, a brisk buffing with a cloth will give them a soft sheen.
Both utensils will handle washing well, but don’t put them in the dishwasher. If the appearance begins to dull with frequent use, a fresh coat of oil will help to renew that beautiful olivewood figure.
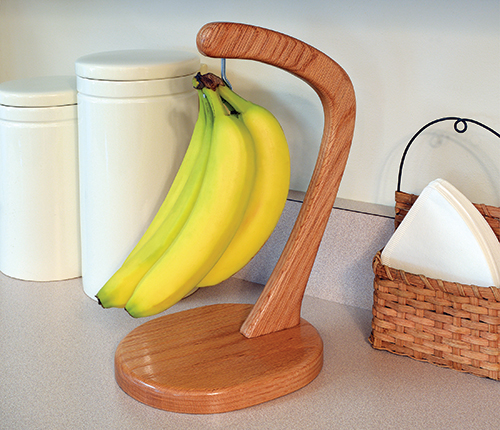
Banana Hanger
I’ve always loved bananas. Guess you could say they really have appeal.
OK, now that we’ve gotten the bad jokes out of the way, I have to admit that I really do like bananas. Except when traveling or when we have overnight guests, my regular morning fare is coffee, a cup of my favorite yogurt and a ripe banana. Fresh fruit is a great between-meal snack, and my usual choice is a banana. For that reason, I want them close at hand, not stashed in a cabinet or at the bottom of a fruit basket, and nothing works better for that than a basic banana hanger.
This is no single-purpose item, either, which is why I have more than one. I have a wonderful herb garden and, during the season, I often pick a small bunch of herbs, tie them off at the stems and suspend the bunch to dry on a hanger identical to this one.
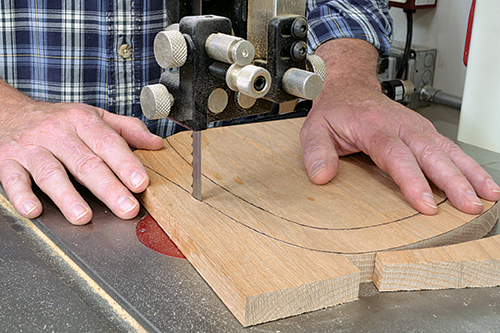
Begin by transferring the hanger arm pattern to a 3/4″-thick workpiece by your preferred means — either cut out the pattern and trace it onto the wood, or simply use a spray adhesive to adhere the pattern to the wood and peel the pattern off after cutting. I’ve opted to cut out the pattern on the band saw, as seen above, but a jigsaw will also do the trick. If using a jigsaw, be sure to install a blade rated for hardwood, and dial back on the saw’s rotary action for a cleaner, less-splintery cut.
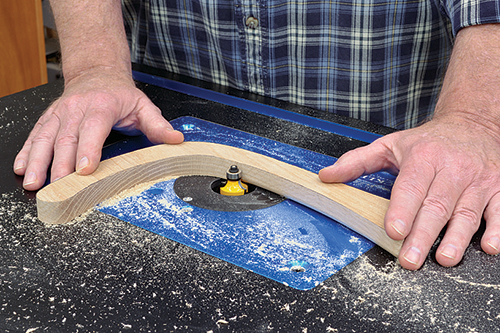
When you’ve cut out the pattern, refine your curves, if needed, to remove any marks from the saw (a combination of disc sander for the convex curves and spindle sander for concave areas works well), then set up your router table with a piloted roundover bit. Leave the flat bottom area alone, but round over all other edges on one side, then flip the workpiece over and repeat with the other side. When finished, give the arm a good sanding all around up to 150-grit.
The hanger base, also made of 3/4″ oak, is a simple oval measuring 6″ wide by 7″ long, which, again, you can cut out with a jigsaw or on the band saw. Using the same setup on the router table you used for the hanger arm, cut a roundover around the top edge of the base, then sand to 150-grit.
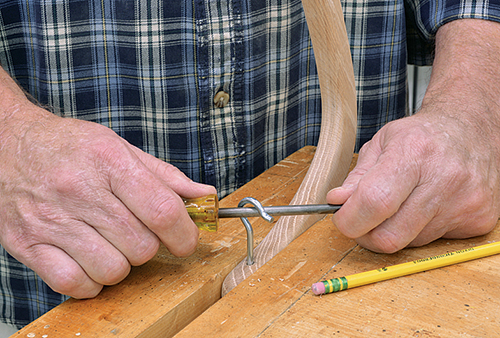
Secure the hanger arm upside down in a vise or clamp it to the edge of your workbench to temporarily install the hanger hook. You can use any type or size of screw-in hook here that is large enough to handle a bunch of bananas. With the hanger arm vertical, drill a pilot hole 1″ from the front of the arm appropriately sized for your hook, and then just twist the hook into place. You may find it easier to use the shaft of a screwdriver to twist the hook in, as I’m doing in the photo. Now remove the hook and set it aside while finishing the hanger; we’ll reinstall it later.
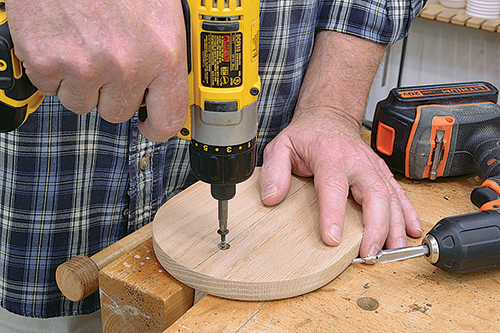
To attach the arm to the hanger base, secure the arm into your vise so the mounting end is flush with the top of the vise. Invert the base onto the arm, and position the arm 1/2″ from the back edge of the base, which exactly centers the hook over the base. Drill a countersunk pilot hole through the base and up into the arm. Dab a bit of glue onto the arm’s attachment point, line up the base and drive in a 2″ screw.
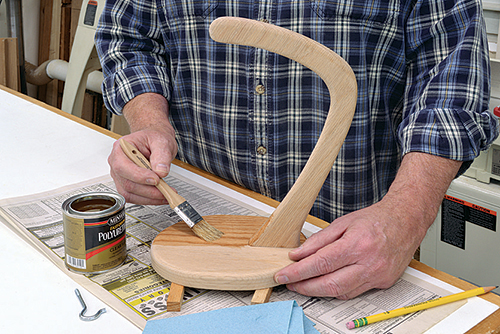
Remove the completed assembly from the vise and wipe off any glue squeeze-out where the arm meets the base. When dry, give the hanger the finish of your choice. For kitchen furniture and accessories, I like the protection offered by polyurethane. Any splashes from the sink or preparing food are easy to clean off, and I really like the way that poly gives oak a deep golden color. Two or three coats is good, sanding lightly between coats.
When the finish has dried, twist the hanger hook back into place with the opening facing forward — it’ll go in easier this time — and it’s ready to go.
One final step to consider is to add a few peel-and-stick felt “dots” to the underside of the base. The hanger, even loaded with a ripe bunch of bananas, isn’t heavy at all, but those felt dots make it easy to slide anywhere you like on your countertop.
Click Here to Download the Materials Lists and Drawings for These Projects.


