My question is about jointer beds. I would like to know if there is any advantage to either dovetail or parallelogram adjustment for bed height. – Chester Okonczak
Rod Burrow: Each jointer style has its advantages and disadvantages. With the added price of the parallelogram jointer, you get extra assurance that it is ready to work right out of the box without the need to check the table’s twists or sags. These adjustments, if done right at the factory, should hold through the life of the jointer. Each table, depending on size, rests on a number of fixed points. Each point has a cam or eccentric that allows precise and simple adjustments. The downside is that you can throw your tables out of adjustment even further if you don’t adjust it properly. Always contact the manufacturer for tips on making these adjustments.
The dovetail style jointers have been in service for a number of years, and the lower price is usually the tradeoff for the lack of adjustability. However, since they have been around for so long there are generations of savvy woodworkers that have these adjustments down to a science. Questions about adjustments can be asked at local wood clubs or on numerous web forums. Table adjustments are made using a set of gib screws at the rear of each jointer table. These gib screws put pressure on a gib plate that is set against the dovetail angle of the ways. Tightening or loosening these gib screws in certain sequences will lower/raise or compensate for table twist. If necessary, further adjustments can be done by adding shims. Basically, every dovetail style jointer needs to be adjusted after setup. The reason: 99 percent of customers who assemble jointers lift the top out of the box by the table ends.
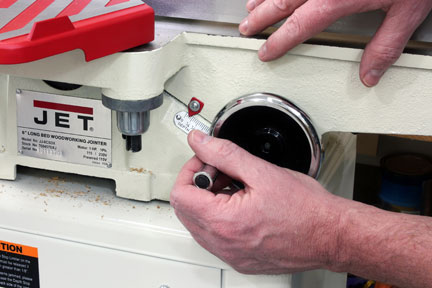
Another benefit of a parallelogram jointer over a dovetail style is the ease of making table height adjustments. The cam and arc design of the parallelogram allow the user to simply raise and lower a table with a lever. There are two different methods of raising and lowering a dovetail style jointer: with an adjustment handle under the table or in a better position in front of the jointer. Both styles give you that old-time feeling that you’re starting a Model A, but once the table height is adjusted all that is needed is quarter or half turns to increase/decrease the depth of cut. (Rod Burrow is vice president of technical support for Rikon Power Tools, Inc.)
Chris Marshall: It’s easy to change the cutting depth on either style of jointer, but for me the bigger issue here is keeping those tables parallel over time. I have a conventional jointer with tables that slide up and down on dovetail ways. I don’t change my depth of cut often, and the tables are still parallel to one another. So far, I’m quite satisfied with it. But, those dovetail ways in the castings and the metal gibs that hold the tables in place are “wear” areas on the machine. Table parallelism depends to some degree on keeping the gib screws properly tightened. Otherwise, the tables can tip down at the far ends. If you don’t change the depth of cut on a regular basis, I think a conventional jointer can stay tuned for a very long time. But, any time you have to loosen the gib screws or change the machine’s depth of cut, you risk the possibility of influencing table parallelism.
On a “parallelogram” style jointer, each table moves up and down by pivoting on several parallel arms underneath. They don’t slide on wear surfaces or depend on gib adjustments. It’s a style that some argue takes the variable of parallelism out of the equation. If you need to change your jointer’s depth of cut frequently, a parallelogram-style jointer could be the better investment to make, at least from a long-term maintenance and tuning standpoint.


