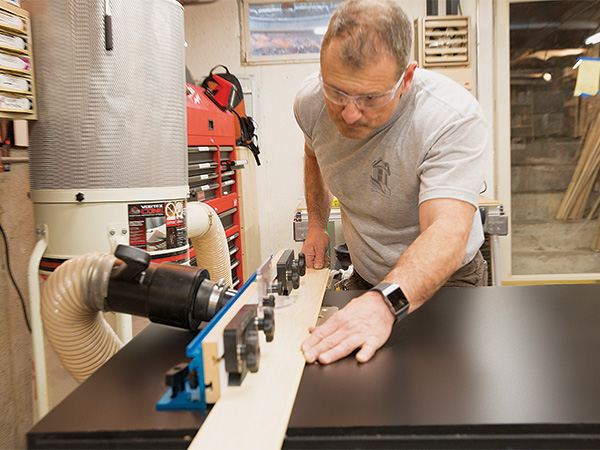
My basement shop is small, and space is at a premium. I keep everything on wheels, and I really do follow that old mantra about there being a “place for everything and everything in its place.”
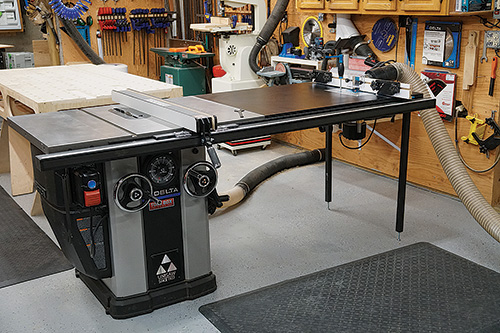
With my space limitations, I decided to mount my new Rockler Pro LiftRouter Lift into the side extension table of my Delta Unisaw. I’m really looking forward to using this router lift, because it will allow me to quickly and accurately adjust the bit height from the top of the table.
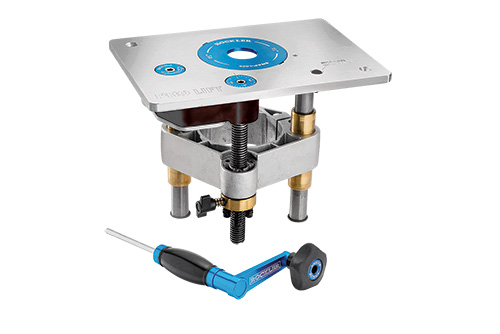
Rockler has two unique methods built into this system for lifting the router: a “Quick-Gear” dial for the lift’s hex wrench will enable me to raise my router through the lift’s full travel in just a few cranks; then, there’s a second precision gear for the wrench so I can make fine bit-height adjustments, too.
A Template is Key
The solution to the first part of this challenge is to use a template to help machine the tabletop opening accurately. Some manufacturers of router table insert plates sell a pre-made template that you can use for this job, with a cutout in it that matches their plate size. But in my situation, I decided to create a template from scrap material instead. Then I’d use my handheld router to cut the opening in the table, mill the rabbet that supports the plate and cut out the waste piece in the middle — all with a single router bit. As you’ll see shortly, spacer strips placed around the inside of my template would move the router inward so I could cut out the inner waste piece neatly. But you could also use a jigsaw to cut out the hole. While that’s faster, it’s not as precise, and you’ll still need to use a template and router to cut the plate’s recess and rabbet first.
Consider Placement and Fence Usage Carefully
The exact location of where you place the router lift plate on your tabletop is matter of personal preference, of course. But, here’s how my thought process went. I chose to locate my plate closer to the user (infeed) side of the saw table, versus centering the plate front-to-back, for several reasons. First, I wanted to give the material I’d be routing as much table support as I could after it passed by the router bit. Sure, it’s always possible to set up a roller support or an outfeed device of some kind behind the table to handle the longer stuff, but having even a few more inches of tabletop behind the plate can’t hurt.
Second, positioning the router lift closer to the infeed side will help me maintain a solid, strong stance and good balance while I’m routing. At the same time, it will prevent me from reaching too far across the table to feed workpieces through the cut.
I also wanted to ensure that my router plate feature will not interfere with “normal” table saw operations. By locating the router plate toward the far right side of the table, instead of centering it side-to-side, I can still use my table saw for ripping material or cutting sheet stock up to about 38″ wide before the router plate impacts my saw’s rip fence. On a previous table saw with a router plate 11installed, I used the rip fence for both
the saw and the router table. It had a custom-built drop-down dust collection hood and, while that worked great, the problem was that when I was routing stuff, I tied up my table saw fence. If I needed an extra piece ripped on the saw, I’d have to break down my router fence setup in order to use the table saw again. With that said, where you place the router lift is up to you.
This go-around, I decided that I would keep the rip fence dedicated to the saw and integrate a standalone router table fence into the new system. I settled on Rockler’s Router Table Fence with a built-in dust hood and featherboard accessories. If you decide to use a separate router table fence, too, be sure that the location you choose won’t have the fence or its other components overhanging the edge of the table, which could become a snag and bump hazard.
Important Reference Marks
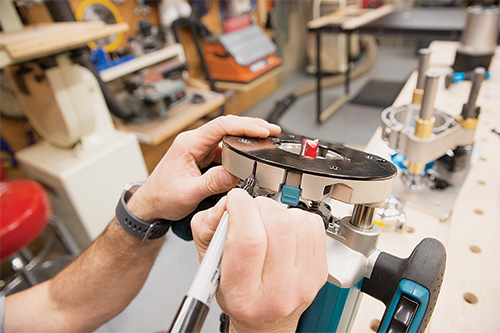
After settling on the best location for the plate and fence, I set the lift in place and used the saw’s rip fence to align and square the plate to the tabletop. Then, I traced around the plate’s perimeter with a pencil. That visual reference proved helpful throughout the entire installation process.
What this tracing doesn’t tell you, though, is how large to make the template. For that, you’ll first need to know the distance from the straight-cutting router bit you’ll use to the outside edge of your router’s subbase. Rockler’s router plate has 3/8″-radius corners, so I decided to use a 3/4″-diameter straight bit to match those corner curves.
A careful measurement from the edge of this cutter, installed in my Makita plunge router, to the rim of its sub-base, was 3″. My router base has both flat and round areas, so to keep the router oriented consistently during cutting, I drew a “witness mark” with a black marker right onto the router base. I made sure that this line was in contact with my template during every cut. That way, I knew I could keep that 3″ offset distance constant as I made my table opening cuts (it can vary slightly around the router base if the sub-base isn’t perfectly centered on the bit or, in my case, if the base has both round and flat areas).
Assembling the Template
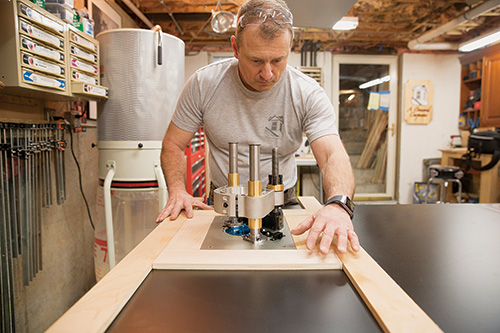
Making my template was pretty straightforward. First, I ripped four pieces of 1/2″-thick scrap plywood, long enough to span across my saw table (front to back, and side to side). Then, I ripped more scrap plywood spacer strips to 3″ wide, to maintain the correct offset between the router bit and the edge of the router. I crosscut these spacers to fit around the router plate with it in position over my penciled reference marks on the table. Then, I set the longer template boards against the outside edges of the spacer strips.
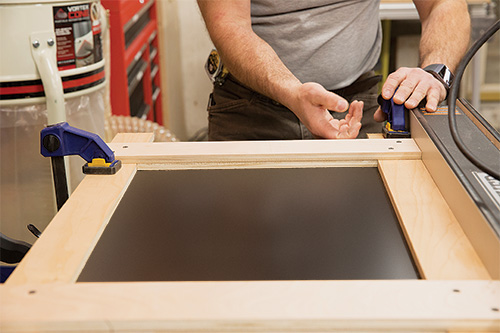
With everything in place, and with my rip fence against the closest template piece to keep things square to the table, I screwed the four template parts together with a couple of overlapping strips of 1/2″ plywood. Use at least two screws per corner joint, and make sure the parts don’t shift at all during assembly. Once screwed together, I clamped the template down firmly to the table. Then, the router lift plate and spacer strips could be removed from the template’s interior to get ready for routing.
Routing the Plate Rabbet
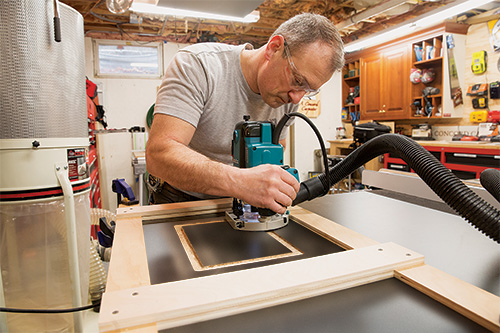
At this point, it’s a good idea to set the router inside the template and check for accuracy. With the machine unplugged, lower the router bit to confirm that the cutting edges are lined up properly with your traced outline — this is the last opportunity you’ll have to be spot-on. If the bit drifts away from the pencil line as you move the router around the template to check things, fix the template to correct it before proceeding — it’s an indication that something must have shifted when you assembled it.
From here, I set my router’s cutting depth to match the router plate’s thickness. This is a critical adjustment if your plate doesn’t have built-in leveling screws. If you cut the rabbet ledge too deep, you’ll have to shim under the plate 00to bring it up to flush with the tabletop.
Then, fire up the router and feed it clockwise around the inside of the template, keeping the witness mark in contact with the template all the time. Don’t hog out all of the waste down to your final cutting depth in one pass; instead, make several passes that get deeper each time. That’ll be easier on both the router and the bit. And if your router has integral dust collection, use it — this is a very messy operation.
Removing the Center Cutout
When the perimeter cut was completed down to the rabbet level, I ripped some 1/2″-thick spacer strips and installed them along all four inside edges of my template. I fit these spacer strips snugly and tacked them in place with some 23-gauge pin nails.
Why the new spacer strips? Well, they move the router and bit 1/2″ in from the previous cut to set it up for cutting out the interior waste piece. And that way, I’d end up with a 1/2″-wide rabbeted ledge to support the router lift.
With the new spacer strips in place, I proceeded to cut out the center section where the router will drop into. A couple more passes enabled me to cut all the way down through the tabletop thickness, producing a smooth cut edge.
Time for a Test Fit
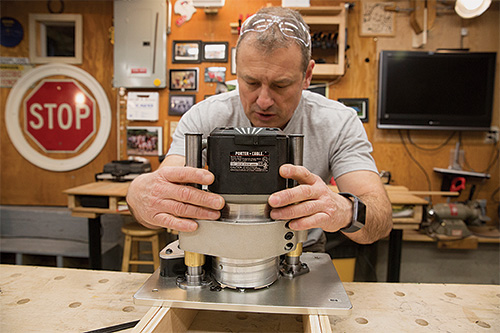
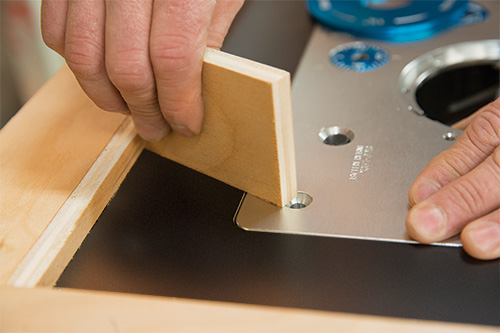
Leave the template in place while doing your first test fit, in case you need to adjust the rabbet depth. One of the best ways to test the height of the router plate is to use a scrap as a straightedge and slide it over the table and across the router plate. If the scrap catches the edge of the plate, you’ll know the plate is still too high. And, if the plate is sitting too low, you’ll see a gap between the scrap and the plate. In that case, a router plate that has height adjustment screws can bring it up to flush easily.
As it turns out, my first test fit showed that the router plate was still about 1/32″ proud of the table surface, so I removed the 1/2″ spacers, reset the router’s cutting depth and cut the rabbet ledge a little deeper. After that, my second test fit showed that the plate sat flush with the table — exactly what I wanted.
When the plate fits properly in its opening, you can mount your router motor into the lift. Rockler’s Pro Lift accepts my PORTER-CABLE 3.25hp router motor without any modification. But, you can order adapter collars for it to fit several popular motor diameters of smaller routers, too.
Adding a Fence
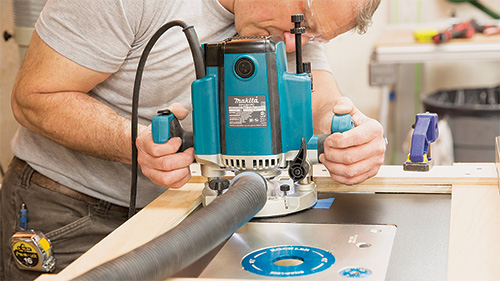
With the lift plate now in place, I could move on to the router table fence. I first centered the fence’s face over the router collet and squared it to the table, again using the table saw’s rip fence as a reference. Then I marked the centerpoints of the fence’s two mounting slots on the tabletop, removed the fence and routed two 1/4″-wide x 5″-long slots down through the table.
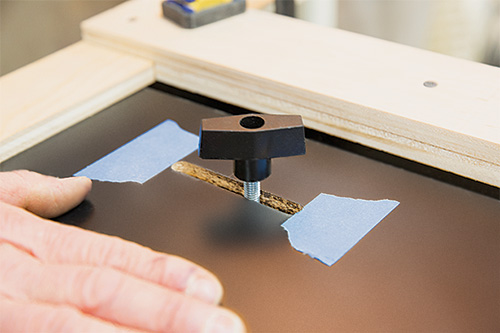
My template again proved helpful as an edge guide for the router to keep these fence slots straight. The slots will allow me to adjust the fence back and forth for setting up various cuts as well as to slide it out of the way when I need to change bits or remove the router lift. I secured the fence to the table with carriage bolts and T-knobs.
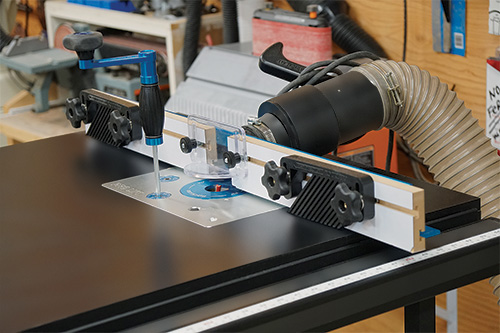
That wraps up this installation procedure. My method isn’t the only way to do the job, but it sure worked well for me. I hope it helps you, too.
– Rob Robillard is a general contractor, carpenter, woodworker and editor and host of www.aconcordcarpenter.com.
Hard to Find Hardware
Rockler Pro Lift Router Lift (8-1/4″ x 11-3/4″ plate) (1) #52429
Rockler Router Table Fence (1) #58215
Rockler Easy-to-Grip T-Knob, Female Threading, 1/4″-20 (1) #52325


